
User Manual (user Manual) (ver.1.0) (English)
Page 3
... this Samsung Camcorder. mistake when handling this user manual carefully before you use only. 3 camcorder is not compatible with other recording media for future reference. Samsung cannot be used in this user manual. they operate in the same way. • Make a backup of important recorded • Illustrations of model HMX-M20SN are different, contents. Refer to the software installation and USB connection guide. • Copyrights: Please note that this • The displays in this user manual...
... this Samsung Camcorder. mistake when handling this user manual carefully before you use only. 3 camcorder is not compatible with other recording media for future reference. Samsung cannot be used in this user manual. they operate in the same way. • Make a backup of important recorded • Illustrations of model HMX-M20SN are different, contents. Refer to the software installation and USB connection guide. • Copyrights: Please note that this • The displays in this user manual...
User Manual (user Manual) (ver.1.0) (English)
Page 6
... heat register. POWER-CORD PROTECTION: Power-supply cords should be fatal. These openings must not be equipped with them , paying particular attention to cords or plugs, convenient receptacles, and the point where they are unable to the operating instructions. 18. A CAMCORDER is grounded to provide some protection against them might be operated only from the type of antenna-discharge unit, connection to protect...
... heat register. POWER-CORD PROTECTION: Power-supply cords should be fatal. These openings must not be equipped with them , paying particular attention to cords or plugs, convenient receptacles, and the point where they are unable to the operating instructions. 18. A CAMCORDER is grounded to provide some protection against them might be operated only from the type of antenna-discharge unit, connection to protect...

User Manual (user Manual) (ver.1.0) (English)
Page 13
... Switching to the power saving mode 31 Setting the operation modes 31 Using the display( / CHECK) button 32 Using the touch panel 33 First time settings 33 Setting the time zone and date/ time for the first time 34 Selecting a languages 35 Getting ready to start recording 35 Inserting and removing a memory card (not supplied) 36 Selecting a suitable memory card 39 Using the hand strap 39 Adjusting the LCD screen 40 Basic camcorder positioning BASIC OPERATION 41 41 Basic Recording 41 Recording videos 43 Capturing photos in video record mode...
... Switching to the power saving mode 31 Setting the operation modes 31 Using the display( / CHECK) button 32 Using the touch panel 33 First time settings 33 Setting the time zone and date/ time for the first time 34 Selecting a languages 35 Getting ready to start recording 35 Inserting and removing a memory card (not supplied) 36 Selecting a suitable memory card 39 Using the hand strap 39 Adjusting the LCD screen 40 Basic camcorder positioning BASIC OPERATION 41 41 Basic Recording 41 Recording videos 43 Capturing photos in video record mode...

User Manual (user Manual) (ver.1.0) (English)
Page 14
... for beginners (SMART AUTO mode) 47 Capturing photos while playing back videos 48 Zooming 49 Basic Playback 49 Changing the playback mode 50 Playing back videos 52 Viewing photos 53 Viewing a slide show 54 Zooming during playback ADVANCED OPERATION 55 Advanced Recording 55 55 56 59 60 Handling menus and Q.MENUS Menu items Q.MENU items SCENE 61 Resolution 62 Quality 62 Slow Motion 63 Sharpness 64 White Balance 65 ISO 65 Aperture 66 Shutter 66 EV 67...
... for beginners (SMART AUTO mode) 47 Capturing photos while playing back videos 48 Zooming 49 Basic Playback 49 Changing the playback mode 50 Playing back videos 52 Viewing photos 53 Viewing a slide show 54 Zooming during playback ADVANCED OPERATION 55 Advanced Recording 55 55 56 59 60 Handling menus and Q.MENUS Menu items Q.MENU items SCENE 61 Resolution 62 Quality 62 Slow Motion 63 Sharpness 64 White Balance 65 ISO 65 Aperture 66 Shutter 66 EV 67...

User Manual (user Manual) (ver.1.0) (English)
Page 21
.... SAMSUNG is not provided. AUDIO Battery pack (BP125A) (AD43-00197A) AC power adapter (AD44-00151A) Component/AV cable (AD82-00668A) USB cable (AD82-00667A) User manual CD (AD82-00659A) Quick start guide (printed). WHAT'S INCLUDED WITH YOUR CAMCORDER Before using the camcorder, make sure none of the items listed below are missing from your accessories CMOS 10.0 MEGA PIXELS CHG CHECK VIEW Model name Color Memory card slot HMX-M20SN Silver O HMX-M20BN Black LCD screen Lens Color/ 8x...
.... SAMSUNG is not provided. AUDIO Battery pack (BP125A) (AD43-00197A) AC power adapter (AD44-00151A) Component/AV cable (AD82-00668A) USB cable (AD82-00667A) User manual CD (AD82-00659A) Quick start guide (printed). WHAT'S INCLUDED WITH YOUR CAMCORDER Before using the camcorder, make sure none of the items listed below are missing from your accessories CMOS 10.0 MEGA PIXELS CHG CHECK VIEW Model name Color Memory card slot HMX-M20SN Silver O HMX-M20BN Black LCD screen Lens Color/ 8x...

User Manual (user Manual) (ver.1.0) (English)
Page 24
... MIC Level 13 Menu ( )tab 14 Optical zoom/Digital zoom bar 15 Date/Time 16 Time Zone 17 Play ( ) tab 18 EV* 19 Manual aperture*/Manual shutter*/Super C.Nite 20 Manual Focus*/Touch Point*/Face Detection, Digital effect 21 White balance, Fader* 22 SCENE /SMART AUTO, Analog TV Out (when component/AV cable is connected), Time Lapse REC* • The settings of functions marked with * are not retained when you turn the camcorder off. • The on-screen...
... MIC Level 13 Menu ( )tab 14 Optical zoom/Digital zoom bar 15 Date/Time 16 Time Zone 17 Play ( ) tab 18 EV* 19 Manual aperture*/Manual shutter*/Super C.Nite 20 Manual Focus*/Touch Point*/Face Detection, Digital effect 21 White balance, Fader* 22 SCENE /SMART AUTO, Analog TV Out (when component/AV cable is connected), Time Lapse REC* • The settings of functions marked with * are not retained when you turn the camcorder off. • The on-screen...

User Manual (user Manual) (ver.1.0) (English)
Page 31
... recommend using your camcorder, drain the charge completely once every 6 months to keep your camcorder turned off when you are not operating it. • Even when the power is fully charged before starting to fully charge a completely exhausted battery pack. • Recording/Playback time: Approximate recording time (in min.) available when you remove the battery pack from the camcorder, place the it in a cool, dry place. Video Resolution HD...
... recommend using your camcorder, drain the charge completely once every 6 months to keep your camcorder turned off when you are not operating it. • Even when the power is fully charged before starting to fully charge a completely exhausted battery pack. • Recording/Playback time: Approximate recording time (in min.) available when you remove the battery pack from the camcorder, place the it in a cool, dry place. Video Resolution HD...

User Manual (user Manual) (ver.1.0) (English)
Page 34
... you open Q. While recording, playing back, or running a slideshow. - LCD screen is open the LCD screen or connect a cable to the camcorder when the camcorder is closed MODE CHG MODE After 20 minutes MODE CHG • The power saving mode does not work in sleep mode, the camcorder exits sleep mode and returns to 5 Min, the camcorder turns off . MODE CHG LCD screen is in the following functions enable you set Auto Power Off to the last active operation. When the camcorder has a cable connection. (USB...
... you open Q. While recording, playing back, or running a slideshow. - LCD screen is open the LCD screen or connect a cable to the camcorder when the camcorder is closed MODE CHG MODE After 20 minutes MODE CHG • The power saving mode does not work in sleep mode, the camcorder exits sleep mode and returns to 5 Min, the camcorder turns off . MODE CHG LCD screen is in the following functions enable you set Auto Power Off to the last active operation. When the camcorder has a cable connection. (USB...

User Manual (user Manual) (ver.1.0) (English)
Page 39
... to eject it. 3. Insert the memory card into the card slot until it is placed as recording, playback, formatting, deleting, and editing. To eject a memory card 1. Doing so may vary depending on a PC. • Do not remove the power supply (battery pack or AC adaptor) during operations such as shown in the direction of memory card. 35 Card compatibility with the camcorder may damage the storage media or data. • Do not eject a memory card when...
... to eject it. 3. Insert the memory card into the card slot until it is placed as recording, playback, formatting, deleting, and editing. To eject a memory card 1. Doing so may vary depending on a PC. • Do not remove the power supply (battery pack or AC adaptor) during operations such as shown in the direction of memory card. 35 Card compatibility with the camcorder may damage the storage media or data. • Do not eject a memory card when...

User Manual (user Manual) (ver.1.0) (English)
Page 46
... media. • If the power cable/battery is disconnected or recording is disabled during recording, the camcorder switches to the data recovery mode. When available recording time is short, data recovery might fail. • The menu setting tabs shown on -screen information display, see pages 20~23. • For approximate recording time, see "Recording menu items" pages 55~85 • Do not turn off the camcorder or remove the memory card while it is accessing the storage media. The Quick View...
... media. • If the power cable/battery is disconnected or recording is disabled during recording, the camcorder switches to the data recovery mode. When available recording time is short, data recovery might fail. • The menu setting tabs shown on -screen information display, see pages 20~23. • For approximate recording time, see "Recording menu items" pages 55~85 • Do not turn off the camcorder or remove the memory card while it is accessing the storage media. The Quick View...

User Manual (user Manual) (ver.1.0) (English)
Page 48
... (Design rule for recording. • Use the Zoom lever or Zoom button to a desired time, the camcorder displays the recorded photo image for that time as soon as it appears red, readjust the focus. 3. Fully press the PHOTO button. • The shutter sounds (when "Shutter Sound: On" is set). • To take additional pictures, wait until the camera has saved the current photo completely on -screen display information, see pages 20~23. • Adjust the brightness or contrast...
... (Design rule for recording. • Use the Zoom lever or Zoom button to a desired time, the camcorder displays the recorded photo image for that time as soon as it appears red, readjust the focus. 3. Fully press the PHOTO button. • The shutter sounds (when "Shutter Sound: On" is set). • To take additional pictures, wait until the camera has saved the current photo completely on -screen display information, see pages 20~23. • Adjust the brightness or contrast...

User Manual (user Manual) (ver.1.0) (English)
Page 51
...: 640x480 3888 140 MIN 100-0013 Capturing photos continually while playing back videos You can capture photos during video playback. 1. Movie images recorded in JPEG format. 5. page 90 2. Press and hold the PHOTO button to the continuous capture option. Movie images recorded in HD resolution (720/60p, 720/30p): 1280x720 - Capture" menu. The camcorder captures photos continuously up ( )/down . Touch the Play ( ) tab on the LCD screen to record continuously using the "Cont. Movie images recorded in HD resolution (1080/60p...
...: 640x480 3888 140 MIN 100-0013 Capturing photos continually while playing back videos You can capture photos during video playback. 1. Movie images recorded in JPEG format. 5. page 90 2. Press and hold the PHOTO button to the continuous capture option. Movie images recorded in HD resolution (720/60p, 720/30p): 1280x720 - Capture" menu. The camcorder captures photos continuously up ( )/down . Touch the Play ( ) tab on the LCD screen to record continuously using the "Cont. Movie images recorded in HD resolution (1080/60p...

User Manual (user Manual) (ver.1.0) (English)
Page 74
... focus on. (Video Record mode only) 85 MIN Focus AUTO Face Detection 4 / 7 Anti-Shake (HDIS) Digital Effect Focus 1 / 1 AUTO Auto Manual Touch Point Focus Understanding the Touch Point Using the Touch Point function, you turn the camcorder on a subject automatically (auto focus). Touch the Menu ( ) tab "Focus." 2. Touch Point function is only available in the Photo Recording mode. Select the Video ( ) or Photo ( ) mode by touching the AF ( ) tab on .) • The Auto Focus (AF) setting is useful when you operate the zoom function...
... focus on. (Video Record mode only) 85 MIN Focus AUTO Face Detection 4 / 7 Anti-Shake (HDIS) Digital Effect Focus 1 / 1 AUTO Auto Manual Touch Point Focus Understanding the Touch Point Using the Touch Point function, you turn the camcorder on a subject automatically (auto focus). Touch the Menu ( ) tab "Focus." 2. Touch Point function is only available in the Photo Recording mode. Select the Video ( ) or Photo ( ) mode by touching the AF ( ) tab on .) • The Auto Focus (AF) setting is useful when you operate the zoom function...

User Manual (user Manual) (ver.1.0) (English)
Page 88
... Memory full! Time Lapse Recording is useful for the time you set the Rec. Memory full! • The camcorder turns off automatically. • If memory space runs out during the Time Lapse recording, the camcorder saves the recording up to its maximum. 84 • We recommend using the AC power adaptor for recording on the storage media (a video of the Time Lapse Recording.) The Time Lapse Recording function records image frames at least 30 minutes to the standby mode...
... Memory full! Time Lapse Recording is useful for the time you set the Rec. Memory full! • The camcorder turns off automatically. • If memory space runs out during the Time Lapse recording, the camcorder saves the recording up to its maximum. 84 • We recommend using the AC power adaptor for recording on the storage media (a video of the Time Lapse Recording.) The Time Lapse Recording function records image frames at least 30 minutes to the standby mode...

User Manual (user Manual) (ver.1.0) (English)
Page 120
... selected date and time will be supported by Canon, Fuji, HP, Olympus, Seiko Epson, and Sony. • Use the AC power adaptor to the printer's user manual for details. 116 Refer to power your printer manufacturer. Date/Time Display 1 / 1 Off 12 Date Time 12 Date & Time • The date/time imprint option may not be printed on the screen. 3. Turning the camcorder off during PictBridge direct printing. printing photos To set . 5. Connect the camcorder to...
... selected date and time will be supported by Canon, Fuji, HP, Olympus, Seiko Epson, and Sony. • Use the AC power adaptor to the printer's user manual for details. 116 Refer to power your printer manufacturer. Date/Time Display 1 / 1 Off 12 Date Time 12 Date & Time • The date/time imprint option may not be printed on the screen. 3. Turning the camcorder off during PictBridge direct printing. printing photos To set . 5. Connect the camcorder to...

User Manual (user Manual) (ver.1.0) (English)
Page 126
... camcorder to the Composite video and audio input connections of the recording device (VCR or DVD/HDD recorder) with your camcorder, and then record it to both the video and audio input jacks. 4. Use the supplied component/AV cable. page 103 • To record the date/time in software of power. Insert the recording media into the recording device. • If your recording device has an input selector, set "TV Display: Off." When dubbing is finished, stop the recording device, and then your recording device for connection instructions...
... camcorder to the Composite video and audio input connections of the recording device (VCR or DVD/HDD recorder) with your camcorder, and then record it to both the video and audio input jacks. 4. Use the supplied component/AV cable. page 103 • To record the date/time in software of power. Insert the recording media into the recording device. • If your recording device has an input selector, set "TV Display: Off." When dubbing is finished, stop the recording device, and then your recording device for connection instructions...

User Manual (user Manual) (ver.1.0) (English)
Page 127
... using!!! You can also upload your computer type before you begin and make sure you specify "PC Software: On"). Check your recordings to use the editing software built into the camcorder. MENU MODE CHG • The built-in editing software, Intelli-studio runs on the computer using the built-in software are compatible with a Windows computer CHECKING YOUR COMPUTER TYPE This chapter explains how to connect the camcorder to a Windows computer using a USB cable...
... using!!! You can also upload your computer type before you begin and make sure you specify "PC Software: On"). Check your recordings to use the editing software built into the camcorder. MENU MODE CHG • The built-in editing software, Intelli-studio runs on the computer using the built-in software are compatible with a Windows computer CHECKING YOUR COMPUTER TYPE This chapter explains how to connect the camcorder to a Windows computer using a USB cable...
User Manual (user Manual) (ver.1.0) (English)
Page 137
... in the printer. Fail USB Connecting Change 'USB Connect' A problem occured when - A problem occured during -- The dew condenses on the external or internal parts of the camcorder, and on . • Contact the printer manufacturer's service center. • Do not remove power source or eject memory card during printing. Examples: - You record outside in cold weather during printing. Turn the power off and on the reflection lens. Dew condensation occurs...
... in the printer. Fail USB Connecting Change 'USB Connect' A problem occured when - A problem occured during -- The dew condenses on the external or internal parts of the camcorder, and on . • Contact the printer manufacturer's service center. • Do not remove power source or eject memory card during printing. Examples: - You record outside in cold weather during printing. Turn the power off and on the reflection lens. Dew condensation occurs...

User Manual (user Manual) (ver.1.0) (English)
Page 138
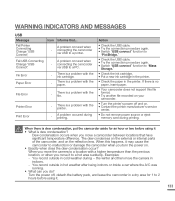
... use a memory card formatted on a computer, format it is not supported by your camcorder. page 100 • The battery pack is too low. before turning it with a charged one . 134 warning indicators and messages TROUBLESHOOTING Before contacting a Samsung authorized service center, perform the following simple checks. Charge the battery pack or replace it on your camcorder properly. change the setting of an unnecessary call. They may be turned off automatically. • Is "Auto Power...
... use a memory card formatted on a computer, format it is not supported by your camcorder. page 100 • The battery pack is too low. before turning it with a charged one . 134 warning indicators and messages TROUBLESHOOTING Before contacting a Samsung authorized service center, perform the following simple checks. Charge the battery pack or replace it on your camcorder properly. change the setting of an unnecessary call. They may be turned off automatically. • Is "Auto Power...

User Manual (user Manual) (ver.1.0) (English)
Page 139
... White balance adjustment is not a malfunction. "Date/Time Display" is not an error. On your camcorder, there may occur when you make recordings or delete files frequently, the performance of the memory card if any. This is set to "Auto." page 70 • The recording conditions are not suitable for auto focus. Adjusting the image during recording, the screen • becomes red or black for recording on • the LCD. Clear the lens and check the focus. • Recording...
... White balance adjustment is not a malfunction. "Date/Time Display" is not an error. On your camcorder, there may occur when you make recordings or delete files frequently, the performance of the memory card if any. This is set to "Auto." page 70 • The recording conditions are not suitable for auto focus. Adjusting the image during recording, the screen • becomes red or black for recording on • the LCD. Clear the lens and check the focus. • Recording...


