
User Manual
Page 3
... user manual. IMPORTANT INFORMATION ON USE About this user manual Before using other accessories are damage to pause the use only. Samsung will the camcorder or memory card, appear on the screen when you set , Protect your important recorded data corresponding icon ( ) appears on the storage media in this manual: Refer to the software installation and USB • 'Scene' refers to the point where you copy them from your PC to other digital video your recorded video and audio...
... user manual. IMPORTANT INFORMATION ON USE About this user manual Before using other accessories are damage to pause the use only. Samsung will the camcorder or memory card, appear on the screen when you set , Protect your important recorded data corresponding icon ( ) appears on the storage media in this manual: Refer to the software installation and USB • 'Scene' refers to the point where you copy them from your PC to other digital video your recorded video and audio...

User Manual
Page 6
... the camcorder. Keep the used lithium battery or memory card out of the reach of fire or personal injury. Do not touch the USB cable or plug with wet hands. Keep the camcorder away from the camcorder. If the USB cable gets hot or the camcorder emits an abnormal sound or smell when charging or when sending data, unplug the power cord immediately and request service from a Samsung service centre...
... the camcorder. Keep the used lithium battery or memory card out of the reach of fire or personal injury. Do not touch the USB cable or plug with wet hands. Keep the camcorder away from the camcorder. If the USB cable gets hot or the camcorder emits an abnormal sound or smell when charging or when sending data, unplug the power cord immediately and request service from a Samsung service centre...

User Manual
Page 10
... START RECORDING 27 BASIC RECORDING 32 27 Inserting/ejecting a memory card (not supplied) 28 Selecting a suitable memory card (not supplied) 30 Recordable time and capacity 31 Using the hand strap 31 Using the lens 32 Recording videos 34 Recording photos 35 Capturing photos during video recording (dual recording) 36 Zooming in and out BASIC PLAYBACK 37 37 Changing the playback mode 38 Playing videos 41 Viewing photos ADVANCED RECORDING 43 43 Using the menu tab in the record mode 43 Recording menu items 44 Video Resolution 45 Photo Resolution...
... START RECORDING 27 BASIC RECORDING 32 27 Inserting/ejecting a memory card (not supplied) 28 Selecting a suitable memory card (not supplied) 30 Recordable time and capacity 31 Using the hand strap 31 Using the lens 32 Recording videos 34 Recording photos 35 Capturing photos during video recording (dual recording) 36 Zooming in and out BASIC PLAYBACK 37 37 Changing the playback mode 38 Playing videos 41 Viewing photos ADVANCED RECORDING 43 43 Using the menu tab in the record mode 43 Recording menu items 44 Video Resolution 45 Photo Resolution...

User Manual
Page 11
... Setting menu items 55 Storage Info 56 File No. 56 Date/Time Set 57 Date/Time Display 57 LCD Brightness 58 Auto LCD Off 59 Beep Sound 59 Shutter Sound 60 Auto Power Off 61 PC Software 62 Format 63 Default Set 63 Language 64 Demo USING WITH A WINDOWS COMPUTER 65 CONNECTING TO OTHER DEVICES 74 65 What you can do with a windows computer 66 Using the intelli-studio programme 72 Using as a removable storage device 74 Connecting to a TV 75 TV image displays TROUBLESHOOTING...
... Setting menu items 55 Storage Info 56 File No. 56 Date/Time Set 57 Date/Time Display 57 LCD Brightness 58 Auto LCD Off 59 Beep Sound 59 Shutter Sound 60 Auto Power Off 61 PC Software 62 Format 63 Default Set 63 Language 64 Demo USING WITH A WINDOWS COMPUTER 65 CONNECTING TO OTHER DEVICES 74 65 What you can do with a windows computer 66 Using the intelli-studio programme 72 Using as a removable storage device 74 Connecting to a TV 75 TV image displays TROUBLESHOOTING...

User Manual
Page 15
...; "Upload" on the LCD screen. ¬page 51 9 The uploading procedure starts. 2. Press the Mode ( ) button to switch to a Windows computer if you have set "PC Software: On". ¬ page 61 STEP5: Delete videos or photos If the camcorder's storage media is full, you 've connected your camcorder to the play back. Start the Intelli-studio programme by different options such as Face, Date, Location, etc. Importing videos/photos from the camcorder's storage media. Saved...
...; "Upload" on the LCD screen. ¬page 51 9 The uploading procedure starts. 2. Press the Mode ( ) button to switch to a Windows computer if you have set "PC Software: On". ¬ page 61 STEP5: Delete videos or photos If the camcorder's storage media is full, you 've connected your camcorder to the play back. Start the Intelli-studio programme by different options such as Face, Date, Location, etc. Importing videos/photos from the camcorder's storage media. Saved...

User Manual
Page 16
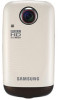
... user manual CD and printed quick start guide. If any unauthorised use of these items are missing from your local Samsung dealer. getting to know the camcorder WHAT'S INCLUDED WITH YOUR CAMCORDER Your new camcorder comes with the following accessories. Model name Colour Memory card slot LCD screen Lens MENU HMX-E10WP HMX-E15WP White HMX-E10BP HMX-E15BP Black Yes Colour Digital zoom: x2 HMX-E10OP HMX-E15OP Orange • The shape is the same for memory cards compatible...
... user manual CD and printed quick start guide. If any unauthorised use of these items are missing from your local Samsung dealer. getting to know the camcorder WHAT'S INCLUDED WITH YOUR CAMCORDER Your new camcorder comes with the following accessories. Model name Colour Memory card slot LCD screen Lens MENU HMX-E10WP HMX-E15WP White HMX-E10BP HMX-E15BP Black Yes Colour Digital zoom: x2 HMX-E10OP HMX-E15OP Orange • The shape is the same for memory cards compatible...

User Manual
Page 19
...mode by pressing the Mode ( ) button. ¬page 23 Video Record mode 1 23 45 0:00:01 6 x2.0 # % $ [99Min] 6 7 8 @ 9 0 ! 1 Video resolution 2 Smart Filter 3 Operating mode ( STBY (Standby) / M 0:00:01 (Recording/Recording time)) 4 Storage media (Memory card) 5 Battery info. (remaining battery level) 6 Quick view 7 Photo tab 8 Photo Remain Counter (total number of recordable photos) 9 Close zoom tab 10 Zoom lever 11 Date/Time display 12 Open/Close zoom tab 13 Zoom ratio 14 Recording start ( ) tab / Recording stop ( ) tab 15 Remaining recordable time $ • The on-screen...
...mode by pressing the Mode ( ) button. ¬page 23 Video Record mode 1 23 45 0:00:01 6 x2.0 # % $ [99Min] 6 7 8 @ 9 0 ! 1 Video resolution 2 Smart Filter 3 Operating mode ( STBY (Standby) / M 0:00:01 (Recording/Recording time)) 4 Storage media (Memory card) 5 Battery info. (remaining battery level) 6 Quick view 7 Photo tab 8 Photo Remain Counter (total number of recordable photos) 9 Close zoom tab 10 Zoom lever 11 Date/Time display 12 Open/Close zoom tab 13 Zoom ratio 14 Recording start ( ) tab / Recording stop ( ) tab 15 Remaining recordable time $ • The on-screen...

User Manual
Page 21
...5 1 Video Play mode 2 Battery info. (remaining charge level) 3 Error File 4 Scroll bar 5 Share mark 6 Next page tab 7 Now/ Total page number 8 Previous page tab 9 Erase protection 10 Highlight 876 Video play mode : Single View 12 3 4 56 0:00:05/0:00:50 100-0001 # 7 @ ! 01/JAN/2010 00:00 8 0 9 15 _ +8 1 Video Play mode 2 Operating status (play/pause) 3 Time code (elapsed time/recorded time) 4 File name (file number) 5 Video resolution 6 Battery info. (remaining battery level) 7 Playback progress bar 8 Recorded date/time display/ Volume control tabs _ / + 9 Playback...
...5 1 Video Play mode 2 Battery info. (remaining charge level) 3 Error File 4 Scroll bar 5 Share mark 6 Next page tab 7 Now/ Total page number 8 Previous page tab 9 Erase protection 10 Highlight 876 Video play mode : Single View 12 3 4 56 0:00:05/0:00:50 100-0001 # 7 @ ! 01/JAN/2010 00:00 8 0 9 15 _ +8 1 Video Play mode 2 Operating status (play/pause) 3 Time code (elapsed time/recorded time) 4 File name (file number) 5 Video resolution 6 Battery info. (remaining battery level) 7 Playback progress bar 8 Recorded date/time display/ Volume control tabs _ / + 9 Playback...

User Manual
Page 36
... the memory. • Actual recording times may not work properly. • When a video file exceeds 1.8GB, a new video file is created automatically. • You can store up to start recording RECORDABLE TIME AND CAPACITY • The following tables show the camcorder's maximum recording time and number of images by video or photo resolution and memory card capacity. • Please note the approximate maximum limits for videos Media Capacity...
... the memory. • Actual recording times may not work properly. • When a video file exceeds 1.8GB, a new video file is created automatically. • You can store up to start recording RECORDABLE TIME AND CAPACITY • The following tables show the camcorder's maximum recording time and number of images by video or photo resolution and memory card capacity. • Please note the approximate maximum limits for videos Media Capacity...

User Manual
Page 39
... the lens, a black shadow on -screen information display, see page 13. • For approximate recording time, see if there are compressed in the menu options. Adjusting the LCD screen does not affect the image being recorded. ¬page 57 • For the various functions available during recording, the camcorder may record surrounding ambient noise. 33 • If the power is off the camcorder or remove the memory card while accessing the storage media.
... the lens, a black shadow on -screen information display, see page 13. • For approximate recording time, see if there are compressed in the menu options. Adjusting the LCD screen does not affect the image being recorded. ¬page 57 • For the various functions available during recording, the camcorder may record surrounding ambient noise. 33 • If the power is off the camcorder or remove the memory card while accessing the storage media.

User Manual
Page 40
... the photo is set ). When you take photos and store them in the storage media. Touch the Quick View ( ) icon to view the most recently recorded photo. • To return to focus the subject, a red frame can take photos. • Do not turn off the camcorder or remove the memory card when taking photos, wait until the camcorder saves the current photo completely on the screen. 4. Adjusting the brightness does not affect the recorded image...
... the photo is set ). When you take photos and store them in the storage media. Touch the Quick View ( ) icon to view the most recently recorded photo. • To return to focus the subject, a red frame can take photos. • Do not turn off the camcorder or remove the memory card when taking photos, wait until the camcorder saves the current photo completely on the screen. 4. Adjusting the brightness does not affect the recorded image...

User Manual
Page 41
... capture photos without switching modes. 1. When you are taking photos. • To stop recording, touch the Recording stop ( ) tab. [99Min] 6 0:00:03 [99Min] 5 • A preview is six. • The photo capture icon ( ) appears on the LCD screen in STBY mode. • The recording (z) indicator appears, and video recording starts. y The number of recordable capturing photos appear next to record video, even while you have captured still images while recording. • The camcorder does not produce the shutter sound when capturing...
... capture photos without switching modes. 1. When you are taking photos. • To stop recording, touch the Recording stop ( ) tab. [99Min] 6 0:00:03 [99Min] 5 • A preview is six. • The photo capture icon ( ) appears on the LCD screen in STBY mode. • The recording (z) indicator appears, and video recording starts. y The number of recordable capturing photos appear next to record video, even while you have captured still images while recording. • The camcorder does not produce the shutter sound when capturing...

User Manual
Page 47
...-0001 MENU MENU 01/JAN/2010 00:00 41 PRECHECK! • Insert a memory card. ¬page 27 • Select the play mode by pressing the Mode ( ) button. ¬page 23 1. When you touch anywhere on the LCD screen to go to view the previous and next photo. • Place and hold your finger, the camcorder displays the selected photo. 3. VIEWING PHOTOS You can view recorded photos using various playback functions. Touch the Photo...
...-0001 MENU MENU 01/JAN/2010 00:00 41 PRECHECK! • Insert a memory card. ¬page 27 • Select the play mode by pressing the Mode ( ) button. ¬page 23 1. When you touch anywhere on the LCD screen to go to view the previous and next photo. • Place and hold your finger, the camcorder displays the selected photo. 3. VIEWING PHOTOS You can view recorded photos using various playback functions. Touch the Photo...

User Manual
Page 68
... correct problems with this camcorder. • If there is sufficiently charged. This enables stable speeds and operation when the camcorder accesses the storage media. • Be aware that formatting erases all files (including protected files) and options on the storage media. Press the MENU button. 2. system setting Format The format function deletes all files and data including protected files. 62 Settings Auto Power Off PC Software Format Default Set Settings Auto Power...
... correct problems with this camcorder. • If there is sufficiently charged. This enables stable speeds and operation when the camcorder accesses the storage media. • Be aware that formatting erases all files (including protected files) and options on the storage media. Press the MENU button. 2. system setting Format The format function deletes all files and data including protected files. 62 Settings Auto Power Off PC Software Format Default Set Settings Auto Power...

User Manual
Page 71
... are minimum requirements. Uploading the recorded videos and photos to Youtube, Flickr, FaceBook, etc. ¬page 69 • You can perform the following functions by connecting your camcorder to your Windows computer with the built-in USB plug and using with a Windows computer WHAT YOU CAN DO WITH A WINDOWS COMPUTER You can also transfer or copy the files (videos and photos) saved on your camcorder, 'Intelli-studio', is...
... are minimum requirements. Uploading the recorded videos and photos to Youtube, Flickr, FaceBook, etc. ¬page 69 • You can perform the following functions by connecting your camcorder to your Windows computer with the built-in USB plug and using with a Windows computer WHAT YOU CAN DO WITH A WINDOWS COMPUTER You can also transfer or copy the files (videos and photos) saved on your camcorder, 'Intelli-studio', is...

User Manual
Page 72
... most convenient way for you must follow these steps: 1. Settings Auto Power Off PC Software Format Default Set To disconnect the USB plug To disconnect the USB plug after completing the file transfer, you to manage your video and photo files. If the "Stop a Hardware device" window appears, click "OK." 4. MENU Step 1. Connecting the USB plug 1. The uploading procedure starts. Set "PC Software: On."¬page 61 • This is the...
... most convenient way for you must follow these steps: 1. Settings Auto Power Off PC Software Format Default Set To disconnect the USB plug To disconnect the USB plug after completing the file transfer, you to manage your video and photo files. If the "Stop a Hardware device" window appears, click "OK." 4. MENU Step 1. Connecting the USB plug 1. The uploading procedure starts. Set "PC Software: On."¬page 61 • This is the...

User Manual
Page 76
... a Windows computer using the built-in all environments. YouTube server-side changes in the future may disable this product is no guarantee the uploading operation will work in USB plug. using with Share marks appears on the screen. • Click "Yes" on the PC screen to begin uploading your camcorder is connected to YouTube's policy, direct video uploading may not be available in your nation / region. Time spent uploading may...
... a Windows computer using the built-in all environments. YouTube server-side changes in the future may disable this product is no guarantee the uploading operation will work in USB plug. using with Share marks appears on the screen. • Click "Yes" on the PC screen to begin uploading your camcorder is connected to YouTube's policy, direct video uploading may not be available in your nation / region. Time spent uploading may...

User Manual
Page 83
... subject is not supported by this camcorder. Set "File No." Playback Message Read Error Icon - Action • Back up important files on panorama mode. The number of photo files is full. Set "File No." Shooting aborted as shot direction changed. Informs that ... This function is too close . Move camera more slowly. Recording Message Write Error Cannot record video on the storage media to your PC, and then format the storage media using the camcorder. Folder and...
... subject is not supported by this camcorder. Set "File No." Playback Message Read Error Icon - Action • Back up important files on panorama mode. The number of photo files is full. Set "File No." Shooting aborted as shot direction changed. Informs that ... This function is too close . Move camera more slowly. Recording Message Write Error Cannot record video on the storage media to your PC, and then format the storage media using the camcorder. Folder and...

User Manual
Page 85
.... Turn off your camcorder and leave it again directly on the subjects you record and the features you copy the data to a shorter available recording time. 79 Storage Media Symptom Memory card functions are using a memory card formatted on a computer, format it for a while in a dry place for the recording, which can lead to your PC or other storage media.) • The memory card is not supported on the storage media. • The internal...
.... Turn off your camcorder and leave it again directly on the subjects you record and the features you copy the data to a shorter available recording time. 79 Storage Media Symptom Memory card functions are using a memory card formatted on a computer, format it for a while in a dry place for the recording, which can lead to your PC or other storage media.) • The memory card is not supported on the storage media. • The internal...

User Manual
Page 92
... HMX-E15WP/HMX-E15BP/HMX-E15OP System Video signal Picture compression format Audio compression format Image device Lens Focal length PAL H.264 (MPEG-4.AVC) AAC (Advanced Audio Coding) 1/3.2", 8M Pixel CMOS F2.2, Digital zoom: x2 4.9mm LCD screen Size/dot number LCD screen method 2.7 inch / 230k 4:3 TSP LCD Connectors HDMI output USB output C type connector Built-in USB General Power source Power source type Power consumption (Recording) Operating temperature Operating humidity Storage temperature Dimensions (WxHxD) Weight Internal MIC Storage media 3.7V (Using Lithium Ion battery...
... HMX-E15WP/HMX-E15BP/HMX-E15OP System Video signal Picture compression format Audio compression format Image device Lens Focal length PAL H.264 (MPEG-4.AVC) AAC (Advanced Audio Coding) 1/3.2", 8M Pixel CMOS F2.2, Digital zoom: x2 4.9mm LCD screen Size/dot number LCD screen method 2.7 inch / 230k 4:3 TSP LCD Connectors HDMI output USB output C type connector Built-in USB General Power source Power source type Power consumption (Recording) Operating temperature Operating humidity Storage temperature Dimensions (WxHxD) Weight Internal MIC Storage media 3.7V (Using Lithium Ion battery...


