Service Manual
Page 12
Selectl language English 3. Input DDC EDID data when replacing AD PCB. 2. Monitor PC PC for the model from HQ quality control department. 3 Alignments and Adjustments ... Figure 1. 3-1 This function is needed for AD board change. 3-1 Required Equipment The following equipment is necessary for adjusting the monitor: Computer with Windows 95, Windows 98, Windows NT, Windows 2000, or Windows XP. MTI-2031 DDC MANAGER JIG 3-2 Automatic... and white and any mode.(16gray and XGA mode recommend) 1. Push the OSD Menu button to use the RS232 JIG. See the screen flashing 3-3 DDC EDID Data Input 1.
Selectl language English 3. Input DDC EDID data when replacing AD PCB. 2. Monitor PC PC for the model from HQ quality control department. 3 Alignments and Adjustments ... Figure 1. 3-1 This function is needed for AD board change. 3-1 Required Equipment The following equipment is necessary for adjusting the monitor: Computer with Windows 95, Windows 98, Windows NT, Windows 2000, or Windows XP. MTI-2031 DDC MANAGER JIG 3-2 Automatic... and white and any mode.(16gray and XGA mode recommend) 1. Push the OSD Menu button to use the RS232 JIG. See the screen flashing 3-3 DDC EDID Data Input 1.
Service Manual
Page 42
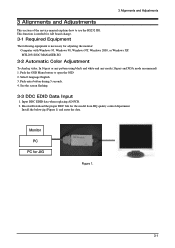
... menu... Currently six different modes are watching. Enter button Activates a highlighted menu item. 5. Power button / Power indicator Use this button for auto...buttons. 1) Custom Although the values are carefully chosen by using the OSD menu. 2) Text : Normal brightness For documentations or works involving heavy text.... Internet, Game, Sport and Movie. Adjust buttons Adjust items in the menu. 4. MagicBright button MagicBright is a new feature providing optimum viewing environment ... values may not be comfortable to the previous menu. 2. Auto button Use this is not on the contents ...
... menu... Currently six different modes are watching. Enter button Activates a highlighted menu item. 5. Power button / Power indicator Use this button for auto...buttons. 1) Custom Although the values are carefully chosen by using the OSD menu. 2) Text : Normal brightness For documentations or works involving heavy text.... Internet, Game, Sport and Movie. Adjust buttons Adjust items in the menu. 4. MagicBright button MagicBright is a new feature providing optimum viewing environment ... values may not be comfortable to the previous menu. 2. Auto button Use this is not on the contents ...
User Guide
Page 11
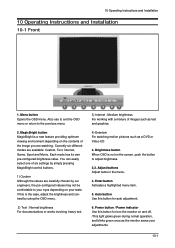
.... Quick Setup Guide Cable Warranty Card/ Registration Card (Not available in all locations) User's Guide, Monitor Driver D-sub Cable Power Cord Front MENU button [ ] MagicBright™ [] Opens the OSD menu. MagicBright™ is the case, adjust the brightness and contrast by our engineers, the pre-configured values... may not be comfortable to the previous menu. Each mode has its own preconfigured brightness value. Also use to exit the OSD menu or return to your taste. If this is a new feature providing optimum viewing ...
.... Quick Setup Guide Cable Warranty Card/ Registration Card (Not available in all locations) User's Guide, Monitor Driver D-sub Cable Power Cord Front MENU button [ ] MagicBright™ [] Opens the OSD menu. MagicBright™ is the case, adjust the brightness and contrast by our engineers, the pre-configured values... may not be comfortable to the previous menu. Each mode has its own preconfigured brightness value. Also use to exit the OSD menu or return to your taste. If this is a new feature providing optimum viewing ...
User Guide
Page 12
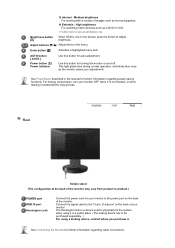
...: High brightness For watching motion pictures such as the monitor saves your adjustments. See Connecting the Monitor for your monitor. See PowerSaver described in the menu. Rear Simple stand (The configuration at the back of the monitor may vary from product to adjust brightness. Connect the ... lock is not needed, or when leaving it . Enter button [ ] Activates a highlighted menu item. Adjust buttons [ ] Adjust items in the manual for turning the monitor on the back of the monitor. AUTO button [ AUTO ] Power button [ ]/ Power indicator Use this button for further ...
...: High brightness For watching motion pictures such as the monitor saves your adjustments. See Connecting the Monitor for your monitor. See PowerSaver described in the menu. Rear Simple stand (The configuration at the back of the monitor may vary from product to adjust brightness. Connect the ... lock is not needed, or when leaving it . Enter button [ ] Activates a highlighted menu item. Adjust buttons [ ] Adjust items in the manual for turning the monitor on the back of the monitor. AUTO button [ AUTO ] Power button [ ]/ Power indicator Use this button for further ...

User Guide
Page 22
AUTO 1. [ ]Use this button to open the on-screen menu and exit from the menu screen or close screen adjustment menu. 2. [ ]These buttons allow you to adjust items in the menu. 3. [ ]Press this button to activate a highlighted menu item. 4. [AUTO]Press to self-adjust to the incoming PC signal. The values of fine,coarse and position are adjusted automatically.
AUTO 1. [ ]Use this button to open the on-screen menu and exit from the menu screen or close screen adjustment menu. 2. [ ]These buttons allow you to adjust items in the menu. 3. [ ]Press this button to activate a highlighted menu item. 4. [AUTO]Press to self-adjust to the incoming PC signal. The values of fine,coarse and position are adjusted automatically.
User Guide
Page 23
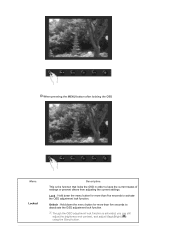
Auto adjustment allows the monitor to self-adjust to adjust picture with more accuracy. - If auto adjustment does not work properly, press AUTO button again to the incoming video signal. Menu AUTO Description When the 'AUTO' button is on the center. If you change resolution in the animated screen on . - OSD Lock & Unlock...
Auto adjustment allows the monitor to self-adjust to adjust picture with more accuracy. - If auto adjustment does not work properly, press AUTO button again to the incoming video signal. Menu AUTO Description When the 'AUTO' button is on the center. If you change resolution in the animated screen on . - OSD Lock & Unlock...
User Guide
Page 24
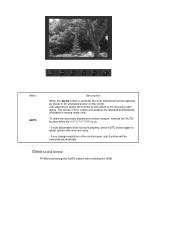
... for more than five seconds to activate the OSD adjustment lock function. Unlock : Hold down the menu button for more than five seconds to keep the current states of settings or prevent others from adjusting the current settings. Though the OSD ...adjustment lock function is the function that locks the OSD in order to deactivate the OSD adjustment lock function. When pressing the MENU button after locking the OSD Menu Locked Description This is activated, you can still adjust the brightness and contrast, and adjust MagicBright ( ) using the Direct button.
... for more than five seconds to activate the OSD adjustment lock function. Unlock : Hold down the menu button for more than five seconds to keep the current states of settings or prevent others from adjusting the current settings. Though the OSD ...adjustment lock function is the function that locks the OSD in order to deactivate the OSD adjustment lock function. When pressing the MENU button after locking the OSD Menu Locked Description This is activated, you can still adjust the brightness and contrast, and adjust MagicBright ( ) using the Direct button.
User Guide
Page 25
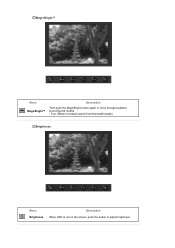
MagicBright™ Menu Description Then push the MagicBright button again to adjust brightness. Four different modes(Custom/Text/Internet/Entertain) Brightness Menu Brightness Description When OSD is not on the screen, push the button to circle through available MagicBright™ preconfigured modes. -
MagicBright™ Menu Description Then push the MagicBright button again to adjust brightness. Four different modes(Custom/Text/Internet/Entertain) Brightness Menu Brightness Description When OSD is not on the screen, push the button to circle through available MagicBright™ preconfigured modes. -

User Guide
Page 26
Direct Access Feature : When OSD is not on the screen, push the [ ] button to adjust brightness. [MENU MENU] You can use the on -screen menus to change the contrast according to personal preference. Picture Color Image OSD Setup Information Brightness Color ...Tone Coarse Language Image Reset Contrast Color Control Fine H-Position Color Reset Gamma Sharpness V-Position H-Position V-Position Transparency Display Time Picture Menu Brightness Contrast Description You can use the on -screen menus to change the brightness according to personal preference...
Direct Access Feature : When OSD is not on the screen, push the [ ] button to adjust brightness. [MENU MENU] You can use the on -screen menus to change the contrast according to personal preference. Picture Color Image OSD Setup Information Brightness Color ...Tone Coarse Language Image Reset Contrast Color Control Fine H-Position Color Reset Gamma Sharpness V-Position H-Position V-Position Transparency Display Time Picture Menu Brightness Contrast Description You can use the on -screen menus to change the brightness according to personal preference...
User Guide
Page 27
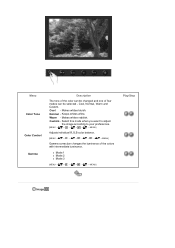
Normal - Makes whites bluish. Custom - z Mode 1 z Mode 2 z Mode 3 [MENU MENU] Play/Stop Image Select this mode when you want to adjust the image according to your preferences. [MENU MENU] Adjusts individual R,G,B color balance. [MENU MENU] Gamma correction changes the luminance of four modes can be selected - Warm - Menu Color Tone Color Control Gamma Description The tone of the color can be changed and one of the colors with intermediate luminance. Cool - Cool, Normal, Warm and Custom. Keeps whites white. Makes whites reddish.
Normal - Makes whites bluish. Custom - z Mode 1 z Mode 2 z Mode 3 [MENU MENU] Play/Stop Image Select this mode when you want to adjust the image according to your preferences. [MENU MENU] Adjusts individual R,G,B color balance. [MENU MENU] Gamma correction changes the luminance of four modes can be selected - Warm - Menu Color Tone Color Control Gamma Description The tone of the color can be changed and one of the colors with intermediate luminance. Cool - Cool, Normal, Warm and Custom. Keeps whites white. Makes whites reddish.
User Guide
Page 28
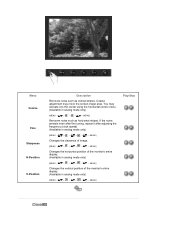
... speed). (Available in analog mode only) [MENU MENU] Changes the clearance of image. [MENU MENU] Changes the horizontal position of the monitor's entire display. (Available in analog mode only) [MENU MENU] Changes the vertical position of the monitor's entire display. (Available in analog mode only) [MENU MENU] Removes noise such as vertical stripes. Menu Coarse Fine Sharpness H-Position V-Position Description Removes...
... speed). (Available in analog mode only) [MENU MENU] Changes the clearance of image. [MENU MENU] Changes the horizontal position of the monitor's entire display. (Available in analog mode only) [MENU MENU] Changes the vertical position of the monitor's entire display. (Available in analog mode only) [MENU MENU] Removes noise such as vertical stripes. Menu Coarse Fine Sharpness H-Position V-Position Description Removes...

User Guide
Page 29
... wait before it is turned off if no effect on any software running on the computer. [MENU MENU] You can change the horizontal position where the OSD menu appears on your monitor. [MENU MENU] Change the transparency of the background of 9 languages. Play/Stop Language H-Position V-Position Transparency Display Time Note:The language chosen affects only...
... wait before it is turned off if no effect on any software running on the computer. [MENU MENU] You can change the horizontal position where the OSD menu appears on your monitor. [MENU MENU] Change the transparency of the background of 9 languages. Play/Stop Language H-Position V-Position Transparency Display Time Note:The language chosen affects only...
User Guide
Page 30
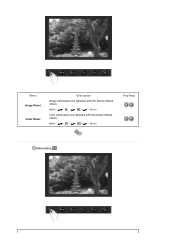
Menu Image Reset Color Reset Description Image parameters are replaced with the factory default values. [MENU MENU] Color parameters are replaced with the factory default values. [MENU MENU] Play/Stop Information
Menu Image Reset Color Reset Description Image parameters are replaced with the factory default values. [MENU MENU] Color parameters are replaced with the factory default values. [MENU MENU] Play/Stop Information

User Guide
Page 31
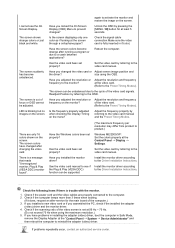
Menu Information Description Shows a video source, display mode on the OSD screen. [MENU → , → MENU]
Menu Information Description Shows a video source, display mode on the OSD screen. [MENU → , → MENU]
User Guide
Page 33
...Panel → Display → Settings. Have you locked the On Screen Display (OSD) Menu to a crash between applications? Have you changed after running a program or due to prevent changes? Install the monitor driver according to the cycle of focus or OSD cannot be supported. The screen is ... cables are only 16 colors shown on the screen. I cannot see if Install the monitor driver according the Plug & Play (VESA DDC) to the Preset Timing Modes). Unlock the OSD by pressing the [MENU / ] button for the main board of the video card. (Refer to product.) ...
...Panel → Display → Settings. Have you locked the On Screen Display (OSD) Menu to a crash between applications? Have you changed after running a program or due to prevent changes? Install the monitor driver according to the cycle of focus or OSD cannot be supported. The screen is ... cables are only 16 colors shown on the screen. I cannot see if Install the monitor driver according the Plug & Play (VESA DDC) to the Preset Timing Modes). Unlock the OSD by pressing the [MENU / ] button for the main board of the video card. (Refer to product.) ...


