
User Manual
Page 8
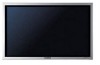
Power Cord Cover-hole Remote Control / Batteries (AAA X 2) Monitor Signal Cable (15 pin D-Sub) BNC to RCA Adaptorjack RS232C CABLE User's Guide CD Sold separately Warranty Card (Not available in all locations) Temporary Stand Wall Mount KIT Speaker Set Stand Kit PIVOT Installation CD Contact a local Samsung Electronics service center to buy optional items. Unpacking Please make sure the following items are missing, contact your monitor. If any items are included with your dealer.
Power Cord Cover-hole Remote Control / Batteries (AAA X 2) Monitor Signal Cable (15 pin D-Sub) BNC to RCA Adaptorjack RS232C CABLE User's Guide CD Sold separately Warranty Card (Not available in all locations) Temporary Stand Wall Mount KIT Speaker Set Stand Kit PIVOT Installation CD Contact a local Samsung Electronics service center to buy optional items. Unpacking Please make sure the following items are missing, contact your monitor. If any items are included with your dealer.

User Manual
Page 16
Mechanical Lay-out 3. Stand 4. Speaker
Mechanical Lay-out 3. Stand 4. Speaker

User Manual
Page 19
Speaker Stand 4. Mechanical Lay-out 3.
Speaker Stand 4. Mechanical Lay-out 3.

User Manual
Page 21
... . Be sure to protect the hole at the bottom of the monitor, where the stand is not responsible for use the Semi Stand as a regular stand and Samsung Electronics is inserted. The Semi Stand is not intended for any problems caused by using it instead of the regular products. ...Never use as the regular stand. Set up the left and right stands respectively. 3. Insert screw into ...
... . Be sure to protect the hole at the bottom of the monitor, where the stand is not responsible for use the Semi Stand as a regular stand and Samsung Electronics is inserted. The Semi Stand is not intended for any problems caused by using it instead of the regular products. ...Never use as the regular stand. Set up the left and right stands respectively. 3. Insert screw into ...

User Manual
Page 22
A 'Cover-Protector' is used to remove the 'Cover-Protector' when attaching the provided Semi Stand or stand kit (sold separately) 1. Be sure to protect the hole at the bottom of the monitor, where the stand is inserted. Put the stand into the hole indicated and tighten. (M4 x 15) Installing Stand Kit 2. Make sure you put the parts in the right direction and in the right place. (M4 x 15) 3. Installing Stand Kit (sold separately) and cover the hole using the 'Cover-Hole' when attaching the wall mount kit. 2. Insert screw into the hole at the bottom of the monitor. 4.
A 'Cover-Protector' is used to remove the 'Cover-Protector' when attaching the provided Semi Stand or stand kit (sold separately) 1. Be sure to protect the hole at the bottom of the monitor, where the stand is inserted. Put the stand into the hole indicated and tighten. (M4 x 15) Installing Stand Kit 2. Make sure you put the parts in the right direction and in the right place. (M4 x 15) 3. Installing Stand Kit (sold separately) and cover the hole using the 'Cover-Hole' when attaching the wall mount kit. 2. Insert screw into the hole at the bottom of the monitor. 4.

User Manual
Page 23
... inserted. Insert screw into the hole at the bottom of the regular products. The Semi Stand is not intended for use the Semi Stand as a regular stand and Samsung Electronics is not responsible for screen adjustment before the stand kit or wall mount kit (sold separately) and cover the hole using a base other than those...
... inserted. Insert screw into the hole at the bottom of the regular products. The Semi Stand is not intended for use the Semi Stand as a regular stand and Samsung Electronics is not responsible for screen adjustment before the stand kit or wall mount kit (sold separately) and cover the hole using a base other than those...

User Manual
Page 24
... protect the hole at the bottom of the monitor, where the stand is used to remove the 'Cover-Protector' when attaching the provided Semi Stand or stand kit (sold separately) 1. Put the stand into the hole indicated and tighten. (M4 × 15) Installing Stand Kit 2. A 'Cover-Protector' is inserted. Insert screw into the hole at... the bottom of the monitor. 4. Make sure you put the parts in the right direction and in the right place. (M4 x 15) 3. Installing Stand Kit (sold separately) and cover the hole using the 'Cover-Hole' when attaching the wall mount kit. 2.
... protect the hole at the bottom of the monitor, where the stand is used to remove the 'Cover-Protector' when attaching the provided Semi Stand or stand kit (sold separately) 1. Put the stand into the hole indicated and tighten. (M4 × 15) Installing Stand Kit 2. A 'Cover-Protector' is inserted. Insert screw into the hole at... the bottom of the monitor. 4. Make sure you put the parts in the right direction and in the right place. (M4 x 15) 3. Installing Stand Kit (sold separately) and cover the hole using the 'Cover-Hole' when attaching the wall mount kit. 2.

User Manual
Page 62
... Power Supply AC 90 ~ 264 V(50/60 Hz) Power Consumption 230W (Maximum) Power Saving Less than 8W Dimensions (WxDxH) Without Stand 974 x 100 x 613 mm Weight Monitor body 26 kg Weight (Protection Glass) Monitor body 27.7 kg Environmental considerations Operating Temperature ... Temperature : -13°F ~113°F (-25°C ~ 45°C) Humidity : 5% ~ 95%, non-condensing or N. or N. General Model Name SyncMaster 403T LCD Panel Size 40.02 inch (Diagonal) Display area 871.68 (H) x 523.008 (V) Pixel Pitch 0.681 (H) x 0.681 (V) Type a-si TFT active matrix...
... Power Supply AC 90 ~ 264 V(50/60 Hz) Power Consumption 230W (Maximum) Power Saving Less than 8W Dimensions (WxDxH) Without Stand 974 x 100 x 613 mm Weight Monitor body 26 kg Weight (Protection Glass) Monitor body 27.7 kg Environmental considerations Operating Temperature ... Temperature : -13°F ~113°F (-25°C ~ 45°C) Humidity : 5% ~ 95%, non-condensing or N. or N. General Model Name SyncMaster 403T LCD Panel Size 40.02 inch (Diagonal) Display area 871.68 (H) x 523.008 (V) Pixel Pitch 0.681 (H) x 0.681 (V) Type a-si TFT active matrix...

User Manual
Page 64
..., S-VHS, RGB, Component 100 MHz Power Supply AC 90 ~ 264 V(50/60 Hz) Power Consumption 170W (Maximum) Power Saving Less than 8W Dimensions (WxDxH) Without Stand Weight 787 x 100 x 500 mm Monitor body 18.2 kg Environmental considerations Operating Temperature : 50°F ~ 104°F(10°C ~ 40°C) Humidity : 10% ~ 80%, non...
..., S-VHS, RGB, Component 100 MHz Power Supply AC 90 ~ 264 V(50/60 Hz) Power Consumption 170W (Maximum) Power Saving Less than 8W Dimensions (WxDxH) Without Stand Weight 787 x 100 x 500 mm Monitor body 18.2 kg Environmental considerations Operating Temperature : 50°F ~ 104°F(10°C ~ 40°C) Humidity : 10% ~ 80%, non...


