Safety Information
Page 73
... Paper...123 Types of Paper and Other Media...123 Paper Not Supported by This Printer...135 Print Area...136 Loading Paper...138 Loading Paper into Standard Paper Feed Tray or Optional Paper Feed Trays 138 Loading Paper in Bypass Tray...146 Loading Envelopes...152 Switching between Paper Trays...157 Printing on Orientation-Fixed or Two-Sided Paper 158 Using Paper Types that Have Unique Names 159 From Registration of WPA/WPA2...117 6. Setting WPA...110 Configuring IEEE 802.1X...115 Installing a Site Certificate...115 Installing Device Certificate...115 Setting Items of User Paper Types...
... Paper...123 Types of Paper and Other Media...123 Paper Not Supported by This Printer...135 Print Area...136 Loading Paper...138 Loading Paper into Standard Paper Feed Tray or Optional Paper Feed Trays 138 Loading Paper in Bypass Tray...146 Loading Envelopes...152 Switching between Paper Trays...157 Printing on Orientation-Fixed or Two-Sided Paper 158 Using Paper Types that Have Unique Names 159 From Registration of WPA/WPA2...117 6. Setting WPA...110 Configuring IEEE 802.1X...115 Installing a Site Certificate...115 Installing Device Certificate...115 Setting Items of User Paper Types...
Safety Information
Page 81
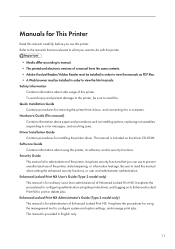
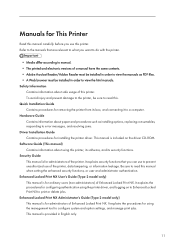
... provided in order to view the manuals as installing options, replacing consumables, responding to configure system and option settings, and manage print jobs. Security Guide This manual is for administrators of Enhanced Locked Print NX. Enhanced Locked Print NX User's Guide (Type 2 model only) This manual is for removing the printer from its security functions. Software Guide Contains information about paper and procedures such as PDF files. • A Web browser must be sure to read this...
... provided in order to view the manuals as installing options, replacing consumables, responding to configure system and option settings, and manage print jobs. Security Guide This manual is for administrators of Enhanced Locked Print NX. Enhanced Locked Print NX User's Guide (Type 2 model only) This manual is for removing the printer from its security functions. Software Guide Contains information about paper and procedures such as PDF files. • A Web browser must be sure to read this...
Safety Information
Page 194
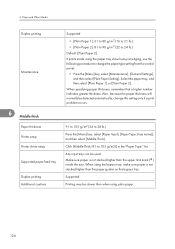
...Paper 2] If prints made using the bypass tray, make sure paper is not stacked higher than the paper guides on the bypass tray. Supported Printing may be detected automatically, change the paper type setting from the control panel: • Press the [Menu] key, select [Maintenance], [General Settings], and then select [Plain Paper Setting]. Make sure paper is not stacked higher than the upper limit mark ( ) inside the tray. Paper and Other Media Duplex printing Maintenance 6 Middle thick Paper thickness Printer setup Printer driver setup Supported paper feed tray Duplex printing...
...Paper 2] If prints made using the bypass tray, make sure paper is not stacked higher than the paper guides on the bypass tray. Supported Printing may be detected automatically, change the paper type setting from the control panel: • Press the [Menu] key, select [Maintenance], [General Settings], and then select [Plain Paper Setting]. Make sure paper is not stacked higher than the upper limit mark ( ) inside the tray. Paper and Other Media Duplex printing Maintenance 6 Middle thick Paper thickness Printer setup Printer driver setup Supported paper feed tray Duplex printing...
Safety Information
Page 197
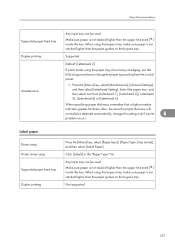
Label paper Printer setup Printer driver setup Supported paper feed tray Duplex printing Press the [Menu] key, select [Paper Input], [Paper Type: (tray name)], and then select [Label Paper]. Click [Labels] in the "Paper Type:" list. Paper Recommendations Supported paper feed tray Any input tray can be used . Select the paper tray, and then select one from the control panel: • Press the [Menu] key, select [Maintenance], [General Settings], and then select [Letterhead Setting]. Not supported 127 Any input tray can be used . Make sure paper is not stacked higher than ...
Label paper Printer setup Printer driver setup Supported paper feed tray Duplex printing Press the [Menu] key, select [Paper Input], [Paper Type: (tray name)], and then select [Label Paper]. Click [Labels] in the "Paper Type:" list. Paper Recommendations Supported paper feed tray Any input tray can be used . Select the paper tray, and then select one from the control panel: • Press the [Menu] key, select [Maintenance], [General Settings], and then select [Letterhead Setting]. Not supported 127 Any input tray can be used . Make sure paper is not stacked higher than ...
Safety Information
Page 198
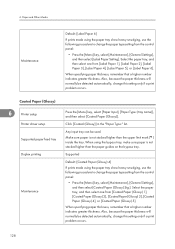
... mark ( ) inside the tray. Select the paper tray, and then select one from the control panel: • Press the [Menu] key, select [Maintenance], [General Settings], and then select [Coated Paper (Glossy) Stg.]. Paper and Other Media Maintenance Default: [Label Paper 6] If prints made using the bypass tray, make sure paper is not stacked higher than the paper guides on the bypass tray. Coated Paper (Glossy) 6 Printer setup Printer driver setup Supported paper feed tray Duplex printing Maintenance Press the [Menu] key, select [Paper Input], [Paper Type: (tray name)], and then...
... mark ( ) inside the tray. Select the paper tray, and then select one from the control panel: • Press the [Menu] key, select [Maintenance], [General Settings], and then select [Coated Paper (Glossy) Stg.]. Paper and Other Media Maintenance Default: [Label Paper 6] If prints made using the bypass tray, make sure paper is not stacked higher than the paper guides on the bypass tray. Coated Paper (Glossy) 6 Printer setup Printer driver setup Supported paper feed tray Duplex printing Maintenance Press the [Menu] key, select [Paper Input], [Paper Type: (tray name)], and then...

Safety Information
Page 200
...) Printer setup Printer driver setup Supported paper feed tray Duplex printing Press the [Menu] key, select [Paper Input], [Paper Type: (tray name)], and then select [Coated Paper(Matted:Thick)]. When using the bypass tray, make sure paper is not stacked higher than the paper guides on the bypass tray. Duplex printing Supported Maintenance 6 Default: [Coated Paper (Matted) 4] If prints made using the bypass tray, make sure paper is not stacked higher than the paper guides on the bypass tray. Also, because the paper thickness will normally be used . Paper and Other Media...
...) Printer setup Printer driver setup Supported paper feed tray Duplex printing Press the [Menu] key, select [Paper Input], [Paper Type: (tray name)], and then select [Coated Paper(Matted:Thick)]. When using the bypass tray, make sure paper is not stacked higher than the paper guides on the bypass tray. Duplex printing Supported Maintenance 6 Default: [Coated Paper (Matted) 4] If prints made using the bypass tray, make sure paper is not stacked higher than the paper guides on the bypass tray. Also, because the paper thickness will normally be used . Paper and Other Media...
Safety Information
Page 201
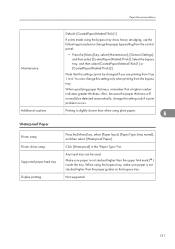
... changed if you are printing from Tray 1 to change this setting only when printing from the control panel: • Press the [Menu] key, select [Maintenance], [General Settings], and then select [Coated Paper(Matted:Thick)]. Also, because the paper thickness will normally be used. Make sure paper is not stacked higher than when using plain paper. 6 Waterproof Paper Printer setup Printer driver setup Supported paper feed tray Duplex printing Press the [Menu] key, select [Paper Input], [Paper Type: (tray name)], and then select [Waterproof Paper]. Paper Recommendations Maintenance...
... changed if you are printing from Tray 1 to change this setting only when printing from the control panel: • Press the [Menu] key, select [Maintenance], [General Settings], and then select [Coated Paper(Matted:Thick)]. Also, because the paper thickness will normally be used. Make sure paper is not stacked higher than when using plain paper. 6 Waterproof Paper Printer setup Printer driver setup Supported paper feed tray Duplex printing Press the [Menu] key, select [Paper Input], [Paper Type: (tray name)], and then select [Waterproof Paper]. Paper Recommendations Maintenance...
Safety Information
Page 202
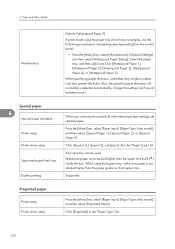
... the paper tray, and then select one from the control panel: • Press the [Menu] key, select [Maintenance], [General Settings], and then select [Waterproof Paper Setting]. When specifying paper thickness, remember that a higher number indicates greater thickness. When using the paper tray show heavy smudging, use the following procedure to change this setting only if a print problem occurs. Supported Preprinted paper Printer setup Printer driver setup Press the [Menu] key, select [Paper Input], [Paper Type: (tray name)], and then select [Preprinted Paper...
... the paper tray, and then select one from the control panel: • Press the [Menu] key, select [Maintenance], [General Settings], and then select [Waterproof Paper Setting]. When specifying paper thickness, remember that a higher number indicates greater thickness. When using the paper tray show heavy smudging, use the following procedure to change this setting only if a print problem occurs. Supported Preprinted paper Printer setup Printer driver setup Press the [Menu] key, select [Paper Input], [Paper Type: (tray name)], and then select [Preprinted Paper...
Safety Information
Page 234
... upside down. • Store toner in Upper Cover. When the following message appears on the display, the toner should be careful not to Black and White using black toner. Replace the toner cartridge if the following message appears on the display: " Add Toner: (color)" Add toner See instructions in a cool dark place. • If toner are not covered by warranty. Maintaining the Printer • When removing jammed paper or replacing toner, avoid getting toner (new or used ) on your skin, wash...
... upside down. • Store toner in Upper Cover. When the following message appears on the display, the toner should be careful not to Black and White using black toner. Replace the toner cartridge if the following message appears on the display: " Add Toner: (color)" Add toner See instructions in a cool dark place. • If toner are not covered by warranty. Maintaining the Printer • When removing jammed paper or replacing toner, avoid getting toner (new or used ) on your skin, wash...
Safety Information
Page 270
... service. The printer cannot detect a hard disk. Problem:Wireless board Please call service. Check if it is installed properly or contact your sales or service representative. For details about installing the unit, see p.75 "Installing the Interface Units". 200 9. Address (109/209) The same IPv6 address already exists. Check if it is detected. For details about installing the unit, see p.75 "Installing the Interface Units". Ethernet Board Error An error on the control panel. Problem with the printer's font file. IPv6 Address...
... service. The printer cannot detect a hard disk. Problem:Wireless board Please call service. Check if it is installed properly or contact your sales or service representative. For details about installing the unit, see p.75 "Installing the Interface Units". 200 9. Address (109/209) The same IPv6 address already exists. Check if it is detected. For details about installing the unit, see p.75 "Installing the Interface Units". Ethernet Board Error An error on the control panel. Problem with the printer's font file. IPv6 Address...
Safety Information
Page 280
... printed). • You must install an optional hard disk drive or set the password of the PDF file using paper smaller than the paper size selected in [PDF Menu] or Web Image Monitor. The printed image is different from that the side guides of [RAM Disk] in the paper tray. Troubleshooting Paper gets wrinkles. • Paper is deteriorated or damaged. For details, see p.138 "Loading Paper". • The fusing unit is damp. For details, see "PDF Menu", Software Guide. 210 For details about [Change PDF Password], see p.174 "Replacing...
... printed). • You must install an optional hard disk drive or set the password of the PDF file using paper smaller than the paper size selected in [PDF Menu] or Web Image Monitor. The printed image is different from that the side guides of [RAM Disk] in the paper tray. Troubleshooting Paper gets wrinkles. • Paper is deteriorated or damaged. For details, see p.138 "Loading Paper". • The fusing unit is damp. For details, see "PDF Menu", Software Guide. 210 For details about [Change PDF Password], see p.174 "Replacing...
Safety Information
Page 283
... out of paper error. • If a paper tray is opened and closed while the printer is now warming up , and this takes time until it . Wait for [Energy Saver On/Off] in the Energy Saver mode. To print the image at higher resolution, install the optional memory. Other Printing Problems It takes too much time to complete the print job. • Photographs and other data intensive pages take a long time for print data..."
... out of paper error. • If a paper tray is opened and closed while the printer is now warming up , and this takes time until it . Wait for [Energy Saver On/Off] in the Energy Saver mode. To print the image at higher resolution, install the optional memory. Other Printing Problems It takes too much time to complete the print job. • Photographs and other data intensive pages take a long time for print data..."
Safety Information
Page 310
Interior 21 Intermediate transfer unit 231 IP address 93 J Job reset key 23 L Label paper 127 LED lamps 87 Left cover 19 Letterhead 126 List of options 13 Loading envelopes 152, 154 Loading paper 47, 138 M Machine types 7 Manuals 14 Manuals for this printer 11 Menu key 23 Middle thick 124 Model-specific information 7 Moving and transporting 227 Moving the printer a short distance 228 N NetWare 98 Network 93, 104 Network setting 98 No DHCP 94 Number keys 24...
Interior 21 Intermediate transfer unit 231 IP address 93 J Job reset key 23 L Label paper 127 LED lamps 87 Left cover 19 Letterhead 126 List of options 13 Loading envelopes 152, 154 Loading paper 47, 138 M Machine types 7 Manuals 14 Manuals for this printer 11 Menu key 23 Middle thick 124 Model-specific information 7 Moving and transporting 227 Moving the printer a short distance 228 N NetWare 98 Network 93, 104 Network setting 98 No DHCP 94 Number keys 24...
Safety Information
Page 329
... the manuals as installing options, replacing consumables, responding to error messages, and resolving jams. Driver Installation Guide Contains procedures for configuring authentication using the management tool to view the html manuals. To avoid injury and prevent damage to the printer, be installed in English only. 11 Software Guide (This manual) Contains information about paper and procedures such as PDF files. • A Web browser must be sure to print or delete jobs. Security Guide This manual is...
... the manuals as installing options, replacing consumables, responding to error messages, and resolving jams. Driver Installation Guide Contains procedures for configuring authentication using the management tool to view the html manuals. To avoid injury and prevent damage to the printer, be installed in English only. 11 Software Guide (This manual) Contains information about paper and procedures such as PDF files. • A Web browser must be sure to print or delete jobs. Security Guide This manual is...
Safety Information
Page 585
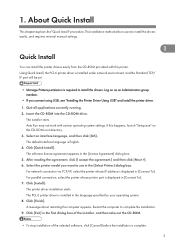
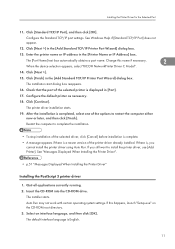
... the printer model you connect using USB, see "Installing the Printer Driver Using USB" and install the printer driver. 1. This installation method allows users to complete the installation. 9. Restart the computer to install the drivers easily, and requires minimal manual settings. 1 Quick Install You can install the printer drivers easily from the CD-ROM provided with certain operating system settings. The default interface language is complete. 5 If this printer. The software license agreement appears in the [Select Printer] dialog box. The PCL 6 printer driver...
... the printer model you connect using USB, see "Installing the Printer Driver Using USB" and install the printer driver. 1. This installation method allows users to complete the installation. 9. Restart the computer to install the drivers easily, and requires minimal manual settings. 1 Quick Install You can install the printer drivers easily from the CD-ROM provided with certain operating system settings. The default interface language is complete. 5 If this printer. The software license agreement appears in the [Select Printer] dialog box. The PCL 6 printer driver...
Safety Information
Page 591
... the device selection appears, select "RICOH NetworkPrinter Driver C Model". 14. Configure the Standard TCP/IP port settings. Change this happens, launch "Setup.exe" on the CD-ROM root directory. 3. The installation start dialog box reappears. 16. After the installation is completed, select one of the selected printer is English. 11 Restart the computer to install the printer driver, use [Add Printer]. Auto Run may not work with certain operating system settings. Click...
... the device selection appears, select "RICOH NetworkPrinter Driver C Model". 14. Configure the Standard TCP/IP port settings. Change this happens, launch "Setup.exe" on the CD-ROM root directory. 3. The installation start dialog box reappears. 16. After the installation is completed, select one of the selected printer is English. 11 Restart the computer to install the printer driver, use [Add Printer]. Auto Run may not work with certain operating system settings. Click...
Safety Information
Page 608
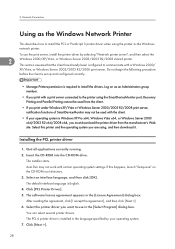
... you print with a print server connected to use the print server, install the printer driver by your operating system is English. 4. Insert the CD-ROM into the CD-ROM drive. The installer starts. Auto Run may not be used from the manufacturer's Web site. Select an interface language, and then click [OK]. Select the printer driver you must download the printer driver from the client. • If you are using the printer as the Windows Network Printer...
... you print with a print server connected to use the print server, install the printer driver by your operating system is English. 4. Insert the CD-ROM into the CD-ROM drive. The installer starts. Auto Run may not be used from the manufacturer's Web site. Select an interface language, and then click [OK]. Select the printer driver you must download the printer driver from the client. • If you are using the printer as the Windows Network Printer...
Safety Information
Page 616
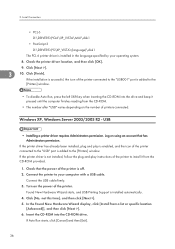
... >]. 6. If the printer driver is off. 2. Check that has Administrators permission. Found New Hardware Wizard starts, and USB Printing Support is installed in the language specified by your computer with a USB cable. Local Connection • PCL 6 D:\DRIVERS\PCL6\XP_VISTA\MUI\disk1 • PostScript 3 D:\DRIVERS\PS\XP_VISTA\(language)\disk1 The PCL 6 printer driver is installed automatically. 4. Windows XP, Windows Server 2003/2003 R2 - If Auto Run starts, click [Cancel] and then [Exit]. 36 3. USB • Installing a printer driver requires Administrators...
... >]. 6. If the printer driver is off. 2. Check that has Administrators permission. Found New Hardware Wizard starts, and USB Printing Support is installed in the language specified by your computer with a USB cable. Local Connection • PCL 6 D:\DRIVERS\PCL6\XP_VISTA\MUI\disk1 • PostScript 3 D:\DRIVERS\PS\XP_VISTA\(language)\disk1 The PCL 6 printer driver is installed automatically. 4. Windows XP, Windows Server 2003/2003 R2 - If Auto Run starts, click [Cancel] and then [Exit]. 36 3. USB • Installing a printer driver requires Administrators...
Safety Information
Page 726
... address will be added to the /etc/hosts file. • The host name will be added to the /etc/hosts file. • When printing with the workstation you are not supported. Solaris, HP-UX Delete the printer entry, and then execute the installation shell script again. Delete the printer. # /usr/sbin/lpadmin -x printer_name 10 Command Configuration hosts file is used. Change the option...
... address will be added to the /etc/hosts file. • The host name will be added to the /etc/hosts file. • When printing with the workstation you are not supported. Solaris, HP-UX Delete the printer entry, and then execute the installation shell script again. Delete the printer. # /usr/sbin/lpadmin -x printer_name 10 Command Configuration hosts file is used. Change the option...
Safety Information
Page 776
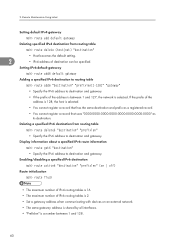
...Enabling/disabling a specified IPv6 destination msh> route active6 "destination" "prefixlen" {on an external network. • The same gateway address is shared by all interfaces. • "Prefixlen" is a number between 1 and 127, the network is selected. Remote Maintenance Using telnet Setting default IPv4 gateway msh> route add default... tables is 2. • Set a gateway address when communicating with devices on | off} Route initialization msh> route flush • The maximum number of IPv4 routing tables is 16. • The maximum number of the address is selected. • You...
...Enabling/disabling a specified IPv6 destination msh> route active6 "destination" "prefixlen" {on an external network. • The same gateway address is shared by all interfaces. • "Prefixlen" is a number between 1 and 127, the network is selected. Remote Maintenance Using telnet Setting default IPv4 gateway msh> route add default... tables is 2. • Set a gateway address when communicating with devices on | off} Route initialization msh> route flush • The maximum number of IPv4 routing tables is 16. • The maximum number of the address is selected. • You...


