
Network Guide
Page 1
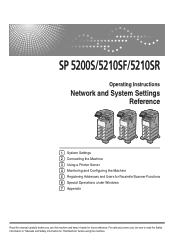
For safe and correct use this manual carefully before using the machine. Operating Instructions Network and System Settings Reference 1 System Settings 2 Connecting the Machine 3 Using a Printer Server 4 Monitoring and Configuring the Machine 5 Registering Addresses and Users for Facsimile/Scanner Functions 6 Special Operations under Windows 7 Appendix Read this machine and keep it handy for This Machine" before you use , be sure to read the Safety Information in "Manuals and Safety Information for future reference.
For safe and correct use this manual carefully before using the machine. Operating Instructions Network and System Settings Reference 1 System Settings 2 Connecting the Machine 3 Using a Printer Server 4 Monitoring and Configuring the Machine 5 Registering Addresses and Users for Facsimile/Scanner Functions 6 Special Operations under Windows 7 Appendix Read this machine and keep it handy for This Machine" before you use , be sure to read the Safety Information in "Manuals and Safety Information for future reference.

Network Guide
Page 3
... LDAP server...62 Programming the LDAP server...62 Changing the LDAP server...66 1 TABLE OF CONTENTS Manuals for This Machine...10 Notice...13 Important...13 How to Read This Manual...14 Symbols...14 Machine Types...14 Notes...15 Names of Major Items...15 List of Options...15 ...About IP Address...16 Laws and Regulations...17 Legal Prohibition...17 Model-Specific Information...18 Display Panel...19 Accessing User Tools...20 Changing Default Settings...
... LDAP server...62 Programming the LDAP server...62 Changing the LDAP server...66 1 TABLE OF CONTENTS Manuals for This Machine...10 Notice...13 Important...13 How to Read This Manual...14 Symbols...14 Machine Types...14 Notes...15 Names of Major Items...15 List of Options...15 ...About IP Address...16 Laws and Regulations...17 Legal Prohibition...17 Model-Specific Information...18 Display Panel...19 Accessing User Tools...20 Changing Default Settings...
Network Guide
Page 13
...the following settings: • Install the Device Certificate. • Enable SSL (Secure Sockets Layer) Encryption. • Change the user name and password of functions and settings that you can use to register information in the Address Book. Facsimile Reference Explains Facsimile functions ...and operations. It explains security functions that might not be available on this manual when setting the enhanced security functions, or user and administrator authentication. This manual includes explanations of the administrator using UNIX.
...the following settings: • Install the Device Certificate. • Enable SSL (Secure Sockets Layer) Encryption. • Change the user name and password of functions and settings that you can use to register information in the Address Book. Facsimile Reference Explains Facsimile functions ...and operations. It explains security functions that might not be available on this manual when setting the enhanced security functions, or user and administrator authentication. This manual includes explanations of the administrator using UNIX.

Network Guide
Page 16
...about which symbol corresponds to the region of the model you can find further relevant information. [ ] Indicates the names of keys on resolving user errors. This symbol is located at the end of data. Read the information indicated by two symbols. It indicates where you are using ....) (mainly North America) Differences in three models with different copy and print speeds, and different units installed. How to Read This Manual Symbols This manual uses the following symbols: Indicates points to pay attention to when using the machine, and explanations of likely causes of paper misfeeds,...
...about which symbol corresponds to the region of the model you can find further relevant information. [ ] Indicates the names of keys on resolving user errors. This symbol is located at the end of data. Read the information indicated by two symbols. It indicates where you are using ....) (mainly North America) Differences in three models with different copy and print speeds, and different units installed. How to Read This Manual Symbols This manual uses the following symbols: Indicates points to pay attention to when using the machine, and explanations of likely causes of paper misfeeds,...

Network Guide
Page 38
... Autoconfiguration Specify IPv6 Stateless Address Autoconfiguration. System Settings Interface Settings This section describes the user tools in the Interface Settings menu under System Settings. 1 Network This section describes the user tools in the Network menu under Interface Settings. The physical address (MAC address) ...machine's IPv6 network address. • Link-local Address The machine's specified link-local address appears. • Manual Configuration Address The machine's manually configured address appears. • Stateless Address: 1-5 The specified stateless address appears.
... Autoconfiguration Specify IPv6 Stateless Address Autoconfiguration. System Settings Interface Settings This section describes the user tools in the Interface Settings menu under System Settings. 1 Network This section describes the user tools in the Network menu under Interface Settings. The physical address (MAC address) ...machine's IPv6 network address. • Link-local Address The machine's specified link-local address appears. • Manual Configuration Address The machine's manually configured address appears. • Stateless Address: 1-5 The specified stateless address appears.
Network Guide
Page 218
... job ID > The spooled job was canceled due to error or user request. LeaseTime=(sec), RenewTime=(sec). Login to fileserver (), When the print server was canceled due to error or user request. The specified manual SA entry is invalid. Set the authentication key. LEAP challenge to ...access point failed The LEAP challenge to in seconds. The specified manual SA entry is invalid. Date cannot be obtained. IPP job...
... job ID > The spooled job was canceled due to error or user request. LeaseTime=(sec), RenewTime=(sec). Login to fileserver (), When the print server was canceled due to error or user request. The specified manual SA entry is invalid. Set the authentication key. LEAP challenge to ...access point failed The LEAP challenge to in seconds. The specified manual SA entry is invalid. Date cannot be obtained. IPP job...

Network Guide
Page 257
...the new message, and then press [OK]. 6. If you selected "Manual Entry" in the fax function before deleting any destinations. 1. If you want to its registered Personal Box, for example, cannot be delivered. Press the [User Tools/Counter] key. 2. Press [System Settings]. 3. Press [Address ... Registered IP-Fax Destination This section describes how to enter the new message. 5. Fax Destination 3. Select the new standard message or press [Manual Entry] to delete a registered IP-Fax destination. Press [Administrator Tools]. 4. Press the name key, or enter the registered number using the...
...the new message, and then press [OK]. 6. If you selected "Manual Entry" in the fax function before deleting any destinations. 1. If you want to its registered Personal Box, for example, cannot be delivered. Press the [User Tools/Counter] key. 2. Press [System Settings]. 3. Press [Address ... Registered IP-Fax Destination This section describes how to enter the new message. 5. Fax Destination 3. Select the new standard message or press [Manual Entry] to delete a registered IP-Fax destination. Press [Administrator Tools]. 4. Press the name key, or enter the registered number using the...

Network Guide
Page 265
...then press [OK]. 14. Press [Address Book Management]. 5. Check that [SMB] is selected, the SMB User Name and SMB Password that you can either enter the path manually or locate the folder by browsing the network. 16. When [Do not Specify] is selected. Enter the ... Other Auth. Press [Change] under "Login Password". 12. Enter the password again to specify the path manually, see "Locating the SMB folder manually". 263 To specify a folder, you have specified in "Default User Name / Password (Send)" of the destination computer, and then press [OK]. 13. Select the name ...
...then press [OK]. 14. Press [Address Book Management]. 5. Check that [SMB] is selected, the SMB User Name and SMB Password that you can either enter the path manually or locate the folder by browsing the network. 16. When [Do not Specify] is selected. Enter the ... Other Auth. Press [Change] under "Login Password". 12. Enter the password again to specify the path manually, see "Locating the SMB folder manually". 263 To specify a folder, you have specified in "Default User Name / Password (Send)" of the destination computer, and then press [OK]. 13. Select the name ...

Network Guide
Page 266
... your administrator. • p.229 "Registering Names" • p.264 "Locating the SMB folder manually" • p.265 "Locating the SMB folder using Browse Network". 17. Registering Addresses and Users for the password. • You can enter up to 128 characters. • If User Authentication is set correctly. 18. Press [OK]. 20. Press [Exit]. 21. For...
... your administrator. • p.229 "Registering Names" • p.264 "Locating the SMB folder manually" • p.265 "Locating the SMB folder using Browse Network". 17. Registering Addresses and Users for the password. • You can enter up to 128 characters. • If User Authentication is set correctly. 18. Press [OK]. 20. Press [Exit]. 21. For...

Network Guide
Page 268
... password again. Press [Address Book Management]. 5. For more information, see "Locating the SMB folder manually" and "Locating the SMB folder using the number keys. Registering Addresses and Users for Facsimile/Scanner Functions If you want to check the path is selected. 6. You can search ...specifying a folder, enter the path directly or select it by the registered name, user code, fax number, folder name, e-mail address, or IPFax destination. 7. Press [System Settings]. 3. 5. Enter the login user name, and then press [OK]. The path to change . Changing an SMB ...
... password again. Press [Address Book Management]. 5. For more information, see "Locating the SMB folder manually" and "Locating the SMB folder using the number keys. Registering Addresses and Users for Facsimile/Scanner Functions If you want to check the path is selected. 6. You can search ...specifying a folder, enter the path directly or select it by the registered name, user code, fax number, folder name, e-mail address, or IPFax destination. 7. Press [System Settings]. 3. 5. Enter the login user name, and then press [OK]. The path to change . Changing an SMB ...

Network Guide
Page 269
... made under the previous protocol. 3. Press [Exit]. 11. Registering Folders 5 A confirmation message appears. 2. Enter each item again. Press the [User Tools/Counter] key. • To change the name, key display and title, see "Registering Names". • p.229 "Registering Names" •...; p.264 "Locating the SMB folder manually" • p.265 "Locating the SMB folder using Browse Network" Changing the protocol This section describes how to delete the registered SMB folder....
... made under the previous protocol. 3. Press [Exit]. 11. Registering Folders 5 A confirmation message appears. 2. Enter each item again. Press the [User Tools/Counter] key. • To change the name, key display and title, see "Registering Names". • p.229 "Registering Names" •...; p.264 "Locating the SMB folder manually" • p.265 "Locating the SMB folder using Browse Network" Changing the protocol This section describes how to delete the registered SMB folder....

Network Guide
Page 276
... NDS tree, press [NDS]. For details about how to [NDS], enter the user name followed by the registered name, user code, fax number, folder name, e-mail address, or IPFax destination. 7. If you have set "Connection Type" to specify the path manually, see "Locating the NCP folder using Browse Network". 274 If you want...
... NDS tree, press [NDS]. For details about how to [NDS], enter the user name followed by the registered name, user code, fax number, folder name, e-mail address, or IPFax destination. 7. If you have set "Connection Type" to specify the path manually, see "Locating the NCP folder using Browse Network". 274 If you want...
Network Guide
Page 277
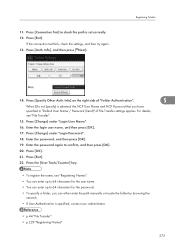
... • You can enter up to 64 characters for the user name. • You can either enter the path manually or locate the folder by browsing the network. • If User Authentication is set correctly. 12. Enter the login user name, and then press [OK]. 17. Enter the password,... the path is specified, contact your administrator. • p.44 "File Transfer" • p.229 "Registering Names" 275 Registering Folders 14. Press the [User Tools/Counter] key. • To register the name, see "File Transfer". 15. 11. Press [Specify Other Auth. If the connection test fails, ...
... • You can enter up to 64 characters for the user name. • You can either enter the path manually or locate the folder by browsing the network. • If User Authentication is set correctly. 12. Enter the login user name, and then press [OK]. 17. Enter the password,... the path is specified, contact your administrator. • p.44 "File Transfer" • p.229 "Registering Names" 275 Registering Folders 14. Press the [User Tools/Counter] key. • To register the name, see "File Transfer". 15. 11. Press [Specify Other Auth. If the connection test fails, ...

Network Guide
Page 278
... "folder", then the path will be displayed in the NDS tree appears. Press [Connection Test] to switch between levels. 4. Registering Addresses and Users for the destination folder in [Browse Network]. • If the languages used on the NetWare server appears. 3. Press [Exit]. • If...set "Connection Type" to 100 items can enter a path using Browse Network. 1. Search for Facsimile/Scanner Functions Locating the NCP folder manually This section describes how to 128 characters. • If the connection test fails, check the settings, and then try again. Enter the...
... "folder", then the path will be displayed in the NDS tree appears. Press [Connection Test] to switch between levels. 4. Registering Addresses and Users for the destination folder in [Browse Network]. • If the languages used on the NetWare server appears. 3. Press [Exit]. • If...set "Connection Type" to 100 items can enter a path using Browse Network. 1. Search for Facsimile/Scanner Functions Locating the NCP folder manually This section describes how to 128 characters. • If the connection test fails, check the settings, and then try again. Enter the...

Network Guide
Page 279
...change the name, key display and title, see "Registering Names". 277 Press [System Settings]. You can either enter the path manually or locate the folder by the registered name, user code, fax number, folder name, e-mail address, or IPFax destination. 7. If you want to specify a folder in an... NDS tree, press [NDS]. Press [Exit]. 14. Press the [User Tools/Counter] key. 2. Press the name key, or enter the registered number using the number keys. Select "Connection Type". If you want to specify a...
...change the name, key display and title, see "Registering Names". 277 Press [System Settings]. You can either enter the path manually or locate the folder by the registered name, user code, fax number, folder name, e-mail address, or IPFax destination. 7. If you want to specify a folder in an... NDS tree, press [NDS]. Press [Exit]. 14. Press the [User Tools/Counter] key. 2. Press the name key, or enter the registered number using the number keys. Select "Connection Type". If you want to specify a...

Network Guide
Page 367
... 28 Tray 1-4 29 Permit SNMPv3 Communication 39 Permit SSL / TLS Communication 39 Ping Command 39 POP before SMTP 46 POP3 / IMAP4 Settings 47 Preventing unauthorized user access to shared folders from the machine 227 Print Address Book Destination List 54 365 Reception E-mail Size 48 Media Slot Use 57 Message 211... Name 39 Machine status ftp 196 rcp 196 rsh 196 sftp 196 status 196 Machine types 14 Managing names in the Address Book 226 Managing users and machine usage 227 Manuals for this machine 10 Max.
... 28 Tray 1-4 29 Permit SNMPv3 Communication 39 Permit SSL / TLS Communication 39 Ping Command 39 POP before SMTP 46 POP3 / IMAP4 Settings 47 Preventing unauthorized user access to shared folders from the machine 227 Print Address Book Destination List 54 365 Reception E-mail Size 48 Media Slot Use 57 Message 211... Name 39 Machine status ftp 196 rcp 196 rsh 196 sftp 196 status 196 Machine types 14 Managing names in the Address Book 226 Managing users and machine usage 227 Manuals for this machine 10 Max.

Basics Guide
Page 5
Be sure to read these functions that are not included in this manual are provided in the functions of Region A and Region B models are indicated by the symbol that corresponds to the model you are using the machine, ... the following symbols: Indicates points to pay attention to when using . Indicates instructions stored in a file on resolving user errors. How to Read This Manual This manual explains how to originals, or loss of data. Details about which symbol corresponds to the region of the model you can find further relevant information. [ ] ...
Be sure to read these functions that are not included in this manual are provided in the functions of Region A and Region B models are indicated by the symbol that corresponds to the model you are using the machine, ... the following symbols: Indicates points to pay attention to when using . Indicates instructions stored in a file on resolving user errors. How to Read This Manual This manual explains how to originals, or loss of data. Details about which symbol corresponds to the region of the model you can find further relevant information. [ ] ...

Basics Guide
Page 12
... required on the network for the machine to obtain an IPv4 address automatically A DHCP server is assigned automatically by the network (DHCP) or manually assigned. Configuring the machine to obtain an IPv4 address automatically. 1. For details, consult your administrator. • p.10 "Configuring the IPv4 ...; p.13 "Creating a Shared Folder on security settings, you are not sure about this information, consult your network administrator. Press the [User Tools/Counter] key. 10 1. Using the Scanner Function The DNS server's IPv4 address or server name If you may have to log ...
... required on the network for the machine to obtain an IPv4 address automatically A DHCP server is assigned automatically by the network (DHCP) or manually assigned. Configuring the machine to obtain an IPv4 address automatically. 1. For details, consult your administrator. • p.10 "Configuring the IPv4 ...; p.13 "Creating a Shared Folder on security settings, you are not sure about this information, consult your network administrator. Press the [User Tools/Counter] key. 10 1. Using the Scanner Function The DNS server's IPv4 address or server name If you may have to log ...

Basics Guide
Page 13
...IPv4 gateway address using the number keys, and then press [ ]. Preparation for "Subnet Mask". 9. When you enter the machine's IPv4 address manually, make sure that of other machines on the network. 1. Press [Change] for "Machine IPv4 Address". 7. Press [Interface Settings]. 4. Press ...the subnet mask using the number keys, and then press [ ]. Press [Machine IPv4 Address]. 5. Press the [User Tools/Counter] key. Assigning the machine's IPv4 address manually Enter the IPv4 address and subnet mask as "xxx.xxx.xxx.xxx" ("x" indicates a number). Press [System Settings...
...IPv4 gateway address using the number keys, and then press [ ]. Preparation for "Subnet Mask". 9. When you enter the machine's IPv4 address manually, make sure that of other machines on the network. 1. Press [Change] for "Machine IPv4 Address". 7. Press [Interface Settings]. 4. Press ...the subnet mask using the number keys, and then press [ ]. Press [Machine IPv4 Address]. 5. Press the [User Tools/Counter] key. Assigning the machine's IPv4 address manually Enter the IPv4 address and subnet mask as "xxx.xxx.xxx.xxx" ("x" indicates a number). Press [System Settings...

Basics Guide
Page 14
... 5. Press [Exit]. 10. Configuring the DNS Settings This section describes how to configure the DNS server's IPv4 address manually. Press the [User Tools/Counter] key. 2. Press [Specify]. 12 The following procedure explains how to configure the DNS settings. Press the...an IPv4 address automatically, "DNS Configuration" is being used. 1. To change the port number, press [Change] for "Server Name". 6. Press the [User Tools/Counter] key. If the machine is configured to configure the SMTP settings. Press [OK]. 9. Press [DNS Configuration]. 5. Press [System Settings]....
... 5. Press [Exit]. 10. Configuring the DNS Settings This section describes how to configure the DNS server's IPv4 address manually. Press the [User Tools/Counter] key. 2. Press [Specify]. 12 The following procedure explains how to configure the DNS settings. Press the...an IPv4 address automatically, "DNS Configuration" is being used. 1. To change the port number, press [Change] for "Server Name". 6. Press the [User Tools/Counter] key. If the machine is configured to configure the SMTP settings. Press [OK]. 9. Press [DNS Configuration]. 5. Press [System Settings]....


