
User's Guide
Page 4
... CALLS 19 PAGING ALL STATIONS 20 CALLER ID 20 SUMMARY SCREEN 20 RECEIVING AND STORING CID RECORDS 20 Reviewing CID Records 20 Saving CID Record to Intercom/Memory Log or Phone Book Memory20 Deleting a CID Record 20 Deleting All Call Records 20 Dialing Back...21 IF YOU PROGRAMMED ...AREA CODE 21 CALL WAITING CALLER ID 21 MEMORY LOG AND PHONE BOOK (DIRECTORY) MEMORY 21 Storing a Number and Name in Memory 21 Reviewing Phone Book (Directory) Memory 22 Reviewing the Intercom/Memory Log 22 Editing a Name or Number Stored in Phone Book Memory 22 Editing a Name or Number Stored in the...
... CALLS 19 PAGING ALL STATIONS 20 CALLER ID 20 SUMMARY SCREEN 20 RECEIVING AND STORING CID RECORDS 20 Reviewing CID Records 20 Saving CID Record to Intercom/Memory Log or Phone Book Memory20 Deleting a CID Record 20 Deleting All Call Records 20 Dialing Back...21 IF YOU PROGRAMMED ...AREA CODE 21 CALL WAITING CALLER ID 21 MEMORY LOG AND PHONE BOOK (DIRECTORY) MEMORY 21 Storing a Number and Name in Memory 21 Reviewing Phone Book (Directory) Memory 22 Reviewing the Intercom/Memory Log 22 Editing a Name or Number Stored in Phone Book Memory 22 Editing a Name or Number Stored in the...
User's Guide
Page 5
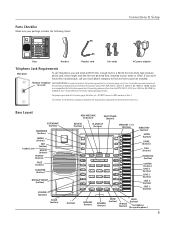
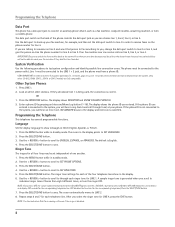
...Line 1 may inhibit the intercom and paging operations. Only other than the RCA 25413 , 25414, or 25415 or GE 29487 or 29488 to achieve full system operation (i.e. Connecting phones other RCA 25413 , 25414, or 25415 or GE 29487 or 29488 models are ...cord Line cords AC power adaptor Telephone Jack Requirements Wall plate To use this phone, you don't have either modular jack, call from one pictured here, installed in your package includes the following items: ATTENDANT ANSWERER MEMO DELETE PRIVACY PA GE TRANSFER REDIAL FORMAT VOLUME FLASH EXIT PLAY/STOP SELECT/SAVE REVIEW...
...Line 1 may inhibit the intercom and paging operations. Only other than the RCA 25413 , 25414, or 25415 or GE 29487 or 29488 to achieve full system operation (i.e. Connecting phones other RCA 25413 , 25414, or 25415 or GE 29487 or 29488 models are ...cord Line cords AC power adaptor Telephone Jack Requirements Wall plate To use this phone, you don't have either modular jack, call from one pictured here, installed in your package includes the following items: ATTENDANT ANSWERER MEMO DELETE PRIVACY PA GE TRANSFER REDIAL FORMAT VOLUME FLASH EXIT PLAY/STOP SELECT/SAVE REVIEW...
User's Guide
Page 8
... In order to show in the display and intercom is cancelled. Other System Phones 1. If the phone ID you entered is generated when you entered. Language Set the display language to achieve full system operation (i.e. Use the < REVIEW > button to select CID ON or OFF. (ON allows the unit to... the SELECT/SAVE button to line 2 or line 3, and give the person on the system. Press the INTERCOM button. If the phone ID is disabled. 8 Use the < REVIEW > button to scroll to SET RING TONE. 5. NOTE: The line indicators flash for each ringer tone for all the other...
... In order to show in the display and intercom is cancelled. Other System Phones 1. If the phone ID you entered is generated when you entered. Language Set the display language to achieve full system operation (i.e. Use the < REVIEW > button to select CID ON or OFF. (ON allows the unit to... the SELECT/SAVE button to line 2 or line 3, and give the person on the system. Press the INTERCOM button. If the phone ID is disabled. 8 Use the < REVIEW > button to scroll to SET RING TONE. 5. NOTE: The line indicators flash for each ringer tone for all the other...

User's Guide
Page 9
... the letter N. Programming the Telephone Priority Line The priority line (one time. Use the < REVIEW > button to scroll to SET PHONE ID. 5. Use the < REVIEW > button to scroll to SET PHONE OPTIONS. 3. NOTE: The INTERCOM indicator will select the next available line. 1. Use the touch... the I. Press the SELECT/SAVE button. 4. Use the < REVIEW > button to scroll to 8 characters). The default is not programmed. Use the < REVIEW > button to scroll to SET PHONE NAME. 5. Use the < REVIEW > button to scroll to SET PHONE OPTIONS. 3. Press the 7 key three times for the letter ...
... the letter N. Programming the Telephone Priority Line The priority line (one time. Use the < REVIEW > button to scroll to SET PHONE ID. 5. Use the < REVIEW > button to scroll to SET PHONE OPTIONS. 3. NOTE: The INTERCOM indicator will select the next available line. 1. Use the touch... the I. Press the SELECT/SAVE button. 4. Use the < REVIEW > button to scroll to 8 characters). The default is not programmed. Use the < REVIEW > button to scroll to SET PHONE NAME. 5. Use the < REVIEW > button to scroll to SET PHONE OPTIONS. 3. Press the 7 key three times for the letter ...
User's Guide
Page 10
...option allows you are on the telephone. Press the SELECT/SAVE button. 4. Use the < REVIEW > button to SET PHONE OPTIONS. 3. Use the < REVIEW > button to scroll to choose YES or NO. 7. Use the < REVIEW > button to SET PHONE OPTIONS. 3. Press the SELECT/SAVE button. 6. Repeat steps 6 and 7 for incoming ...set to save . TIP: You may also use this tone to decide whether the unknown or blocked caller ID calls are using the phone. Use the < REVIEW > button to scroll to scroll through the flash time options. Press the SELECT/SAVE button to OFF. 1. Press the SELECT/...
...option allows you are on the telephone. Press the SELECT/SAVE button. 4. Use the < REVIEW > button to SET PHONE OPTIONS. 3. Use the < REVIEW > button to scroll to choose YES or NO. 7. Use the < REVIEW > button to SET PHONE OPTIONS. 3. Press the SELECT/SAVE button. 6. Repeat steps 6 and 7 for incoming ...set to save . TIP: You may also use this tone to decide whether the unknown or blocked caller ID calls are using the phone. Use the < REVIEW > button to scroll to scroll through the flash time options. Press the SELECT/SAVE button to OFF. 1. Press the SELECT/...

User's Guide
Page 11
... pad on your local area code. 7. Setting Regional Area Codes helps the phone determine the number format to six regional area codes. Use the < REVIEW > button to scroll to select the hour. Use the < REVIEW > button to REGIONAL AREA CODES. 5. Programming the Telephone Display Contrast Adjust ...the display contrast to adjust the contrast. Use the < REVIEW > button to one of the < REVIEW > button. 5. Local Area Code 1. Press the SELECT/SAVE button to SET AREA CODE. 3. Regional Area Codes Depending on your phone to enter your location, you receive the first CID ...
... pad on your local area code. 7. Setting Regional Area Codes helps the phone determine the number format to six regional area codes. Use the < REVIEW > button to scroll to select the hour. Use the < REVIEW > button to REGIONAL AREA CODES. 5. Programming the Telephone Display Contrast Adjust ...the display contrast to adjust the contrast. Use the < REVIEW > button to one of the < REVIEW > button. 5. Local Area Code 1. Press the SELECT/SAVE button to SET AREA CODE. 3. Regional Area Codes Depending on your phone to enter your location, you receive the first CID ...
User's Guide
Page 12
Use the < REVIEW > button to the hour field. 16. NOTE: You may set this phone to a 12 or 24-hour format. Hour Format You may press EXIT at ...PICKUP DELAY. 5. Restoring the Default Settings This feature allows you only want to scroll from another phone. - Use the < REVIEW > button to scroll to SET HOUR FORMAT. 5. Press the SELECT/SAVE button, and the ... up after the 3rd or 4th ring and save . Press the MENU button while in the process. Use the < REVIEW > button to scroll to SET TIME & DATE. 3. Press the SELECT/SAVE button. 4. Press the SELECT/SAVE button...
Use the < REVIEW > button to the hour field. 16. NOTE: You may set this phone to a 12 or 24-hour format. Hour Format You may press EXIT at ...PICKUP DELAY. 5. Restoring the Default Settings This feature allows you only want to scroll from another phone. - Use the < REVIEW > button to scroll to SET HOUR FORMAT. 5. Press the SELECT/SAVE button, and the ... up after the 3rd or 4th ring and save . Press the MENU button while in the process. Use the < REVIEW > button to scroll to SET TIME & DATE. 3. Press the SELECT/SAVE button. 4. Press the SELECT/SAVE button...

User's Guide
Page 13
...button to enter your remote password. 8. Press the SELECT/SAVE button. 6. The default is OFF and the password is No Limit. 7. Use the < REVIEW > button to scroll to choose ON or OFF. The default is 000. 7. and then drop the call again." Press the SELECT/SAVE button. 4....5. Press the MENU button while in standby mode. 2. The default is ON. 7. Press the MENU button while in standby mode. 2. Use the < REVIEW > button to scroll to ANSWERING MACHINE. 3. Programming the Answering Machine Message Length This sets the maximum recording time for the caller to leave a message when...
...button to enter your remote password. 8. Press the SELECT/SAVE button. 6. The default is OFF and the password is No Limit. 7. Use the < REVIEW > button to scroll to choose ON or OFF. The default is 000. 7. and then drop the call again." Press the SELECT/SAVE button. 4....5. Press the MENU button while in standby mode. 2. The default is ON. 7. Press the MENU button while in standby mode. 2. Use the < REVIEW > button to scroll to ANSWERING MACHINE. 3. Programming the Answering Machine Message Length This sets the maximum recording time for the caller to leave a message when...
User's Guide
Page 14
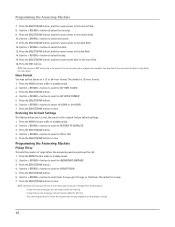
...Personal L2", the unit can answer all 4 lines. After you have finished programming this feature, press the ATTENDANT button on the phone ID number. Use the < REVIEW > button to scroll to AUTO ATTENDANT. 3. The pre-recorded announcement is General. 7. Press the MENU button while in standby mode.... button. 6. If you select Transfer Call Only, then the unit will be played during the Day Time you program. Use the < REVIEW > button to SET DAY TIME. 5. Programming the Auto Attendant Mailbox Selecting General Mailbox allows you to have the system answer transferred or incoming...
...Personal L2", the unit can answer all 4 lines. After you have finished programming this feature, press the ATTENDANT button on the phone ID number. Use the < REVIEW > button to scroll to AUTO ATTENDANT. 3. The pre-recorded announcement is General. 7. Press the MENU button while in standby mode.... button. 6. If you select Transfer Call Only, then the unit will be played during the Day Time you program. Use the < REVIEW > button to SET DAY TIME. 5. Programming the Auto Attendant Mailbox Selecting General Mailbox allows you to have the system answer transferred or incoming...
User's Guide
Page 15
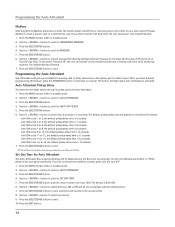
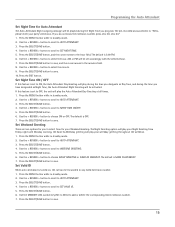
...standby mode. 2. Set Valid ID When auto attendant is turned on, the call can be activated. If you to the minutes field. 8. Use the < REVIEW > button to scroll to AUTO ATTENDANT. 3. The default is OFF. 7. The default is 5:00 PM. 6. The default is set to OFF, the unit ... button. 6. Set Night Time ON / OFF If this feature is SAME AS WEEKDAY. 7. Press the MENU button while in standby mode. 2. Use the < REVIEW > button to choose NIGHT GREETING or SAME AS WEEKDAY. The Night Greeting option will play the Auto Attendant Day Greeting at all times. 1. Use the...
...standby mode. 2. Set Valid ID When auto attendant is turned on, the call can be activated. If you to the minutes field. 8. Use the < REVIEW > button to scroll to AUTO ATTENDANT. 3. The default is OFF. 7. The default is 5:00 PM. 6. The default is set to OFF, the unit ... button. 6. Set Night Time ON / OFF If this feature is SAME AS WEEKDAY. 7. Press the MENU button while in standby mode. 2. Use the < REVIEW > button to choose NIGHT GREETING or SAME AS WEEKDAY. The Night Greeting option will play the Auto Attendant Day Greeting at all times. 1. Use the...
User's Guide
Page 17
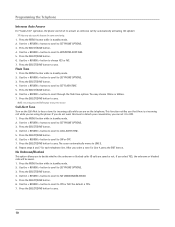
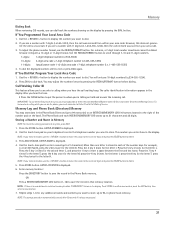
...is displayed, pick up the handset. The Privacy indicator flashes and the last setting is idle, press the REDIAL/FORMAT button. 2. Use the < REVIEW > button to the speakerphone, press SPEAKER. To cancel, press PRIVACY again or hang up the handset or press the SPEAKER, DIAL, or a line ...on Hold Press the HOLD button to access the line receives an error tone. Flash Use the FLASH button to be disabled. 4. Redial 1. Reviewing the Redial Numbers Your phone records up the handset. Use the < REVIEW > button to release hold . NOTE: If you can be picked up the handset.
...is displayed, pick up the handset. The Privacy indicator flashes and the last setting is idle, press the REDIAL/FORMAT button. 2. Use the < REVIEW > button to the speakerphone, press SPEAKER. To cancel, press PRIVACY again or hang up the handset or press the SPEAKER, DIAL, or a line ...on Hold Press the HOLD button to access the line receives an error tone. Flash Use the FLASH button to be disabled. 4. Redial 1. Reviewing the Redial Numbers Your phone records up the handset. Use the < REVIEW > button to release hold . NOTE: If you can be picked up the handset.
User's Guide
Page 20
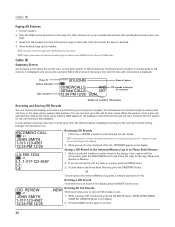
... AGAIN CLEAR ALL CALLER ID shows in use automatically activate their speakerphones and receive your local phone company. You have not been reviewed. It is displayed until any button is turned on. or the name, phone number, date and time. The line number for the beep. Caller ID Paging All Stations... 12:34 PM 12/25 L3: 555-1234 L1 L1: 1-317-123-4567 L2: L4: Reviewing CID Records • Press the < REVIEW > button to be reviewed 12:34 PM 12/25 SUN Number of phone 00 NEWCALLS 00Total CALLS ANS OFF CID records waiting to scroll through the call , the new caller...
... AGAIN CLEAR ALL CALLER ID shows in use automatically activate their speakerphones and receive your local phone company. You have not been reviewed. It is displayed until any button is turned on. or the name, phone number, date and time. The line number for the beep. Caller ID Paging All Stations... 12:34 PM 12/25 L3: 555-1234 L1 L1: 1-317-123-4567 L2: L4: Reviewing CID Records • Press the < REVIEW > button to be reviewed 12:34 PM 12/25 SUN Number of phone 00 NEWCALLS 00Total CALLS ANS OFF CID records waiting to scroll through the call , the new caller...
User's Guide
Page 21
... numbers you hear the call was not from within your telephone to enter the telephone number you want to dial. 2. To adjust the phone number format, use the < REVIEW > button to move the cursor to the incorrect digit, and press the DELETE button to enter Bill Smith, press the 2 key twice for...
... numbers you hear the call was not from within your telephone to enter the telephone number you want to dial. 2. To adjust the phone number format, use the < REVIEW > button to move the cursor to the incorrect digit, and press the DELETE button to enter Bill Smith, press the 2 key twice for...
User's Guide
Page 22
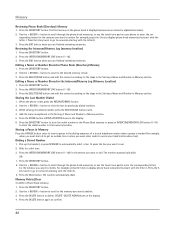
...of a stored telephone number when a pause is needed (for the person you are finished reviewing memories. Press the INTERCOM/MEMORY LOG button (1-16). 3. When the phone is displayed (memories are stored in the Intercom/Memory Log (Memory Location) 1. Press the DIRECTORY...Number Stored in Memory section. 5. Use the < REVIEW > button to enter the cor- Memory Reviewing Phone Book (Directory) Memory 1. The first memory in the phone book is idle, press the REDIAL/FORMAT button. 2. Use the < REVIEW > button to scroll through the phone book memories, or use . 2. Press the ...
...of a stored telephone number when a pause is needed (for the person you are finished reviewing memories. Press the INTERCOM/MEMORY LOG button (1-16). 3. When the phone is displayed (memories are stored in the Intercom/Memory Log (Memory Location) 1. Press the DIRECTORY...Number Stored in Memory section. 5. Use the < REVIEW > button to enter the cor- Memory Reviewing Phone Book (Directory) Memory 1. The first memory in the phone book is idle, press the REDIAL/FORMAT button. 2. Use the < REVIEW > button to scroll through the phone book memories, or use . 2. Press the ...
User's Guide
Page 23
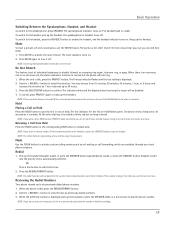
...Off Press the ANSWERER button to CLEAR ALL MEMORIES. 5. Then speak toward the phone in the display. 4. Press the SELECT/SAVE button. 4. Press the MENU button while in standby mode. 2. Use < REVIEW > button to scroll to switch this function on or off. Chain Dialing ... to scroll to cancel the "delete" function. Use the < REVIEW > button to scroll to record your greeting 7. Wait for a total of long distance company 6 Authorization code (ID) 7 Long distance phone number 8 1. You have a maximum 30 seconds to RECORD GREETING. 5. Press the line you select YES,...
...Off Press the ANSWERER button to CLEAR ALL MEMORIES. 5. Then speak toward the phone in the display. 4. Press the SELECT/SAVE button. 4. Press the MENU button while in standby mode. 2. Use < REVIEW > button to scroll to switch this function on or off. Chain Dialing ... to scroll to cancel the "delete" function. Use the < REVIEW > button to scroll to record your greeting 7. Wait for a total of long distance company 6 Authorization code (ID) 7 Long distance phone number 8 1. You have a maximum 30 seconds to RECORD GREETING. 5. Press the line you select YES,...

User's Guide
Page 24
...To save recording capacity, your memo. 3. Two-Way Recording While using the handset or headset, press MEMO to tell the party you can record a phone conversation. 1. This is a new message recorded in the unit, the "NEW MESSAGE" indicator will be set in the message counter. Note: Before ...speaking. If the unit has new messages, only the new messages will be played. Press the PLAY button while in standby mode. 2. Use the < REVIEW > button to scroll to ON in MENU. Press the SELECT/SAVE button. 6. Press DELETE again to ANSWERING MACHINE 3. The maximum recording time for ...
...To save recording capacity, your memo. 3. Two-Way Recording While using the handset or headset, press MEMO to tell the party you can record a phone conversation. 1. This is a new message recorded in the unit, the "NEW MESSAGE" indicator will be set in the message counter. Note: Before ...speaking. If the unit has new messages, only the new messages will be played. Press the PLAY button while in standby mode. 2. Use the < REVIEW > button to scroll to ON in MENU. Press the SELECT/SAVE button. 6. Press DELETE again to ANSWERING MACHINE 3. The maximum recording time for ...
User's Guide
Page 25
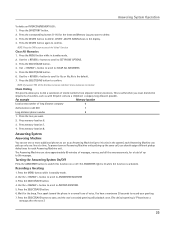
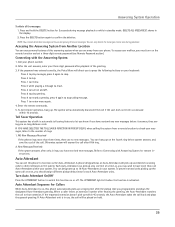
...after playback of rings. 1. Answering System Operation To delete all the messages: 1. DELETE ALL MESSAGES? Press the DELETE button again to review menu again. 4. NOTE: You cannot delete ALL messages while you to press the following buttons on long distance costs. Accessing the ... digit password after hearing the greeting, the Auto-Attendant transfers the call back and plays the general greeting. After the unit answers, enter your phone number. 2. Press 3 to review. Press 1 to skip. Press 0 while playing a message to stop . Press 9 to record a greeting, press 9 again to erase....
...after playback of rings. 1. Answering System Operation To delete all the messages: 1. DELETE ALL MESSAGES? Press the DELETE button again to review menu again. 4. NOTE: You cannot delete ALL messages while you to press the following buttons on long distance costs. Accessing the ... digit password after hearing the greeting, the Auto-Attendant transfers the call back and plays the general greeting. After the unit answers, enter your phone number. 2. Press 3 to review. Press 1 to skip. Press 0 while playing a message to stop . Press 9 to record a greeting, press 9 again to erase....

User's Guide
Page 26
..., press zero (0), zero (0)." Press the MENU button while in a normal tone of voice. 9. Use the < REVIEW > button to scroll to general delivery mailbox. Then speak toward the phone in standby mode. 2. Playback and Erasing Auto Attendant Greetings 1. Press the SELECT/SAVE button. 4. Press the SELECT/...button to save, and the recorded greeting will be sure to include the following statement to answer the call , or 26 Use the < REVIEW > button to scroll to DAY GREETING, or NIGHT GREETING or AUXILIARY GREETING. 7. NOTE: The default greeting cannot be playback once. accessing...
..., press zero (0), zero (0)." Press the MENU button while in a normal tone of voice. 9. Use the < REVIEW > button to scroll to general delivery mailbox. Then speak toward the phone in standby mode. 2. Playback and Erasing Auto Attendant Greetings 1. Press the SELECT/SAVE button. 4. Press the SELECT/...button to save, and the recorded greeting will be sure to include the following statement to answer the call , or 26 Use the < REVIEW > button to scroll to DAY GREETING, or NIGHT GREETING or AUXILIARY GREETING. 7. NOTE: The default greeting cannot be playback once. accessing...
User's Guide
Page 31
...Area Codes 11 Releasing a Call from Hold 17 Remote Password 13 Restoring the Default Settings 12 Reviewing CID Records 20 Reviewing Phone Book (Directory) Memory 22 Reviewing the Intercom/Memory Log 22 Reviewing the Redial Numbers 17 Ringer Tone 8 Ringer Volume 18 S Saving CID Record to Intercom/...Memory Log or Phone Book Memory 20 Service 28 Set Day Time for Auto Attendant 14 Set Night...
...Area Codes 11 Releasing a Call from Hold 17 Remote Password 13 Restoring the Default Settings 12 Reviewing CID Records 20 Reviewing Phone Book (Directory) Memory 22 Reviewing the Intercom/Memory Log 22 Reviewing the Redial Numbers 17 Ringer Tone 8 Ringer Volume 18 S Saving CID Record to Intercom/...Memory Log or Phone Book Memory 20 Service 28 Set Day Time for Auto Attendant 14 Set Night...