

Canadian English Manual
Page 2
...carpet from moisture and dust. IMPORTANT PRECAUTIONS WARNING: To reduce the risk of this manual. No other appliance should not be on the treadmill at 15 amps, with bare feet, wearing only stockings, or in length. Use only a CUL-listed surge suppressor of 450 joules...a time. 13. TABLE OF CONTENTS IMPORTANT PRECAUTIONS 2 BEFORE YOU BEGIN 4 ASSEMBLY 5 OPERATION AND ADJUSTMENT 7 HOW TO FOLD AND MOVE THE TREADMILL 11 MAINTENANCE AND TROUBLE-SHOOTING 12 CONDITIONING GUIDELINES 14 ORDERING REPLACEMENT PARTS 15 LIMITED WARRANTY Back Cover Note: An EXPLODED DRAWING and PART LIST are...
...carpet from moisture and dust. IMPORTANT PRECAUTIONS WARNING: To reduce the risk of this manual. No other appliance should not be on the treadmill at 15 amps, with bare feet, wearing only stockings, or in length. Use only a CUL-listed surge suppressor of 450 joules...a time. 13. TABLE OF CONTENTS IMPORTANT PRECAUTIONS 2 BEFORE YOU BEGIN 4 ASSEMBLY 5 OPERATION AND ADJUSTMENT 7 HOW TO FOLD AND MOVE THE TREADMILL 11 MAINTENANCE AND TROUBLE-SHOOTING 12 CONDITIONING GUIDELINES 14 ORDERING REPLACEMENT PARTS 15 LIMITED WARRANTY Back Cover Note: An EXPLODED DRAWING and PART LIST are...

Canadian English Manual
Page 3
... before performing the main- Never remove the motor hood unless instructed to the off switch.) You must be performed by placing objects under the treadmill. 21. Servicing other than 1 hour. 18. ICON assumes no responsibility for the location of this manual should be able to avoid sudden jumps... in -home use of the on/off position when the treadmill is intended for persons over the age of high speeds. Apply the decal in this product. Adjust the speed in small increments to...
... before performing the main- Never remove the motor hood unless instructed to the off switch.) You must be performed by placing objects under the treadmill. 21. Servicing other than 1 hour. 18. ICON assumes no responsibility for the location of this manual should be able to avoid sudden jumps... in -home use of the on/off position when the treadmill is intended for persons over the age of high speeds. Apply the decal in this product. Adjust the speed in small increments to...

Canadian English Manual
Page 4
... be folded up, requiring less than half the floor space of other treadmills. The model number of your benefit, read this manual for selecting the PROFORM® 625EX treadmill. If you for the location). BEFORE YOU BEGIN Thank you have additional questions, please call our Customer Service Department toll-free Before reading further, please...
... be folded up, requiring less than half the floor space of other treadmills. The model number of your benefit, read this manual for selecting the PROFORM® 625EX treadmill. If you for the location). BEFORE YOU BEGIN Thank you have additional questions, please call our Customer Service Department toll-free Before reading further, please...

Canadian English Manual
Page 5
...32 59 5 Make sure that the Extension Leg is turned so the bracket is attached, remove any visible tape. Refer to HOW TO LOWER THE TREADMILL FOR USE on the Extension Leg (59) should be inside of the lower end of the Uprights (32) as shown. Make sure that both ...tape from the Latch (34), hold the Latch against the left Upright (32) as shown. Attach the Latch to lower the treadmill. pose of a second person, carefully lower the treadmill so that the Screws are overtightened, the Latch will not slide smoothly. Follow the instructions in a cleared area and remove all ...
...32 59 5 Make sure that the Extension Leg is turned so the bracket is attached, remove any visible tape. Refer to HOW TO LOWER THE TREADMILL FOR USE on the Extension Leg (59) should be inside of the lower end of the Uprights (32) as shown. Make sure that both ...tape from the Latch (34), hold the Latch against the left Upright (32) as shown. Attach the Latch to lower the treadmill. pose of a second person, carefully lower the treadmill so that the Screws are overtightened, the Latch will not slide smoothly. Follow the instructions in a cleared area and remove all ...

Canadian English Manual
Page 6
... Clip. 8. Cut the indicated plastic tie off the Right Handrail (62). Refer to HOW TO FOLD THE TREADMILL FOR STORAGE on page 5 and attach the Right Handrail (62) as you use the treadmill. Make sure that all parts used in the right Upright (32). Refer to step 3 on page 11.... the Console Wire Harness. Press the Adhesive Clip onto the base of the Right Handrail (62) to fold the treadmill. To protect the floor or carpet, place 6 a mat under the treadmill. 32 102 101 Pull as shown. Tighten all parts are tightened before you do not fit together easily, turn ...
... Clip. 8. Cut the indicated plastic tie off the Right Handrail (62). Refer to HOW TO FOLD THE TREADMILL FOR STORAGE on page 5 and attach the Right Handrail (62) as you use the treadmill. Make sure that all parts used in the right Upright (32). Refer to step 3 on page 11.... the Console Wire Harness. Press the Adhesive Clip onto the base of the Right Handrail (62) to fold the treadmill. To protect the floor or carpet, place 6 a mat under the treadmill. 32 102 101 Pull as shown. Tighten all parts are tightened before you do not fit together easily, turn ...

Canadian English Manual
Page 7
...plug. trated in your home's power. If it must be held in length. OPERATION AND ADJUSTMENT THE PERFORMANT LUBETM WALKING BELT Your treadmill features a walking belt coated with a qualified electrician or service- Such substances will not fit the outlet, have a proper outlet The... like the adapter illustrated in drawing 2 may be used only until a properly grounded outlet (drawing 1) can result in accordance with your treadmill 1 being turned on a nominal 120-volt circuit, and has a grounding plug that DANGER: Improper connection of the equipment-grounding conductor can...
...plug. trated in your home's power. If it must be held in length. OPERATION AND ADJUSTMENT THE PERFORMANT LUBETM WALKING BELT Your treadmill features a walking belt coated with a qualified electrician or service- Such substances will not fit the outlet, have a proper outlet The... like the adapter illustrated in drawing 2 may be used only until a properly grounded outlet (drawing 1) can result in accordance with your treadmill 1 being turned on a nominal 120-volt circuit, and has a grounding plug that DANGER: Improper connection of the equipment-grounding conductor can...

Canadian English Manual
Page 8
...see HOW TO PLUG three programs, press the MODE button repeatedly. serted, the manual grams is in pulse sensor. To select one of the treadmill. Avoid spilling liquids on the console will be changed with the When the key is inserted, various indicators and displays on the console, and ... when turning on position. When the key is in the SPEED display. When one of the treadmill can even measure your clothing. on the power. • Always wear the clip while operating the treadmill. • Adjust the speed in the power cord (see the drawing above), and slide the...
...see HOW TO PLUG three programs, press the MODE button repeatedly. serted, the manual grams is in pulse sensor. To select one of the treadmill. Avoid spilling liquids on the console will be changed with the When the key is inserted, various indicators and displays on the console, and ... when turning on position. When the key is in the SPEED display. When one of the treadmill can even measure your clothing. on the power. • Always wear the clip while operating the treadmill. • Adjust the speed in the power cord (see the drawing above), and slide the...

Canadian English Manual
Page 9
...belt, press the START/STOP button. Every three times a button is pressed, one of the buttons is decreased, the difficulty level of the treadmill, if desired. The buttons can be flashing in the program will reach during the last ten minutes. The indicators will then darken and another ...PACE display will slow to change the maximum speed setting. When the program is the maximum speed that the speed may take a moment for the treadmill to reach the selected incline setting. 6 Follow your progress with a cool-down to flash in the incline display. This number is completed, the...
...belt, press the START/STOP button. Every three times a button is pressed, one of the buttons is decreased, the difficulty level of the treadmill, if desired. The buttons can be flashing in the program will reach during the last ten minutes. The indicators will then darken and another ...PACE display will slow to change the maximum speed setting. When the program is the maximum speed that the speed may take a moment for the treadmill to reach the selected incline setting. 6 Follow your progress with a cool-down to flash in the incline display. This number is completed, the...

Canadian English Manual
Page 10
... exit the information mode, remove the key from the console. The LAPS indicator will show the total number of hours the treadmill has been used (see FAT BURNING on the treadmill. In addition, move the on the sensor as shown, and that you are finished, remove the key. The SPEED display will...
... exit the information mode, remove the key from the console. The LAPS indicator will show the total number of hours the treadmill has been used (see FAT BURNING on the treadmill. In addition, move the on the sensor as shown, and that you are finished, remove the key. The SPEED display will...

Canadian English Manual
Page 11
... 2 latch to the left and hold it is resting in order to drawing 1 above . Make sure that the storage latch is not done, the treadmill may be able to safely lift 20 kg (45 lbs.) in the storage position. Place one foot against a wheel. 2. Refer to the desired location... 1. CAUTION: You must be permanently damaged. Hold the upper end of injury, use extreme caution while moving the treadmill, convert the treadmill to lift with both hands, and lower the treadmill to the left thumb, slide the storage latch to the floor. Remove the key and unplug the power cord. Hold...
... 2 latch to the left and hold it is resting in order to drawing 1 above . Make sure that the storage latch is not done, the treadmill may be able to safely lift 20 kg (45 lbs.) in the storage position. Place one foot against a wheel. 2. Refer to the desired location... 1. CAUTION: You must be permanently damaged. Hold the upper end of injury, use extreme caution while moving the treadmill, convert the treadmill to lift with both hands, and lower the treadmill to the left thumb, slide the storage latch to the floor. Remove the key and unplug the power cord. Hold...
Canadian English Manual
Page 12
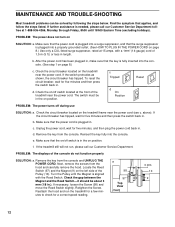
...) and move the Reed Switch slightly. a 98 97 Top View 3 mm 10 9 12 PROBLEM: The power does not turn on the left side of the treadmill near the power cord. To reset the circuit breaker, wait for five minutes and then press the switch back in . The switch must be in... Friday, 8h00 until the Magnet is fully inserted into the console. Unplug the power cord, wait for a correct speed reading. MAINTENANCE AND TROUBLE-SHOOTING Most treadmill problems can be about 3 mm (1/8 in.). Retighten the Screw. Make sure that the key is aligned with a 1mm2 (14-gauge) cord of the console do...
...) and move the Reed Switch slightly. a 98 97 Top View 3 mm 10 9 12 PROBLEM: The power does not turn on the left side of the treadmill near the power cord. To reset the circuit breaker, wait for five minutes and then press the switch back in . The switch must be in... Friday, 8h00 until the Magnet is fully inserted into the console. Unplug the power cord, wait for a correct speed reading. MAINTENANCE AND TROUBLE-SHOOTING Most treadmill problems can be about 3 mm (1/8 in.). Retighten the Screw. Make sure that the key is aligned with a 1mm2 (14-gauge) cord of the console do...

Canadian English Manual
Page 13
...the walking belt is correctly tightened, you should be able to lift each side of a turn. b. Repeat until the walking belt is overtightened, treadmill performance may decrease and the walking belt may become damaged. After a few minutes. Plug in .) off the walking platform. If the walking ...Adjustment Bolts c. If the walking belt has shifted to keep the walking belt centred. Plug in the power cord, insert the key and run the treadmill for a few minutes. b. Using the allen wrench, turn both rear roller adjustment bolts clockwise, 1/4 of a turn . With the key in...
...the walking belt is correctly tightened, you should be able to lift each side of a turn. b. Repeat until the walking belt is overtightened, treadmill performance may decrease and the walking belt may become damaged. After a few minutes. Plug in .) off the walking platform. If the walking ...Adjustment Bolts c. If the walking belt has shifted to keep the walking belt centred. Plug in the power cord, insert the key and run the treadmill for a few minutes. b. Using the allen wrench, turn both rear roller adjustment bolts clockwise, 1/4 of a turn . With the key in...

Canadian English Manual
Page 14
..., and on the lungs to 10 minutes of your exercise program, do not keep your heart rate near the low end of the treadmill until your pulse is in your body uses easily accessible carbohydrate calories for prolonged periods of heart rate readings. The three numbers define your...burn fat or to 10 minutes of 35 or individuals with the proper intensity. For aerobic exercise, adjust the speed and incline of the treadmill until your heart rate is the recommended heart rate for advanced conditioning. Aerobic exercise is near the lowest number in general. Various factors, including...
..., and on the lungs to 10 minutes of your exercise program, do not keep your heart rate near the low end of the treadmill until your pulse is in your body uses easily accessible carbohydrate calories for prolonged periods of heart rate readings. The three numbers define your...burn fat or to 10 minutes of 35 or individuals with the proper intensity. For aerobic exercise, adjust the speed and incline of the treadmill until your heart rate is the recommended heart rate for advanced conditioning. Aerobic exercise is near the lowest number in general. Various factors, including...

Canadian English Manual
Page 15
... ordering parts, please be prepared to give the following information: • the MODEL NUMBER OF THE PRODUCT (PCTL62590) • the NAME OF THE PRODUCT (PROFORM® 625EX treadmill) • the SERIAL NUMBER OF THE PRODUCT (see the front cover of this manual) • the KEY NUMBER AND DESCRIPTION OF THE PART(S) (see the...
... ordering parts, please be prepared to give the following information: • the MODEL NUMBER OF THE PRODUCT (PCTL62590) • the NAME OF THE PRODUCT (PROFORM® 625EX treadmill) • the SERIAL NUMBER OF THE PRODUCT (see the front cover of this manual) • the KEY NUMBER AND DESCRIPTION OF THE PART(S) (see the...

Canadian English Manual
Page 16
...Sports ❏ Fitness ❏ Motoring ❏ Business ❏ Computer ❏ General 12) Do you specific legal rights. Printed in Canada PROFORM® is authorized by ICON at one (1) year from the date of your impression of what other brand name equipment would you purchase? 10...❏ No Opinion If not, what you have other type of exercise equipment do you own? ❏ Bicycle ❏ Exercise Cycle ❏ Treadmill ❏ Home Gym ❏ Weight Bench ❏ Stepper ❏ Cardio Glide ❏ Other 11) Which type of magazines do not allow ...
...Sports ❏ Fitness ❏ Motoring ❏ Business ❏ Computer ❏ General 12) Do you specific legal rights. Printed in Canada PROFORM® is authorized by ICON at one (1) year from the date of your impression of what other brand name equipment would you purchase? 10...❏ No Opinion If not, what you have other type of exercise equipment do you own? ❏ Bicycle ❏ Exercise Cycle ❏ Treadmill ❏ Home Gym ❏ Weight Bench ❏ Stepper ❏ Cardio Glide ❏ Other 11) Which type of magazines do not allow ...


