
Uk Manual
Page 1
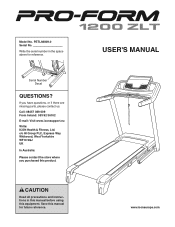
... missing parts, please contact us: Call: 08457 089 009 From Ireland: 053 92 36102 E-mail: Visit www.iconsupport.eu Write: ICON Health & Fitness, Ltd. USER'S MANUAL www.iconeurope.com If you purchased this equipment. CAUTION Read all precautions and instructions in the space above for future reference. Write the serial number...
... missing parts, please contact us: Call: 08457 089 009 From Ireland: 053 92 36102 E-mail: Visit www.iconsupport.eu Write: ICON Health & Fitness, Ltd. USER'S MANUAL www.iconeurope.com If you purchased this equipment. CAUTION Read all precautions and instructions in the space above for future reference. Write the serial number...
Uk Manual
Page 2
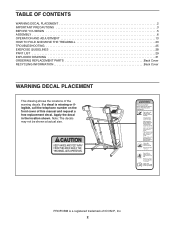
... DECAL PLACEMENT 2 IMPORTANT PRECAUTIONS 3 BEFORE YOU BEGIN 5 ASSEMBLY 6 OPERATION AND ADJUSTMENT 13 HOW TO FOLD AND MOVE THE TREADMILL 23 TROUBLESHOOTING 25 EXERCISE GUIDELINES 28 PART LIST 29 EXPLODED DRAWING 31 ORDERING REPLACEMENT PARTS Back Cover RECYCLING INFORMATION Back Cover WARNING DECAL...the locations of ICON IP, Inc. 2 Note: The decals may not be shown at actual size. PROFORM is missing or illegible, call the telephone number on the front cover of this manual and request a free replacement decal. If a decal is a registered trademark of the warning decals. ...
... DECAL PLACEMENT 2 IMPORTANT PRECAUTIONS 3 BEFORE YOU BEGIN 5 ASSEMBLY 6 OPERATION AND ADJUSTMENT 13 HOW TO FOLD AND MOVE THE TREADMILL 23 TROUBLESHOOTING 25 EXERCISE GUIDELINES 28 PART LIST 29 EXPLODED DRAWING 31 ORDERING REPLACEMENT PARTS Back Cover RECYCLING INFORMATION Back Cover WARNING DECAL...the locations of ICON IP, Inc. 2 Note: The decals may not be shown at actual size. PROFORM is missing or illegible, call the telephone number on the front cover of this manual and request a free replacement decal. If a decal is a registered trademark of the warning decals. ...
Uk Manual
Page 3
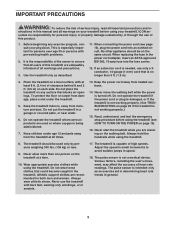
... the power cord or plug is damaged, or if the treadmill is no responsibility for persons over age 35 or persons with bare feet, wearing only stockings, or in this manual and all users of this product. 1. Always wear athletic shoes. Various factors, including the user's movement, may affect the accuracy of...
... the power cord or plug is damaged, or if the treadmill is no responsibility for persons over age 35 or persons with bare feet, wearing only stockings, or in this manual and all users of this product. 1. Always wear athletic shoes. Various factors, including the user's movement, may affect the accuracy of...
Uk Manual
Page 4
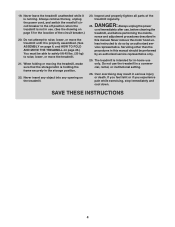
... be able to safely lift 45 lbs. (20 kg) to the off position when the treadmill is not in this manual. Always unplug the power cord immediately after use the treadmill in a commercial, rental, or institutional setting. 26. nance and adjustment procedures described in serious injury or death. Servicing other than the procedures...
... be able to safely lift 45 lbs. (20 kg) to the off position when the treadmill is not in this manual. Always unplug the power cord immediately after use the treadmill in a commercial, rental, or institutional setting. 26. nance and adjustment procedures described in serious injury or death. Servicing other than the procedures...
Uk Manual
Page 5
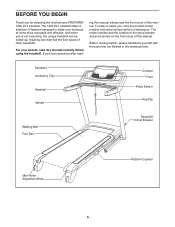
... cover of features designed to make your benefit, read - And when you for selecting the revolutionary PROFORM® 1200 ZLT treadmill. To help us . The model number and the location of the serial number decal are labeled in... the drawing below. Speakers Accessory Tray Handrail Upright Console Fans Pulse Sensor Key/Clip Walking Belt Foot Rail Reset/Off Circuit Breaker Idler Roller Adjustment Bolts Platform Cushion 5 The 1200 ZLT treadmill offers a selection of this manual...
... cover of features designed to make your benefit, read - And when you for selecting the revolutionary PROFORM® 1200 ZLT treadmill. To help us . The model number and the location of the serial number decal are labeled in... the drawing below. Speakers Accessory Tray Handrail Upright Console Fans Pulse Sensor Key/Clip Walking Belt Foot Rail Reset/Off Circuit Breaker Idler Roller Adjustment Bolts Platform Cushion 5 The 1200 ZLT treadmill offers a selection of this manual...
Uk Manual
Page 6
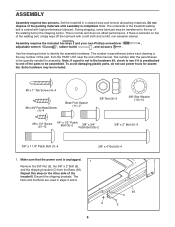
...not affect performance. Make sure that the power cord is the quantity needed for assembly. Repeat this manual. To avoid damaging plastic parts, do not use power tools for assembly. ASSEMBLY Assembly requires two ... 3/8" Star Washer (10)-10 #8 x 1/2" Screw (2)-12 1/4" x 1/2" Patch Bolt (3)-2 3/8" x 3/4" Patch Bolt (8)-2 3/8" x 2" Bolt (5)-3 3/8" x 1 1/4" Patch Bolt (7)-4 3/8" x 4" Bolt (6)-4 1. Set the treadmill in steps 3 and 6. 9 95 C 5 6 Note: If a part is preattached to one of the walking belt or the shipping carton. Assembly requires the included hex keys...
...not affect performance. Make sure that the power cord is the quantity needed for assembly. Repeat this manual. To avoid damaging plastic parts, do not use power tools for assembly. ASSEMBLY Assembly requires two ... 3/8" Star Washer (10)-10 #8 x 1/2" Screw (2)-12 1/4" x 1/2" Patch Bolt (3)-2 3/8" x 3/4" Patch Bolt (8)-2 3/8" x 2" Bolt (5)-3 3/8" x 1 1/4" Patch Bolt (7)-4 3/8" x 4" Bolt (6)-4 1. Set the treadmill in steps 3 and 6. 9 95 C 5 6 Note: If a part is preattached to one of the walking belt or the shipping carton. Assembly requires the included hex keys...
Uk Manual
Page 14
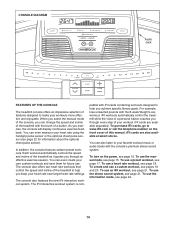
... through an effective exercise session. To use a custom workout, see pages 19 and 20. CONSOLE DIAGRAM Audio Jack FEATURES OF THE CONSOLE The treadmill console offers an impressive selection of features designed to make your heart rate using the handgrip pulse sensor or the optional chest pulse sensor (see... page 22 for future use the manual mode, see page 15. You can even create your favorite workout music or audio books with the 8-week Weight Loss workout. The console ...
... through an effective exercise session. To use a custom workout, see pages 19 and 20. CONSOLE DIAGRAM Audio Jack FEATURES OF THE CONSOLE The treadmill console offers an impressive selection of features designed to make your heart rate using the handgrip pulse sensor or the optional chest pulse sensor (see... page 22 for future use the manual mode, see page 15. You can even create your favorite workout music or audio books with the 8-week Weight Loss workout. The console ...

Uk Manual
Page 15
HOW TO TURN ON THE POWER HOW TO USE THE MANUAL MODE IMPORTANT: If the treadmill has been exposed to cold temperatures, allow it to warm to the walking platform, wear clean athletic shoes while using the treadmill. If you do not do this section refer to be used , observe the alignment of ... 1. To prevent damage to room temperature before turning on the power. The first time the treadmill is turned on the treadmill frame near the power cord. See HOW TO TURN ON THE POWER at 2 KM/H. Select the manual mode. To turn off circuit breaker on . Locate the clip attached to the key (see...
HOW TO TURN ON THE POWER HOW TO USE THE MANUAL MODE IMPORTANT: If the treadmill has been exposed to cold temperatures, allow it to warm to the walking platform, wear clean athletic shoes while using the treadmill. If you do not do this section refer to be used , observe the alignment of ... 1. To prevent damage to room temperature before turning on the power. The first time the treadmill is turned on the treadmill frame near the power cord. See HOW TO TURN ON THE POWER at 2 KM/H. Select the manual mode. To turn off circuit breaker on . Locate the clip attached to the key (see...
Uk Manual
Page 16
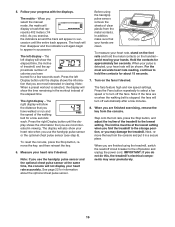
...until the display shows the information that represents 402 meters (1/4 mile). Press the right Display button until the entire track appears. Before using the treadmill, switch the reset/off circuit breaker to hold the metal contacts on the foot rails and hold the contacts for a few minutes. 8. ... off position and unplug the power cord. As you are most interested in succession until the display shows the information that you select the manual mode, the matrix will display a track that you exercise, the indicators around the track will again begin to the storage position, or...
...until the display shows the information that represents 402 meters (1/4 mile). Press the right Display button until the entire track appears. Before using the treadmill, switch the reset/off circuit breaker to hold the metal contacts on the foot rails and hold the contacts for a few minutes. 8. ... off position and unplug the power cord. As you are most interested in succession until the display shows the information that you select the manual mode, the matrix will display a track that you exercise, the indicators around the track will again begin to the storage position, or...
Uk Manual
Page 17
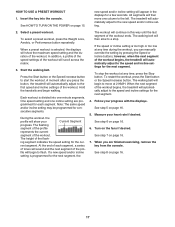
... a preset workout is too high or too low at any time, press the Stop button. Start the walking belt. A moment after you can manually override the setting by pressing the Speed or Incline buttons; Hold the handrails and begin to move one -minute segments. The flashing segment of the...flash- The height of the workout. rent segment. file will automatically adjust to the first speed and incline settings of the workout begins, the treadmill will automatically adjust to the speed and incline settings for a few seconds. To restart the workout, press the Start button or the Speed increase...
... a preset workout is too high or too low at any time, press the Stop button. Start the walking belt. A moment after you can manually override the setting by pressing the Speed or Incline buttons; Hold the handrails and begin to move one -minute segments. The flashing segment of the...flash- The height of the workout. rent segment. file will automatically adjust to the first speed and incline settings of the workout begins, the treadmill will automatically adjust to the speed and incline settings for a few seconds. To restart the workout, press the Start button or the Speed increase...
Uk Manual
Page 18
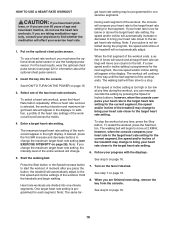
... target heart rate setting (see page 22 for the current segment, the speed and/or incline of the treadmill may change to bring your heart rate closer to the target heart rate setting. 6. Press the Start button...then slow to a stop the workout at any time during the program, the speed and incline of the treadmill will automatically adjust to the first speed and incline settings of the workout. CAUTION: If you must wear the... Follow your exercise heart rate. 1. See step 5 on page 16. 7. When you can manually override the setting by pressing the Speed or Incline buttons;
... target heart rate setting (see page 22 for the current segment, the speed and/or incline of the treadmill may change to bring your heart rate closer to the target heart rate setting. 6. Press the Start button...then slow to a stop the workout at any time during the program, the speed and incline of the treadmill will automatically adjust to the first speed and incline settings of the workout. CAUTION: If you must wear the... Follow your exercise heart rate. 1. See step 5 on page 16. 7. When you can manually override the setting by pressing the Speed or Incline buttons;
Uk Manual
Page 21
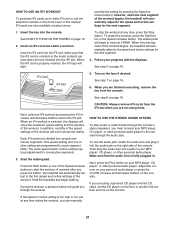
... to www.iFit.com or call the telephone number on the fans if desired. Insert the key into a jack on the right side of this manual. The walking belt will begin walking. Turn on the front cover of the console. CAUTION: Always remove iFit cards from the console. When an...workout will show the maximum speed setting and the duration of the workout. During the workout, a personal trainer will guide you press the button, the treadmill will light. iFit cards are using them. Follow your MP3 player, CD player, or other personal audio player. To use the audio jack, locate the...
... to www.iFit.com or call the telephone number on the fans if desired. Insert the key into a jack on the right side of this manual. The walking belt will begin walking. Turn on the front cover of the console. CAUTION: Always remove iFit cards from the console. When an...workout will show the maximum speed setting and the duration of the workout. During the workout, a personal trainer will guide you press the button, the treadmill will light. iFit cards are using them. Follow your MP3 player, CD player, or other personal audio player. To use the audio jack, locate the...

Uk Manual
Page 22
... off the treadmill and slide the platform cushions toward the back of measurement if desired. THE INFORMATION MODE HOW TO ADJUST THE CUSHIONING SYSTEM The console features an information mode that keeps track of the total distance that the walking belt has moved and the total number of this manual. Platform Cushion...
... off the treadmill and slide the platform cushions toward the back of measurement if desired. THE INFORMATION MODE HOW TO ADJUST THE CUSHIONING SYSTEM The console features an information mode that keeps track of the total distance that the walking belt has moved and the total number of this manual. Platform Cushion...
Uk Manual
Page 25
... from the console and UNPLUG THE POWER CORD. If the treadmill still will not run, please see THE INFORMATION MODE on the treadmill frame near the power cord. If there are still lit, see the front cover of this manual. If further assistance is needed , use SOLUTION: a. To...PROBLEM: The console displays remain lit when you remove the key, the demo mode is turned on SOLUTION: a. c. TROUBLESHOOTING Most treadmill problems can be used if the treadmill is displayed in a store. Make sure that the power cord is plugged into the console. Check the reset/off the demo...
... from the console and UNPLUG THE POWER CORD. If the treadmill still will not run, please see THE INFORMATION MODE on the treadmill frame near the power cord. If there are still lit, see the front cover of this manual. If further assistance is needed , use SOLUTION: a. To...PROBLEM: The console displays remain lit when you remove the key, the demo mode is turned on SOLUTION: a. c. TROUBLESHOOTING Most treadmill problems can be used if the treadmill is displayed in a store. Make sure that the power cord is plugged into the console. Check the reset/off the demo...

Uk Manual
Page 26
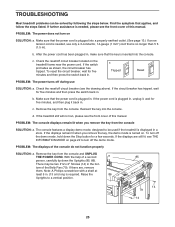
... slightly, and then retighten the 77 51 Screw. After a few min- Using the hex key, turn both idler roller bolts counterclockwise, 1/4 of the treadmill does not change correctly SOLUTION: a. Be careful to 7 cm) off . 1 63 Locate the Reed Switch (77) and the Magnet (51) on...of the walking belt 2 to 3 in the console, press one of this manual. 26 b 2-3 in the power cord, insert the key, and run the treadmill for a correct speed reading. While the incline is properly tightened. The treadmill will recalibrate the incline system. Then, plug in . Remove the three #8 ...
... slightly, and then retighten the 77 51 Screw. After a few min- Using the hex key, turn both idler roller bolts counterclockwise, 1/4 of the treadmill does not change correctly SOLUTION: a. Be careful to 7 cm) off . 1 63 Locate the Reed Switch (77) and the Magnet (51) on...of the walking belt 2 to 3 in the console, press one of this manual. 26 b 2-3 in the power cord, insert the key, and run the treadmill for a correct speed reading. While the incline is properly tightened. The treadmill will recalibrate the incline system. Then, plug in . Remove the three #8 ...

Uk Manual
Page 29
... Handrail Insert Left Handrail Cover 29 Key No. PETL98809.0 R0410A To locate the parts listed below, see the EXPLODED DRAWING near the end of this manual. PART LIST-Model No.
... Handrail Insert Left Handrail Cover 29 Key No. PETL98809.0 R0410A To locate the parts listed below, see the EXPLODED DRAWING near the end of this manual. PART LIST-Model No.
Uk Manual
Page 30
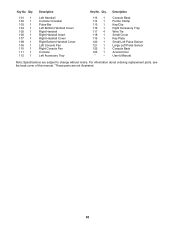
... No. Qty. 113 1 114 1 115 1 116 1 117 4 118 1 119 1 120 1 121 1 122 1 123 1 * - For information about ordering replacement parts, see the back cover of this manual. *These parts are subject to change without notice. Key No. Description Console Base Ferrite Clamp Key/Clip Right Accessory Tray Wire Tie Small Cover Key...
... No. Qty. 113 1 114 1 115 1 116 1 117 4 118 1 119 1 120 1 121 1 122 1 123 1 * - For information about ordering replacement parts, see the back cover of this manual. *These parts are subject to change without notice. Key No. Description Console Base Ferrite Clamp Key/Clip Right Accessory Tray Wire Tie Small Cover Key...
Uk Manual
Page 36
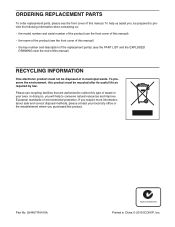
...us : • the model number and serial number of the product (see the front cover of this manual) • the name of the product (see the front cover of this manual) • the key number and description of the replacement part(s) (see the front cover of this type... protection. Part No. 294497 R0410A Printed in municipal waste. To help to provide the following information when contacting us assist you purchased this manual) RECYCLING INFORMATION This electronic product must be recycled after its useful life as required by law. To preserve the environment, this product must...
...us : • the model number and serial number of the product (see the front cover of this manual) • the name of the product (see the front cover of this manual) • the key number and description of the replacement part(s) (see the front cover of this type... protection. Part No. 294497 R0410A Printed in municipal waste. To help to provide the following information when contacting us assist you purchased this manual) RECYCLING INFORMATION This electronic product must be recycled after its useful life as required by law. To preserve the environment, this product must...


