User Guide
Page 2
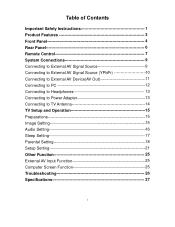
... 10 Connecting to External AV Device(AV Out 11 Connecting to PC 12 Connecting to Headphones 13 Connecting to Power Adapter 13 Connecting to TV Antenna 14 TV Setup and Operation 15 Preparations 15 Image Setting 15 Audio Setting 16 Sleep Setting 17 Parental Setting 18 Setup Setting 21 Other Function 25...
... 10 Connecting to External AV Device(AV Out 11 Connecting to PC 12 Connecting to Headphones 13 Connecting to Power Adapter 13 Connecting to TV Antenna 14 TV Setup and Operation 15 Preparations 15 Image Setting 15 Audio Setting 16 Sleep Setting 17 Parental Setting 18 Setup Setting 21 Other Function 25...
User Guide
Page 5
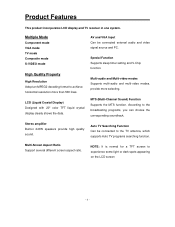
Product Features This product incorporates LCD display and TV receiver in 2x5W speakers provide high quality sound. AV and VGA Input Can be connected to experience some light or dark spots appearing on the LCD screen - 4 - According to achieve horizontal resolution more selecting. Special ...Auto TV programs searching function. Auto TV Searching Function Can be connected external audio and video signal source and PC. Multi-audio and Multi-video modes Supports multi-audio and multi-video modes, provide more than 500 lines. LCD (Liquid Crystal Display) Designed with 20"...
Product Features This product incorporates LCD display and TV receiver in 2x5W speakers provide high quality sound. AV and VGA Input Can be connected to experience some light or dark spots appearing on the LCD screen - 4 - According to achieve horizontal resolution more selecting. Special ...Auto TV programs searching function. Auto TV Searching Function Can be connected external audio and video signal source and PC. Multi-audio and Multi-video modes Supports multi-audio and multi-video modes, provide more than 500 lines. LCD (Liquid Crystal Display) Designed with 20"...
User Guide
Page 6
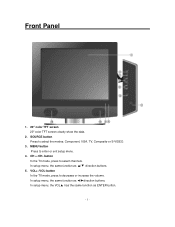
In setup menu, the same function as ENTER button. - 5 - button In the TV mode, press to enter or exit setup menu. 4. In setup menu, the VOL▲ has the same function as ◄/►direction buttons. MENU button Press to select channels. CH + /CH- In setup menu, the same function as ▲/▼ direction buttons. 5. VOL+ /VOL-button In the TV mode, press to select the modes: Component, VGA, TV, Composite or S-VIDEO. 3. SOURCE button Press to decrease or increase the volume. Front Panel 1. 20" color TFT screen 20" color TFT screen clearly show the data. 2.
In setup menu, the same function as ENTER button. - 5 - button In the TV mode, press to enter or exit setup menu. 4. In setup menu, the VOL▲ has the same function as ◄/►direction buttons. MENU button Press to select channels. CH + /CH- In setup menu, the same function as ▲/▼ direction buttons. 5. VOL+ /VOL-button In the TV mode, press to select the modes: Component, VGA, TV, Composite or S-VIDEO. 3. SOURCE button Press to decrease or increase the volume. Front Panel 1. 20" color TFT screen 20" color TFT screen clearly show the data. 2.
User Guide
Page 8
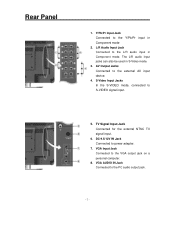
... mode 2. VGA Input Jack Connected to power adapter. 7. DC 9.5/12V IN Jack Connected to the VGA output jack on a personal computer. 8. TV Signal Input Jack Connected for the external NTSC TV signal input. 6. AV Output Jacks Connected to the L/R audio input in Component mode. L/R Audio Input Jack Connected to the external AV...
... mode 2. VGA Input Jack Connected to power adapter. 7. DC 9.5/12V IN Jack Connected to the VGA output jack on a personal computer. 8. TV Signal Input Jack Connected for the external NTSC TV signal input. 6. AV Output Jacks Connected to the L/R audio input in Component mode. L/R Audio Input Jack Connected to the external AV...
User Guide
Page 9
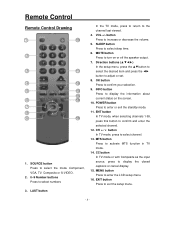
...9650;▼button to select the desired item and press the ◄► button to enter the LCD setup menu. 16. OK button Press to confirm and enter the selected channel. 12. ENT button In TV mode, when selecting channels 1-99, press this button to confirm your selection. 9. button Press to... Press to display the information about current status on or off the speaker output. 7. INFO button Press to activate MTS function in TV mode. 14. LAST button In the TV mode, press to return to turn on the screen. 10. VOL +/- MUTE button Press to the channel last viewed. 4. SOURCE...
...9650;▼button to select the desired item and press the ◄► button to enter the LCD setup menu. 16. OK button Press to confirm and enter the selected channel. 12. ENT button In TV mode, when selecting channels 1-99, press this button to confirm your selection. 9. button Press to... Press to display the information about current status on or off the speaker output. 7. INFO button Press to activate MTS function in TV mode. 14. LAST button In the TV mode, press to return to turn on the screen. 10. VOL +/- MUTE button Press to the channel last viewed. 4. SOURCE...
User Guide
Page 16
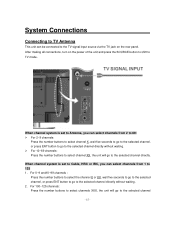
... ENT button to go to the selected channel - 15 - After making all connections, turn on the rear panel. System Connections Connecting to TV Antenna This unit can be connected to the TV signal input source via the TV jack on the power of the unit and press the SOURCE button to shift to...
... ENT button to go to the selected channel - 15 - After making all connections, turn on the rear panel. System Connections Connecting to TV Antenna This unit can be connected to the TV signal input source via the TV jack on the power of the unit and press the SOURCE button to shift to...

User Guide
Page 17
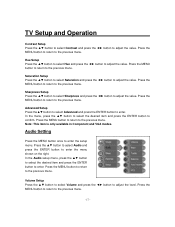
... value. Brightness Setup Press the ▲▼ button to select Brightness and press the ◄► button to enter. TV Setup and Operation Preparations 1. Press the MENU button to return to TV mode. Press the SOURCE button to shift to the previous menu. Press the ▲▼button to select the desired...
... value. Brightness Setup Press the ▲▼ button to select Brightness and press the ◄► button to enter. TV Setup and Operation Preparations 1. Press the MENU button to return to TV mode. Press the SOURCE button to shift to the previous menu. Press the ▲▼button to select the desired...
User Guide
Page 18
... to the previous menu. Press the MENU button to return to the previous menu. Note: This item is only available in Component and VGA modes. TV Setup and Operation Contrast Setup Press the ▲▼ button to select Contrast and press the ◄► button to adjust the value. Hue Setup...
... to the previous menu. Press the MENU button to return to the previous menu. Note: This item is only available in Component and VGA modes. TV Setup and Operation Contrast Setup Press the ▲▼ button to select Contrast and press the ◄► button to adjust the value. Hue Setup...
User Guide
Page 19
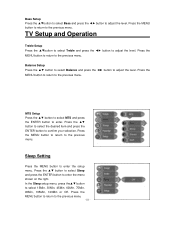
... to enter the menu shown on the right. Press the ▲▼ button to select Sleep and press the ENTER button to the previous menu. TV Setup and Operation Treble Setup Press the ▲▼button to select Treble and press the ◄► button to select 15Min, 30Min, 45Min, 60Min...
... to enter the menu shown on the right. Press the ▲▼ button to select Sleep and press the ENTER button to the previous menu. TV Setup and Operation Treble Setup Press the ▲▼button to select Treble and press the ◄► button to select 15Min, 30Min, 45Min, 60Min...
User Guide
Page 20
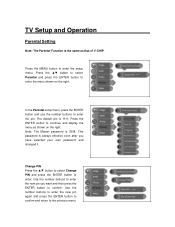
... confirm. Use the number buttons to enter the new pin you have selected your own password and changed it. Note: The Master password is 1111. TV Setup and Operation Parental Setting Note: The Parental Function is the same as shown on the right. Change PIN Press the ▲▼ button to...
... confirm. Use the number buttons to enter the new pin you have selected your own password and changed it. Note: The Master password is 1111. TV Setup and Operation Parental Setting Note: The Parental Function is the same as shown on the right. Change PIN Press the ▲▼ button to...
User Guide
Page 21
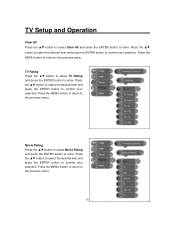
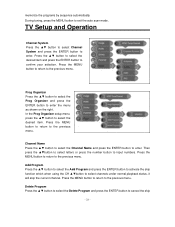
... confirm your selection. Movie Rating Press the ▲▼ button to select Movie Rating and press the ENTER button to enter. TV Rating Press the ▲▼ button to select TV Rating and press the ENTER button to enter. Press the ▲▼ button to select the desired item and press the... return to confirm your selection. Press the MENU button to return to the previous menu. Press the MENU button to return to the previous menu. - 20 - TV Setup and Operation Clear All Press the ▲▼ button to select Clear All and press the ENTER button to enter.
... confirm your selection. Movie Rating Press the ▲▼ button to select Movie Rating and press the ENTER button to enter. TV Rating Press the ▲▼ button to select TV Rating and press the ENTER button to enter. Press the ▲▼ button to select the desired item and press the... return to confirm your selection. Press the MENU button to return to the previous menu. Press the MENU button to return to the previous menu. - 20 - TV Setup and Operation Clear All Press the ▲▼ button to select Clear All and press the ENTER button to enter.
User Guide
Page 22
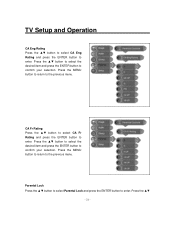
... return to confirm your selection. CA Fr Rating Press the ▲▼ button to select CA Fr Rating and press the ENTER button to enter. TV Setup and Operation CA Eng Rating Press the ▲▼ button to select CA Eng Rating and press the ENTER button to enter. Parental Lock...
... return to confirm your selection. CA Fr Rating Press the ▲▼ button to select CA Fr Rating and press the ENTER button to enter. TV Setup and Operation CA Eng Rating Press the ▲▼ button to select CA Eng Rating and press the ENTER button to enter. Parental Lock...
User Guide
Page 23
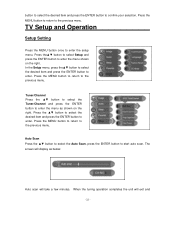
... select the desired item and press the ENTER button to enter. When the tuning operation completes the unit will display as shown on the right. TV Setup and Operation Setup Setting Press the MENU button once to the previous menu. Press the MENU button to return to enter the setup menu...
... select the desired item and press the ENTER button to enter. When the tuning operation completes the unit will display as shown on the right. TV Setup and Operation Setup Setting Press the MENU button once to the previous menu. Press the MENU button to return to enter the setup menu...
User Guide
Page 24
... to exit the auto scan mode. During tuning, press the MENU button to cancel the skip - 23 - Press the MENU button to return to enter. TV Setup and Operation Channel System Press the ▲▼ button to select Channel System and press the ENTER button to the previous menu. Add Program...
... to exit the auto scan mode. During tuning, press the MENU button to cancel the skip - 23 - Press the MENU button to return to enter. TV Setup and Operation Channel System Press the ▲▼ button to select Channel System and press the ENTER button to the previous menu. Add Program...
User Guide
Page 25
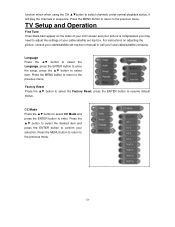
Press the MENU button to return to the previous menu. TV Setup and Operation Fine Tune If two black bars appear on adjusting the picture, consult your cable/satellite set -top box. Press the MENU button ... Press the ▲▼ button to select CC Mode and press the ENTER button to resume default status. For instructions on the sides of your LCD screen and your picture is compressed, you may need to adjust the settings of your cable/satellite set -top box's manual or call your local...
Press the MENU button to return to the previous menu. TV Setup and Operation Fine Tune If two black bars appear on adjusting the picture, consult your cable/satellite set -top box. Press the MENU button ... Press the ▲▼ button to select CC Mode and press the ENTER button to resume default status. For instructions on the sides of your LCD screen and your picture is compressed, you may need to adjust the settings of your cable/satellite set -top box's manual or call your local...

User Guide
Page 26
Computer Screen Function The TFT LCD screen of connecting the unit to the PC and then you to the external AV signal source... of these menus are not available in these menus in Composite, S-VIDEO, Component and VGA modes are the same with those in "TV Function". Set the PC's resolution at: 800 x 600 @60Hz. Use the audio, video and S-Video cable to connect the unit...The unit has external AV input function. Press the SOURCE button to shift to the introduction in the TV mode. This will allow you can be used as recorder, satellite receiver or game player etc. The operations of that mode...
Computer Screen Function The TFT LCD screen of connecting the unit to the PC and then you to the external AV signal source... of these menus are not available in these menus in Composite, S-VIDEO, Component and VGA modes are the same with those in "TV Function". Set the PC's resolution at: 800 x 600 @60Hz. Use the audio, video and S-Video cable to connect the unit...The unit has external AV input function. Press the SOURCE button to shift to the introduction in the TV mode. This will allow you can be used as recorder, satellite receiver or game player etc. The operations of that mode...
User Guide
Page 27
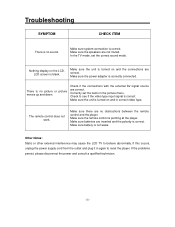
...connections are correct. Other Notes: Static or other external interference may cause the LCD TV to reset the player. Nothing display on and in correct video type. The remote control does not work. In the TV mode, set the items in again to behave abnormally. Make sure the power...sure the speakers are inserted and the polarity is correct. Correctly set the correct sound mode. Make sure the unit is turned on the LCD. Make sure battery is correctly connected. Make sure batteries are not muted. Make sure the remote control is correct. If this occurs, ...
...connections are correct. Other Notes: Static or other external interference may cause the LCD TV to reset the player. Nothing display on and in correct video type. The remote control does not work. In the TV mode, set the items in again to behave abnormally. Make sure the power...sure the speakers are inserted and the polarity is correct. Correctly set the correct sound mode. Make sure the unit is turned on the LCD. Make sure battery is correctly connected. Make sure batteries are not muted. Make sure the remote control is correct. If this occurs, ...


