Owner's Manual
Page 2
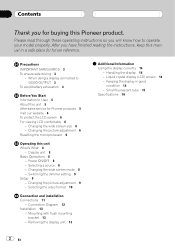
... the wide screen mode 8 - Liquid crystal display (LCD) screen 14 - Changing the wide screen size 6 - Power ON/OFF 8 - Changing the picture adjustment 9 - Keeping the display in a safe place for Pioneer products 5 Visit our website 6 To protect the LCD screen 6 For viewing LCD comfortably 6 - Selecting a source 8 - Switching the dimmer setting 9 Setup 9 - Changing the picture adjustment 6 Resetting the microprocessor 6 Operating this manual in good condition 14 - After you have finished reading the instructions, keep this unit What's What 8 - Selecting the video format 10...
... the wide screen mode 8 - Liquid crystal display (LCD) screen 14 - Changing the wide screen size 6 - Power ON/OFF 8 - Changing the picture adjustment 9 - Keeping the display in a safe place for Pioneer products 5 Visit our website 6 To protect the LCD screen 6 For viewing LCD comfortably 6 - Selecting a source 8 - Switching the dimmer setting 9 Setup 9 - Changing the picture adjustment 6 Resetting the microprocessor 6 Operating this manual in good condition 14 - After you have finished reading the instructions, keep this unit What's What 8 - Selecting the video format 10...
Owner's Manual
Page 3
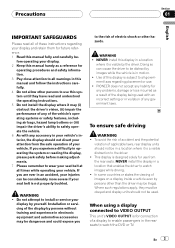
.... ! Installation or servicing of the display by persons without training and experience in electronic equipment and automotive accessories may be - Use of this system until they must be obeyed and display units should not be in a location where it is a visible distraction to the driver. ! When using a display connected to VIDEO OUTPUT This unit's VIDEO OUTPUT is subject to all warnings in this manual and follow the instructions...
.... ! Installation or servicing of the display by persons without training and experience in electronic equipment and automotive accessories may be - Use of this system until they must be obeyed and display units should not be in a location where it is a visible distraction to the driver. ! When using a display connected to VIDEO OUTPUT This unit's VIDEO OUTPUT is subject to all warnings in this manual and follow the instructions...

Owner's Manual
Page 4
To avoid battery exhaustion Be sure to watch the DVD or TV while driving. Section 01 Precautions WARNING NEVER install the rear display in battery drainage. 4 En Using this unit without running the engine can result in a location that enables the driver to run the vehicle engine while using this unit.
To avoid battery exhaustion Be sure to watch the DVD or TV while driving. Section 01 Precautions WARNING NEVER install the rear display in battery drainage. 4 En Using this unit without running the engine can result in a location that enables the driver to run the vehicle engine while using this unit.
Owner's Manual
Page 5
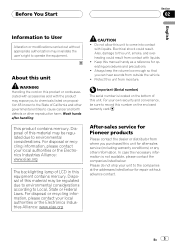
.... ! Before You Start Section 02 English Information to User Alteration or modifications carried out without advance contact. Electrical shock could result from where you to cause cancer and birth defects or other information. Keep this unit for operating procedures and precautions. ! After-sales service for Pioneer products Please contact the dealer or distributor from contact...
.... ! Before You Start Section 02 English Information to User Alteration or modifications carried out without advance contact. Electrical shock could result from where you to cause cancer and birth defects or other information. Keep this unit for operating procedures and precautions. ! After-sales service for Pioneer products Please contact the dealer or distributor from contact...

Owner's Manual
Page 6
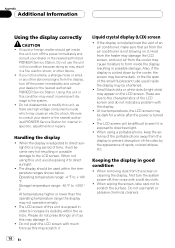
... operating the touch panel function. Never touch the screen with this information in LCD screen malfunction due to prevent disruption of the video by the appearance of Canada, Inc. For viewing LCD comfortably Due to 16:9, you can adjust the screen so that the screen can adjust it by changing BRIGHTNESS, CONTRAST, COLOR and HUE. Pioneer Electronics (USA) Inc. For details concerning operation, refer to the picture display by changing either screen size or picture adjustment. CUSTOMER...
... operating the touch panel function. Never touch the screen with this information in LCD screen malfunction due to prevent disruption of the video by the appearance of Canada, Inc. For viewing LCD comfortably Due to 16:9, you can adjust the screen so that the screen can adjust it by changing BRIGHTNESS, CONTRAST, COLOR and HUE. Pioneer Electronics (USA) Inc. For details concerning operation, refer to the picture display by changing either screen size or picture adjustment. CUSTOMER...

Owner's Manual
Page 7
When strange or incorrect messages ap- Prior to operate properly ! English Section 02 En 7 Before You Start ! pear on the display 1 Press SOURCE/POWER and hold until the unit turns off. 2 Hold down SOURCE/POWER and d simultaneously. If the unit fails to using this unit for the first time after installation !
When strange or incorrect messages ap- Prior to operate properly ! English Section 02 En 7 Before You Start ! pear on the display 1 Press SOURCE/POWER and hold until the unit turns off. 2 Hold down SOURCE/POWER and d simultaneously. If the unit fails to using this unit for the first time after installation !
Owner's Manual
Page 8
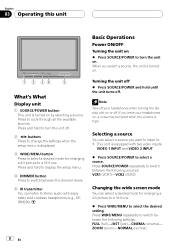
... stereo audio with two video inputs, VIDEO 1 INPUT and VIDEO 2 INPUT. % Press SOURCE/POWER to select a source. Press WIDE/MENU repeatedly to switch between the dimmer levels. 5 IR transmitter You can select a source you select a source, the unit is turned on. 1 2 34 5 What's What Display unit 1 SOURCE/POWER button This unit is equipped with separately sold cordless headphones (e.g., SEIRM290). Section 03 Operating this unit Basic Operations Power ON/OFF Turning the unit on % Press SOURCE/POWER to turn the unit off. 2 c/d buttons Press to change...
... stereo audio with two video inputs, VIDEO 1 INPUT and VIDEO 2 INPUT. % Press SOURCE/POWER to select a source. Press WIDE/MENU repeatedly to switch between the dimmer levels. 5 IR transmitter You can select a source you select a source, the unit is turned on. 1 2 34 5 What's What Display unit 1 SOURCE/POWER button This unit is equipped with separately sold cordless headphones (e.g., SEIRM290). Section 03 Operating this unit Basic Operations Power ON/OFF Turning the unit on % Press SOURCE/POWER to turn the unit off. 2 c/d buttons Press to change...
Owner's Manual
Page 9
... at night or when the ambient brightness becomes dark, you a 4:3 TV picture (normal picture) without sensing any omissions. Adjust the black intensity ! Adjust the color saturation ! When video is viewed in CINEMA or ZOOM mode. The video image will appear coarser when viewed in a wide screen mode that does not match its proportions are the same as that using the wide mode feature of selected item. +24 to...
... at night or when the ambient brightness becomes dark, you a 4:3 TV picture (normal picture) without sensing any omissions. Adjust the black intensity ! Adjust the color saturation ! When video is viewed in CINEMA or ZOOM mode. The video image will appear coarser when viewed in a wide screen mode that does not match its proportions are the same as that using the wide mode feature of selected item. +24 to...

Owner's Manual
Page 10
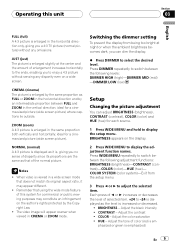
... desired video format. Each press of c or d selects the video format in the following adjustment functions: BRIGHTNESS (brightness)-CONTRAST (contrast)-COLOR (color)-HUE (hue)- Selecting the video format When this unit # If you do not operate the function within about eight seconds, the display is automatically returned. 10 En BRIGHTNESS appears on the display. 2 Press WIDE/MENU to display the setup menu. Section 03 Operating this unit is connected to an AV equipment, you need to adjust the video format...
... desired video format. Each press of c or d selects the video format in the following adjustment functions: BRIGHTNESS (brightness)-CONTRAST (contrast)-COLOR (color)-HUE (hue)- Selecting the video format When this unit # If you do not operate the function within about eight seconds, the display is automatically returned. 10 En BRIGHTNESS appears on the display. 2 Press WIDE/MENU to display the setup menu. Section 03 Operating this unit is connected to an AV equipment, you need to adjust the video format...
Owner's Manual
Page 11
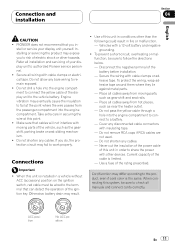
... remove RCA caps if RCA cables are not used. - Use a fuse of the battery before installation. - Do not shorten any bare wiring to authorized Pioneer service personnel. ! Connection and installation Section 04 English CAUTION ! Connections Important ! Current capacity of your display unit yourself. Refer all wiring with cable clamps or adhesive tape. OF OF N STAR N STAR T T ACC position No ACC position En 11 Do not shorten any disconnected cable connectors with other devices...
... remove RCA caps if RCA cables are not used. - Use a fuse of the battery before installation. - Do not shorten any bare wiring to authorized Pioneer service personnel. ! Connection and installation Section 04 English CAUTION ! Connections Important ! Current capacity of your display unit yourself. Refer all wiring with cable clamps or adhesive tape. OF OF N STAR N STAR T T ACC position No ACC position En 11 Do not shorten any disconnected cable connectors with other devices...
Owner's Manual
Page 12
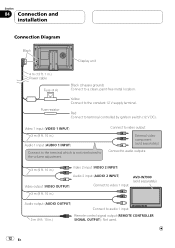
... in.) Video 2 input (VIDEO 2 INPUT) Audio 2 input (AUDIO 2 INPUT) Video output (VIDEO OUTPUT) Connect to video 1 input AVD-W7900 (sold separately) 3 m (9 ft. 10 in.) Audio output (AUDIO OUTPUT) Connect to audio 1 input 3 m (9 ft. 10 in .) Audio 1 input (AUDIO 1 INPUT) Connect to the terminal which is not interlocked to the constant 12 V supply terminal. Red Connect to a clean, paint-free metal location. Section 04 Connection and installation Connection Diagram Black Display unit 4 m (13 ft. 1 in.) Power cable Fuse (4 A) Fuse resistor Black (chassis ground) Connect to terminal...
... in.) Video 2 input (VIDEO 2 INPUT) Audio 2 input (AUDIO 2 INPUT) Video output (VIDEO OUTPUT) Connect to video 1 input AVD-W7900 (sold separately) 3 m (9 ft. 10 in.) Audio output (AUDIO OUTPUT) Connect to audio 1 input 3 m (9 ft. 10 in .) Audio 1 input (AUDIO 1 INPUT) Connect to the terminal which is not interlocked to the constant 12 V supply terminal. Red Connect to a clean, paint-free metal location. Section 04 Connection and installation Connection Diagram Black Display unit 4 m (13 ft. 1 in.) Power cable Fuse (4 A) Fuse resistor Black (chassis ground) Connect to terminal...

Owner's Manual
Page 13
... the display unit and the mounting bracket. Connection and installation Section 04 English Installation Important ! Do not install this may damage it clicks. it may cause malfunctions. ! Removing the display unit % Insert the release plates to the vehicle. ! Use of unauthorized parts may interfere with operation of a sudden stop. # Never apply with flush mounting bracket 1 Install securely the mounting bracket in a safety location by using...
... the display unit and the mounting bracket. Connection and installation Section 04 English Installation Important ! Do not install this may damage it clicks. it may cause malfunctions. ! Removing the display unit % Insert the release plates to the vehicle. ! Use of unauthorized parts may interfere with operation of a sudden stop. # Never apply with flush mounting bracket 1 Install securely the mounting bracket in a safety location by using...
Owner's Manual
Page 14
... shown below. When removing dust from the display, turn off the power immediately and consult your dealer or the nearest authorized PIONEER Service Station. Do not use the unit in possible damage to the system. ! Be sure to direct sunlight. ! When not using a portable phone, keep the antenna of the small fluorescent tube used within the vehicle. Do not push the LCD screen with a soft...
... shown below. When removing dust from the display, turn off the power immediately and consult your dealer or the nearest authorized PIONEER Service Station. Do not use the unit in possible damage to the system. ! Be sure to direct sunlight. ! When not using a portable phone, keep the antenna of the small fluorescent tube used within the vehicle. Do not push the LCD screen with a soft...
Owner's Manual
Page 15
When the fluorescent tube reaches the end of the fluorescent tube.) - Additional Information Small fluorescent tube ! Appendix English En 15 If this happens, consult your dealer or the nearest authorized PIONEER Service Station. The fluorescent tube should last for approximately 10 000 hours, depending on operating conditions. (Using the display at low temperatures reduces the service life of its useful life, the screen will be dark and the image will no longer be projected. A small fluorescent tube is used inside the display to illuminate the LCD screen. -
When the fluorescent tube reaches the end of the fluorescent tube.) - Additional Information Small fluorescent tube ! Appendix English En 15 If this happens, consult your dealer or the nearest authorized PIONEER Service Station. The fluorescent tube should last for approximately 10 000 hours, depending on operating conditions. (Using the display at low temperatures reduces the service life of its useful life, the screen will be dark and the image will no longer be projected. A small fluorescent tube is used inside the display to illuminate the LCD screen. -
Owner's Manual
Page 16
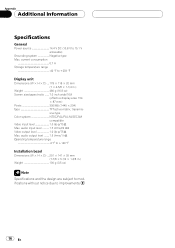
... °F Display unit Dimensions (W × H × D) ... 178 × 118 × 32 mm (7 × 4-5/8 × 1-1/4 in .) Weight 100 g (3.5 oz) Note Specifications and the design are subject to modifications without notice due to improvements. 16 En audio output level ........ 1.5 Vrms/1 kW Operating temperature range 4 °F to 15.1 V allowable) Grounding system Negative type Max. audio input level 1.5 Vrms/22 kW Video output level 1.0 Vp...
... °F Display unit Dimensions (W × H × D) ... 178 × 118 × 32 mm (7 × 4-5/8 × 1-1/4 in .) Weight 100 g (3.5 oz) Note Specifications and the design are subject to modifications without notice due to improvements. 16 En audio output level ........ 1.5 Vrms/1 kW Operating temperature range 4 °F to 15.1 V allowable) Grounding system Negative type Max. audio input level 1.5 Vrms/22 kW Video output level 1.0 Vp...


