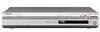
Owner's Manual
Page 4
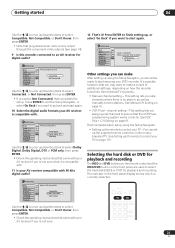
Contents 01 Before you start Features 6 What's in the box 8 Putting the batteries in the remote control 8 Using the remote control 8 Disc / content format playback compatibility 9 About the internal hard disk drive 11 02 Connecting up Rear panel connections 12 Front ...satellite receiver (2) . . . 16 Connecting to an AV amplifier 17 Connecting other AV sources 18 Plugging in 18 03 Controls and displays Front panel 19 Display 20 Remote control 21 06 Recording About DVD recording 43 About HDD recording 43 Recording time and picture quality 43 Restrictions on video recording 44...
Contents 01 Before you start Features 6 What's in the box 8 Putting the batteries in the remote control 8 Using the remote control 8 Disc / content format playback compatibility 9 About the internal hard disk drive 11 02 Connecting up Rear panel connections 12 Front ...satellite receiver (2) . . . 16 Connecting to an AV amplifier 17 Connecting other AV sources 18 Plugging in 18 03 Controls and displays Front panel 19 Display 20 Remote control 21 06 Recording About DVD recording 43 About HDD recording 43 Recording time and picture quality 43 Restrictions on video recording 44...
Owner's Manual
Page 8
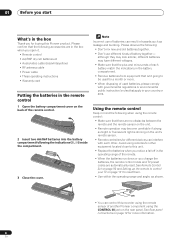
...8226; Make sure that there are in the box when you change the batteries, the remote control mode and TV preset codes are automatically reset. Using the remote control Keep in mind the following when using the remote control: • Make sure that the plus and minus ends of used for other . ...Warranty card Putting the batteries in the remote control 1 Open the battery compartment cover on the back of battery together- 01 Before you start What's in the box Thank you notice a fall off in the operating range of another Pioneer component using the CONTROL IN jack on the rear panel. See...
...8226; Make sure that there are in the box when you change the batteries, the remote control mode and TV preset codes are automatically reset. Using the remote control Keep in mind the following when using the remote control: • Make sure that the plus and minus ends of used for other . ...Warranty card Putting the batteries in the remote control 1 Open the battery compartment cover on the back of battery together- 01 Before you start What's in the box Thank you notice a fall off in the operating range of another Pioneer component using the CONTROL IN jack on the rear panel. See...

Owner's Manual
Page 20
... ' indicators light to indicate that the HDD or DVD is selected for the clock display. 6 2 3 (page 90) Shows the remote control mode (if nothing is displayed, the remote control mode is 1). 7 REM Lights when the character display is showing the remaining available recording time. 8 (page 92) Lights when the ... TV channel has a Second Audio Program channel. 16 OVER (page 93) Lights when the analog audio input level is not recordable.) 20 En 03 Controls and displays Display 12 3 4 56 789 10 11 12 13 14 15 16 1 / Arrows indicate the copy direction between the HDD ( ) and...
... ' indicators light to indicate that the HDD or DVD is selected for the clock display. 6 2 3 (page 90) Shows the remote control mode (if nothing is displayed, the remote control mode is 1). 7 REM Lights when the character display is showing the remaining available recording time. 8 (page 92) Lights when the ... TV channel has a Second Audio Program channel. 16 OVER (page 93) Lights when the analog audio input level is not recordable.) 20 En 03 Controls and displays Display 12 3 4 56 789 10 11 12 13 14 15 16 1 / Arrows indicate the copy direction between the HDD ( ) and...

Owner's Manual
Page 21
... select the hard disk (HDD) for recording or playback. 6 DVD (page 25) Press to select the DVD for track/chapter/title selection; Controls and displays 03 Remote control 1 2 STANDBY/ON ONE TOUCH OPEN/CLOSE COPY 3 4 5 HDD DVD 6 7 AUDIO SUBTITLE ANGLE PLAY MODE 8 ABC DEF GHI JKL ...The same buttons can navigate all on-screen displays. See also the Note on copying on the following page. 2 Remote control indicator Lights when setting up the remote control for timer recording. Use CLEAR to enter a PlusCode programming number for use the number buttons to clear an entry...
... select the hard disk (HDD) for recording or playback. 6 DVD (page 25) Press to select the DVD for track/chapter/title selection; Controls and displays 03 Remote control 1 2 STANDBY/ON ONE TOUCH OPEN/CLOSE COPY 3 4 5 HDD DVD 6 7 AUDIO SUBTITLE ANGLE PLAY MODE 8 ABC DEF GHI JKL ...The same buttons can navigate all on-screen displays. See also the Note on copying on the following page. 2 Remote control indicator Lights when setting up the remote control for timer recording. Use CLEAR to enter a PlusCode programming number for use the number buttons to clear an entry...

Owner's Manual
Page 23
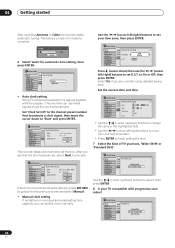
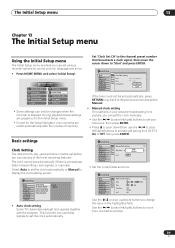
... ENTER. ENTER DVD RECORDER Initial Setup Basic Tuner Video Out Audio In Audio Out Language Recording Playback COFrlnooncSktcrPSeaeentnelDCstDioasimprstplpaullyaseyitnegtyhoisusrerteucporbdeefro.re you Remote Control Set Start Setup Mavigator Cancel Please use the Setup Navigator, press (cursor down) to select Cancel, then press ENTER...Basic Tuner Video Out Audio In Audio Out Language Recording Playback Clock SLeatnguage On Screen Display Front Panel Display Remote Control SetEnglish Setup Mavigator français 4 Press ENTER again to make several basic settings using the recorder for ...
... ENTER. ENTER DVD RECORDER Initial Setup Basic Tuner Video Out Audio In Audio Out Language Recording Playback COFrlnooncSktcrPSeaeentnelDCstDioasimprstplpaullyaseyitnegtyhoisusrerteucporbdeefro.re you Remote Control Set Start Setup Mavigator Cancel Please use the Setup Navigator, press (cursor down) to select Cancel, then press ENTER...Basic Tuner Video Out Audio In Audio Out Language Recording Playback Clock SLeatnguage On Screen Display Front Panel Display Remote Control SetEnglish Setup Mavigator français 4 Press ENTER again to make several basic settings using the recorder for ...
Owner's Manual
Page 24
.... Initial Setup Basic Tuner Video Out Audio In Audio Out Language Recording Playback Clock STeVt Screen Size On Screen Display Front Panel Display Remote Control Set Wide (16:9) Setup Mavigator Standard (4:3) Use the / (cursor up /down to select, then press ENTER. 8 Is your.... Initial Setup Basic Tuner Video Out Audio In Audio Out Language Recording Playback Clock SCeltock Setting On Screen Display Front Panel Display Remote Control SetAuto Setup Mavigator Manual • Auto clock setting Some TV channels broadcast time signals together with progressive scan video? After you...
.... Initial Setup Basic Tuner Video Out Audio In Audio Out Language Recording Playback Clock STeVt Screen Size On Screen Display Front Panel Display Remote Control Set Wide (16:9) Setup Mavigator Standard (4:3) Use the / (cursor up /down to select, then press ENTER. 8 Is your.... Initial Setup Basic Tuner Video Out Audio In Audio Out Language Recording Playback Clock SCeltock Setting On Screen Display Front Panel Display Remote Control SetAuto Setup Mavigator Manual • Auto clock setting Some TV channels broadcast time signals together with progressive scan video? After you...
Owner's Manual
Page 25
... Initial Setup Basic Tuner Video Out Audio In Audio Out Language Recording Playback Clock SAeVt Amp Digital Connect On Screen Display Front Panel Display Remote Control SetConnected Setup Mavigator Not Connected Use the / (cursor up /down ) buttons to select Compatible, Not Compatible, or Don't Know, ... Basic Tuner Video Out Audio In Audio Out Language Recording Playback Clock S9e6tkHz PCM Compatible On Screen Display Front Panel Display Remote Control Set Compatible Setup Mavigator Not Compatible Don't Know Selecting the hard disk or DVD for playback and recording. This setting lets...
... Initial Setup Basic Tuner Video Out Audio In Audio Out Language Recording Playback Clock SAeVt Amp Digital Connect On Screen Display Front Panel Display Remote Control SetConnected Setup Mavigator Not Connected Use the / (cursor up /down ) buttons to select Compatible, Not Compatible, or Don't Know, ... Basic Tuner Video Out Audio In Audio Out Language Recording Playback Clock S9e6tkHz PCM Compatible On Screen Display Front Panel Display Remote Control Set Compatible Setup Mavigator Not Compatible Don't Know Selecting the hard disk or DVD for playback and recording. This setting lets...
Owner's Manual
Page 26
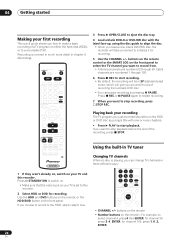
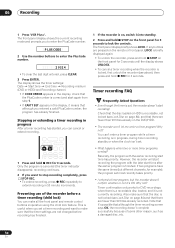
...your recording The TV program you just recorded should be in chapter 6 (Recording). If you want to step 5 now. buttons on the remote • Number buttons on the front panel to initialize it for recording. STANDBY/ON OPEN/CLOSE HDD DVD CHANNEL 3 Press OPEN/CLOSE to...channels are numbered 1 through 69. CHANNEL ENTER • CHANNEL +/- for channel 102, press 1, 0, 2, ENTER. 26 En buttons on the remote control or the SMART JOG on the remote - PLAY STOP REC STOPREC ì Playing back your TV is covered in much more chapters. • Press PLAY to start recording. &#...
...your recording The TV program you just recorded should be in chapter 6 (Recording). If you want to step 5 now. buttons on the remote • Number buttons on the front panel to initialize it for recording. STANDBY/ON OPEN/CLOSE HDD DVD CHANNEL 3 Press OPEN/CLOSE to...channels are numbered 1 through 69. CHANNEL ENTER • CHANNEL +/- for channel 102, press 1, 0, 2, ENTER. 26 En buttons on the remote control or the SMART JOG on the remote - PLAY STOP REC STOPREC ì Playing back your TV is covered in much more chapters. • Press PLAY to start recording. &#...
Owner's Manual
Page 50
...• The recorder won't let me enter a timer program! Timer confirmation only works for 3 seconds to make all the front panel and remote control buttons inoperative using the child lock feature. Also make sure that the disc loaded or HDD is not locked (see above), then press and .... • To extend recording, press ì REC repeatedly to extend recording in progress After a timer recording has started, you want to lock the controls. If any buttons are not changed before a timer recording (child lock) You can 't enter a timer program while a timer recording is in the ...
...• The recorder won't let me enter a timer program! Timer confirmation only works for 3 seconds to make all the front panel and remote control buttons inoperative using the child lock feature. Also make sure that the disc loaded or HDD is not locked (see above), then press and .... • To extend recording, press ì REC repeatedly to extend recording in progress After a timer recording has started, you want to lock the controls. If any buttons are not changed before a timer recording (child lock) You can 't enter a timer program while a timer recording is in the ...
Owner's Manual
Page 54
...a DVD to a camcorder connected to the DV IN/OUT jack. 1 Connect the camcorder to the DV IN/OUT jack of players (including many Pioneer models) can also play finalized discs recorded in the timecode on your recordings on page 93) between Stereo 1 and Stereo 2. A number of this ...While recording, you cannot exit the DV recording screen using the / / / (cursor buttons) followed by selecting Pause Rec or Stop Rec from this remote control during recording. • If you restart recording after you finalize a disc. All the title menus are a number of different styles of discs it still...
...a DVD to a camcorder connected to the DV IN/OUT jack. 1 Connect the camcorder to the DV IN/OUT jack of players (including many Pioneer models) can also play finalized discs recorded in the timecode on your recordings on page 93) between Stereo 1 and Stereo 2. A number of this ...While recording, you cannot exit the DV recording screen using the / / / (cursor buttons) followed by selecting Pause Rec or Stop Rec from this remote control during recording. • If you restart recording after you finalize a disc. All the title menus are a number of different styles of discs it still...

Owner's Manual
Page 63
Input Title Name 10/07Wed 3:00PM 2ch LP CAPS small ABC DE F GH I # DN O OOO O ø U U U U Y ß $% 0123456789 _& x c a 2 3 1 -o 1/4 1/2 3/4 ¿ ` NO P Q R S T U VWX Y Z ( ) : ; Copying and back-up 07 3 Input a name for the selected title, then press ENTER. 3 Use the playback controls to find the place where you want to divide the title, then press ENTER. AA A A A AÆ ç E E E E I I I I J KLM . , ? !
Input Title Name 10/07Wed 3:00PM 2ch LP CAPS small ABC DE F GH I # DN O OOO O ø U U U U Y ß $% 0123456789 _& x c a 2 3 1 -o 1/4 1/2 3/4 ¿ ` NO P Q R S T U VWX Y Z ( ) : ; Copying and back-up 07 3 Input a name for the selected title, then press ENTER. 3 Use the playback controls to find the place where you want to divide the title, then press ENTER. AA A A A AÆ ç E E E E I I I I J KLM . , ? !

Owner's Manual
Page 73
Input Title Name 11/04Wed 12:30PM 2ch LP CAPS small ABC DE F GH I # DN O OOO O ø U U U U Y ß $% 0 1 + 2 - 3 4 / @ 5 [ 6 ¥ 7 ] 8 ˆ 9 ÷ < x = ± > { _ | _ } ~ & ¡ c a NO P Q R S T U VWX Y Z ( ) : ; Editing 08 Title Name (Ttl Name) VR mode Video mode HDD You can give titles new names of up to 64 characters long for VR mode and HDD recordings and 32 characters for Video mode recordings. 1 Select 'Ttl Name' from the Disc Navigator menu options. 2 Use the / / / (cursor buttons) to select the title you want to name, then press ENTER to ...
Input Title Name 11/04Wed 12:30PM 2ch LP CAPS small ABC DE F GH I # DN O OOO O ø U U U U Y ß $% 0 1 + 2 - 3 4 / @ 5 [ 6 ¥ 7 ] 8 ˆ 9 ÷ < x = ± > { _ | _ } ~ & ¡ c a NO P Q R S T U VWX Y Z ( ) : ; Editing 08 Title Name (Ttl Name) VR mode Video mode HDD You can give titles new names of up to 64 characters long for VR mode and HDD recordings and 32 characters for Video mode recordings. 1 Select 'Ttl Name' from the Disc Navigator menu options. 2 Use the / / / (cursor buttons) to select the title you want to name, then press ENTER to ...

Owner's Manual
Page 78
For other remote control key shortcuts, see Using the remote key shortcuts to input a name on page 73. • For discs formatted on page 78). Combine two adjacent chapters into two: Select the chapter you ...
For other remote control key shortcuts, see Using the remote key shortcuts to input a name on page 73. • For discs formatted on page 78). Combine two adjacent chapters into two: Select the chapter you ...

Owner's Manual
Page 84
... Adjust Play Mode DV Record Basic settings Input Disc Name VR mode Video mode Use this to enter a name for a Video mode disc. For other remote control key shortcuts, see only a limited character set. If you will completely erase the disc). 2 Input a name for the disc up to 64 characters long for... The Disc Setup menu Chapter 11 The Disc Setup menu From the Disc Setup menu you can still be initialized (which will see Using the remote key shortcuts to input a name on page 73. • For discs formatted on -screen. 1 Select 'Input Disc Name' from the Home menu: • Press ...
... Adjust Play Mode DV Record Basic settings Input Disc Name VR mode Video mode Use this to enter a name for a Video mode disc. For other remote control key shortcuts, see only a limited character set. If you will completely erase the disc). 2 Input a name for the disc up to 64 characters long for... The Disc Setup menu Chapter 11 The Disc Setup menu From the Disc Setup menu you can still be initialized (which will see Using the remote key shortcuts to input a name on page 73. • For discs formatted on -screen. 1 Select 'Input Disc Name' from the Home menu: • Press ...
Owner's Manual
Page 89
.... Initial Setup Basic Tuner Video Out Audio In Audio Out Language Recording Playback Clock Setting On Screen Display Front Panel Display Remote Control Set Setup Navigator Auto Manual • Auto clock setting Some TV channels broadcast time signals together with the program. Initial ...set the clock automatically. Initial Setup Basic Clock SMetatinnugal Clock Setting 1/2 Tuner On Screen Display Video Out Audio In Front PTainmeel ZDoinspelay Remote Control Set USA Alaska Audio Out Language Setup Mavigator D.S.T. Off Use the / (cursor up/down to change the value in your ...
.... Initial Setup Basic Tuner Video Out Audio In Audio Out Language Recording Playback Clock Setting On Screen Display Front Panel Display Remote Control Set Setup Navigator Auto Manual • Auto clock setting Some TV channels broadcast time signals together with the program. Initial ...set the clock automatically. Initial Setup Basic Clock SMetatinnugal Clock Setting 1/2 Tuner On Screen Display Video Out Audio In Front PTainmeel ZDoinspelay Remote Control Set USA Alaska Audio Out Language Setup Mavigator D.S.T. Off Use the / (cursor up/down to change the value in your ...
Owner's Manual
Page 90
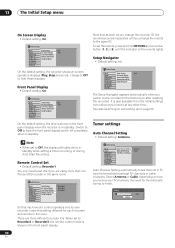
... automatic tuning to set to Recorder2 or Recorder3, the remote control mode is also available from the Initial Settings menu should you receive your TV channels, then wait for the first time (or after resetting the recorder). There are using more than one Pioneer DVD recorder in standby. See also Switching on and...
... automatic tuning to set to Recorder2 or Recorder3, the remote control mode is also available from the Initial Settings menu should you receive your TV channels, then wait for the first time (or after resetting the recorder). There are using more than one Pioneer DVD recorder in standby. See also Switching on and...

Owner's Manual
Page 101
...If you need to, you will not be able to use this remote control with a new code. Setting up correctly, the TV should switch on the remote controls lights. To be able to use this feature you first have to program the remote with a maker code from the table below , you can use... TV. Maker Aiwa Funai GE General Goldstar Grandient Hitachi Magnavox Mitsubishi NEC Panasonic Philips Pioneer RCA Sanyo Sharp Sony Toshiba Victor Zenith Using the TV remote control buttons The table below for your TV. If the remote is more than one code given for your make, input the first one in the ...
...If you need to, you will not be able to use this remote control with a new code. Setting up correctly, the TV should switch on the remote controls lights. To be able to use this feature you first have to program the remote with a maker code from the table below , you can use... TV. Maker Aiwa Funai GE General Goldstar Grandient Hitachi Magnavox Mitsubishi NEC Panasonic Philips Pioneer RCA Sanyo Sharp Sony Toshiba Victor Zenith Using the TV remote control buttons The table below for your TV. If the remote is more than one code given for your make, input the first one in the ...
Owner's Manual
Page 103
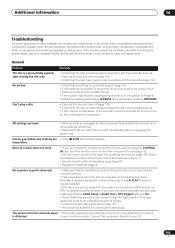
... is loaded properly (aligned in disc tray and label-side up). • There may be condensation in another Pioneer product using the CONTROL IN jack, point the remote control at regular play speed) or slow motion play. If you cannot is distorted connect via this component, please check... the points below , ask your nearest Pioneer authorized service center or your dealer to the correct input and the volume turned up...
... is loaded properly (aligned in disc tray and label-side up). • There may be condensation in another Pioneer product using the CONTROL IN jack, point the remote control at regular play speed) or slow motion play. If you cannot is distorted connect via this component, please check... the points below , ask your nearest Pioneer authorized service center or your dealer to the correct input and the volume turned up...
Owner's Manual
Page 104
...the battery replaced, contact your dealer or a Pioneer Service Center. During playback the picture is dark • When a copy-protected disc is no power to the input signal. Connect the recorder directly to your TV using this remote control • If there is already recording to ...disc, check that it (page 9). • Discs recorded with copy-once material cannot be specifically RW compatible in the remote control code list. Can't control your TV. Check that these limits have overlapped, in order to DVD) • Make sure that there is a recordable DVD...
...the battery replaced, contact your dealer or a Pioneer Service Center. During playback the picture is dark • When a copy-protected disc is no power to the input signal. Connect the recorder directly to your TV using this remote control • If there is already recording to ...disc, check that it (page 9). • Discs recorded with copy-once material cannot be specifically RW compatible in the remote control code list. Can't control your TV. Check that these limits have overlapped, in order to DVD) • Make sure that there is a recordable DVD...
Owner's Manual
Page 105
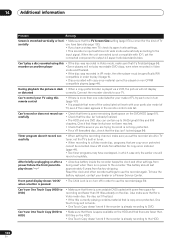
Additional information 14 Problem The picture freezes and the front panel and remote control buttons stop working. There are two ways to one disc (note that has had the commercials edited out? A standard DVD disc can hold STANDBY/ON ...
Additional information 14 Problem The picture freezes and the front panel and remote control buttons stop working. There are two ways to one disc (note that has had the commercials edited out? A standard DVD disc can hold STANDBY/ON ...


