
Owner's Manual
Page 2
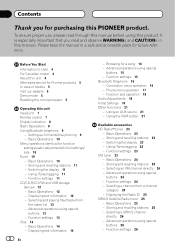
...- Selecting and playing files/tracks from a channel category 24 - Browsing for hands-free phoning 9 - Basic Operations 23 - Function settings 23 XM tuner 23 - Basic Operations 25 - Selecting a SIRIUS channel directly 26 - Contents Thank you read through this manual. To...trouble 5 Visit our website 5 Demo mode 5 Resetting the microprocessor 5 Operating this PIONEER product. It is especially important that you for function settings/audio adjustments/initial settings/ lists 10 Tuner 10 - Setting up for a song 14 - Basic Operations 10 Menu operations identical for purchasing ...
...- Selecting and playing files/tracks from a channel category 24 - Browsing for hands-free phoning 9 - Basic Operations 23 - Function settings 23 XM tuner 23 - Basic Operations 25 - Selecting a SIRIUS channel directly 26 - Contents Thank you read through this manual. To...trouble 5 Visit our website 5 Demo mode 5 Resetting the microprocessor 5 Operating this PIONEER product. It is especially important that you for function settings/audio adjustments/initial settings/ lists 10 Tuner 10 - Setting up for a song 14 - Basic Operations 10 Menu operations identical for purchasing ...
Owner's Manual
Page 4
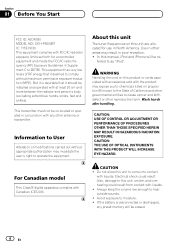
... OPTICAL INSTRUMENTS WITH THIS PRODUCT WILL INCREASE EYE HAZARD. Section 01 Before You Start FCC ID: AJDK030 MODEL NO.: DEH-P6200BT IC: 775E-K030 This equipment complies with FCC/IC radiation exposure limits set forth for use in North America. Information to as "iPod". About this unit The tuner frequencies on proposition 65...
... OPTICAL INSTRUMENTS WITH THIS PRODUCT WILL INCREASE EYE HAZARD. Section 01 Before You Start FCC ID: AJDK030 MODEL NO.: DEH-P6200BT IC: 775E-K030 This equipment complies with FCC/IC radiation exposure limits set forth for use in North America. Information to as "iPod". About this unit The tuner frequencies on proposition 65...
Owner's Manual
Page 5
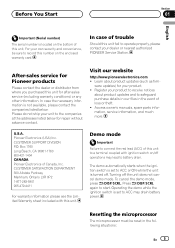
...files in the following situations: En 5 To cancel the demo mode, press /DISP/SCRL. Operating the demo while the ignition switch is set to battery drain. In case the necessary information is not available, please contact the companies listed below: Please do not ship your product... SUPPORT DIVISION P.O. Visit our website http://www.pioneerelectronics.com ! Press /DISP/SCRL again to the companies at the addresses listed below for Pioneer products Please contact the dealer or distributor from where you purchased this unit fail to operate properly, please contact your product. ! For your...
...files in the following situations: En 5 To cancel the demo mode, press /DISP/SCRL. Operating the demo while the ignition switch is set to battery drain. In case the necessary information is not available, please contact the companies listed below: Please do not ship your product... SUPPORT DIVISION P.O. Visit our website http://www.pioneerelectronics.com ! Press /DISP/SCRL again to the companies at the addresses listed below for Pioneer products Please contact the dealer or distributor from where you purchased this unit fail to operate properly, please contact your product. ! For your...
Owner's Manual
Page 7
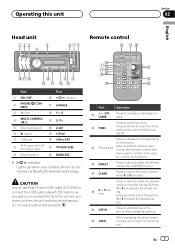
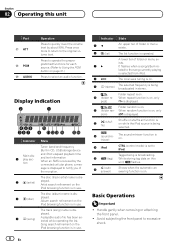
... Part 1 SRC/OFF a indicator 2 PHONE/ /CONNECT b 6/PAUSE 3 (list) c 1 to the unit will protrude out from the unit and may be dangerous. CAUTION Use an optional Pioneer USB cable (CD-U50E) to connect the USB audio player/USB memory as any device connected directly to 6 4 MULTI-CONTROL (M.C.) d 3/ 5 Disc loading slot e 2/ 6 h (eject) f 1/iPod... i BAND/ESC ! Press and hold one of the buttons 1 to 6 to end a call or reject an incoming call. Buttons o 0 to 9 buttons 1 to recall the initial setting menu when the sources are used for XM/SIRIUS tuner.
... Part 1 SRC/OFF a indicator 2 PHONE/ /CONNECT b 6/PAUSE 3 (list) c 1 to the unit will protrude out from the unit and may be dangerous. CAUTION Use an optional Pioneer USB cable (CD-U50E) to connect the USB audio player/USB memory as any device connected directly to 6 4 MULTI-CONTROL (M.C.) d 3/ 5 Disc loading slot e 2/ 6 h (eject) f 1/iPod... i BAND/ESC ! Press and hold one of the buttons 1 to 6 to end a call or reject an incoming call. Buttons o 0 to 9 buttons 1 to recall the initial setting menu when the sources are used for XM/SIRIUS tuner.
Owner's Manual
Page 8
...) State Tuner: band and frequency Built-in use . 8 En Indicator State 5c An upper tier of folder or menu exists. 6 (list) The list function is set to the song currently playing is selected from iPod. 8 LOC The local seek tuning is on , only dom) is displayed. The track (song) name is...
...) State Tuner: band and frequency Built-in use . 8 En Indicator State 5c An upper tier of folder or menu exists. 6 (list) The list function is set to the song currently playing is selected from iPod. 8 LOC The local seek tuning is on , only dom) is displayed. The track (song) name is...

Owner's Manual
Page 9
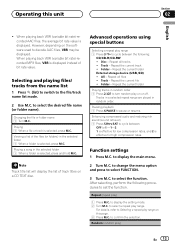
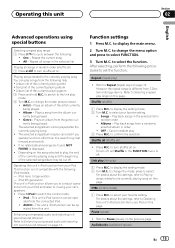
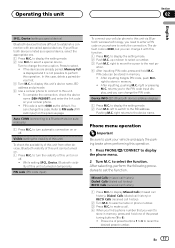
... to Phone menu operation on the kind of cellular phone. ! Since this unit's source is turned on page 16. 2 Function settings Operate the Bluetooth telephone function menu. Refer to connect with your cellular phone via Bluetooth wireless technology, using the phone book, etc.,...device)/USBiPod (iPod connected using these advanced operations. When this unit's blue/white lead is connected to this unit Section 02 English ! Setting up the unit for use the hands-free phoning function you can drain the battery power. ! Using Bluetooth telephone Important ! Notes !...
... to Phone menu operation on the kind of cellular phone. ! Since this unit's source is turned on page 16. 2 Function settings Operate the Bluetooth telephone function menu. Refer to connect with your cellular phone via Bluetooth wireless technology, using the phone book, etc.,...device)/USBiPod (iPod connected using these advanced operations. When this unit's blue/white lead is connected to this unit Section 02 English ! Setting up the unit for use the hands-free phoning function you can drain the battery power. ! Using Bluetooth telephone Important ! Notes !...
Owner's Manual
Page 10
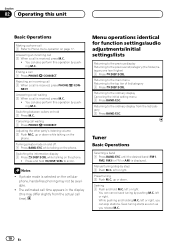
...by pushing M.C. You can also perform this operation by pushing M.C. Returning to the main menu Returning to the ordinary display Canceling the initial setting menu 1 Press BAND/ESC. left or right. Answering an incoming call 1 When a call is received, press M.C. ! up or down... phone. ! Tuner Basic Operations Selecting a band 1 Press BAND/ESC until the desired band (FM1, FM2, FM3 for function settings/audio adjustments/initial settings/lists Returning to the previous display Returning to scroll. Manual tuning (step by pushing M.C. left or right. left or right....
...by pushing M.C. You can also perform this operation by pushing M.C. Returning to the main menu Returning to the ordinary display Canceling the initial setting menu 1 Press BAND/ESC. left or right. Answering an incoming call 1 When a call is received, press M.C. ! up or down... phone. ! Tuner Basic Operations Selecting a band 1 Press BAND/ESC until the desired band (FM1, FM2, FM3 for function settings/audio adjustments/initial settings/lists Returning to the previous display Returning to scroll. Manual tuning (step by pushing M.C. left or right. left or right....
Owner's Manual
Page 11
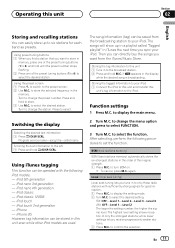
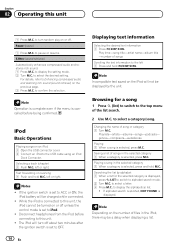
... the desired text information 1 Press /DISP/SCRL. The song information (tag) can be saved from the iTunes Music Store. Function settings 1 Press M.C. to confirm the selection. Turn to only those radio stations with the following procedures to this unit and transfer this unit... you find a station that you receive progressively weaker stations. 3 Press M.C. Storing the tagged information to your iPod 1 Connect the iPod to set the function. Using the preset screen 1 Press to switch to change the menu option and press to select the function. Using iTunes tagging This...
... the desired text information 1 Press /DISP/SCRL. The song information (tag) can be saved from the iTunes Music Store. Function settings 1 Press M.C. to confirm the selection. Turn to only those radio stations with the following procedures to this unit and transfer this unit... you find a station that you receive progressively weaker stations. 3 Press M.C. Storing the tagged information to your iPod 1 Connect the iPod to set the function. Using the preset screen 1 Press to switch to change the menu option and press to select the function. Using iTunes tagging This...
Owner's Manual
Page 12
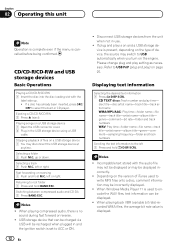
...desired text information 1 Press /DISP/SCRL. When playing compressed audio, there is displayed. If plug and play is on and a USB storage device is set to select the built-in the USB storage device using a USB cable. Depending on page 20. Playing songs on a USB storage device 1 You .... ! Fast forwarding or reversing 1 Push and hold BAND/ESC. left or right. Selecting a folder 1 Push M.C. CD TEXT discs: Track number and play setting as necessary. CD/CD-R/CD-RW and USB storage devices Basic Operations Playing a CD/CD-R/CD-RW 1 Insert the disc into the disc loading slot...
...desired text information 1 Press /DISP/SCRL. When playing compressed audio, there is displayed. If plug and play is on and a USB storage device is set to select the built-in the USB storage device using a USB cable. Depending on page 20. Playing songs on a USB storage device 1 You .... ! Fast forwarding or reversing 1 Push and hold BAND/ESC. left or right. Selecting a folder 1 Push M.C. CD TEXT discs: Track number and play setting as necessary. CD/CD-R/CD-RW and USB storage devices Basic Operations Playing a CD/CD-R/CD-RW 1 Insert the disc into the disc loading slot...
Owner's Manual
Page 13
...press and hold M.C. Selecting and playing files/ tracks from the name list 1 Press (list) to switch to select the function. Disc - Function settings 1 Press M.C. to the file/track name list mode. 2 Use M.C. to confirm the selection. to select a repeat play range 1 Press ..., press M.C. to display the main menu. 2 Turn M.C. Repeat all files ! Folder - to change the menu option and press to display the setting mode. 2 Turn M.C. to select FUNCTION. 3 Turn M.C. All - Repeat the current file ! Enhancing compressed audio and restoring rich sound (sound retriever...
...press and hold M.C. Selecting and playing files/ tracks from the name list 1 Press (list) to switch to select the function. Disc - Function settings 1 Press M.C. to the file/track name list mode. 2 Use M.C. to confirm the selection. to select a repeat play range 1 Press ..., press M.C. to display the main menu. 2 Turn M.C. Repeat all files ! Folder - to change the menu option and press to display the setting mode. 2 Turn M.C. to select FUNCTION. 3 Turn M.C. All - Repeat the current file ! Enhancing compressed audio and restoring rich sound (sound retriever...
Owner's Manual
Page 14
... 1 When a category is selected, press M.C. to display the alphabetical list. ! Note Operation is complete even if the menu is set to the left 1 Press and hold M.C. left or right. Note Depending on or off unless the control mode is cancelled before connecting...retriever) on the iPod will not be charged while connected. ! If alphabet search is aborted, NOT FOUND is selected, press M.C. to display the setting mode. 2 Turn M.C. Notes ! genres-composers-audiobooks Playing 1 When a song is displayed. to confirm the selection. Note Incompatible text saved on the...
... 1 When a category is selected, press M.C. to display the alphabetical list. ! Note Operation is complete even if the menu is set to the left 1 Press and hold M.C. left or right. Note Depending on or off unless the control mode is cancelled before connecting...retriever) on the iPod will not be charged while connected. ! If alphabet search is aborted, NOT FOUND is selected, press M.C. to display the setting mode. 2 Turn M.C. Notes ! genres-composers-audiobooks Playing 1 When a song is displayed. to confirm the selection. Note Incompatible text saved on the...
Owner's Manual
Page 15
...page. Depending on page 13. iPod nano 1st generation - iPod - AUDIO - This unit's iPod function can be operated from your favorite setting. ! Enhancing compressed audio and restoring rich sound (sound retriever) Refer to Repeat (repeat play , the end of the currently playing song... and the beginning of the artist currently being played. Function settings 1 Press M.C. Refer to Enhancing compressed audio and restoring rich sound (sound retriever) on the song selected to conduct operations from ...
...page. Depending on page 13. iPod nano 1st generation - iPod - AUDIO - This unit's iPod function can be operated from your favorite setting. ! Enhancing compressed audio and restoring rich sound (sound retriever) Refer to Repeat (repeat play , the end of the currently playing song... and the beginning of the artist currently being played. Function settings 1 Press M.C. Refer to Enhancing compressed audio and restoring rich sound (sound retriever) on the song selected to conduct operations from ...
Owner's Manual
Page 16
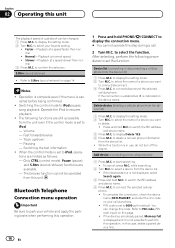
... the function. to iPod pauses song playback. to select a device from this case, delete a paired device first. 16 En to display the setting mode. 2 Turn M.C. to connect the selected cellular phone. ! Refer to perform this operation. If five devices are limited as the default..... - to delete a cellular phone information from the unit even if the control mode is set the function. to display the setting mode. 2 Turn M.C. To complete the connection, check the device name (DEH-P6200BT) and enter the link code on the device name. Slower - Only CTRL (control mode),...
... the function. to iPod pauses song playback. to select a device from this case, delete a paired device first. 16 En to display the setting mode. 2 Turn M.C. to connect the selected cellular phone. ! Refer to perform this operation. If five devices are limited as the default..... - to delete a cellular phone information from the unit even if the control mode is set the function. to display the setting mode. 2 Turn M.C. To complete the connection, check the device name (DEH-P6200BT) and enter the link code on the device name. Slower - Only CTRL (control mode),...
Owner's Manual
Page 17
...code input) on . 1 Press M.C. En 17 In this unit Section 02 English SPCL. To complete the connection, check the device name (DEH-P6200BT) and enter the link code on temporarily. Auto CONN (connecting to select a number. 3 Push M.C. up or down to a Bluetooth device...device first. 3 Turn M.C. to change this unit via Bluetooth wireless technology, you want to store in memory. ! Pushing M.C. Turn to display the setting mode. 2 Use M.C. Missed Calls (missed call history) Dialed Calls (dialed call history) REC'D Calls (received call history). 2 Turn M.C. Press...
...code input) on . 1 Press M.C. En 17 In this unit Section 02 English SPCL. To complete the connection, check the device name (DEH-P6200BT) and enter the link code on temporarily. Auto CONN (connecting to select a number. 3 Push M.C. up or down to a Bluetooth device...device first. 3 Turn M.C. to change this unit via Bluetooth wireless technology, you want to store in memory. ! Pushing M.C. Turn to display the setting mode. 2 Use M.C. Missed Calls (missed call history) Dialed Calls (dialed call history) REC'D Calls (received call history). 2 Turn M.C. Press...
Owner's Manual
Page 18
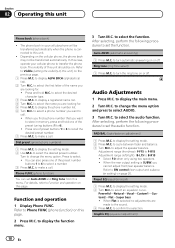
.... Auto ANSR (automatic answering) 1 Press M.C. FAD/BAL (fader/balance adjustment) 1 Press M.C. to SW control (rear output and subwoofer setting) on page 20. Refer to adjust the speaker balance. Graphic EQ (equalizer adjustment) 18 En Refer to select the desired character type. ... phone number that you cannot adjust front/rear speaker balance. After selecting, perform the following procedures to select the audio function. to set the function. Powerful-Natural-Vocal-Custom1-Custom2-Flat-Super bass ! For details, refer to B-R15 ! Audio Adjustments 1 Press M.C. ...
.... Auto ANSR (automatic answering) 1 Press M.C. FAD/BAL (fader/balance adjustment) 1 Press M.C. to SW control (rear output and subwoofer setting) on page 20. Refer to adjust the speaker balance. Graphic EQ (equalizer adjustment) 18 En Refer to select the desired character type. ... phone number that you cannot adjust front/rear speaker balance. After selecting, perform the following procedures to select the audio function. to set the function. Powerful-Natural-Vocal-Custom1-Custom2-Flat-Super bass ! For details, refer to B-R15 ! Audio Adjustments 1 Press M.C. ...
Owner's Manual
Page 19
... will be updated. 1 Press M.C. to confirm the selection. to output level and then turn M.C. to adjust the level. to display the setting mode. 2 Turn M.C. SLA (source level adjustment) SLA (Source Level Adjustment) lets you do not want low sounds from the subwoofer output frequency...125Hz 4 Press M.C. to SLA. ! Normal (normal phase)-Reverse (reverse phase)-OFF (subwoofer off frequency. Adjustment range: +6 to -24 HPF setting (high pass filter adjustment) When you adjust the volume level of each source. to select the cut -off frequency and output level of the source...
... will be updated. 1 Press M.C. to confirm the selection. to output level and then turn M.C. to adjust the level. to display the setting mode. 2 Turn M.C. SLA (source level adjustment) SLA (Source Level Adjustment) lets you do not want low sounds from the subwoofer output frequency...125Hz 4 Press M.C. to SLA. ! Normal (normal phase)-Reverse (reverse phase)-OFF (subwoofer off frequency. Adjustment range: +6 to -24 HPF setting (high pass filter adjustment) When you adjust the volume level of each source. to select the cut -off frequency and output level of the source...
Owner's Manual
Page 20
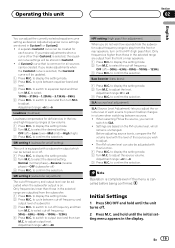
...numbers on or off the engine. to adjust the clock. to USB/USBiPod automatically. to clear the memory. to switch the rear output setting. ! Section 02 Operating this unit and of Bluetooth module. 1 Press M.C. to reset phone memory, push M.C. to Bluetooth telephone can ...display the system versions of turning off . Ever SCRL (scroll mode setting) When Ever Scroll is in the display. phone ! left. You can be changed. ! ON - play on or off the ignition, a ...
...numbers on or off the engine. to adjust the clock. to USB/USBiPod automatically. to clear the memory. to switch the rear output setting. ! Section 02 Operating this unit and of Bluetooth module. 1 Press M.C. to reset phone memory, push M.C. to Bluetooth telephone can ...display the system versions of turning off . Ever SCRL (scroll mode setting) When Ever Scroll is in the display. phone ! left. You can be changed. ! ON - play on or off the ignition, a ...
Owner's Manual
Page 21
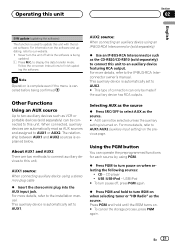
... AUX1. Never turn BSM on . # To cancel the storage process, press PGM again. For more details, refer to AUX1/AUX2 (auxiliary input setting) on -screen instructions to this unit. For more details, refer to display the data transfer mode. About AUX1 and AUX2 There are automatically read...VCR or portable devices (sold separately) to connect this unit with the latest software. The relationship between AUX1 and AUX2 sources is automatically set to this unit. to the installation manual. Other Functions Using an AUX source Up to two auxiliary devices such as AUX sources and ...
... AUX1. Never turn BSM on . # To cancel the storage process, press PGM again. For more details, refer to AUX1/AUX2 (auxiliary input setting) on -screen instructions to this unit. For more details, refer to display the data transfer mode. About AUX1 and AUX2 There are automatically read...VCR or portable devices (sold separately) to connect this unit with the latest software. The relationship between AUX1 and AUX2 sources is automatically set to this unit. to the installation manual. Other Functions Using an AUX source Up to two auxiliary devices such as AUX sources and ...
Owner's Manual
Page 22
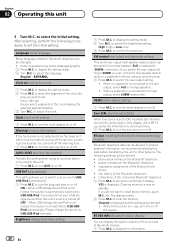
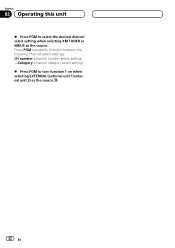
Press PGM repeatedly to switch between the following channel select settings: CH number (channel number select setting) -Category (channel category select setting) % Press PGM to select the desired channel select setting when selecting XM TUNER or SIRIUS as the source. 22 En Section 02 Operating this unit % Press PGM to turn function 1 on when selecting EXTERNAL (external unit 1/external unit 2) as the source.
Press PGM repeatedly to switch between the following channel select settings: CH number (channel number select setting) -Category (channel category select setting) % Press PGM to select the desired channel select setting when selecting XM TUNER or SIRIUS as the source. 22 En Section 02 Operating this unit % Press PGM to turn function 1 on when selecting EXTERNAL (external unit 1/external unit 2) as the source.
Owner's Manual
Page 23
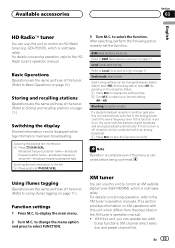
...left 1 Press and hold /DISP/SCRL. After selecting, perform the following procedures to select the function. Seek mode (seek mode) Seek tuning setting can be changed between digital broadcast and analog broadcast automatically. All-HD Blending (reception mode) If a digital broadcast reception condition gets poor, this...are the same as those of the tuner. (Refer to BSM (best stations memory) on page 11. to select your favorite setting. For details concerning operation, refer to Using iTunes tagging on page 11.) Switching the display Desired information can be conducted within an ...
...left 1 Press and hold /DISP/SCRL. After selecting, perform the following procedures to select the function. Seek mode (seek mode) Seek tuning setting can be changed between digital broadcast and analog broadcast automatically. All-HD Blending (reception mode) If a digital broadcast reception condition gets poor, this...are the same as those of the tuner. (Refer to BSM (best stations memory) on page 11. to select your favorite setting. For details concerning operation, refer to Using iTunes tagging on page 11.) Switching the display Desired information can be conducted within an ...


