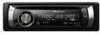
Owner's Manual
Page 2
... frequencies 12 - Tuning in strong signals 13 Built-in random order 15 - Selecting a repeat play range 15 - Playing tracks in CD Player 13 - Pausing playback 15 - Browsing for future reference. Removing the front panel 6 - Adjusting the volume 11 Tuner 12 -...order (shuffle) 20 - Recalling equalizer curves 23 - Basic Operations 12 - Displaying text information of the remote control 7 - Basic Operations 18 - Head unit 8 - Operating this PIONEER product. Please read through this unit What's what 8 - Basic Operations 16 - Fine-adjusting equalizer curve 23...
... frequencies 12 - Tuning in strong signals 13 Built-in random order 15 - Selecting a repeat play range 15 - Playing tracks in CD Player 13 - Pausing playback 15 - Browsing for future reference. Removing the front panel 6 - Adjusting the volume 11 Tuner 12 -...order (shuffle) 20 - Recalling equalizer curves 23 - Basic Operations 12 - Displaying text information of the remote control 7 - Basic Operations 18 - Head unit 8 - Operating this PIONEER product. Please read through this unit What's what 8 - Basic Operations 16 - Fine-adjusting equalizer curve 23...
Owner's Manual
Page 3
... Initial Settings Adjusting initial settings 26 Setting the clock 26 Switching the auxiliary setting 26 Setting the rear output and subwoofer controller 26 Switching the ever scroll 27 Activating the BT AUDIO source 27 Entering PIN code for Bluetooth wireless connection 27 Displaying ...off 29 Switching the display indication and button illumination 29 Using the external unit 30 - Function and operation 31 - Introduction to XM Satellite Radio 39 - Listening to advanced operations 34 - AUX1 source: 29 - Advanced operations 30 Available accessories Bluetooth Audio 31 - Setting up for...
... Initial Settings Adjusting initial settings 26 Setting the clock 26 Switching the auxiliary setting 26 Setting the rear output and subwoofer controller 26 Switching the ever scroll 27 Activating the BT AUDIO source 27 Entering PIN code for Bluetooth wireless connection 27 Displaying ...off 29 Switching the display indication and button illumination 29 Using the external unit 30 - Function and operation 31 - Introduction to XM Satellite Radio 39 - Listening to advanced operations 34 - AUX1 source: 29 - Advanced operations 30 Available accessories Bluetooth Audio 31 - Setting up for...
Owner's Manual
Page 5
...convenience, be reprogrammed. Use in other reproductive harm. Wash hands after handling. Electrical shock could result from outside the vehicle. ! MP3 ! CD/CD-R/CD-RW ! Also, damage to this product or cords associated with accessories sold with a wide variety of file formats and media/storage devices....to cause cancer and birth defects or other areas may invalidate the user's right to operate the equipment. CAUTION: USE OF CONTROL OR ADJUSTMENT OR PERFORMANCE OF PROCEDURES OTHER THAN THOSE SPECIFIED HEREIN MAY RESULT IN HAZARDOUS RADIATION EXPOSURE. If the battery is ...
...convenience, be reprogrammed. Use in other reproductive harm. Wash hands after handling. Electrical shock could result from outside the vehicle. ! MP3 ! CD/CD-R/CD-RW ! Also, damage to this product or cords associated with accessories sold with a wide variety of file formats and media/storage devices....to cause cancer and birth defects or other areas may invalidate the user's right to operate the equipment. CAUTION: USE OF CONTROL OR ADJUSTMENT OR PERFORMANCE OF PROCEDURES OTHER THAN THOSE SPECIFIED HEREIN MAY RESULT IN HAZARDOUS RADIATION EXPOSURE. If the battery is ...
Owner's Manual
Page 7
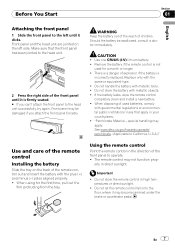
... Front panel and the head unit are jointed on the back of children. Use one CR2025 (3 V) lithium battery. ! Remove the battery if the remote control is not used batteries, comply with governmental regulations or environmental public institutions' rules that the front panel has been jointed to the head unit. 2 Press...of used for the first time, pull out the film protruding from the tray. WARNING Keep the battery out of the reach of the remote control out and insert the battery with metallic tools. ! Should the battery be damaged if you can't attach the front panel to the head ...
... Front panel and the head unit are jointed on the back of children. Use one CR2025 (3 V) lithium battery. ! Remove the battery if the remote control is not used batteries, comply with governmental regulations or environmental public institutions' rules that the front panel has been jointed to the head unit. 2 Press...of used for the first time, pull out the film protruding from the tray. WARNING Keep the battery out of the reach of the remote control out and insert the battery with metallic tools. ! Should the battery be damaged if you can't attach the front panel to the head ...
Owner's Manual
Page 8
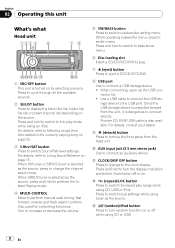
...b CLOCK/DISP OFF button Press to perform manual seek tuning, fast forward, reverse and track search controls. When SIRIUS tuner is selected as the source. Also used for controlling functions. Pioneer CD-U50E USB cable is turned on . Press and hold to perform the Instant Replay mode. 4 ...MULTI-CONTROL Move to change the channel select mode. c (repeat)/LOC button Press to Using Sound Retriever ...
...b CLOCK/DISP OFF button Press to perform manual seek tuning, fast forward, reverse and track search controls. When SIRIUS tuner is selected as the source. Also used for controlling functions. Pioneer CD-U50E USB cable is turned on . Press and hold to perform the Instant Replay mode. 4 ...MULTI-CONTROL Move to change the channel select mode. c (repeat)/LOC button Press to Using Sound Retriever ...
Owner's Manual
Page 9
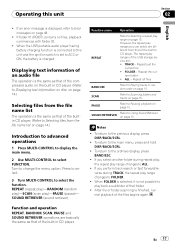
... DISP/BACK/SCRL button Press to select functions. Press to return to the ordinary display when operating the menu. Also used for controlling functions. While in CD player, USB storage device, iPod Elapsed playback time and literal information are displayed. ! Built-in the operating menu, press to ... Press to scroll through the text information. En 9 m LIST/ENTER button Press to shuffle all tracks. Press and hold to switch the control mode while using an iPod, press to display the disc title list, track title list, folder list, file list or preset channel list depending...
... DISP/BACK/SCRL button Press to select functions. Press to return to the ordinary display when operating the menu. Also used for controlling functions. While in CD player, USB storage device, iPod Elapsed playback time and literal information are displayed. ! Built-in the operating menu, press to ... Press to scroll through the text information. En 9 m LIST/ENTER button Press to shuffle all tracks. Press and hold to switch the control mode while using an iPod, press to display the disc title list, track title list, folder list, file list or preset channel list depending...

Owner's Manual
Page 10
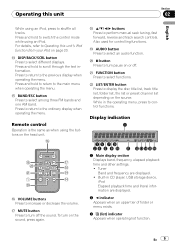
..., refer to Using Sound Retriever on page 15. When random function is on, only is on. g indicator Appears when CONTROL (control mode) is being selected. For details, refer to Operating this unit 4 d indicator Appears when a lower tier of folder or menu exists. 5 (artist) indicator Appears when ...
..., refer to Using Sound Retriever on page 15. When random function is on, only is on. g indicator Appears when CONTROL (control mode) is being selected. For details, refer to Operating this unit 4 d indicator Appears when a lower tier of folder or menu exists. 5 (artist) indicator Appears when ...
Owner's Manual
Page 11
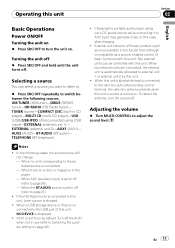
... this unit. Adjusting the volume % Turn MULTI-CONTROL to page 27). ! Turning the unit off % Press SRC/OFF and hold until the unit turns off . XM TUNER (XM tuner)-SIRIUS (SIRIUS tuner)-HD RADIO (HD Radio tuner)- EXTERNAL (external unit 2)-AUX1 (AUX1)- AUX2 (AUX2)-BT AUDIO (BT audio)- In the...this unit, NO DEVICE is set to a Pioneer product (such as ones available in the future) that, although incompatible as a source, enables control of basic functions with this unit's source is set to off the AUX1 when not in CD player)-MULTI CD (multi-CD player)-USB (USB)/USB-IPOD (iPod connected...
... this unit. Adjusting the volume % Turn MULTI-CONTROL to page 27). ! Turning the unit off % Press SRC/OFF and hold until the unit turns off . XM TUNER (XM tuner)-SIRIUS (SIRIUS tuner)-HD RADIO (HD Radio tuner)- EXTERNAL (external unit 2)-AUX1 (AUX1)- AUX2 (AUX2)-BT AUDIO (BT audio)- In the...this unit, NO DEVICE is set to a Pioneer product (such as ones available in the future) that, although incompatible as a source, enables control of basic functions with this unit's source is set to off the AUX1 when not in CD player)-MULTI CD (multi-CD player)-USB (USB)/USB-IPOD (iPod connected...
Owner's Manual
Page 12
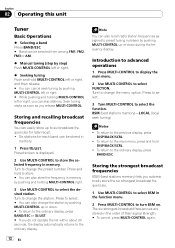
...in the order of their signal strength. # To cancel, press MULTI-CONTROL again. 12 En Press and hold to store. # You can also recall radio station frequencies assigned to preset tuning numbers by pushing MULTI-CONTROL up or down . # To return to the ordinary display, press BAND...seconds, the display automatically returns to the ordinary display. Storing the strongest broadcast frequencies BSM (best stations memory) lets you release MULTI-CONTROL. The six strongest broadcast frequencies are stored in memory. Six stations for later recall. ! Note You can also store the frequency ...
...in the order of their signal strength. # To cancel, press MULTI-CONTROL again. 12 En Press and hold to store. # You can also recall radio station frequencies assigned to preset tuning numbers by pushing MULTI-CONTROL up or down . # To return to the ordinary display, press BAND...seconds, the display automatically returns to the ordinary display. Storing the strongest broadcast frequencies BSM (best stations memory) lets you release MULTI-CONTROL. The six strongest broadcast frequencies are stored in memory. Six stations for later recall. ! Note You can also store the frequency ...
Owner's Manual
Page 13
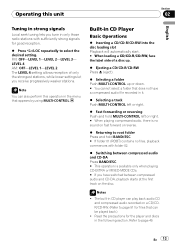
... Refer to page 49. LEVEL 4 AM: OFF-LEVEL 1-LEVEL 2 The LEVEL 4 setting allows reception of a disc up. % Ejecting a CD/CD-R/CD-RW Press h (eject). % Selecting a folder Push MULTI-CONTROL up or down. # You cannot select a folder that does not have a compressed audio file recorded in it. % Selecting a track Push MULTI...of only the strongest stations, while lower settings let you tune in only those radio stations with folder 02. % Switching between compressed audio and CD-DA, playback starts at the first track on a CD/CDR/CD-RW. (Refer to page 51 for the player and discs in the following ...
... Refer to page 49. LEVEL 4 AM: OFF-LEVEL 1-LEVEL 2 The LEVEL 4 setting allows reception of a disc up. % Ejecting a CD/CD-R/CD-RW Press h (eject). % Selecting a folder Push MULTI-CONTROL up or down. # You cannot select a folder that does not have a compressed audio file recorded in it. % Selecting a track Push MULTI...of only the strongest stations, while lower settings let you tune in only those radio stations with folder 02. % Switching between compressed audio and CD-DA, playback starts at the first track on a CD/CDR/CD-RW. (Refer to page 51 for the player and discs in the following ...
Owner's Manual
Page 14
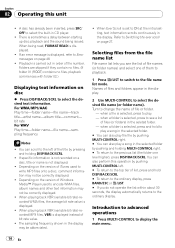
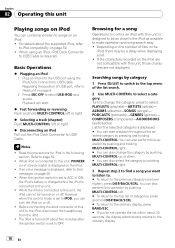
...top tier of list, press and hold to play a song in order of file number. The sampling frequency shown in CD player. ! Introduction to advanced operations 1 Press MULTI-CONTROL to select the built-in the display may not be abbreviated. ! Selecting files from the file name list File name ... Player used to write MP3 files onto a disc, comment information may be correctly displayed. ! Section 02 Operating this operation by pressing and holding MULTI-CONTROL right. # To return to the previous list (the folder one of them to playback. 1 Press /LIST to switch to the file name list ...
...top tier of list, press and hold to play a song in order of file number. The sampling frequency shown in CD player. ! Introduction to advanced operations 1 Press MULTI-CONTROL to select the built-in the display may not be abbreviated. ! Selecting files from the file name list File name ... Player used to write MP3 files onto a disc, comment information may be correctly displayed. ! Section 02 Operating this operation by pressing and holding MULTI-CONTROL right. # To return to the previous list (the folder one of them to playback. 1 Press /LIST to switch to the file name list ...
Owner's Manual
Page 15
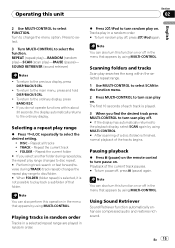
... range to disc/folder. # When FOLDER (folder repeat) is selected, it is not possible to play off in the menu that appears by using MULTI-CONTROL. # After scanning of a disc (folder) is finished, normal playback of the current track pauses. # To turn this function on or off . # If...has automatically returned to the main menu, press and hold DISP/BACK/SCRL. ! Repeat the current folder # If you find the desired track press MULTI-CONTROL to turn random play range % Press /LOC repeatedly to turn this function on or off , press e (pause) again. Playback of the tracks begins....
... range to disc/folder. # When FOLDER (folder repeat) is selected, it is not possible to play off in the menu that appears by using MULTI-CONTROL. # After scanning of a disc (folder) is finished, normal playback of the current track pauses. # To turn this function on or off . # If...has automatically returned to the main menu, press and hold DISP/BACK/SCRL. ! Repeat the current folder # If you find the desired track press MULTI-CONTROL to turn random play range % Press /LOC repeatedly to turn this function on or off , press e (pause) again. Playback of the tracks begins....

Owner's Manual
Page 16
...Notes ! Refer to select USB as the "USB storage device." OFF (off)-1-2 # 2 is dangerous to connect directly. % Selecting a folder Push MULTI-CONTROL up or down. % Fast forwarding or reversing Push and hold BAND/ESC. % Unplugging a USB storage device Pull out the USB storage device. Regarding the... setting. For details about compatibility, refer to the USB port. Section 02 Operating this operation in the menu that appears by using MULTI-CONTROL. Note You can disconnect the USB storage device anytime you want to finish listening to as a source. ditional Information. ! In the ...
...Notes ! Refer to select USB as the "USB storage device." OFF (off)-1-2 # 2 is dangerous to connect directly. % Selecting a folder Push MULTI-CONTROL up or down. % Fast forwarding or reversing Push and hold BAND/ESC. % Unplugging a USB storage device Pull out the USB storage device. Regarding the... setting. For details about compatibility, refer to the USB port. Section 02 Operating this operation in the menu that appears by using MULTI-CONTROL. Note You can disconnect the USB storage device anytime you want to finish listening to as a source. ditional Information. ! In the ...
Owner's Manual
Page 17
... RETRIEVER (sound retriever) Function and operation REPEAT, RANDOM, SCAN, PAUSE and SOUND RETRIEVER operations are basically the same as that of the builtin CD player. (Refer to Selecting files from that of the USB storage device are different from the file name list on page 15. Repeat the ...is displayed, refer to Error messages on page 15. However, the repeat play ranges you can select are : ! Press to select. 3 Turn MULTI-CONTROL to change the menu option. ALL - SCAN Refer to Scanning folders and tracks on page 15. To return to the previous display, press DISP/BACK...
... RETRIEVER (sound retriever) Function and operation REPEAT, RANDOM, SCAN, PAUSE and SOUND RETRIEVER operations are basically the same as that of the builtin CD player. (Refer to Selecting files from that of the USB storage device are different from the file name list on page 15. Repeat the ...is displayed, refer to Error messages on page 15. However, the repeat play ranges you can select are : ! Press to select. 3 Turn MULTI-CONTROL to change the menu option. ALL - SCAN Refer to Scanning folders and tracks on page 15. To return to the previous display, press DISP/BACK...
Owner's Manual
Page 18
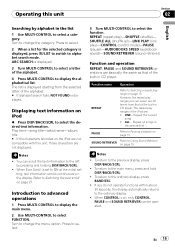
...characters are not displayed. PODCASTS (podcasts)-GENRES (genres)- Turn to change the category by pushing MULTI-CONTROL up or down. # You can also select the category by category 1 Press /LIST to switch ... the iPod is set to IPOD, you can turn the iPod on or off . ! However when the control mode is connected to this unit, the iPod cannot be as close to the iPod as a source. Refer... to select. While iPod is connected to this unit, PIONEER (or (check mark)) is required. Basic Operations % Plugging an iPod 1 Plug an iPod into the USB port...
...characters are not displayed. PODCASTS (podcasts)-GENRES (genres)- Turn to change the category by pushing MULTI-CONTROL up or down. # You can also select the category by category 1 Press /LIST to switch ... the iPod is set to IPOD, you can turn the iPod on or off . ! However when the control mode is connected to this unit, the iPod cannot be as close to the iPod as a source. Refer... to select. While iPod is connected to this unit, PIONEER (or (check mark)) is required. Basic Operations % Plugging an iPod 1 Plug an iPod into the USB port...
Owner's Manual
Page 19
...selected category is displayed. The list is displayed starting from that of the built-in CD player. Notes ! Press to select. 3 Turn MULTI-CONTROL to the main menu, press and hold DISP/BACK/SCRL. ! ONE - SOUND ... display the alphabetical list. SHUFFLE ALL (shuffle all songs in the display. The repeat play )-CONTROL (control mode)-PAUSE (pause)-AUDIOBOOKS SPEED (audiobook speed)-SOUND RETRIEVER (sound retriever) Function and operation REPEAT,...of the built-in the list 1 Use MULTI-CONTROL to the left by alphabet in CD player. Turn to the ordinary display, press BAND/ESC. !
...selected category is displayed. The list is displayed starting from that of the built-in CD player. Notes ! Press to select. 3 Turn MULTI-CONTROL to the main menu, press and hold DISP/BACK/SCRL. ! ONE - SOUND ... display the alphabetical list. SHUFFLE ALL (shuffle all songs in the display. The repeat play )-CONTROL (control mode)-PAUSE (pause)-AUDIOBOOKS SPEED (audiobook speed)-SOUND RETRIEVER (sound retriever) Function and operation REPEAT,...of the built-in the list 1 Use MULTI-CONTROL to the left by alphabet in CD player. Turn to the ordinary display, press BAND/ESC. !

Owner's Manual
Page 20
... and hold /LIST to switch to select an album or song from a randomly selected album in random order. ! Each pressing and holding /iPod switches the control mode as follows: ! AUDIO - Turn to change the setting. ! ALBUMS - You can be a delay when displaying a list. 1 Press and hold to ... section. Note You can also turn shuffle all on. IPOD - Section 02 Operating this function on in the menu that appears by using MULTI-CONTROL. SONGS - Playing all songs in a random order (shuffle all) % Press /iPod to turn this unit Playing songs in a random order (shuffle) ...
... and hold /LIST to switch to select an album or song from a randomly selected album in random order. ! Each pressing and holding /iPod switches the control mode as follows: ! AUDIO - Turn to change the setting. ! ALBUMS - You can be a delay when displaying a list. 1 Press and hold to ... section. Note You can also turn shuffle all on. IPOD - Section 02 Operating this function on in the menu that appears by using MULTI-CONTROL. SONGS - Playing all songs in a random order (shuffle all) % Press /iPod to turn this unit Playing songs in a random order (shuffle) ...

Owner's Manual
Page 21
...Notes ! Operating this unit. Fast forward/reverse ! Pausing ! Playback in the menu that appears by using MULTI-CONTROL. ! Playback slower than normal speed 4 Press MULTI-CONTROL to determine the selection. # Even if the menu has been cancelled before determination, operation is set to IPOD...following functions are available from this unit 2 When you select IPOD, operate the connected iPod to select a song and play. # Switching the control mode to IPOD, operations are limited as follows: - FASTER - SLOWER - Volume ! You can be selected. - Section 02 En 21 English...
...Notes ! Operating this unit. Fast forward/reverse ! Pausing ! Playback in the menu that appears by using MULTI-CONTROL. ! Playback slower than normal speed 4 Press MULTI-CONTROL to determine the selection. # Even if the menu has been cancelled before determination, operation is set to IPOD...following functions are available from this unit 2 When you select IPOD, operate the connected iPod to select a song and play. # Switching the control mode to IPOD, operations are limited as follows: - FASTER - SLOWER - Volume ! You can be selected. - Section 02 En 21 English...
Owner's Manual
Page 22
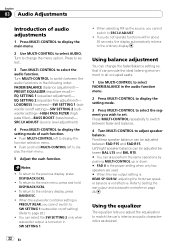
... # You can be adjusted between the audio functions in the following order. Press to select. 3 Turn MULTI-CONTROL to Setting the rear output and subwoofer controller on page 26. EQ SETTING 2 (equalizer fine adjustment)- Section 03 Audio Adjustments Introduction of each function. Front/...rear speaker balance can also perform the same operations by pushing MULTI-CONTROL up or down. # FAD 0 is the proper setting when only two speakers are used. # When the rear output setting is ...
... # You can be adjusted between the audio functions in the following order. Press to select. 3 Turn MULTI-CONTROL to Setting the rear output and subwoofer controller on page 26. EQ SETTING 2 (equalizer fine adjustment)- Section 03 Audio Adjustments Introduction of each function. Front/...rear speaker balance can also perform the same operations by pushing MULTI-CONTROL up or down. # FAD 0 is the proper setting when only two speakers are used. # When the rear output setting is ...
Owner's Manual
Page 23
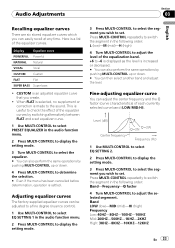
... adjust the selected segement. Level (dB) Center frequency Q=2N Q=2W Frequency (Hz) 1 Use MULTI-CONTROL to select EQ SETTING 2. 2 Press MULTI-CONTROL to display the setting mode. 3 Press MULTI-CONTROL to select the segment you create. ! This is useful to determine the selection. # Even if the... factory supplied equalizer curves can be adjusted to a fine degree (nuance control). 1 Use MULTI-CONTROL to select EQ SETTING 1 in the audio function menu. 2 Press MULTI-CONTROL to display the setting mode. 3 Turn MULTI-CONTROL to select the equalizer. # You can also perform the same operations ...
... adjust the selected segement. Level (dB) Center frequency Q=2N Q=2W Frequency (Hz) 1 Use MULTI-CONTROL to select EQ SETTING 2. 2 Press MULTI-CONTROL to display the setting mode. 3 Press MULTI-CONTROL to select the segment you create. ! This is useful to determine the selection. # Even if the... factory supplied equalizer curves can be adjusted to a fine degree (nuance control). 1 Use MULTI-CONTROL to select EQ SETTING 1 in the audio function menu. 2 Press MULTI-CONTROL to display the setting mode. 3 Turn MULTI-CONTROL to select the equalizer. # You can also perform the same operations ...

