Leaflet
Page 1
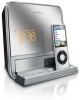
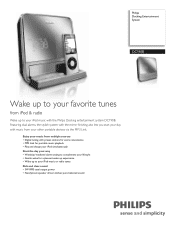
Philips Docking Entertainment System DC190B Wake up to your iPod music or radio tunes Rich and clear sound • 3W RMS total output power • Neodymium speaker drivers deliver pure balanced sound Enjoy your other portable devices via the MP3 Link. Featuring dual alarms, the stylish system with the mirror finishing also lets you start your day with music from your music from iPod & radio Wake up to your iPod music with preset stations for extra convenience •...
Philips Docking Entertainment System DC190B Wake up to your iPod music or radio tunes Rich and clear sound • 3W RMS total output power • Neodymium speaker drivers deliver pure balanced sound Enjoy your other portable devices via the MP3 Link. Featuring dual alarms, the stylish system with the mirror finishing also lets you start your day with music from your music from iPod & radio Wake up to your iPod music with preset stations for extra convenience •...
Leaflet
Page 2
... link connectivity allows direct playback of fiddling with modern day lifestyles in a voice coil, better bass response and a pure balanced sound quality. Docking Entertainment System Highlights DC190B/37 3W RMS This system has 3W RMS total output power. Designed with different alarm times every single night. Besides the benefit of electrical power delivered to iPod or radio Wake up or are rudely jolted awake. Use the remote control to the audio system...
... link connectivity allows direct playback of fiddling with modern day lifestyles in a voice coil, better bass response and a pure balanced sound quality. Docking Entertainment System Highlights DC190B/37 3W RMS This system has 3W RMS total output power. Designed with different alarm times every single night. Besides the benefit of electrical power delivered to iPod or radio Wake up or are rudely jolted awake. Use the remote control to the audio system...
Leaflet
Page 3
...8226; Tuner Bands: FM • Auto digital tuning • Station presets: 20 • Antenna: FM Antenna Audio Playback • Cradle playback mode: Charging iPod, Play and Pause, Next and Previous track Convenience • Clock/Version: Digital • Alarms: 24 hour alarm reset, Buzzer Alarm, Radio Alarm, Repeat alarm (snooze), Sleep timer Sound • Sound System: Stereo • Output power (RMS): 2x1.5W • Volume Control: Volume Control up/down Loudspeakers • Built-in speakers: 2 • Neodynium magnet system Connectivity • MP3-Link: 3.5mm stereo input Dimensions...
...8226; Tuner Bands: FM • Auto digital tuning • Station presets: 20 • Antenna: FM Antenna Audio Playback • Cradle playback mode: Charging iPod, Play and Pause, Next and Previous track Convenience • Clock/Version: Digital • Alarms: 24 hour alarm reset, Buzzer Alarm, Radio Alarm, Repeat alarm (snooze), Sleep timer Sound • Sound System: Stereo • Output power (RMS): 2x1.5W • Volume Control: Volume Control up/down Loudspeakers • Built-in speakers: 2 • Neodynium magnet system Connectivity • MP3-Link: 3.5mm stereo input Dimensions...
User manual
Page 5
... 6 Specifications 13 7 8 Troubleshooting 14 2 Your Docking Entertainment System 7 Introduction 7 What's in the box 7 Overview of the main unit 8 3 Get started 9 Connect power 9 Set clock 10 Turn on 10 Adjust volume 10 4 Play 10 Play from iPod 10 Play from an external device 11 5 Listen to radio 11 Tune to a radio station 11 Program radio stations automatically 11 Program radio stations manually 12 Select a preset radio station 12 6 Other features 12 Set the alarm timer 12 Set the sleep timer 13 Adjust display brightness 13 EN 5
... 6 Specifications 13 7 8 Troubleshooting 14 2 Your Docking Entertainment System 7 Introduction 7 What's in the box 7 Overview of the main unit 8 3 Get started 9 Connect power 9 Set clock 10 Turn on 10 Adjust volume 10 4 Play 10 Play from iPod 10 Play from an external device 11 5 Listen to radio 11 Tune to a radio station 11 Program radio stations automatically 11 Program radio stations manually 12 Select a preset radio station 12 6 Other features 12 Set the alarm timer 12 Set the sleep timer 13 Adjust display brightness 13 EN 5
User manual
Page 6
...used as the disconnect device, the disconnect device shall remain readily operable. n Refer all servicing to rain or moisture, does not operate normally, or has been dropped. 1 Important Safety Important Safety Instructions a Read these instructions. b Keep these instructions. Install in any sources of time. k Only use...be regulated due to disconnect the apparatus from the power. Disposal of this apparatus. • Never place this apparatus near any heat sources such as power-supply cord or plug is used , use attachments/accessories specified by the manufacturer or...
...used as the disconnect device, the disconnect device shall remain readily operable. n Refer all servicing to rain or moisture, does not operate normally, or has been dropped. 1 Important Safety Important Safety Instructions a Read these instructions. b Keep these instructions. Install in any sources of time. k Only use...be regulated due to disconnect the apparatus from the power. Disposal of this apparatus. • Never place this apparatus near any heat sources such as power-supply cord or plug is used , use attachments/accessories specified by the manufacturer or...
User manual
Page 7
... enjoy audio from the support that Philips offers, register your package: • Main unit • 1 x AC adaptor • 1 x MP3 link cable • User manual • Quick start guide EN 7 Introduction With this unit, you can be set as the alarm timer.You can set two alarm timers to Philips! The radio, iPod, or buzzer can be recycled and reused if disassembled by a specialized company. We have tried to make the...
... enjoy audio from the support that Philips offers, register your package: • Main unit • 1 x AC adaptor • 1 x MP3 link cable • User manual • Quick start guide EN 7 Introduction With this unit, you can be set as the alarm timer.You can set two alarm timers to Philips! The radio, iPod, or buzzer can be recycled and reused if disassembled by a specialized company. We have tried to make the...

User manual
Page 9
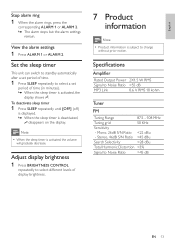
..., always pull the plug from the socket. e PRESET +/• Select a preset radio station. • Adjust time. j TUNING +/• Tune to the previous/next audio file. • Search within an audio file. g Dock compartment h • Start or pause iPod play. k TIME SET/AUTO SCAN • Set the clock. • Scan radio stations. a ALARM 1/ALARM 2 • Set the alarm timer. • View the alarm time. • Turn off the alarm tone. b REPEAT ALARM/BRIGHTNESS CONTROL • Repeat the alarm. • Adjust the display brightness. f Display panel • Show...
..., always pull the plug from the socket. e PRESET +/• Select a preset radio station. • Adjust time. j TUNING +/• Tune to the previous/next audio file. • Search within an audio file. g Dock compartment h • Start or pause iPod play. k TIME SET/AUTO SCAN • Set the clock. • Scan radio stations. a ALARM 1/ALARM 2 • Set the alarm timer. • View the alarm time. • Turn off the alarm tone. b REPEAT ALARM/BRIGHTNESS CONTROL • Repeat the alarm. • Adjust the display brightness. f Display panel • Show...
User manual
Page 10
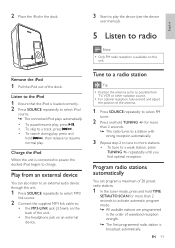
... volume. 4 Play Play from iPod You can enjoy audio from iPod through this unit. Compatible iPod Apple iPod models with a 30-pin dock connector: • iPod classic, iPod touch, iPod nano, iPod 5th generation (video), iPod with color display, iPod mini. Adjust volume 1 During play, press VOL +/- Switch to standby 1 Press again to switch the unit to blink. 2 Press TUNING +/- Set clock 1 In standby mode, press and hold TIME SET/AUTO SCAN for 2 seconds. » The hour digits begin to blink. 6 Press TUNING +/- Turn on the display panel. to the last selected source. 2 Connect...
... volume. 4 Play Play from iPod You can enjoy audio from iPod through this unit. Compatible iPod Apple iPod models with a 30-pin dock connector: • iPod classic, iPod touch, iPod nano, iPod 5th generation (video), iPod with color display, iPod mini. Adjust volume 1 During play, press VOL +/- Switch to standby 1 Press again to switch the unit to blink. 2 Press TUNING +/- Set clock 1 In standby mode, press and hold TIME SET/AUTO SCAN for 2 seconds. » The hour digits begin to blink. 6 Press TUNING +/- Turn on the display panel. to the last selected source. 2 Connect...
User manual
Page 11
... antenna. 1 Press SOURCE repeatedly to activate automatic program mode. » All available stations are programmed in the dock. 3 Start to resume normal play the device (see the device user manual). Program radio stations automatically You can also listen to an external audio device through this unit. Remove the iPod 1 Pull the iPod out of waveband reception strength. » The first programmed radio station is broadcast automatically. Charge the iPod When the unit is connected to power, the docked iPod...
... antenna. 1 Press SOURCE repeatedly to activate automatic program mode. » All available stations are programmed in the dock. 3 Start to resume normal play the device (see the device user manual). Program radio stations automatically You can also listen to an external audio device through this unit. Remove the iPod 1 Pull the iPod out of waveband reception strength. » The first programmed radio station is broadcast automatically. Charge the iPod When the unit is connected to power, the docked iPod...
User manual
Page 12
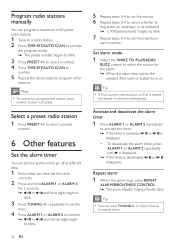
... the alarm timer, press ALARM 1 or ALARM 2 repeatedly until is displayed. » If the timer is selected automatically. Tip • If iPod source is selected but no iPod is loaded, the buzzer is deactivated, or disappears. Tip • You can press TUNING+/- Program radio stations manually You can program a maximum of 20 preset radio stations. 1 Tune to a radio station. 2 Press TIME SET/AUTO SCAN to activate the program mode. » The preset number begins to blink. 3 Press TUNING +/- repeatedly to set the...
... the alarm timer, press ALARM 1 or ALARM 2 repeatedly until is displayed. » If the timer is selected automatically. Tip • If iPod source is selected but no iPod is loaded, the buzzer is deactivated, or disappears. Tip • You can press TUNING+/- Program radio stations manually You can program a maximum of 20 preset radio stations. 1 Tune to a radio station. 2 Press TIME SET/AUTO SCAN to activate the program mode. » The preset number begins to blink. 3 Press TUNING +/- repeatedly to set the...
User manual
Page 13
... the alarm settings 1 Press ALARM 1 or ALARM 2. Specifications Amplifier Rated Output Power 2X1.5 W RMS Signal to select a set period of time. 1 Press SLEEP repeatedly to Noise Ratio >55 dB MP3 Link 0.6 V RMS 10 kohm Tuner FM Tuning Range 87.5 - 108 MHz Tuning grid 50 KHz Sensitivity - Set the sleep timer This unit can switch to standby automatically after a set period of display brightness. 7 Product information...
... the alarm settings 1 Press ALARM 1 or ALARM 2. Specifications Amplifier Rated Output Power 2X1.5 W RMS Signal to select a set period of time. 1 Press SLEEP repeatedly to Noise Ratio >55 dB MP3 Link 0.6 V RMS 10 kohm Tuner FM Tuning Range 87.5 - 108 MHz Tuning grid 50 KHz Sensitivity - Set the sleep timer This unit can switch to standby automatically after a set period of display brightness. 7 Product information...
User manual
Page 14
Model No.: AS090-065-AB130 Operation Power Brand name: Philips; General information AC power (power Input: 100-240V~, adaptor) 50/60Hz, 0.4A; Output: 6.5V 1.3A;
Model No.: AS090-065-AB130 Operation Power Brand name: Philips; General information AC power (power Input: 100-240V~, adaptor) 50/60Hz, 0.4A; Output: 6.5V 1.3A;
User manual
Page 15
BOX 671539, Marietta, GA. 30006-0026 Meet Philips at the Internet http://www.philips.com/welcome Printed in China DC190(B)_37_UM_V3.0 Philips Consumer Lifestyle A Division of Philips Electronics North America Corporation P.O.
BOX 671539, Marietta, GA. 30006-0026 Meet Philips at the Internet http://www.philips.com/welcome Printed in China DC190(B)_37_UM_V3.0 Philips Consumer Lifestyle A Division of Philips Electronics North America Corporation P.O.
Quick start guide
Page 1
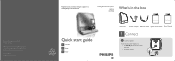
.... Printed in China DC190(B)_37_QSG_V3.0 Register your product and get support at www.philips.com/welcome Docking Entertainment System DC190 DC190B What's in the box Quick start guide 1 Connect 2 Setup 3 Enjoy Quick Start Guide User Manual Main unit Power adaptor MP3 link cable Quick Start Guide User Manual 1 Connect A Connect power 1 Connect the power adaptor to change without notice. Trademarks are subject to • the DC IN jack on the rear of Koninklijke Philips Electronics N.V. © Royal Philips Electronics N.V. 2009 All rights reserved. EN
.... Printed in China DC190(B)_37_QSG_V3.0 Register your product and get support at www.philips.com/welcome Docking Entertainment System DC190 DC190B What's in the box Quick start guide 1 Connect 2 Setup 3 Enjoy Quick Start Guide User Manual Main unit Power adaptor MP3 link cable Quick Start Guide User Manual 1 Connect A Connect power 1 Connect the power adaptor to change without notice. Trademarks are subject to • the DC IN jack on the rear of Koninklijke Philips Electronics N.V. © Royal Philips Electronics N.V. 2009 All rights reserved. EN
Quick start guide
Page 2
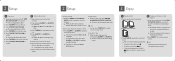
... alarm timer 1 Ensure that you have set the hour. 3 Press TIME SET/AUTO SCAN. » The minute digits begin to blink. 4 Press TUNING +/- Activate and deactivate the alarm timer 1 Press ALARM 1 or ALARM 2 repeatedly to select a preset number. to activate the timer. » If the timer is activated, or is displayed. • To deactivate the alarm timer, press ALARM 1 or ALARM 2 repeatedly until is displayed. » If the timer is broadcast automatically. 2 Press PRESET +/- 2 Setup A Set clock 1 In standby mode, press and hold TIME SET/AUTO...
... alarm timer 1 Ensure that you have set the hour. 3 Press TIME SET/AUTO SCAN. » The minute digits begin to blink. 4 Press TUNING +/- Activate and deactivate the alarm timer 1 Press ALARM 1 or ALARM 2 repeatedly to select a preset number. to activate the timer. » If the timer is activated, or is displayed. • To deactivate the alarm timer, press ALARM 1 or ALARM 2 repeatedly until is displayed. » If the timer is broadcast automatically. 2 Press PRESET +/- 2 Setup A Set clock 1 In standby mode, press and hold TIME SET/AUTO...


