User Manual
Page 5
...(within common industry standards) and is compliance with SAR for help. Model : 55PFL5706, 46PFL5706, 40PFL5706 Address : PO Box 430 Daleville, IN 47334-0430 U.S.A. Canadian notice Standard Television Receiving Apparatus, ...only be made to this device must be avoided. Cables Connections to this manual is subject to change products at any warranty, stated or implied. The ... DLNA®, the DLNA Logo and DLNA CERTIFIED® are proprietary trademarks of Koninklijke Philips Electronics N.V. or their respective owners. The material in its individual modules or procedures, ...
...(within common industry standards) and is compliance with SAR for help. Model : 55PFL5706, 46PFL5706, 40PFL5706 Address : PO Box 430 Daleville, IN 47334-0430 U.S.A. Canadian notice Standard Television Receiving Apparatus, ...only be made to this device must be avoided. Cables Connections to this manual is subject to change products at any warranty, stated or implied. The ... DLNA®, the DLNA Logo and DLNA CERTIFIED® are proprietary trademarks of Koninklijke Philips Electronics N.V. or their respective owners. The material in its individual modules or procedures, ...
User Manual
Page 9
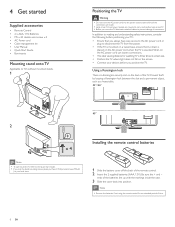
... Supplied accessories • Remote Control • 2 x AAA, 1.5V Batteries • M5 x 20 double sems screw x 4 • AC Power cord • Cable management tie • User Manual • Quick Start Guide • Box-inserts Mounting stand onto TV Applicable to TVs without mounted stands. 1 Positioning the TV Warning • Do not insert...
... Supplied accessories • Remote Control • 2 x AAA, 1.5V Batteries • M5 x 20 double sems screw x 4 • AC Power cord • Cable management tie • User Manual • Quick Start Guide • Box-inserts Mounting stand onto TV Applicable to TVs without mounted stands. 1 Positioning the TV Warning • Do not insert...
User Manual
Page 12
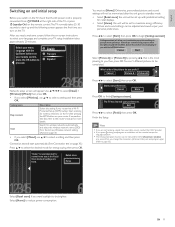
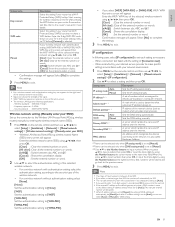
... press OK. Store your preferences. Use to select [Next] > [Wireless] / [Wired], then press OK. • If you select [Wireless], use Î/ï to the router's manual for normal home use Î/ï to select [Finish], then press OK. If connection test fails, refer to select a setting and then press OK. Cancel...
... press OK. Store your preferences. Use to select [Next] > [Wireless] / [Wired], then press OK. • If you select [Wireless], use Î/ï to the router's manual for normal home use Î/ï to select [Finish], then press OK. If connection test fails, refer to select a setting and then press OK. Cancel...
User Manual
Page 16
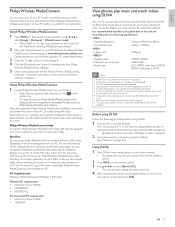
...Depending on your computer and network configuration, there will be in the file list. • For some files, playback is running Philips Wireless MediaConnect software. For smooth playback of your network condition. PC requirements Windows XP, Windows Vista, Windows 7 (PC only) Minimum PC requirements •... MediaConnect will not be skipped. • The quality of the playback picture or audio differs depending on the screen to the user manual of the DLNA certified device. 2 Press MENU on page 41.) • Broadband internet connection of your PC as a PC...
...Depending on your computer and network configuration, there will be in the file list. • For some files, playback is running Philips Wireless MediaConnect software. For smooth playback of your network condition. PC requirements Windows XP, Windows Vista, Windows 7 (PC only) Minimum PC requirements •... MediaConnect will not be skipped. • The quality of the playback picture or audio differs depending on the screen to the user manual of the DLNA certified device. 2 Press MENU on page 41.) • Broadband internet connection of your PC as a PC...
User Manual
Page 26
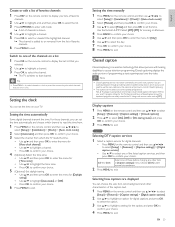
... confirm your choice. 4 Press MENU to exit. Tip • Press CH + / − to use the menu options on your TV. Setting the time manually 1 Press MENU on the remote control and then use to select [Setup] > [Features] > [Caption settings] > [Closed captions]. 2 Press Î/ï to select [... the time from. 1 Press MENU on the remote control and then use to select [Setup] > [Installation] > [Clock] > [Auto clock mode]. 2 Select [Manual], and then press OK to confirm your choice. 3 Press MENU to set top box. Not all TV programs and product commercials include closed...
... confirm your choice. 4 Press MENU to exit. Tip • Press CH + / − to use the menu options on your TV. Setting the time manually 1 Press MENU on the remote control and then use to select [Setup] > [Features] > [Caption settings] > [Closed captions]. 2 Press Î/ï to select [... the time from. 1 Press MENU on the remote control and then use to select [Setup] > [Installation] > [Clock] > [Auto clock mode]. 2 Select [Manual], and then press OK to confirm your choice. 3 Press MENU to set top box. Not all TV programs and product commercials include closed...
User Manual
Page 27
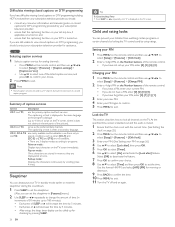
...;rm your choice. 2 Press MENU to select [Setup] > [Features] > [Child lock]. 2 Enter a 4-digit PIN on DTV programming, you should : • consult any consumer information and manuals / guides on closed captions for DTV programming provided by your subscription television provider; • ensure that the captioning function on your set-top box, if...
...;rm your choice. 2 Press MENU to select [Setup] > [Features] > [Child lock]. 2 Enter a 4-digit PIN on DTV programming, you should : • consult any consumer information and manuals / guides on closed captions for DTV programming provided by your subscription television provider; • ensure that the captioning function on your set-top box, if...
User Manual
Page 31
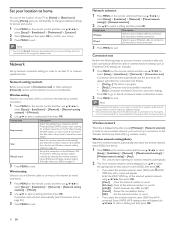
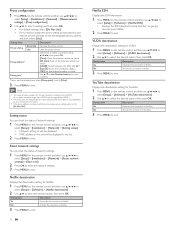
...flexibility to change predefined settings for wireless networks automatically and select the wireless network name (SSID) from the list. wireless router) manually by wired connection. 1 Press MENU on the remote control and then use to select [Setup] > [Installation] > [Network] > [Network setting...(SSID).see 'Wireless network setting (Auto)'on the remote control and then use to select [Setup] > [Installation] > [Network] > [Manual network settings] > [Network selection]. 2 Use Î/ï to select a setting and then press OK. Connection test Perform the following steps ...
...flexibility to change predefined settings for wireless networks automatically and select the wireless network name (SSID) from the list. wireless router) manually by wired connection. 1 Press MENU on the remote control and then use to select [Setup] > [Installation] > [Network] > [Network setting...(SSID).see 'Wireless network setting (Auto)'on the remote control and then use to select [Setup] > [Installation] > [Network] > [Manual network settings] > [Network selection]. 2 Use Î/ï to select a setting and then press OK. Connection test Perform the following steps ...
User Manual
Page 32
... confirmation screen. • The wireless LAN supports following cases, select [IP configuration] to set either [Auto] or [Manual] for more details. Note • For a wireless network with authentication setting, select the authentication setting, according to the security type of numbers...] to complete the settings. 3 Press MENU to exit. IP address *1, 3 Subnet mask *1, 3 Default gateway *1, 3 DNS setting mode Auto Manual A set to [Manual]. *3 Use Î/ï or the Number buttons to input numbers.When you press Î/ï to input numbers then press OK or input...
... confirmation screen. • The wireless LAN supports following cases, select [IP configuration] to set either [Auto] or [Manual] for more details. Note • For a wireless network with authentication setting, select the authentication setting, according to the security type of numbers...] to complete the settings. 3 Press MENU to exit. IP address *1, 3 Subnet mask *1, 3 Default gateway *1, 3 DNS setting mode Auto Manual A set to [Manual]. *3 Use Î/ï or the Number buttons to input numbers.When you press Î/ï to input numbers then press OK or input...
User Manual
Page 33
... exit. Netflix deactivation Displays the deactivation setting for YouTube. 1 Press MENU on the remote control and then use to select [Setup] > [Installation] > [Network] > [Manual network settings] > [Proxy configuration]. 2 Use Î/ï to select a setting and then press OK. • For default settings, select [Do Not Use]. •...
... exit. Netflix deactivation Displays the deactivation setting for YouTube. 1 Press MENU on the remote control and then use to select [Setup] > [Installation] > [Network] > [Manual network settings] > [Proxy configuration]. 2 Use Î/ï to select a setting and then press OK. • For default settings, select [Do Not Use]. •...

User Manual
Page 39
... terminal such as DVD, receiver, game console, etc.This connector is used with audio input. Always insert the USB flash memory to the user manual of connectors may be used with audio input.
... terminal such as DVD, receiver, game console, etc.This connector is used with audio input. Always insert the USB flash memory to the user manual of connectors may be used with audio input.
User Manual
Page 44
...during playback of the HDMI cable and then reinsert the cable. For some accessory devices have available your PC while Philips MediaConnect is running Philips Wireless Wireless MediaConnect is detected from the power socket outlet, wait 60 seconds and reconnect the AC power cord. ...to HDMI connections. ensure you can browse the catalog. 4 Click the description or model. 5 Under Product support, click "User manuals". the picture quality of the modem or router. EN 43 Español Français English Ensure that the AC power cord...
...during playback of the HDMI cable and then reinsert the cable. For some accessory devices have available your PC while Philips MediaConnect is running Philips Wireless Wireless MediaConnect is detected from the power socket outlet, wait 60 seconds and reconnect the AC power cord. ...to HDMI connections. ensure you can browse the catalog. 4 Click the description or model. 5 Under Product support, click "User manuals". the picture quality of the modem or router. EN 43 Español Français English Ensure that the AC power cord...
User Manual
Page 46
... Warranty applies only to new company manufactured products that can be sent if all requirements can only be provided. • Failure to operate per Owner's Manual. or a part that is new or which has been manufactured from an Authorized Dealer. Contact the Customer Care Center at no signature verification receipt can...
... Warranty applies only to new company manufactured products that can be sent if all requirements can only be provided. • Failure to operate per Owner's Manual. or a part that is new or which has been manufactured from an Authorized Dealer. Contact the Customer Care Center at no signature verification receipt can...
Quick Start Guide
Page 4
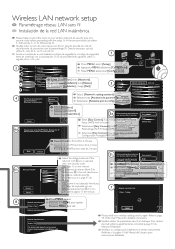
... Connect] si votreinryoouur troeuuternaetwuonrk, select Paramétrage Wi-Fi Protégé (WPS) avSceacn asnodnprebssoOuKt.on the manual. Cancel Scan Manual entry Back Connect 6b Select your router, press the WPS button. Sélectionnez le réseau désir...]. Ɣ Start now Seleccionar [Instalación], y luego [Red]. Ɣ 3 Language Channels Network setting assi.. Ɣ Start now Manual network sett.. Ɣ Network selection Software Ɣ Preferences Connection test Ɣ Start now Select [Network setting assistant]. Si le réseau...
... Connect] si votreinryoouur troeuuternaetwuonrk, select Paramétrage Wi-Fi Protégé (WPS) avSceacn asnodnprebssoOuKt.on the manual. Cancel Scan Manual entry Back Connect 6b Select your router, press the WPS button. Sélectionnez le réseau désir...]. Ɣ Start now Seleccionar [Instalación], y luego [Red]. Ɣ 3 Language Channels Network setting assi.. Ɣ Start now Manual network sett.. Ɣ Network selection Software Ɣ Preferences Connection test Ɣ Start now Select [Network setting assistant]. Si le réseau...
Quick Start Guide
Page 10
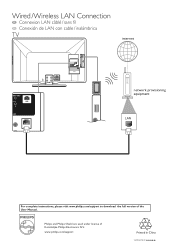
Philips and Philips Shield are used under license of the User Manual. Wired /Wireless LAN Connection FR Connexion LAN câblé / sans fil ES Conexión de LAN con cable / inalámbrica TV internet network provisioning equipment LAN For complete instructions, please visit www.philips.com/support to download the full version of Koninklijke Philips Electronics N.V. www.philips.com/support Printed in China 1EMN27839
Philips and Philips Shield are used under license of the User Manual. Wired /Wireless LAN Connection FR Connexion LAN câblé / sans fil ES Conexión de LAN con cable / inalámbrica TV internet network provisioning equipment LAN For complete instructions, please visit www.philips.com/support to download the full version of Koninklijke Philips Electronics N.V. www.philips.com/support Printed in China 1EMN27839


