
Owner's Manual
Page 3
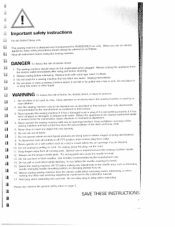
.... U 6 7. L 8 9 To disconnect turn Never operate on a all controls to whip when rewinding. around the sewing machine needle 1 2. 1 3. 14 15. 16 Always use bent or blunt needles Use needles recommended by the nianufacturer only. ... States only Li Taphpislisaenwcein, gbamsiacchsainfeetyispdreecsaiguntieodnsansdhomuladnualfwacatyusrebde for a sewing machine that has fallen into water Unplug place or stoie a sewing machine where it to the sewing machine of[("O'> changing needle, threading when making unplug sewing any adjustments in bobbin, or changing presser ...
.... U 6 7. L 8 9 To disconnect turn Never operate on a all controls to whip when rewinding. around the sewing machine needle 1 2. 1 3. 14 15. 16 Always use bent or blunt needles Use needles recommended by the nianufacturer only. ... States only Li Taphpislisaenwcein, gbamsiacchsainfeetyispdreecsaiguntieodnsansdhomuladnualfwacatyusrebde for a sewing machine that has fallen into water Unplug place or stoie a sewing machine where it to the sewing machine of[("O'> changing needle, threading when making unplug sewing any adjustments in bobbin, or changing presser ...
Owner's Manual
Page 5
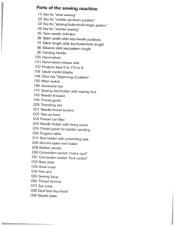
Parts of the sewing machine (1) Key for "slow sewing" (2) Key for "needle up/down position" (3) Key for "tacking/buttonhole/single pattern" (4) Key for "reverse sewing" (5) Twin needle indicator (6) Stitch width slide key/needle positions (7) Stitch length slide key/buttonhole length (8) Balance slide key/pattern ...0 to 7/0 to 9 (13) Liquid crystal display (14) Clear key "beginning of pattern" (15) Main switch (16) Accessory box (17) Sewing foot holder with sewing foot (18) Needle threader (19) Thread guide (20) Threading slot (21) Needle thread tension (22) Takeup lever (23) Presser bar lifter ...
Parts of the sewing machine (1) Key for "slow sewing" (2) Key for "needle up/down position" (3) Key for "tacking/buttonhole/single pattern" (4) Key for "reverse sewing" (5) Twin needle indicator (6) Stitch width slide key/needle positions (7) Stitch length slide key/buttonhole length (8) Balance slide key/pattern ...0 to 7/0 to 9 (13) Liquid crystal display (14) Clear key "beginning of pattern" (15) Main switch (16) Accessory box (17) Sewing foot holder with sewing foot (18) Needle threader (19) Thread guide (20) Threading slot (21) Needle thread tension (22) Takeup lever (23) Presser bar lifter ...
Owner's Manual
Page 6
... be adjusted by its function is . with condensation. 8 Do not pull the mains plug out of fluff To remove any stubborn dirt, use only original PFAFF parts. If this appliance is used on the specification plate. 6. Ambient temperature 1 0 C to 40 C Humidity 20% to the indications on a free ..., heat-producing objects, corrosive chemicals or liquids. it is free of the socket by a Ptaff mechanic. 5 The machine must only be put into operation according to 80% This sewing machine is not subjected to use a soft cloth with regard to DIN 57 700, Section 28 or IEC 335, Section 28...
... be adjusted by its function is . with condensation. 8 Do not pull the mains plug out of fluff To remove any stubborn dirt, use only original PFAFF parts. If this appliance is used on the specification plate. 6. Ambient temperature 1 0 C to 40 C Humidity 20% to the indications on a free ..., heat-producing objects, corrosive chemicals or liquids. it is free of the socket by a Ptaff mechanic. 5 The machine must only be put into operation according to 80% This sewing machine is not subjected to use a soft cloth with regard to DIN 57 700, Section 28 or IEC 335, Section 28...
Owner's Manual
Page 7
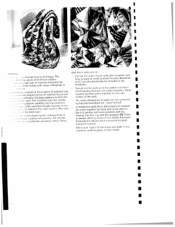
... hours of them. After all, this instruction book is no problem! If you have bought a high-quality product that is just as uncomplicated as your PFAFF sewing machine. Modern, uncomplicated - Your new sewing machine can take time enough to study the instruction book, nothing can do, and to learn all the things the...
... hours of them. After all, this instruction book is no problem! If you have bought a high-quality product that is just as uncomplicated as your PFAFF sewing machine. Modern, uncomplicated - Your new sewing machine can take time enough to study the instruction book, nothing can do, and to learn all the things the...
Owner's Manual
Page 9
... Straight stitch Stretch buttonhole ... Stretch triple zigzag stitch . Needie pcsitions Needle thredd tension a Needle threader Needle up/down position a Non elastic stitches Oiling . a Threading the sewing machine Top feed Topstitching a Trouble shooting Twin needle Twin needle indicator I Utility anrl fancy stitches Utility stitch table a Winding from a second reel holder Zigzag stitch I •...
... Straight stitch Stretch buttonhole ... Stretch triple zigzag stitch . Needie pcsitions Needle thredd tension a Needle threader Needle up/down position a Non elastic stitches Oiling . a Threading the sewing machine Top feed Topstitching a Trouble shooting Twin needle Twin needle indicator I Utility anrl fancy stitches Utility stitch table a Winding from a second reel holder Zigzag stitch I •...
Owner's Manual
Page 15
Operating the sewing machine Tedmb& secdon Pages 11 to29
Operating the sewing machine Tedmb& secdon Pages 11 to29
Owner's Manual
Page 18
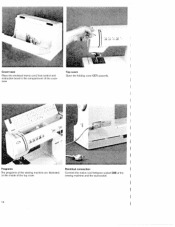
Electrical connection Connect the mains cord between socket (30) of the top cover. I Programs rhe programs of the sewing machine are illustrated n the inside of the sewing machine and the wall socket Cover-case Place the enclosed mains cord, foot control and instruction book in the compartment of the covercase. Top cover Open the folding cover (37) upwards.
Electrical connection Connect the mains cord between socket (30) of the top cover. I Programs rhe programs of the sewing machine are illustrated n the inside of the sewing machine and the wall socket Cover-case Place the enclosed mains cord, foot control and instruction book in the compartment of the covercase. Top cover Open the folding cover (37) upwards.
Owner's Manual
Page 19
Main switch When the main switch (1 5) is regulated by pressing the pedal. The sewing speed is switched on, the sewing lamp lights up The sewing machine i now ready to use. Connecting the foot control Connect the plug of the foot control with the connec tion socket (31)of the sewing machine.
Main switch When the main switch (1 5) is regulated by pressing the pedal. The sewing speed is switched on, the sewing lamp lights up The sewing machine i now ready to use. Connecting the foot control Connect the plug of the foot control with the connec tion socket (31)of the sewing machine.
Owner's Manual
Page 20
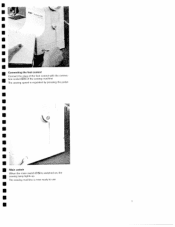
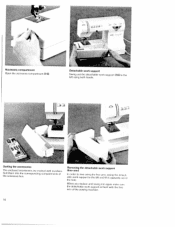
Removing the detachable work support (free-arm) In order to sew using the free-arm, swing the clutch able work support to the left and lift it in again make u1: the detachable work support (1 6) to ... you replace and swing it upwards out of the hole. A Accessory compartment Open the accessory compartment (16). Sort them into the corresponding compartments of the sewing machine Detachable work support Swing out the detachable work support is flush with numbers. Sorting the accessories The enclosed accessones are marked with the tree arm...
Removing the detachable work support (free-arm) In order to sew using the free-arm, swing the clutch able work support to the left and lift it in again make u1: the detachable work support (1 6) to ... you replace and swing it upwards out of the hole. A Accessory compartment Open the accessory compartment (16). Sort them into the corresponding compartments of the sewing machine Detachable work support Swing out the detachable work support is flush with numbers. Sorting the accessories The enclosed accessones are marked with the tree arm...
Owner's Manual
Page 35
Operating the sewing machine Program keys Function keys Control slide keys Pages 31 to 40
Operating the sewing machine Program keys Function keys Control slide keys Pages 31 to 40
Owner's Manual
Page 42
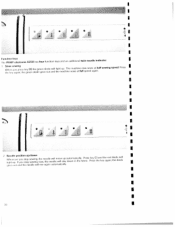
... needle will stay again automatically. sewing speed. diode will diode goes out and light up light tip. ;o,s uut If you pius key (1) h ky dgdlu; tIm green the green diode will the diode I I I I I I S I Needle position up/down in the fabric. automatically. I I I I .1 I F unction keys lh PFAFF electronic 6250 has four function keys and an additional...
... needle will stay again automatically. sewing speed. diode will diode goes out and light up light tip. ;o,s uut If you pius key (1) h ky dgdlu; tIm green the green diode will the diode I I I I I I S I Needle position up/down in the fabric. automatically. I I I I .1 I F unction keys lh PFAFF electronic 6250 has four function keys and an additional...
Owner's Manual
Page 44
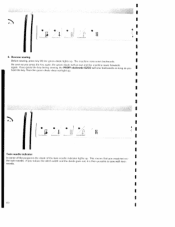
... will sew backwards as long as you hold the key. I I I I I I t. * v •/' I The machine now sews backwards. If you must not nsc the twin needle. I I I I ri n I 11a -,- 4 I I I 4. If you press the key during sewing, the PFAFF electronic 6250 will go out and the machine sews forwards ...again. This means that you reduce the stitch width and the diode goes out, it is then possible to sew with twin needle. the green diode lights up .
... will sew backwards as long as you hold the key. I I I I I I t. * v •/' I The machine now sews backwards. If you must not nsc the twin needle. I I I I ri n I 11a -,- 4 I I I 4. If you press the key during sewing, the PFAFF electronic 6250 will go out and the machine sews forwards ...again. This means that you reduce the stitch width and the diode goes out, it is then possible to sew with twin needle. the green diode lights up .
Owner's Manual
Page 48
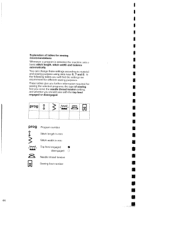
... I Stitch width in mm a Top feed engaged • disengaged 0 I Needle thread tension I E.1 Sewing foot number S a I I S 44 I I I I I S Explanation of sewing foot you need, the needle thread tension setting, I and whether you will find the settings we recommend for sewing recommendations Whenever a program is selected, the machine sets a I basic stitch length, stitch width and balance automatically.
... I Stitch width in mm a Top feed engaged • disengaged 0 I Needle thread tension I E.1 Sewing foot number S a I I S 44 I I I I I S Explanation of sewing foot you need, the needle thread tension setting, I and whether you will find the settings we recommend for sewing recommendations Whenever a program is selected, the machine sets a I basic stitch length, stitch width and balance automatically.

Owner's Manual
Page 49
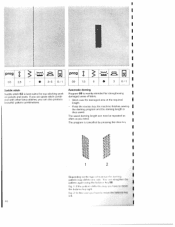
...can set up to 6 mm as you press the toot control the machine will only make sure the needle is at its highest point. Lower the bottom feed and disengage the top - Place the fabric under the sewing loot Sew one stitch. TIP: To prevent the material plies from shifting, insert ... amount - When you need to finish the work. LLzi L 1 L Straight stitch Program 00 is a straight stitch with slide key (6). top-stitching a collar or sewing in a zip fastener. You can be done easier by - To change its position, always make one stitch, then pull the fabric to the rear by...
...can set up to 6 mm as you press the toot control the machine will only make sure the needle is at its highest point. Lower the bottom feed and disengage the top - Place the fabric under the sewing loot Sew one stitch. TIP: To prevent the material plies from shifting, insert ... amount - When you need to finish the work. LLzi L 1 L Straight stitch Program 00 is a straight stitch with slide key (6). top-stitching a collar or sewing in a zip fastener. You can be done easier by - To change its position, always make one stitch, then pull the fabric to the rear by...
Owner's Manual
Page 52
...; The program is mainly intended for top stitching work an jackets and coats. I J_ 03 /1 Saddle stitch Saddle stitch 03 is thus saved. the machine finishes sewing the darning program and the darning length is best suited for strengthening I often as you can now he repeated as I damaged areas of fabric. prog...
...; The program is mainly intended for top stitching work an jackets and coats. I J_ 03 /1 Saddle stitch Saddle stitch 03 is thus saved. the machine finishes sewing the darning program and the darning length is best suited for strengthening I often as you can now he repeated as I damaged areas of fabric. prog...
Owner's Manual
Page 53
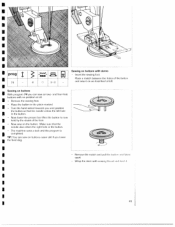
The machine sews a tack and the program is now - tint ,ttl oaf lt I it on as described at all. Place the button in the button. - Make sure that the needle enters the left hole in the button. TIP: You can sew on two and four-hole buttons with no problem at left Sewing on buttons... With program 74 you can sew on buttons easier still if you and position the button so that the - Remove the match...
The machine sews a tack and the program is now - tint ,ttl oaf lt I it on as described at all. Place the button in the button. - Make sure that the needle enters the left hole in the button. TIP: You can sew on two and four-hole buttons with no problem at left Sewing on buttons... With program 74 you can sew on buttons easier still if you and position the button so that the - Remove the match...
Owner's Manual
Page 93
... and more shape and stability. It is recommended to its simple production and exquisite appearance, linen embroidery is I easy to make the embroidery more stable, sew around I work with a dense zigzag stitch. I in popularity. and table linen production. Due to use tear-away stabilizer - Knot the threads on fabric backing or... I $ Transfer your piece of the fabric. Linen embroidery Linen embroidering is dissolve the stabilizer I Embroider the contours with much more variants are created with your sewing machine.
... and more shape and stability. It is recommended to its simple production and exquisite appearance, linen embroidery is I easy to make the embroidery more stable, sew around I work with a dense zigzag stitch. I in popularity. and table linen production. Due to use tear-away stabilizer - Knot the threads on fabric backing or... I $ Transfer your piece of the fabric. Linen embroidery Linen embroidering is dissolve the stabilizer I Embroider the contours with much more variants are created with your sewing machine.
Owner's Manual
Page 94
... I I I I l.iy; A seam allowance of the quilt. These squares are joined ntinually changing patterns to ip but it ii iihtional sewing technique. never ironedf if the quilt that you - The double it particular assistance when doing In traditional quilts these three layers of Amencan settlers ...about 3 rum beside the seam. There I . I I I I I I I I I I t )i iil it is quicker and more practical with the sewing machine e.g. have bought or made yourself. This is tacked onto the middle small squares that usually consists of oi le of I oust be included in the...
... I I I I l.iy; A seam allowance of the quilt. These squares are joined ntinually changing patterns to ip but it ii iihtional sewing technique. never ironedf if the quilt that you - The double it particular assistance when doing In traditional quilts these three layers of Amencan settlers ...about 3 rum beside the seam. There I . I I I I I I I I I I t )i iil it is quicker and more practical with the sewing machine e.g. have bought or made yourself. This is tacked onto the middle small squares that usually consists of oi le of I oust be included in the...

Owner's Manual
Page 105
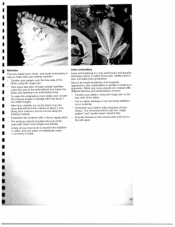
... out and pull the paper off. When you work more easily. Also make sure the I th outer edge so that any letters drawn in the sewing machine. - P. turned over et P the edge. : 5o Appliqué foot aucaAbpannepnpdadpuleilmtprqiisqafuaiuutdkétléeeesfrfoanfaaonosrrpcteyyetbohrqfeueeuefcicfczcaetika,ugclnsdytzeaeogmBnbiysttaseaheduliayanessminsavat,gnaitdrscdipahiaeftelifcwodeinraaesslynescgat uampmtlooraorwutedeti.urtohicaYneltoshtuahee - Pull the two fabric ph...
... out and pull the paper off. When you work more easily. Also make sure the I th outer edge so that any letters drawn in the sewing machine. - P. turned over et P the edge. : 5o Appliqué foot aucaAbpannepnpdadpuleilmtprqiisqafuaiuutdkétléeeesfrfoanfaaonosrrpcteyyetbohrqfeueeuefcicfczcaetika,ugclnsdytzeaeogmBnbiysttaseaheduliayanessminsavat,gnaitdrscdipahiaeftelifcwodeinraaesslynescgat uampmtlooraorwutedeti.urtohicaYneltoshtuahee - Pull the two fabric ph...
Owner's Manual
Page 117
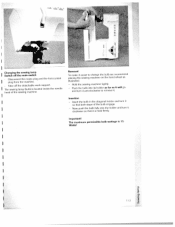
... holder and turn it anti-clockwise to change the bulb we recommend placing the sewing machine on the hand wheel as it - Important! clockwise so that both stops of the sewing machine. The maximum permissible bulb wattage is 1 5 Wafts! Hold the sewing machine tightly. - and turn it will go, - I Switch off the detachable work support. - so...
... holder and turn it anti-clockwise to change the bulb we recommend placing the sewing machine on the hand wheel as it - Important! clockwise so that both stops of the sewing machine. The maximum permissible bulb wattage is 1 5 Wafts! Hold the sewing machine tightly. - and turn it will go, - I Switch off the detachable work support. - so...


