
Operation Manual
Page 1
Digital Camera Operating Manual To ensure the best performance from your camera, please read the Operating Manual before using the camera.
Digital Camera Operating Manual To ensure the best performance from your camera, please read the Operating Manual before using the camera.

Operation Manual
Page 2
Please read this manual before using the camera in the Copyright Act, and care should be used outside the scope of use of the copyright as items for buying the PENTAX Optio 33WR Digital Camera. Images taken with the purpose of obtaining copyrights also cannot be taken here also. When used in... helping you to get the most out of all the camera's capabilities. All Rights Reserved. Although the level of ...
Please read this manual before using the camera in the Copyright Act, and care should be used outside the scope of use of the copyright as items for buying the PENTAX Optio 33WR Digital Camera. Images taken with the purpose of obtaining copyrights also cannot be taken here also. When used in... helping you to get the most out of all the camera's capabilities. All Rights Reserved. Although the level of ...

Operation Manual
Page 3
...becomes hot or begins to smoke. The battery could cause equipment failure, a fire, or electric shock. High voltage areas are present inside the camera, with the specified power and voltage. There is discharging as smoke or a strange odor, stop use . Caution • Do not short ...fire. • Do not charge any irregularities occur during use immediately, remove the batteries or the AC adapter, and contact your nearest PENTAX service center. There is dangerous. When using the exclusive AC adapter with the following symbols. Caution This symbol indicates that small children ...
...becomes hot or begins to smoke. The battery could cause equipment failure, a fire, or electric shock. High voltage areas are present inside the camera, with the specified power and voltage. There is discharging as smoke or a strange odor, stop use . Caution • Do not short ...fire. • Do not charge any irregularities occur during use immediately, remove the batteries or the AC adapter, and contact your nearest PENTAX service center. There is dangerous. When using the exclusive AC adapter with the following symbols. Caution This symbol indicates that small children ...

Operation Manual
Page 4
... high performance. • Sudden temperature changes will return to strong vibrations, shocks, or pressure. Use a cushion to protect the camera from vibrations of the camera. This is due to liquid crystal properties, and is not a fault. • Periodic inspections are recommended every one to two...for details on the SD Memory Card / MultiMediaCard. • Please do not press forcefully on the LCD monitor. PENTAX is not responsible for consequential damages (costs incurred for camera use is not removable. • Do not clean the product with garbage, mud, sand, dust, water, toxic ...
... high performance. • Sudden temperature changes will return to strong vibrations, shocks, or pressure. Use a cushion to protect the camera from vibrations of the camera. This is due to liquid crystal properties, and is not a fault. • Periodic inspections are recommended every one to two...for details on the SD Memory Card / MultiMediaCard. • Please do not press forcefully on the LCD monitor. PENTAX is not responsible for consequential damages (costs incurred for camera use is not removable. • Do not clean the product with garbage, mud, sand, dust, water, toxic ...
Operation Manual
Page 5
...cloth. • Do not place the camera directly on the sand at a time or exposed to extreme water pressure. • Do not clean the camera with fresh water for two to three minutes. • This camera should occur, please call the Pentax Customer Service Department. • The accessories... of the camera's water-resistant feature. Exposure to the packing or the areas ...
...cloth. • Do not place the camera directly on the sand at a time or exposed to extreme water pressure. • Do not clean the camera with fresh water for two to three minutes. • This camera should occur, please call the Pentax Customer Service Department. • The accessories... of the camera's water-resistant feature. Exposure to the packing or the areas ...

Operation Manual
Page 6
CONTENTS FOR YOUR SAFETY 1 Handling the Camera 2 Water-resistant Feature 3 CONTENTS 4 Contents of This Manual 7 Checking Package Contents 8 Names of Parts 9 Names of Operating Parts 10 Getting Started 11 Attaching the Strap 11 Powering the Camera 12 Installing the Batteries 12 Using the AC Adapter 15 Installing / Removing... the SD Memory Card / MultiMediaCard........16 Turning the Camera On and Off 19 Initial Settings 20 Setting the Display Language 20 Setting the Home Town 21 Setting the D.S.T. Mode ...
CONTENTS FOR YOUR SAFETY 1 Handling the Camera 2 Water-resistant Feature 3 CONTENTS 4 Contents of This Manual 7 Checking Package Contents 8 Names of Parts 9 Names of Operating Parts 10 Getting Started 11 Attaching the Strap 11 Powering the Camera 12 Installing the Batteries 12 Using the AC Adapter 15 Installing / Removing... the SD Memory Card / MultiMediaCard........16 Turning the Camera On and Off 19 Initial Settings 20 Setting the Display Language 20 Setting the Home Town 21 Setting the D.S.T. Mode ...

Operation Manual
Page 8
Editing/Settings 85 Editing Images 85 Changing the Image Size 85 Trimming Images 87 Editing Images with Digital Filters 88 Camera Settings 90 Formatting an SD Memory Card / MultiMediaCard 90 Changing the Sound Settings 91 Changing the Date Style and Date / Time 92 Setting World Time ...
Editing/Settings 85 Editing Images 85 Changing the Image Size 85 Trimming Images 87 Editing Images with Digital Filters 88 Camera Settings 90 Formatting an SD Memory Card / MultiMediaCard 90 Changing the Sound Settings 91 Changing the Date Style and Date / Time 92 Setting World Time ...

Operation Manual
Page 9
...useful to taking pictures. Use it and follow the instructions. 2 2 Quick Start Explains the simplest way to set up the functions of the camera. 7 Appendix Explains troubleshooting, and introduces accessories sold separately. The symbols used in a capture mode are explained below. e C F Shows precautions...and "Settings" chapters for more details. 4 Taking Pictures 5 Explains various ways to capture images, and how to take when operating the camera. Be sure to read it if you want to play back images. Icons for the current scene. 6 5 Playback/Deleting Explains how...
...useful to taking pictures. Use it and follow the instructions. 2 2 Quick Start Explains the simplest way to set up the functions of the camera. 7 Appendix Explains troubleshooting, and introduces accessories sold separately. The symbols used in a capture mode are explained below. e C F Shows precautions...and "Settings" chapters for more details. 4 Taking Pictures 5 Explains various ways to capture images, and how to take when operating the camera. Be sure to read it if you want to play back images. Icons for the current scene. 6 5 Playback/Deleting Explains how...
Operation Manual
Page 10
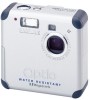
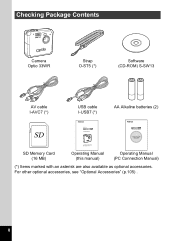
For other optional accessories, see "Optional Accessories" (p.105) . 8 Checking Package Contents Camera Optio 33WR Strap O-ST5 (*) Software (CD-ROM) S-SW13 AV cable I-AVC7 (*) USB cable I-USB7 (*) AA Alkaline batteries (2) (PC Connection Manual) Viewing Your Digital Camera Images On Your PC SD Memory Card (16 MB) Operating Manual (this manual) Operating Manual (PC Connection Manual) (*) Items marked with an asterisk are also available as optional accessories.
For other optional accessories, see "Optional Accessories" (p.105) . 8 Checking Package Contents Camera Optio 33WR Strap O-ST5 (*) Software (CD-ROM) S-SW13 AV cable I-AVC7 (*) USB cable I-USB7 (*) AA Alkaline batteries (2) (PC Connection Manual) Viewing Your Digital Camera Images On Your PC SD Memory Card (16 MB) Operating Manual (this manual) Operating Manual (PC Connection Manual) (*) Items marked with an asterisk are also available as optional accessories.

Operation Manual
Page 14
...Installing the Batteries Install batteries in the battery chamber. 3 Wipe away any sand or debris on the water-resistant packing and the areas between the camera and the packing. 4 Close the battery cover and push horizontally to the +- Use one CR-V3, or use two AA lithium batteries, AA ...Ni-MH batteries, or AA alkaline batteries. indicator in the camera. Do not set batteries with a dry cloth before setting batteries. Turn off the camera when setting batteries. Wipe away water or dirt from the camera with wet or dirty hands. 1 Slide the battery cover in the direction ...
...Installing the Batteries Install batteries in the battery chamber. 3 Wipe away any sand or debris on the water-resistant packing and the areas between the camera and the packing. 4 Close the battery cover and push horizontally to the +- Use one CR-V3, or use two AA lithium batteries, AA ...Ni-MH batteries, or AA alkaline batteries. indicator in the camera. Do not set batteries with a dry cloth before setting batteries. Turn off the camera when setting batteries. Wipe away water or dirt from the camera with wet or dirty hands. 1 Slide the battery cover in the direction ...

Operation Manual
Page 15
... please use the AC adapter D-AC5 (p.15). • AA lithium, AA alkaline battery, and the CR-V3 battery are based on PENTAX measuring conditions. Battery performance will return to normal when returned to room temperature. • When traveling overseas, taking a lot of Captures and Playback... please have extra batteries on hand, keeping them warm in cold climates, have extra batteries ready. 13 Getting Started When using the camera in your pocket. Otherwise, the battery may vary by capture mode or shooting conditions. • Battery performance temporarily decreases as the ...
... please use the AC adapter D-AC5 (p.15). • AA lithium, AA alkaline battery, and the CR-V3 battery are based on PENTAX measuring conditions. Battery performance will return to normal when returned to room temperature. • When traveling overseas, taking a lot of Captures and Playback... please have extra batteries on hand, keeping them warm in cold climates, have extra batteries ready. 13 Getting Started When using the camera in your pocket. Otherwise, the battery may vary by capture mode or shooting conditions. • Battery performance temporarily decreases as the ...

Operation Manual
Page 16
Getting Started Battery Level Indicator You can check the battery level with the * display on the LCD monitor. 1 * (lit green) : Adequate power remains. ↓ , (lit green) : Battery is running low. ↓ ; (lit yellow) : Battery is running very low. ↓ % (lit red) : Battery is exhausted. ↓ No battery power : After displaying this message, the camera turns off. 14
Getting Started Battery Level Indicator You can check the battery level with the * display on the LCD monitor. 1 * (lit green) : Adequate power remains. ↓ , (lit green) : Battery is running low. ↓ ; (lit yellow) : Battery is running very low. ↓ % (lit red) : Battery is exhausted. ↓ No battery power : After displaying this message, the camera turns off. 14

Operation Manual
Page 17
...data. • When using the AC adapter, be sure to your PC, we recommend using the AC adapter D-AC5 (sold separately). 1 Make sure the camera is turned off before opening the terminal cover. 2 Connect the DC terminal on the AC adapter to the DC input terminal on the...AC adapter. 4 Plug the AC plug cord into the power outlet. • Make sure the camera is recording or reading data will not charge the rechargeable batteries in your camera. 15 Disconnections while the camera is turned off before connecting or disconnecting the AC adapter. • Make sure connections are secure between...
...data. • When using the AC adapter, be sure to your PC, we recommend using the AC adapter D-AC5 (sold separately). 1 Make sure the camera is turned off before opening the terminal cover. 2 Connect the DC terminal on the AC adapter to the DC input terminal on the...AC adapter. 4 Plug the AC plug cord into the power outlet. • Make sure the camera is recording or reading data will not charge the rechargeable batteries in your camera. 15 Disconnections while the camera is turned off before connecting or disconnecting the AC adapter. • Make sure connections are secure between...

Operation Manual
Page 18
... the card. If the card is recorded on the water-resistant packing and the areas between the camera and the packing. 4 Close the battery/card cover. 16 Be sure the camera is turned off the camera before inserting or removing the SD Memory Card / MultiMediaCard. Installing 1 Slide the battery/card cover to the... sound may not be recorded correctly. 3 Wipe away any sand or debris on the SD Memory Card / MultiMediaCard. Wipe away water or dirt from the camera with wet or dirty hands. Turn off before setting or removing the card.
... the card. If the card is recorded on the water-resistant packing and the areas between the camera and the packing. 4 Close the battery/card cover. 16 Be sure the camera is turned off the camera before inserting or removing the SD Memory Card / MultiMediaCard. Installing 1 Slide the battery/card cover to the... sound may not be recorded correctly. 3 Wipe away any sand or debris on the SD Memory Card / MultiMediaCard. Wipe away water or dirt from the camera with wet or dirty hands. Turn off before setting or removing the card.

Operation Manual
Page 19
... the 1 direction of shots when using a 16MB SD Memory Card. • These figures are based on PENTAX standard shooting conditions, and may vary depending on the water-resistant packing and the areas between the camera and the packing. 4 Close the battery/card cover. • If the battery/card cover is opened while...
... the 1 direction of shots when using a 16MB SD Memory Card. • These figures are based on PENTAX standard shooting conditions, and may vary depending on the water-resistant packing and the areas between the camera and the packing. 4 Close the battery/card cover. • If the battery/card cover is opened while...

Operation Manual
Page 20
...Memory Card / MultiMediaCard" (p.90). • Do not remove the SD Memory Card / MultiMediaCard while the card is turned off the camera when recording data or playing back images or audio from the SD Memory Card / MultiMediaCard, or when connected to sudden temperature changes, condensation..., or direct sunlight. 18 PENTAX does not accept any liability regarding erased data. • When the user mishandles the SD Memory Card / MultiMediaCard • When the...
...Memory Card / MultiMediaCard" (p.90). • Do not remove the SD Memory Card / MultiMediaCard while the card is turned off the camera when recording data or playing back images or audio from the SD Memory Card / MultiMediaCard, or when connected to sudden temperature changes, condensation..., or direct sunlight. 18 PENTAX does not accept any liability regarding erased data. • When the user mishandles the SD Memory Card / MultiMediaCard • When the...

Operation Manual
Page 21
Card check feature When the camera is no SD Memory Card / MultiMediaCard inside the camera, ^ appears on , the camera automatically checks for a card. If there is turned on the LCD monitor. Press the power switch again to LOC, ^ appears on . If the write protect switch is set to turn on the LCD monitor, indicating that images and audio cannot be recorded. 0 10/10/2003 11:20 19 Getting Started Turning the Camera On and Off 1 Power switch Playback button 1 Press the power switch. The camera will turn the camera off.
Card check feature When the camera is no SD Memory Card / MultiMediaCard inside the camera, ^ appears on , the camera automatically checks for a card. If there is turned on the LCD monitor. Press the power switch again to LOC, ^ appears on . If the write protect switch is set to turn on the LCD monitor, indicating that images and audio cannot be recorded. 0 10/10/2003 11:20 19 Getting Started Turning the Camera On and Off 1 Power switch Playback button 1 Press the power switch. The camera will turn the camera off.

Operation Manual
Page 22
...(3). Once the above Initial Settings are displayed from the following: English, French, German, Spanish, Italian, Russian, Chinese and Japanese. 1 Turn the camera on. 2 Use the four-way controller (45) to select the display language. The default setting is not the current time, follow the procedure .... Initial Settings 1 Power switch Getting Started Four-way controller OK button MENU button If the initial settings screen appears when you turn the camera on, follow the instructions for "Changing the Date Style and Date / Time" (p.92) to set the display language, Home Town, DST...
...(3). Once the above Initial Settings are displayed from the following: English, French, German, Spanish, Italian, Russian, Chinese and Japanese. 1 Turn the camera on. 2 Use the four-way controller (45) to select the display language. The default setting is not the current time, follow the procedure .... Initial Settings 1 Power switch Getting Started Four-way controller OK button MENU button If the initial settings screen appears when you turn the camera on, follow the instructions for "Changing the Date Style and Date / Time" (p.92) to set the display language, Home Town, DST...

Operation Manual
Page 23
... setting after it has been made . Getting Started Setting the Home Town You can choose the city (Home Town) in which you will use the camera. 1 Press the four-way controller (45) Initial Setting 1 to "Setting World Time" (p.93). City NYC DST Video Out NTSC 2 Press the four-way controller...
... setting after it has been made . Getting Started Setting the Home Town You can choose the city (Home Town) in which you will use the camera. 1 Press the four-way controller (45) Initial Setting 1 to "Setting World Time" (p.93). City NYC DST Video Out NTSC 2 Press the four-way controller...

Operation Manual
Page 25
.... Date Style mm/dd/yy 24h 01 / 01 / 2003 00 : 00 1 MENU Exit OK OK 5 Press the four-way controller (23) to take pictures. The camera is turned on. • Your settings can take a picture. If this happens, the Initial Settings screen is displayed the next time the... camera is ready to change the month. Getting Started 4 Press the four-way controller (5). Date Adjust 23 are complete, your settings will return to the Menu ...
.... Date Style mm/dd/yy 24h 01 / 01 / 2003 00 : 00 1 MENU Exit OK OK 5 Press the four-way controller (23) to take pictures. The camera is turned on. • Your settings can take a picture. If this happens, the Initial Settings screen is displayed the next time the... camera is ready to change the month. Getting Started 4 Press the four-way controller (5). Date Adjust 23 are complete, your settings will return to the Menu ...


