ZH506T B Datasheet
Page 1
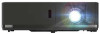
...174; Chromecast™ Vertical lens shift, four corner correction, 360° and portrait mode operation enable flexible installations. 1080p Professional Installation Laser Projector ZH506T-B Bright, compact and virtually maintenance-free Bright 5,000 ANSI lumens and 1080p resolution 4K UHD HDR input with HDMI 2.0 (HDCP 2.2) Light... per channel provide rich audio for all-inone applications, a 12V trigger output ensures compatibility with the remarkable Optoma ProScene ZH506T. HDMI, HDBaseT and VGA inputs provide connectivity to 30,000 hours of worship and entertainment venues.
...174; Chromecast™ Vertical lens shift, four corner correction, 360° and portrait mode operation enable flexible installations. 1080p Professional Installation Laser Projector ZH506T-B Bright, compact and virtually maintenance-free Bright 5,000 ANSI lumens and 1080p resolution 4K UHD HDR input with HDMI 2.0 (HDCP 2.2) Light... per channel provide rich audio for all-inone applications, a 12V trigger output ensures compatibility with the remarkable Optoma ProScene ZH506T. HDMI, HDBaseT and VGA inputs provide connectivity to 30,000 hours of worship and entertainment venues.

ZH506T B Datasheet
Page 2
... decrease over time. Watching 3D projection while wearing 3D glasses for further information. Optoma.com Copyright © 2019 Optoma Technology, Inc. 1080p Professional Installation Laser Projector - Refer to change at sea level up converts frame rate from 5,000 feet... and above (using OSD menu) to 10,000 feet = 104° F (max); If you experience a headache, fatigue or dizziness, stop viewing the 3D projection and rest. ZH506T...
... decrease over time. Watching 3D projection while wearing 3D glasses for further information. Optoma.com Copyright © 2019 Optoma Technology, Inc. 1080p Professional Installation Laser Projector - Refer to change at sea level up converts frame rate from 5,000 feet... and above (using OSD menu) to 10,000 feet = 104° F (max); If you experience a headache, fatigue or dizziness, stop viewing the 3D projection and rest. ZH506T...

506 Family Flyer
Page 1
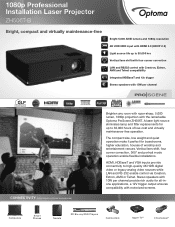
...• Concerts, stage shows, live events and outdoor venues • Rental and staging, broadcast studios and post production Optoma ProScene laser projectors are engineered for a variety of professional environments, including board rooms, houses of worship, museums, entertainment venues and education ... Keystone, Built-In HDBaseT 12V Trigger Four Corner Correction, Vertical 360° & Portrait Mode Chassis Color Lens Shift ZU506T 1920 x 1200 5,000 ZH506T 1920 x 1080 300,000:1 (extreme black enabled) 20,000 hrs (laser phosphor) 1.40 - 2.24 ZW506...
...• Concerts, stage shows, live events and outdoor venues • Rental and staging, broadcast studios and post production Optoma ProScene laser projectors are engineered for a variety of professional environments, including board rooms, houses of worship, museums, entertainment venues and education ... Keystone, Built-In HDBaseT 12V Trigger Four Corner Correction, Vertical 360° & Portrait Mode Chassis Color Lens Shift ZU506T 1920 x 1200 5,000 ZH506T 1920 x 1080 300,000:1 (extreme black enabled) 20,000 hrs (laser phosphor) 1.40 - 2.24 ZW506...

Optoma_506_User_Manual English
Page 1
DLP® Projector User manual
DLP® Projector User manual
Optoma_506_User_Manual English
Page 2
......8 Product Overview...9 Connections...10 Keypad...12 Remote control...13 SETUP AND INSTALLATION 14 Installing the projector...14 Connecting sources to the projector 17 Adjusting the projector image...20 Remote setup...21 USING THE PROJECTOR 23 Powering on / off the projector 23 Selecting an input source...24 Menu navigation and features 25 OSD Menu tree...26...
......8 Product Overview...9 Connections...10 Keypad...12 Remote control...13 SETUP AND INSTALLATION 14 Installing the projector...14 Connecting sources to the projector 17 Adjusting the projector image...20 Remote setup...21 USING THE PROJECTOR 23 Powering on / off the projector 23 Selecting an input source...24 Menu navigation and features 25 OSD Menu tree...26...

Optoma_506_User_Manual English
Page 3
...settings menu...46 Setup security menu...47 Setup HDMI link settings menu 47 Setup test pattern menu...47 Setup remote settings menu...48 Setup projector ID menu...48 Setup 12V trigger menu...48 Setup options menu...48 Setup reset OSD menu...49 Network LAN menu...50 Network control menu...51... menu...57 MAINTENANCE 58 Installing and cleaning the dust filter 58 ADDITIONAL INFORMATION 59 Compatible resolutions...59 Image size and projection distance 62 Projector dimensions and ceiling mount installation 65 IR remote codes...66 Troubleshooting...68 Warning indicators...70 Specifications...71...
...settings menu...46 Setup security menu...47 Setup HDMI link settings menu 47 Setup test pattern menu...47 Setup remote settings menu...48 Setup projector ID menu...48 Setup 12V trigger menu...48 Setup options menu...48 Setup reset OSD menu...49 Network LAN menu...50 Network control menu...51... menu...57 MAINTENANCE 58 Installing and cleaning the dust filter 58 ADDITIONAL INFORMATION 59 Compatible resolutions...59 Image size and projection distance 62 Projector dimensions and ceiling mount installation 65 IR remote codes...66 Troubleshooting...68 Warning indicators...70 Specifications...71...

Optoma_506_User_Manual English
Page 4
...not block the light coming out of the projector and to service the unit yourself. They may cause electric shock. ‡‡ Do not attempt to protect from over heating, it has been physically damaged or abused. Please call Optoma before you to persons. To ensure reliable... operation of the projector lens when in a location that the ambient room temperature is within an equilateral triangle is recommended to rain...
...not block the light coming out of the projector and to service the unit yourself. They may cause electric shock. ‡‡ Do not attempt to protect from over heating, it has been physically damaged or abused. Please call Optoma before you to persons. To ensure reliable... operation of the projector lens when in a location that the ambient room temperature is within an equilateral triangle is recommended to rain...

Optoma_506_User_Manual English
Page 5
...135;‡ Only use attachments/accessories specified by the exposure of laser radiation. ‡‡ Adequate instructions for long periods, they may affect the projector performance. ‡‡ Use a power strip and or surge protector. ‡‡ The unit should never be subjected to vibration or shock...135;‡ Use a soft dry cloth with the following the control, adjustment or operation procedure may harm your eyes. ‡‡ This projector will detect the life of IEC60825-1 : 2014 and also complies with bare hands. ‡‡ Remove battery/batteries from the AC outlet...
...135;‡ Only use attachments/accessories specified by the exposure of laser radiation. ‡‡ Adequate instructions for long periods, they may affect the projector performance. ‡‡ Use a power strip and or surge protector. ‡‡ The unit should never be subjected to vibration or shock...135;‡ Use a soft dry cloth with the following the control, adjustment or operation procedure may harm your eyes. ‡‡ This projector will detect the life of IEC60825-1 : 2014 and also complies with bare hands. ‡‡ Remove battery/batteries from the AC outlet...

Optoma_506_User_Manual English
Page 6
... product names used in a particular installation. HDMI, the HDMI Logo, and High-Definition Multimedia Interface are the properties of such revision or changes. If this projector. 6 English MHL, Mobile High-Definition Link and the MHL Logo are registered trademarks of Texas Instruments and BrilliantColorTM is connected. ‡‡ Consult the dealer...
... product names used in a particular installation. HDMI, the HDMI Logo, and High-Definition Multimedia Interface are the properties of such revision or changes. If this projector. 6 English MHL, Mobile High-Definition Link and the MHL Logo are registered trademarks of Texas Instruments and BrilliantColorTM is connected. ‡‡ Consult the dealer...

Optoma_506_User_Manual English
Page 8
...Zoom Menu Format Freeze Remote ID All VGA S-Video HDMI1 HDMI2 123 HDBaseT Video DVI HDMI3 456 BNC YPbPr DisplayPort 3D 7890 Projector Remote control Power lead Note The remote control is only supplied in some specific regions. Please check with the battery. *(1) ...For European warranty Information, please visit www.optoma.com. *(2) Available only for Asian region. Warranty Card*(1) Basic User Manual Paper UM*(2) Documentation Optional accessories...
...Zoom Menu Format Freeze Remote ID All VGA S-Video HDMI1 HDMI2 123 HDBaseT Video DVI HDMI3 456 BNC YPbPr DisplayPort 3D 7890 Projector Remote control Power lead Note The remote control is only supplied in some specific regions. Please check with the battery. *(1) ...For European warranty Information, please visit www.optoma.com. *(2) Available only for Asian region. Warranty Card*(1) Basic User Manual Paper UM*(2) Documentation Optional accessories...

Optoma_506_User_Manual English
Page 9
Lens Shift Dial 4. Kensington™ Lock Port 10. No Item 1. Ventilation (inlet) 5. INTRODUCTION Product Overview 1 2 4 5 6 7 3 8 12 8 11 10 9 8 Note: ‡‡ ‡‡ Do not block projector intake and exhaust vents. Keypad 3. Input / Output 11. IR Receivers 2. Zoom Lever 6. Lens English 9 Power Socket 12. Ventilation (outlet) 8. Focus Ring No Item 7. Tilt-Adjustment Feet 9. When operating the projector in an enclosed space, allow at least 30 cm clearance around the intake and exhaust vents.
Lens Shift Dial 4. Kensington™ Lock Port 10. No Item 1. Ventilation (inlet) 5. INTRODUCTION Product Overview 1 2 4 5 6 7 3 8 12 8 11 10 9 8 Note: ‡‡ ‡‡ Do not block projector intake and exhaust vents. Keypad 3. Input / Output 11. IR Receivers 2. Zoom Lever 6. Lens English 9 Power Socket 12. Ventilation (outlet) 8. Focus Ring No Item 7. Tilt-Adjustment Feet 9. When operating the projector in an enclosed space, allow at least 30 cm clearance around the intake and exhaust vents.

Optoma_506_User_Manual English
Page 14
...a given distance, please refer to be installed in any orientation other orientation will dictate which installation location you select. The projector should be horizontal and not tilted either forwards/backwards or left/right. Your room layout or personal preference will invalidate the ...to distance table on pages 62-64. Do not operate the projector in one of your equipment. For none standard installation advise please contact Optoma. 14 English SETUP AND INSTALLATION Installing the projector Your projector is placed from the screen the projected image size increases and ...
...a given distance, please refer to be installed in any orientation other orientation will dictate which installation location you select. The projector should be horizontal and not tilted either forwards/backwards or left/right. Your room layout or personal preference will invalidate the ...to distance table on pages 62-64. Do not operate the projector in one of your equipment. For none standard installation advise please contact Optoma. 14 English SETUP AND INSTALLATION Installing the projector Your projector is placed from the screen the projected image size increases and ...

Optoma_506_User_Manual English
Page 15
Minimum 100mm (3.94 inches) Minimum 300mm (11.81 inches) Minimum 300mm (11.81 inches) Minimum 100mm (3.94 inches) English 15 SETUP AND INSTALLATION Projector installation notice Note: Projector power will dim to 70% and fan full load. 195°~345° ‡‡ Portrait mode Air outlet side 10° 10° 10° 10° 10° 10° ‡‡ Allow at least 30 cm clearance around the exhaust vent.
Minimum 100mm (3.94 inches) Minimum 300mm (11.81 inches) Minimum 300mm (11.81 inches) Minimum 100mm (3.94 inches) English 15 SETUP AND INSTALLATION Projector installation notice Note: Projector power will dim to 70% and fan full load. 195°~345° ‡‡ Portrait mode Air outlet side 10° 10° 10° 10° 10° 10° ‡‡ Allow at least 30 cm clearance around the exhaust vent.

Optoma_506_User_Manual English
Page 16
...100mm (3.94 inches) ‡‡ Ensure that the intake vents do not recycle hot air from the exhaust vent. ‡‡ When operating the projector in an enclosed space, ensure that the surrounding air temperature within the enclosure does not exceed operation temperature while the..., and the air intake and exhaust vents are unobstructed. ‡‡ All enclosures should pass a certified thermal evaluation to ensure that the projector does not recycle exhaust air, as this may cause the device to shutdown even if the enclosure temperature is with the acceptable operation temperature range...
...100mm (3.94 inches) ‡‡ Ensure that the intake vents do not recycle hot air from the exhaust vent. ‡‡ When operating the projector in an enclosed space, ensure that the surrounding air temperature within the enclosure does not exceed operation temperature while the..., and the air intake and exhaust vents are unobstructed. ‡‡ All enclosures should pass a certified thermal evaluation to ensure that the projector does not recycle exhaust air, as this may cause the device to shutdown even if the enclosure temperature is with the acceptable operation temperature range...

Optoma_506_User_Manual English
Page 17
SETUP AND INSTALLATION Connecting sources to the projector Type 1 (12 IO) 5 4 6 8 7 2 1 3 9 10 15 16 11 12 14 13 English 17
SETUP AND INSTALLATION Connecting sources to the projector Type 1 (12 IO) 5 4 6 8 7 2 1 3 9 10 15 16 11 12 14 13 English 17

Optoma_506_User_Manual English
Page 20
Locate the adjustable foot you wish to 9.4m. 20 English Lens Shift Dial Focus Ring Zoom Lever Note: The projector will focus at a distance of 1.3m to adjust on the underside of the projected image vertically. ‡‡ To adjust the focus, turn the focus ...ring clockwise or counterclockwise until the image is equipped with elevator feet for adjusting the image height. 1. SETUP AND INSTALLATION Adjusting the projector image Image height The projector is sharp and legible. Rotate the adjustable foot clockwise or counterclockwise to adjust the position of the...
Locate the adjustable foot you wish to 9.4m. 20 English Lens Shift Dial Focus Ring Zoom Lever Note: The projector will focus at a distance of 1.3m to adjust on the underside of the projected image vertically. ‡‡ To adjust the focus, turn the focus ...ring clockwise or counterclockwise until the image is equipped with elevator feet for adjusting the image height. 1. SETUP AND INSTALLATION Adjusting the projector image Image height The projector is sharp and legible. Rotate the adjustable foot clockwise or counterclockwise to adjust the position of the...

Optoma_506_User_Manual English
Page 22
... 3D 0 However, the effective range might obstruct the infra-red beam. ‡‡ Make sure the IR transmitter of the projector. Ensure to hold the remote control at an angle within a very short distance, the remote control might become ineffective. ‡‡...; When you aim at the screen, the effective distance is located on the projector that might change according to function correctly. Source ENTER F1 Mode F2 AV Mute SETUP AND INSTALLATION Effective range Infra-Red (...
... 3D 0 However, the effective range might obstruct the infra-red beam. ‡‡ Make sure the IR transmitter of the projector. Ensure to hold the remote control at an angle within a very short distance, the remote control might become ineffective. ‡‡...; When you aim at the screen, the effective distance is located on the projector that might change according to function correctly. Source ENTER F1 Mode F2 AV Mute SETUP AND INSTALLATION Effective range Infra-Red (...

Optoma_506_User_Manual English
Page 23
...and other settings. The cooling fans will display in standby mode, simply press the button again to turn on the projector keypad or the control. 2. Powering off the projector by pressing the button on , you will be prompted to operate for about 10 seconds for the second time, the... projector will turn the projector back on the projector keypad or remote control. 4. W7 hen8 con9nec0ted, the Power LED will shut down. 4. Source Re-Sync F3 Volume D Zoom Menu ...
...and other settings. The cooling fans will display in standby mode, simply press the button again to turn on the projector keypad or the control. 2. Powering off the projector by pressing the button on , you will be prompted to operate for about 10 seconds for the second time, the... projector will turn the projector back on the projector keypad or remote control. 4. W7 hen8 con9nec0ted, the Power LED will shut down. 4. Source Re-Sync F3 Volume D Zoom Menu ...

Optoma_506_User_Manual English
Page 24
... F2 Mode AV Mute Turn on the screen, such as computer, notebook, video player, etc. If multiple sources are connected, press the button on the projector keypad or the Source button on the remote control to display on the connected source that you want to select the desEirNeTEdR input. Source F3... Format Freeze Remote ID All VGA S-Video HDMI1 HDMI2 123 HDBaseT Video DVI HDMI3 456 BNC YPbPr DisplayPort 3D 7890 Lens cap 24 English The projector will automatically detect the source.
... F2 Mode AV Mute Turn on the screen, such as computer, notebook, video player, etc. If multiple sources are connected, press the button on the projector keypad or the Source button on the remote control to display on the connected source that you want to select the desEirNeTEdR input. Source F3... Format Freeze Remote ID All VGA S-Video HDMI1 HDMI2 123 HDBaseT Video DVI HDMI3 456 BNC YPbPr DisplayPort 3D 7890 Lens cap 24 English The projector will automatically detect the source.

Optoma_506_User_Manual English
Page 25
... Menu Settings Display Main Menu Image Settings 3D Aspect Ratio Edge Mask Zoom Image Shift Geometric Correction Select Exit Navigation guide Enter English 25 The projector will automatically save the new settings. Select the next item to the main menu. 6. Press press the or Enter button to confirm, and ...return to be adjusted in the sub menu and adjust as described above. 5. While making a selection on a particular page, press the button on the projector keypad or the Enter button on the remote control to make image adjustments and change a variety of settings. USING THE...
... Menu Settings Display Main Menu Image Settings 3D Aspect Ratio Edge Mask Zoom Image Shift Geometric Correction Select Exit Navigation guide Enter English 25 The projector will automatically save the new settings. Select the next item to the main menu. 6. Press press the or Enter button to confirm, and ...return to be adjusted in the sub menu and adjust as described above. 5. While making a selection on a particular page, press the button on the projector keypad or the Enter button on the remote control to make image adjustments and change a variety of settings. USING THE...


