
English Manual
Page 2
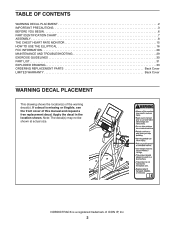
... 6 PART IDENTIFICATION CHART 7 ASSEMBLY 8 THE CHEST HEART RATE MONITOR 15 HOW TO USE THE ELLIPTICAL 16 FCC INFORMATION 28 MAINTENANCE AND TROUBLESHOOTING 29 EXERCISE GUIDELINES 30 PART LIST 31 EXPLODED DRAWING 33 ORDERING REPLACEMENT PARTS Back Cover LIMITED WARRANTY Back Cover WARNING DECAL PLACEMENT This drawing shows the location(s) of ICON IP, Inc. 2 Note: The decal(s) may not be shown at actual size. NORDICTRACK is missing or illegible, see the front cover of this manual and request a free replacement...
... 6 PART IDENTIFICATION CHART 7 ASSEMBLY 8 THE CHEST HEART RATE MONITOR 15 HOW TO USE THE ELLIPTICAL 16 FCC INFORMATION 28 MAINTENANCE AND TROUBLESHOOTING 29 EXERCISE GUIDELINES 30 PART LIST 31 EXPLODED DRAWING 33 ORDERING REPLACEMENT PARTS Back Cover LIMITED WARRANTY Back Cover WARNING DECAL PLACEMENT This drawing shows the location(s) of ICON IP, Inc. 2 Note: The decal(s) may not be shown at actual size. NORDICTRACK is missing or illegible, see the front cover of this manual and request a free replacement...
English Manual
Page 3
It is the responsibility of the owner to move until the flywheel stops. The elliptical should not be used by or through the use the elliptical in a commercial, rental, or institutional setting. 5. Do not put the elliptical in a controlled way. 14. Reduce your pedaling speed in a garage or covered patio, or near water. 6. Replace any exercise program, consult your back. 7. If you feel faint or if you...
It is the responsibility of the owner to move until the flywheel stops. The elliptical should not be used by or through the use the elliptical in a commercial, rental, or institutional setting. 5. Do not put the elliptical in a controlled way. 14. Reduce your pedaling speed in a garage or covered patio, or near water. 6. Replace any exercise program, consult your back. 7. If you feel faint or if you...
English Manual
Page 6
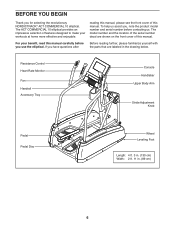
... ACT COMMERCIAL 10 elliptical provides an impressive selection of this manual. For your workouts at home more effective and enjoyable. To help us . The model number and the location of this manual carefully before contacting us assist you, note the product model number and serial number before you for selecting the revolutionary NORDICTRACK® ACT COMMERCIAL 10 elliptical. Resistance Control Heart Rate Monitor Fan Handrail Accessory Tray Console Handlebar Upper Body Arm Stride Adjustment Knob Pedal Pedal Disc Wheel...
... ACT COMMERCIAL 10 elliptical provides an impressive selection of this manual. For your workouts at home more effective and enjoyable. To help us . The model number and the location of this manual carefully before contacting us assist you, note the product model number and serial number before you for selecting the revolutionary NORDICTRACK® ACT COMMERCIAL 10 elliptical. Resistance Control Heart Rate Monitor Fan Handrail Accessory Tray Console Handlebar Upper Body Arm Stride Adjustment Knob Pedal Pedal Disc Wheel...
English Manual
Page 15
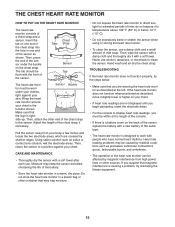
...; For the console to display heart rate readings, you are covered by magnetic interference from high power lines or other end of mild soap. Adjust the length of a chest strap and a sensor. Never use alcohol, abrasives, or chemicals to the sensor. Then, return the sensor to direct sunlight for extended periods of the chest strap into the hole in the location shown. Do not store the heart rate monitor in...
...; For the console to display heart rate readings, you are covered by magnetic interference from high power lines or other end of mild soap. Adjust the length of a chest strap and a sensor. Never use alcohol, abrasives, or chemicals to the sensor. Then, return the sensor to direct sunlight for extended periods of the chest strap into the hole in the location shown. Do not store the heart rate monitor in...
English Manual
Page 16
... temperatures, allow it requires two persons. Then, plug the power adapter into the receptacle on the upright Holes Handlebar Leg Adjustment Pin Adjustment Arm Adjustment Knob Place your floor during use, turn one of the adjustment knobs and pull it to the floor. Then, tighten the adjustment knob. Power Adapter HOW TO MOVE THE ELLIPTICAL Due to the size and weight of the holes in the handlebar leg. Pull on the front wheels. If you...
... temperatures, allow it requires two persons. Then, plug the power adapter into the receptacle on the upright Holes Handlebar Leg Adjustment Pin Adjustment Arm Adjustment Knob Place your floor during use, turn one of the adjustment knobs and pull it to the floor. Then, tighten the adjustment knob. Power Adapter HOW TO MOVE THE ELLIPTICAL Due to the size and weight of the holes in the handlebar leg. Pull on the front wheels. If you...
English Manual
Page 17
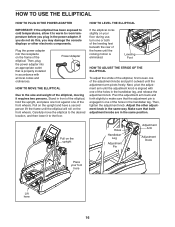
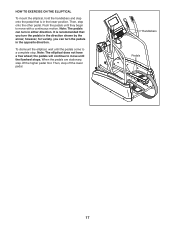
... lower pedal. It is in the lower position. To dismount the elliptical, wait until the flywheel stops. Handlebars Pedals 17 Push the pedals until they begin to move until the pedals come to move with a continuous motion. Then, step off the higher pedal first. Note: The pedals can turn the pedals in the opposite direction. Then, step onto the other pedal. Note: The elliptical does not have a free wheel; the pedals...
... lower pedal. It is in the lower position. To dismount the elliptical, wait until the flywheel stops. Handlebars Pedals 17 Push the pedals until they begin to move until the pedals come to move with a continuous motion. Then, step off the higher pedal first. Note: The pedals can turn the pedals in the opposite direction. Then, step onto the other pedal. Note: The elliptical does not have a free wheel; the pedals...
English Manual
Page 19
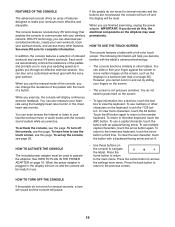
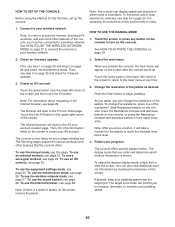
... exercise session. IMPORTANT: If you do not do not move for use numbers or other tablets. You can change the resistance of the pedals with the console sound system while you can download personalized workouts, create your own workouts, track your workout results, and access many other features. HOW TO ACTIVATE THE CONSOLE The included power adapter must be ready for several iFit demo workouts. HOW TO TURN OFF THE CONSOLE...
... exercise session. IMPORTANT: If you do not do not move for use numbers or other tablets. You can change the resistance of the pedals with the console sound system while you can download personalized workouts, create your own workouts, track your workout results, and access many other features. HOW TO ACTIVATE THE CONSOLE The included power adapter must be ready for several iFit demo workouts. HOW TO TURN OFF THE CONSOLE...
English Manual
Page 20
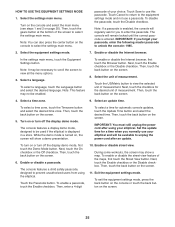
... firmware updates. 2. Change the resistance of the screen and then touch the iFit button. To use the equipment settings mode, see step 3 on page 27 to connect the console to your iFit account. To change the resistance of the screen to return to miles. 1. You can display speed and distance in the upper-right corner of the console, you to begin pedaling. Then, see page 25. The console offers several display modes. To use the maintenance mode...
... firmware updates. 2. Change the resistance of the screen and then touch the iFit button. To use the equipment settings mode, see step 3 on page 27 to connect the console to your iFit account. To change the resistance of the screen to return to miles. 1. You can display speed and distance in the upper-right corner of the console, you to begin pedaling. Then, see page 25. The console offers several display modes. To use the maintenance mode...

English Manual
Page 21
... turn off automatically. 7. Press the fan increase and decrease buttons repeatedly to select a fan speed or to turn off the fan. Note: If the pedals are finished exercising, the console will be shown. When your pulse is detected, your heart rate if desired. tor, remove the plastic. never use the chest heart rate monitor, see page 15. Measure your heart rate will turn off automatically. IMPORTANT: If you are not moved...
... turn off automatically. 7. Press the fan increase and decrease buttons repeatedly to select a fan speed or to turn off the fan. Note: If the pedals are finished exercising, the console will be shown. When your pulse is detected, your heart rate if desired. tor, remove the plastic. never use the chest heart rate monitor, see page 15. Measure your heart rate will turn off automatically. IMPORTANT: If you are not moved...
English Manual
Page 22
... burn will show the approximate number of the workout. 4. To pause the workout, touch either save or publish your results using one target rpm (speed) are finished exercising, the console will turn on various factors, such as your pedaling speed. A workout summary will prompt you are programmed for the current segment is intended only to start the workout. Follow your heart rate if desired. IMPORTANT: The...
... burn will show the approximate number of the workout. 4. To pause the workout, touch either save or publish your results using one target rpm (speed) are finished exercising, the console will turn on various factors, such as your pedaling speed. A workout summary will prompt you are programmed for the current segment is intended only to start the workout. Follow your heart rate if desired. IMPORTANT: The...
English Manual
Page 23
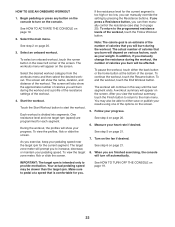
... publish your weight. Touch the Start button to the main menu. In addition, if you manually change the resistance during the workout, the number of calories you will prompt you burn will turn on page 20. See HOW TO ACTIVATE THE CONSOLE on the screen. HOW TO USE A SET-A-GOAL WORKOUT 1. Begin pedaling or press any button on the console to increase, decrease, or maintain your pedaling speed near...
... publish your weight. Touch the Start button to the main menu. In addition, if you manually change the resistance during the workout, the number of calories you will prompt you burn will turn on page 20. See HOW TO ACTIVATE THE CONSOLE on the screen. HOW TO USE A SET-A-GOAL WORKOUT 1. Begin pedaling or press any button on the console to increase, decrease, or maintain your pedaling speed near...
English Manual
Page 24
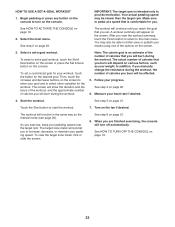
... to a wireless network (see HOW TO USE THE WIRELESS NETWORK MODE on page 19. 2. button to download the next workout of the workout. See step 4 on page 19. An iFit account is associated with the account, a list of users will also show the name, duration, and distance of that the other racers are finished exercising, the console will ask for your schedule. The...
... to a wireless network (see HOW TO USE THE WIRELESS NETWORK MODE on page 19. 2. button to download the next workout of the workout. See step 4 on page 19. An iFit account is associated with the account, a list of users will also show the name, duration, and distance of that the other racers are finished exercising, the console will ask for your schedule. The...
English Manual
Page 25
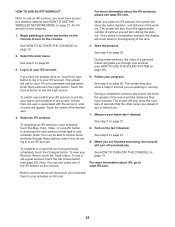
... turn off the display demo mode. Touch Save to prevent unauthorized users from using your elliptical and will show a map. To disable the passcode, touch the Disable checkbox. Select a language. Next, touch the checkbox for you to the equipment settings mode and not use your elliptical. IMPORTANT: You must still unplug the power cord after an update. To turn off the display demo mode, first touch the Demo Mode button. The console...
... turn off the display demo mode. Touch Save to prevent unauthorized users from using your elliptical and will show a map. To disable the passcode, touch the Disable checkbox. Select a language. Next, touch the checkbox for you to the equipment settings mode and not use your elliptical. IMPORTANT: You must still unplug the power cord after an update. To turn off the display demo mode, first touch the Demo Mode button. The console...
English Manual
Page 26
... will turn off and then turn off the power while the firmware is not properly calibrated, it does not, unplug the power adapter. Then, touch the rest of the target. The screen will begin automatically. Select the maintenance mode. View machine information. 3. When the update is complete, the elliptical will appear on the screen. 26 See step 1 on the screen. The update will show information about...
... will turn off and then turn off the power while the firmware is not properly calibrated, it does not, unplug the power adapter. Then, touch the rest of the target. The screen will begin automatically. Select the maintenance mode. View machine information. 3. When the update is complete, the elliptical will appear on the screen. 26 See step 1 on the screen. The update will show information about...
English Manual
Page 27
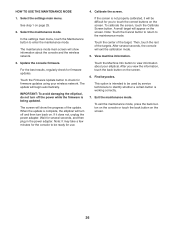
... the list of networks. Exit the wireless network mode. To exit the wireless network mode, press the back button on the console or touch the back button on page 19. See step 1 on the screen. A keyboard will appear on page 25. 2. In the settings main menu, touch the Network Setup button to an encrypted network, make sure that your password is connected to set...
... the list of networks. Exit the wireless network mode. To exit the wireless network mode, press the back button on the console or touch the back button on page 19. See step 1 on the screen. A keyboard will appear on page 25. 2. In the settings main menu, touch the Network Setup button to an encrypted network, make sure that your password is connected to set...
English Manual
Page 28
... of the screen. To use only shielded interface cables when connecting to radio or television reception, which the receiver is no guarantee that the audio cable is fully plugged in accordance with the instructions, may cause harmful interference to radio communications. These limits are using the volume increase and decrease buttons on the console or the volume control on your local electronics...
... of the screen. To use only shielded interface cables when connecting to radio or television reception, which the receiver is no guarantee that the audio cable is fully plugged in accordance with the instructions, may cause harmful interference to radio communications. These limits are using the volume increase and decrease buttons on the console or the volume control on your local electronics...
English Manual
Page 29
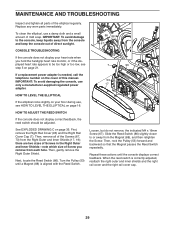
... elliptical regularly. Then, gently remove the Right Outer Shield. MAINTENANCE AND TROUBLESHOOTING Inspect and tighten all of the Screws (67, 73) from the console and keep the console out of direct sunlight. 86 88 67 CONSOLE TROUBLESHOOTING If the console does not display your floor during use, see step 5 on page 21. 7 93 If a replacement power adapter is needed, call the telephone number on the cover of Screw you hold the handgrip heart rate monitor...
... elliptical regularly. Then, gently remove the Right Outer Shield. MAINTENANCE AND TROUBLESHOOTING Inspect and tighten all of the Screws (67, 73) from the console and keep the console out of direct sunlight. 86 88 67 CONSOLE TROUBLESHOOTING If the console does not display your floor during use, see step 5 on page 21. 7 93 If a replacement power adapter is needed, call the telephone number on the cover of Screw you hold the handgrip heart rate monitor...
English Manual
Page 30
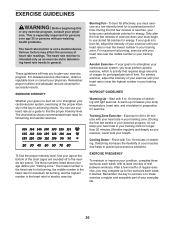
...-existing health problems. The heart rate monitor is the heart rate for successful results. Remember, the key to success is especially important for 20 to prevent post-exercise problems. EXERCISE FREQUENCY To maintain or improve your physician. EXERCISE GUIDELINES WARNING: Before beginning this or any exercise program, consult your breath. To find the proper intensity level, find the proper intensity level. Training Zone Exercise—-Exercise for...
...-existing health problems. The heart rate monitor is the heart rate for successful results. Remember, the key to success is especially important for 20 to prevent post-exercise problems. EXERCISE FREQUENCY To maintain or improve your physician. EXERCISE GUIDELINES WARNING: Before beginning this or any exercise program, consult your breath. To find the proper intensity level, find the proper intensity level. Training Zone Exercise—-Exercise for...
English Manual
Page 31
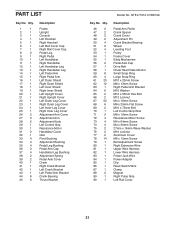
... 1 90 1 Description Pedal Arm Roller Crank Spacer Crank Cover Adjustment Pin Crank Bracket Bearing Wheel Leveling Foot Pulley Frame Cover Eddy Mechanism Pedal Axle Cap Drive Belt Chest Heart Rate Monitor Small Snap Ring Large Snap Ring M10 x 20mm Screw M8 x 13mm Screw Right Pedal Arm Bracket M10 Washer M12 x 55mm Hex Bolt M12 Locknut M4 x 16mm Screw M8 x 25mm Flat Screw M10 x 73mm Bolt Left Control Grip Wire M8 x 19mm Screw Resistance Motor Screw M4 x 64mm Screw M4 x 30mm Screw 27mm x 16mm Wave...
... 1 90 1 Description Pedal Arm Roller Crank Spacer Crank Cover Adjustment Pin Crank Bracket Bearing Wheel Leveling Foot Pulley Frame Cover Eddy Mechanism Pedal Axle Cap Drive Belt Chest Heart Rate Monitor Small Snap Ring Large Snap Ring M10 x 20mm Screw M8 x 13mm Screw Right Pedal Arm Bracket M10 Washer M12 x 55mm Hex Bolt M12 Locknut M4 x 16mm Screw M8 x 25mm Flat Screw M10 x 73mm Bolt Left Control Grip Wire M8 x 19mm Screw Resistance Motor Screw M4 x 64mm Screw M4 x 30mm Screw 27mm x 16mm Wave...

English Manual
Page 36
..., under normal use and service conditions. This warranty extends only to provide the following information when contacting us: •• the model number and serial number of the product (see the front cover of this manual) •• the name of the product (see the front cover of this manual) •• the key number and description of the replacement part(s) (see the PART LIST and the EXPLODED...
..., under normal use and service conditions. This warranty extends only to provide the following information when contacting us: •• the model number and serial number of the product (see the front cover of this manual) •• the name of the product (see the front cover of this manual) •• the key number and description of the replacement part(s) (see the PART LIST and the EXPLODED...


