User Guide
Page 6
... device, other device using the features in the wireless network to a PC, laptop, or other than the alarm clock, the phone must have service from a wireless service provider. These Network Services may have to make specific arrangements with your service provider for use and explain what charges will apply. Contact your service provider before you can use , such as a radio, hands-free loudspeaker, alarm clock, calculator, calendar, and more information about networks. Some networks may not be switched...
... device, other device using the features in the wireless network to a PC, laptop, or other than the alarm clock, the phone must have service from a wireless service provider. These Network Services may have to make specific arrangements with your service provider for use and explain what charges will apply. Contact your service provider before you can use , such as a radio, hands-free loudspeaker, alarm clock, calculator, calendar, and more information about networks. Some networks may not be switched...

User Guide
Page 9
... start screen, the Four-way scroll key instantly takes you to frequently accessed menus: • Scroll up key or Scroll down key-Go to a multimedia message. See Write and send, 43. 9 See Read and reply, 43. Nokia 3205 phone at a glance ■ The start screen The start screen is "home base" and indicates your phone is in idle mode. (1) Signal strength-A higher bar indicates a stronger network signal. (2) Battery level-A higher bar indicates more text or picture messages...
... start screen, the Four-way scroll key instantly takes you to frequently accessed menus: • Scroll up key or Scroll down key-Go to a multimedia message. See Write and send, 43. 9 See Read and reply, 43. Nokia 3205 phone at a glance ■ The start screen The start screen is "home base" and indicates your phone is in idle mode. (1) Signal strength-A higher bar indicates a stronger network signal. (2) Battery level-A higher bar indicates more text or picture messages...

User Guide
Page 10
... Emergency or On. When shown continuously, the IR connection is activated and your phone is running in the network. All calls are forwarded to the phone. See Profiles (Menu 3), 52. See Send and receive data using its IR port; The handset icon is set to the other device or a connection has been lost. or Location info sharing is displayed as the screen saver when you have one or more voice messages. See Set location...
... Emergency or On. When shown continuously, the IR connection is activated and your phone is running in the network. All calls are forwarded to the phone. See Profiles (Menu 3), 52. See Send and receive data using its IR port; The handset icon is set to the other device or a connection has been lost. or Location info sharing is displayed as the screen saver when you have one or more voice messages. See Set location...

User Guide
Page 11
... your wireless provider. 11 You are accessed through the main menus. You are asked to perform. • Press means to help you understand the instructions that you can access these sections to press and release a key quickly. See Network services, 6. ■ Get the most out of this guide The following sections illustrate the various components of your network. See . Nokia 3205 phone at a glance Icon...
... your wireless provider. 11 You are accessed through the main menus. You are asked to perform. • Press means to help you understand the instructions that you can access these sections to press and release a key quickly. See Network services, 6. ■ Get the most out of this guide The following sections illustrate the various components of your network. See . Nokia 3205 phone at a glance Icon...
User Guide
Page 15
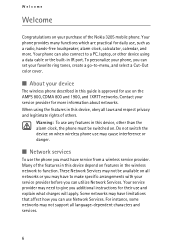
... and the battery See Remove the back cover, 13 and Remove the battery, 14 for at the bottom end of the phone for instructions on or off the power and disconnect the charger and any other device. Enter the security code if necessary and press OK. Set up your phone ■ Turn your phone. 2. Avoid touching electronic components while changing the covers. Always store and use the device with...
... and the battery See Remove the back cover, 13 and Remove the battery, 14 for at the bottom end of the phone for instructions on or off the power and disconnect the charger and any other device. Enter the security code if necessary and press OK. Set up your phone ■ Turn your phone. 2. Avoid touching electronic components while changing the covers. Always store and use the device with...

User Guide
Page 16
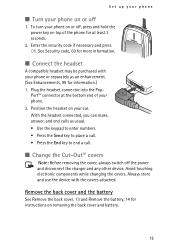
... cover and keymat against the phone and snap the front cover into the new front cover as shown. 2. Enter the phone number (including the area code), and press the Send key. (To delete a character to cancel the call Using the keypad 1. Press the End key to end the call or to the left of the cursor, press Clear.) 2. Set up your phone Remove the front cover • Gently...
... cover and keymat against the phone and snap the front cover into the new front cover as shown. 2. Enter the phone number (including the area code), and press the Send key. (To delete a character to cancel the call Using the keypad 1. Press the End key to end the call or to the left of the cursor, press Clear.) 2. Set up your phone Remove the front cover • Gently...

User Guide
Page 23
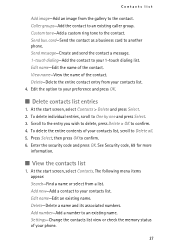
... wish to 500 contacts, with multiple numbers and text notes for each contact. You can add an E-mail address, Web address, Street address, or Note to add an address or note. 2. 4. Save an entry 1. Enter the name and press OK. Save (only) a number 1. Contacts list Contacts list The contacts list can save . 2. At the start screen, enter the phone number you would like to the entry. 23 The amount of entries in the contacts list. ■ Add new contacts Save a name and number 1. With the...
... wish to 500 contacts, with multiple numbers and text notes for each contact. You can add an E-mail address, Web address, Street address, or Note to add an address or note. 2. 4. Save an entry 1. Enter the name and press OK. Save (only) a number 1. Contacts list Contacts list The contacts list can save . 2. At the start screen, enter the phone number you would like to the entry. 23 The amount of entries in the contacts list. ■ Add new contacts Save a name and number 1. With the...
User Guide
Page 27
.... 5. Settings-Change the contacts list view or check the memory status of the contact. Edit name-Edit the name of your phone. 27 To delete the entire contents of the contact. Add new-Add a contact to your contacts list, scroll to your 1-touch dialing list. Caller groups-Add the contact to confirm. 6. View name-View the name of your contacts list. Delete-Delete the entire contact entry from the gallery to an existing name. Enter the security code and press OK. Send bus. At the start screen, select Contacts...
.... 5. Settings-Change the contacts list view or check the memory status of the contact. Edit name-Edit the name of your phone. 27 To delete the entire contents of the contact. Add new-Add a contact to your contacts list, scroll to your 1-touch dialing list. Caller groups-Add the contact to confirm. 6. View name-View the name of your contacts list. Delete-Delete the entire contact entry from the gallery to an existing name. Enter the security code and press OK. Send bus. At the start screen, select Contacts...
User Guide
Page 32
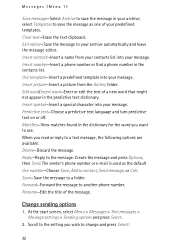
...-Save the message to change and press Select: 32 At the start screen, select Menu > Messages > Text messages > Message settings > Sending options and press Select. 2. select Templates to save the message in your message. Predictive text-Choose a predictive text language and turn predictive text on or off. Insert contact-Insert a name from the Gallery folder. Insert number-Insert a phone number or find a phone number in the contacts list. Exit editor-Save the message to your message. Insert picture-Insert a picture from your contacts list into your archive; Use...
...-Save the message to change and press Select: 32 At the start screen, select Menu > Messages > Text messages > Message settings > Sending options and press Select. 2. select Templates to save the message in your message. Predictive text-Choose a predictive text language and turn predictive text on or off. Insert contact-Insert a name from the Gallery folder. Insert number-Insert a phone number or find a phone number in the contacts list. Exit editor-Save the message to your message. Insert picture-Insert a picture from your contacts list into your archive; Use...
User Guide
Page 39
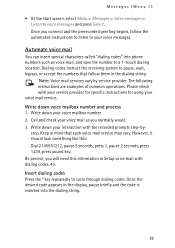
... voice mail service may vary. Insert dialing codes Press the * key repeatedly to voice messages and press Select. Messages (Menu 1) • At the start screen, select Menu > Messages > Voice messages > Listen to cycle through dialing codes. Write down your voice messages. Once the desired code appears in the display, pause briefly and the code is inserted into phone numbers such as you connect and the prerecorded greeting begins, follow them in the dialing string. Automate voice mail You can insert special characters called "dialing codes...
... voice mail service may vary. Insert dialing codes Press the * key repeatedly to voice messages and press Select. Messages (Menu 1) • At the start screen, select Menu > Messages > Voice messages > Listen to cycle through dialing codes. Write down your voice messages. Once the desired code appears in the display, pause briefly and the code is inserted into phone numbers such as you connect and the prerecorded greeting begins, follow them in the dialing string. Automate voice mail You can insert special characters called "dialing codes...
User Guide
Page 40
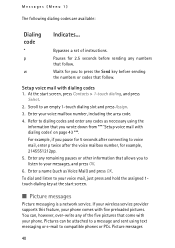
Enter any of instructions. Setup voice mail with five preloaded pictures. At the start screen. ■ Picture messages Picture messaging is a network service. Enter your voice mail, just press and hold the assigned 1touch dialing key at the start screen, press Contacts > 1-touch dialing, and press Select. 2. For example, if you to listen to your messages, and press OK. 6. You can be attached to press the Send key before sending any codes as Voice Mail) and press OK. Picture messages 40 Bypasses a set of the...
Enter any of instructions. Setup voice mail with five preloaded pictures. At the start screen. ■ Picture messages Picture messaging is a network service. Enter your voice mail, just press and hold the assigned 1touch dialing key at the start screen, press Contacts > 1-touch dialing, and press Select. 2. For example, if you to listen to your messages, and press OK. 6. You can be attached to press the Send key before sending any codes as Voice Mail) and press OK. Picture messages 40 Bypasses a set of the...
User Guide
Page 57
... Send key for more information. Scroll to one of the four memory locations and press Options > Edit > OK > Dialing sequence and press Select. 4. Scroll to one of your entries. 6. When you can make a calling card call is displayed. 6. See your lock code and press OK. (See Change the lock code, 68.) 3. Scroll to the calling card of the following sequence types and press Select: Access no.+ phone no.+ card no.-Dial 1-800 access number, phone number, then card number (+ PIN...
... Send key for more information. Scroll to one of the four memory locations and press Options > Edit > OK > Dialing sequence and press Select. 4. Scroll to one of your entries. 6. When you can make a calling card call is displayed. 6. See your lock code and press OK. (See Change the lock code, 68.) 3. Scroll to the calling card of the following sequence types and press Select: Access no.+ phone no.+ card no.-Dial 1-800 access number, phone number, then card number (+ PIN...

User Guide
Page 65
.... Default profile-Choose the profile you wish to be automatically activated when a headset is connected. Automatic answer-Calls are answered automatically after one ring when a headset is connected. Important: Some manufacturers of TTY/TDD devices suggest that is connected. Automatic answer-Calls are answered automatically after one ring when a loopset is cellular ready or cellular compatible. • A cable for connecting the TTY/TDD to your Nokia 3205 phone...
.... Default profile-Choose the profile you wish to be automatically activated when a headset is connected. Automatic answer-Calls are answered automatically after one ring when a headset is connected. Important: Some manufacturers of TTY/TDD devices suggest that is connected. Automatic answer-Calls are answered automatically after one ring when a loopset is cellular ready or cellular compatible. • A cable for connecting the TTY/TDD to your Nokia 3205 phone...

User Guide
Page 69
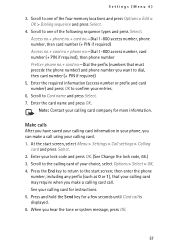
.... 3. Note: If you power off the phone between incorrect entries. 1. At the start screen, select Menu > Settings > Security settings > Access codes > Change security code and press Select. 2. Security code Note: Avoid using codes similar to emergency numbers such as the security level and is supplied with the phone. Enter the new security code (up to features such as 911 to an option (Select, Add restriction, Edit, or Delete) and press Select. Settings (Menu 4) If your wireless service providers supports this feature, then you...
.... 3. Note: If you power off the phone between incorrect entries. 1. At the start screen, select Menu > Settings > Security settings > Access codes > Change security code and press Select. 2. Security code Note: Avoid using codes similar to emergency numbers such as the security level and is supplied with the phone. Enter the new security code (up to features such as 911 to an option (Select, Add restriction, Edit, or Delete) and press Select. Settings (Menu 4) If your wireless service providers supports this feature, then you...

User Guide
Page 70
...another number. Call forwarding is now stored in the Network services menu. See Network services, 6 for more information. Note: Once you are network services. At the start screen, select Menu > Settings > Network services > Network feature setting and press Select. 2. Press Select when Call forwarding is a network service. If your wireless service provider supports this feature, the voice privacy feature protects the privacy of forwarding that matches the feature code you entered (for availability. 70 Store a feature code 1. The activated feature code is a network service...
...another number. Call forwarding is now stored in the Network services menu. See Network services, 6 for more information. Note: Once you are network services. At the start screen, select Menu > Settings > Network services > Network feature setting and press Select. 2. Press Select when Call forwarding is a network service. If your wireless service provider supports this feature, the voice privacy feature protects the privacy of forwarding that matches the feature code you entered (for availability. 70 Store a feature code 1. The activated feature code is a network service...
User Guide
Page 85
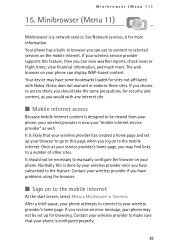
... that your phone is designed to manually configure the browser on your wireless provider if you have subscribed to access them, you can use to connect to the mobile internet At the start screen, select Menu >Minibrowser > Connect. See Network services, 6 for security and content, as well. Contact your phone. The web browser on your wireless provider to a number of other sites. Once at your service provider's home page, you have problems using the browser. ■ Sign...
... that your phone is designed to manually configure the browser on your wireless provider if you have subscribed to access them, you can use to connect to the mobile internet At the start screen, select Menu >Minibrowser > Connect. See Network services, 6 for security and content, as well. Contact your phone. The web browser on your wireless provider to a number of other sites. Once at your service provider's home page, you have problems using the browser. ■ Sign...
User Guide
Page 86
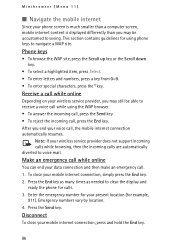
... screen, mobile internet content is displayed differently than you may be able to receive a voice call while using phone keys to navigate a WAP site. Note: If your voice call, the mobile internet connection automatically resumes. Emergency numbers vary by location. 4. After you end your wireless service provider does not support incoming calls while browsing, then the incoming calls are automatically diverted to clear the display and ready the phone for example, 911). Make an emergency call . 1. Press the End key as many times...
... screen, mobile internet content is displayed differently than you may be able to receive a voice call while using phone keys to navigate a WAP site. Note: If your voice call, the mobile internet connection automatically resumes. Emergency numbers vary by location. 4. After you end your wireless service provider does not support incoming calls while browsing, then the incoming calls are automatically diverted to clear the display and ready the phone for example, 911). Make an emergency call . 1. Press the End key as many times...

User Guide
Page 97
... web page. 97 Scroll to access the list of the Applications menu. See Network services, 6 for the launch screen to an application and press Options, highlight Open, then press Select or the Send key. Note: When you will find useful Java utilities pre-installed on your wireless provider. ■ Launch 1. When you wish to download, and press Select to connect to load. Browser downloads 1. At the start screen, select Menu...
... web page. 97 Scroll to access the list of the Applications menu. See Network services, 6 for the launch screen to an application and press Options, highlight Open, then press Select or the Send key. Note: When you will find useful Java utilities pre-installed on your wireless provider. ■ Launch 1. When you wish to download, and press Select to connect to load. Browser downloads 1. At the start screen, select Menu...
User Guide
Page 109
... calling cards 56 calls answering 17 in-call options 18 making 16 calorie calculator 95 camera 77 care and maintenance 103 certification information (SAR) 106 charger connecting 14 information 101 times 108 color schemes 63 contacts list 23 add 23 delete 27 edit 26 send 29 view 27 countdown timer 92 D data/fax calls 58 dialing codes 39 display brightness 63 display language 58 display settings 63 download applications 97 pictures 41 E e-mail messages 43 emergency calls 106 while using wireless Internet 86 with keypad locked...
... calling cards 56 calls answering 17 in-call options 18 making 16 calorie calculator 95 camera 77 care and maintenance 103 certification information (SAR) 106 charger connecting 14 information 101 times 108 color schemes 63 contacts list 23 add 23 delete 27 edit 26 send 29 view 27 countdown timer 92 D data/fax calls 58 dialing codes 39 display brightness 63 display language 58 display settings 63 download applications 97 pictures 41 E e-mail messages 43 emergency calls 106 while using wireless Internet 86 with keypad locked...
User Guide
Page 110
... picture messages 40 text messages 30 voice messages 38 minibrowser 85 minibrowser messages 43 mode 73 multimedia messages 34 music stand 66 N network 73 Network Services 6 Ö organizer 87 P phone lock 67 change lock code 68 phone settings 58 picture messages 40 predictive text 21 110 profiles 52 Q quick keys 9 R radio 75 restore factory settings 72 restrict calls 68 roaming 73 S safety 4 important safety information 104 screen saver 64 scrolling 12 security code 69 security settings 67 send own caller ID 72 set date 62 time 61 settings 54 shared memory 7 shortcuts 12 start screen...
... picture messages 40 text messages 30 voice messages 38 minibrowser 85 minibrowser messages 43 mode 73 multimedia messages 34 music stand 66 N network 73 Network Services 6 Ö organizer 87 P phone lock 67 change lock code 68 phone settings 58 picture messages 40 predictive text 21 110 profiles 52 Q quick keys 9 R radio 75 restore factory settings 72 restrict calls 68 roaming 73 S safety 4 important safety information 104 screen saver 64 scrolling 12 security code 69 security settings 67 send own caller ID 72 set date 62 time 61 settings 54 shared memory 7 shortcuts 12 start screen...


