
Nokia 2605 classic User Guide in English
Page 5
...E-mail Messages........... 53 4 Text Entry 27 Word Mode 27 Abc (Multi-tap) Mode 28 123 (number) Mode 28 Symbols Mode 28 4. Set Up Your Phone ...... 17 Antenna 17 Change the Battery 17 Charge the Battery 19 Wrist Strap 19 Replace the Camera Xpress-onTM snap 19 Replace the Back Camera... Xpress-onTM snap 21 Turn Your Phone On or Off....... 22 Connect the Headset 22 Make A Call 23 Answer Calls 24 3. Contents Contents SAFETY 6 Welcome 9 Getting Help 9 Get The Most...
...E-mail Messages........... 53 4 Text Entry 27 Word Mode 27 Abc (Multi-tap) Mode 28 123 (number) Mode 28 Symbols Mode 28 4. Set Up Your Phone ...... 17 Antenna 17 Change the Battery 17 Charge the Battery 19 Wrist Strap 19 Replace the Camera Xpress-onTM snap 19 Replace the Back Camera... Xpress-onTM snap 21 Turn Your Phone On or Off....... 22 Connect the Headset 22 Make A Call 23 Answer Calls 24 3. Contents Contents SAFETY 6 Welcome 9 Getting Help 9 Get The Most...

Nokia 2605 classic User Guide in English
Page 6
Mobile Instant Phone Information 76 Messaging 54 Setup Assistant 77 9. Battery and Charger Information 81 Battery Information 81 Nokia Battery Authentication Guidelines 82 Care and Maintenance ....... 84 Additional Safety Information 86 Index 94 5 VZ Navigator 58 12. Enhancements 80 15. Recent Calls 56 View ... .......... 78 Activate and use Voice Commands 78 14. Settings & Tools .......... 59 My Verizon 59 Tools 59 Bluetooth Menu 64 Sounds Settings 66 Display Settings 67 Phone Settings 69 Call Settings 74 Memory 76 13. Contents 8. My Ringtones 55 10.
Mobile Instant Phone Information 76 Messaging 54 Setup Assistant 77 9. Battery and Charger Information 81 Battery Information 81 Nokia Battery Authentication Guidelines 82 Care and Maintenance ....... 84 Additional Safety Information 86 Index 94 5 VZ Navigator 58 12. Enhancements 80 15. Recent Calls 56 View ... .......... 78 Activate and use Voice Commands 78 14. Settings & Tools .......... 59 My Verizon 59 Tools 59 Bluetooth Menu 64 Sounds Settings 66 Display Settings 67 Phone Settings 69 Call Settings 74 Memory 76 13. Contents 8. My Ringtones 55 10.

Nokia 2605 classic User Guide in English
Page 7
SWITCH ON SAFELY Do not switch the device on when wireless phone use is not water-resistant. Your first consideration while driving should be susceptible to operate the vehicle while driving. SWITCH OFF IN RESTRICTED AREAS Follow ...
SWITCH ON SAFELY Do not switch the device on when wireless phone use is not water-resistant. Your first consideration while driving should be susceptible to operate the vehicle while driving. SWITCH OFF IN RESTRICTED AREAS Follow ...

Nokia 2605 classic User Guide in English
Page 10
... device label The MEID is found on the type label, which is located beneath the battery on the back of this Nokia mobile device. To personalize your phone, you need help, the Nokia Care Contact Center is available for all individuals, including those with disabilities. Before calling, we recommend that you write down...
... device label The MEID is found on the type label, which is located beneath the battery on the back of this Nokia mobile device. To personalize your phone, you need help, the Nokia Care Contact Center is available for all individuals, including those with disabilities. Before calling, we recommend that you write down...

Nokia 2605 classic User Guide in English
Page 12
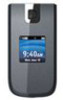
Phone at A Glance 1. Directional key 4. Vibration key 9. Earpiece 2. International Dialing key 11. Voicemail 1-touch dial key 12. Left Soft key 16. Speakerphone key 15. Alphanumeric keypad 8. Right Soft key 5. End/Power key 7. Send key 14. Camera key 6. Clear key 13. Next key 10. OK key 11 Display screen 3. Phone at A Glance 1.
Phone at A Glance 1. Directional key 4. Vibration key 9. Earpiece 2. International Dialing key 11. Voicemail 1-touch dial key 12. Left Soft key 16. Speakerphone key 15. Alphanumeric keypad 8. Right Soft key 5. End/Power key 7. Send key 14. Camera key 6. Clear key 13. Next key 10. OK key 11 Display screen 3. Phone at A Glance 1.

Nokia 2605 classic User Guide in English
Page 13
Microphone 9. Phone at A Glance 1. Wrist Strap eyelet 10. Speakerphone 12 Camera lens 6. Volume keys 3. Headset jack 4. Back cover Xpress-onTM snap 8. Camera Xpress-onTM snap 5. Voice Command key 11. Charging/ Data port 2. Front display 7.
Microphone 9. Phone at A Glance 1. Wrist Strap eyelet 10. Speakerphone 12 Camera lens 6. Volume keys 3. Headset jack 4. Back cover Xpress-onTM snap 8. Camera Xpress-onTM snap 5. Voice Command key 11. Charging/ Data port 2. Front display 7.

Nokia 2605 classic User Guide in English
Page 14
...Signal strength indicator. You are in a digital network. SSL security feature is on . Press the Right Soft key to access the complete glossary, see "Phone Information," p. 76. You are roaming outside your home network. See "Airplane Mode," p. 69. To view how to select this option. 5. Message ... a fully charged battery. 6. Signal strength - Location information sharing mode. ■ Indicators and Icons Depending on your phone settings and modes, some or all of bars displayed. 2. Phone at A Glance ■ Standby Mode The start screen is home base and indicates that your...
...Signal strength indicator. You are in a digital network. SSL security feature is on . Press the Right Soft key to access the complete glossary, see "Phone Information," p. 76. You are roaming outside your home network. See "Airplane Mode," p. 69. To view how to select this option. 5. Message ... a fully charged battery. 6. Signal strength - Location information sharing mode. ■ Indicators and Icons Depending on your phone settings and modes, some or all of bars displayed. 2. Phone at A Glance ■ Standby Mode The start screen is home base and indicates that your...

Nokia 2605 classic User Guide in English
Page 15
... 72. Vibrate mode is in progress. You have new voicemails. Alarm clock is still active. Voice call: a call . See "Location Setting," p. 72. Dormant mode: the phone is in Standby Mode. Location information sharing is on . Alarm only is set . TTY is in a dormant state during a data call is on . You have... missed calls. No icon indicates that the phone is enabled. Battery level indicator. You have new messages in progress. No service indicator. Bluetooth wireless connectivity is on...
... 72. Vibrate mode is in progress. You have new voicemails. Alarm clock is still active. Voice call: a call . See "Location Setting," p. 72. Dormant mode: the phone is in Standby Mode. Location information sharing is on . Alarm only is set . TTY is in a dormant state during a data call is on . You have... missed calls. No icon indicates that the phone is enabled. Battery level indicator. You have new messages in progress. No service indicator. Bluetooth wireless connectivity is on...

Nokia 2605 classic User Guide in English
Page 16
... can use the Left and Right Soft keys to select Message or Contacts. Depending on how you can select or view items and customize your phone features. See "Main Menu Settings," p. 69. In Standby Mode, use the Directional key to select highlighted menus and submenus. ■ Directional Key ... the OK key, then scroll up , down (or scroll left , and right through the menu options. Phone at A Glance Each main menu contains submenus and lists from which you configure your phone, some or all the operations are instructed in the "Default List" view mode unless specially indicated. ■...
... can use the Left and Right Soft keys to select Message or Contacts. Depending on how you can select or view items and customize your phone features. See "Main Menu Settings," p. 69. In Standby Mode, use the Directional key to select highlighted menus and submenus. ■ Directional Key ... the OK key, then scroll up , down (or scroll left , and right through the menu options. Phone at A Glance Each main menu contains submenus and lists from which you configure your phone, some or all the operations are instructed in the "Default List" view mode unless specially indicated. ■...

Nokia 2605 classic User Guide in English
Page 17
... shortcut you want to other shortcuts. Press the Directional key Left - My Verizon. Scroll to the place where you want to move , and select Move. Phone at A Glance The default menu setting for MY SHORTCUTS is as follows: 1. Alarm Clock To change the default shortcuts, select Settings. Press the Directional key...
... shortcut you want to other shortcuts. Press the Directional key Left - My Verizon. Scroll to the place where you want to move , and select Move. Phone at A Glance The default menu setting for MY SHORTCUTS is as follows: 1. Alarm Clock To change the default shortcuts, select Settings. Press the Directional key...

Nokia 2605 classic User Guide in English
Page 18
...or navigation. ■ Change the Battery Remove the back cover With the back of the phone facing you should never rely solely on location data from the Location Setting menu. Set Up Your Phone 2. Contact with any radio transmitting device, avoid touching the antenna area unnecessarily while the ...cellular radio networks for precise location measurement, and you , push down and slide the back cover toward the bottom of the phone and remove. 17 Set Up Your Phone ■ Antenna Your device may reduce the battery life. An internal GPS antenna is transmitting or receiving. As with such...
...or navigation. ■ Change the Battery Remove the back cover With the back of the phone facing you should never rely solely on location data from the Location Setting menu. Set Up Your Phone 2. Contact with any radio transmitting device, avoid touching the antenna area unnecessarily while the ...cellular radio networks for precise location measurement, and you , push down and slide the back cover toward the bottom of the phone and remove. 17 Set Up Your Phone ■ Antenna Your device may reduce the battery life. An internal GPS antenna is transmitting or receiving. As with such...

Nokia 2605 classic User Guide in English
Page 19
... battery After you have removed the back cover, insert your phone requires service, contact the Nokia Care Contact Center. 18 Replace the back cover Replace the cover.... Avoid touching electronic components while changing the cover. Important: Do not remove the front cover of the phone. Attempts to align the contacts, and press down until the battery fits into the finger grip, and ...lift the battery from its compartment. Set Up Your Phone Note: Always turn off the device, and disconnect the charger and any other device, before removing the...
... battery After you have removed the back cover, insert your phone requires service, contact the Nokia Care Contact Center. 18 Replace the back cover Replace the cover.... Avoid touching electronic components while changing the cover. Important: Do not remove the front cover of the phone. Attempts to align the contacts, and press down until the battery fits into the finger grip, and ...lift the battery from its compartment. Set Up Your Phone Note: Always turn off the device, and disconnect the charger and any other device, before removing the...

Nokia 2605 classic User Guide in English
Page 20
... tighten it. ■ Replace the Camera Xpress-onTM snap You can remove and replace the camera Xpress-onTM snap on the front cover of the phone. Charging with the AC-6U charger is recommended when quick charging is purchased separately. ■ Wrist Strap Note: The wrist strap does NOT come... CA-101 data cable is used for data transfer and slow charging the battery while connected to show the battery is charging. Set Up Your Phone 3. Insert the charger output plug into a standard AC outlet. 2. The CA-101 data cable is needed. The battery strength indicator scrolls, to a PC or...
... tighten it. ■ Replace the Camera Xpress-onTM snap You can remove and replace the camera Xpress-onTM snap on the front cover of the phone. Charging with the AC-6U charger is recommended when quick charging is purchased separately. ■ Wrist Strap Note: The wrist strap does NOT come... CA-101 data cable is used for data transfer and slow charging the battery while connected to show the battery is charging. Set Up Your Phone 3. Insert the charger output plug into a standard AC outlet. 2. The CA-101 data cable is needed. The battery strength indicator scrolls, to a PC or...

Nokia 2605 classic User Guide in English
Page 21
Place the two rear camera tabs into holes as illustrated. 20 Place your thumb in the gap between the camera Xpress-onTM snap and the phone and push down. 2. Place the phone with the front of the phone. 3. Push the camera Xpress-onTM snap toward the top of the phone facing you. Slide the camera Xpress-onTM snap out and lift it away from the phone. 4. Set Up Your Phone 1.
Place the two rear camera tabs into holes as illustrated. 20 Place your thumb in the gap between the camera Xpress-onTM snap and the phone and push down. 2. Place the phone with the front of the phone. 3. Push the camera Xpress-onTM snap toward the top of the phone facing you. Slide the camera Xpress-onTM snap out and lift it away from the phone. 4. Set Up Your Phone 1.

Nokia 2605 classic User Guide in English
Page 22
Push the camera Xpress-onTM snap toward the bottom of the phone. Place the phone with the slot in place. To replace the back Xpress-onTM snap, align it is in the phone. 3. 5. You must remove the back cover of the phone facing you. Push and slide the back Xpress-onTM snap toward the top... lift it is in place. 21 Slide the back Xpress-onTM snap toward the bottom of the phone until it from its compartment to remove. 2. Set Up Your Phone ■ Replace the Back Camera Xpress-onTM snap You can remove and replace the back Xpress-onTM snap on the back of the...
Push the camera Xpress-onTM snap toward the bottom of the phone. Place the phone with the slot in place. To replace the back Xpress-onTM snap, align it is in the phone. 3. 5. You must remove the back cover of the phone facing you. Push and slide the back Xpress-onTM snap toward the top... lift it is in place. 21 Slide the back Xpress-onTM snap toward the bottom of the phone until it from its compartment to remove. 2. Set Up Your Phone ■ Replace the Back Camera Xpress-onTM snap You can remove and replace the back Xpress-onTM snap on the back of the...

Nokia 2605 classic User Guide in English
Page 23
... For hands-free operation, connect a compatible headset with a standard 2.5-mm plug to your ear. Do not use the headset, your ability to customize your phone. 2. Plug the headset connector into the 2.5-mm headset jack on , Setup Assistant prompts you to hear outside sounds may be affected. Warning: When you ...can endanger your phone On or Off, press and hold the End/Power key for at least 3 seconds. The first time the device is turned on the side ...
... For hands-free operation, connect a compatible headset with a standard 2.5-mm plug to your ear. Do not use the headset, your ability to customize your phone. 2. Plug the headset connector into the 2.5-mm headset jack on , Setup Assistant prompts you to hear outside sounds may be affected. Warning: When you ...can endanger your phone On or Off, press and hold the End/Power key for at least 3 seconds. The first time the device is turned on the side ...

Nokia 2605 classic User Guide in English
Page 24
Enter the phone number (including the area code if necessary), and press the Send key . To use , because the volume may be extremely loud. Call a 1-touch dial number ... delete a character to enter contact numbers, see "One Touch Dial," p. 75. Warning: Do not hold the last number. Set Up Your Phone ■ Make A Call To make sure the phone is in use the contacts menu and to the left of the assigned key. Press the End key to end the call...
Enter the phone number (including the area code if necessary), and press the Send key . To use , because the volume may be extremely loud. Call a 1-touch dial number ... delete a character to enter contact numbers, see "One Touch Dial," p. 75. Warning: Do not hold the last number. Set Up Your Phone ■ Make A Call To make sure the phone is in use the contacts menu and to the left of the assigned key. Press the End key to end the call...

Nokia 2605 classic User Guide in English
Page 25
... Contacts," p. 44. 24 When you , the caller's identity must be shown as Restricted or Unavailable. To forward the call to your Contacts, only the phone number is connected to a handsfree device. The more information, see "Answer Options," p. 74. • Open the flip (default setting). • Press ...any key. • The call automatically connects when your phone is displayed, or the incoming caller number may be stored in your voicemail, select Ignore. If the caller is connected, press the Send key on...
... Contacts," p. 44. 24 When you , the caller's identity must be shown as Restricted or Unavailable. To forward the call to your Contacts, only the phone number is connected to a handsfree device. The more information, see "Answer Options," p. 74. • Open the flip (default setting). • Press ...any key. • The call automatically connects when your phone is displayed, or the incoming caller number may be stored in your voicemail, select Ignore. If the caller is connected, press the Send key on...

Nokia 2605 classic User Guide in English
Page 26
To turn sounds on and and silence all other party on a call the contact. Select Audio to Phone to hear the other party on the phone, or Audio to Device to a contact that is connected. Vibrate Mode To use Vibrate Mode with a ringtone, from Standby Mode, select MENU > Settings & Tools ...press the Volume keys Up until the desired level is displayed. Or press and hold the Vibration key (see "Phone at A Glance," p. 11). Search your Contact List. Recent Calls - Set Up Your Phone Picture ID You can assign a picture to hear the other sounds, open the flip and press the Volume ...
To turn sounds on and and silence all other party on a call the contact. Select Audio to Phone to hear the other party on the phone, or Audio to Device to a contact that is connected. Vibrate Mode To use Vibrate Mode with a ringtone, from Standby Mode, select MENU > Settings & Tools ...press the Volume keys Up until the desired level is displayed. Or press and hold the Vibration key (see "Phone at A Glance," p. 11). Search your Contact List. Recent Calls - Set Up Your Phone Picture ID You can assign a picture to hear the other sounds, open the flip and press the Volume ...

Nokia 2605 classic User Guide in English
Page 27
Select whether to select Mute. Record a phone call , utilize the Left Soft key to protect the privacy of the conversation. To deactivate this feature, select Unmute. 26 Set Up Your Phone Main Menu - Notepad - Open the notepad. Voice Record - Voice Privacy On - Use Main Menu. Mute Function To prevent the other person from hearing your own voice during a call .
Select whether to select Mute. Record a phone call , utilize the Left Soft key to protect the privacy of the conversation. To deactivate this feature, select Unmute. 26 Set Up Your Phone Main Menu - Notepad - Open the notepad. Voice Record - Voice Privacy On - Use Main Menu. Mute Function To prevent the other person from hearing your own voice during a call .


