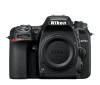
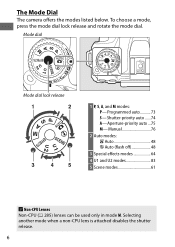
D7500 Release - Nikon
D7500 Release
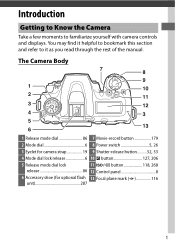
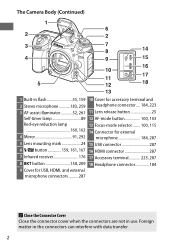
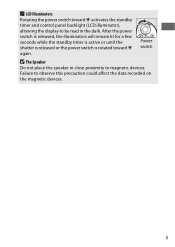
Related Manual Pages
Related Videos

Should YOU BUY the NIKON D7500 in 2022?
Duration: 7:33
Total Views: 39,506
Duration: 7:33
Total Views: 39,506
Similar Questions


Nikon D3100 Shutter Release Error, How Do I Fix This Or Do I Have To Send It In.
(Posted by ringofive 10 years ago)