
D50 User's Manual
Page 2
... shooting and playback options. Technical Notes (pages 101-103) Read this chapter for more information on Custom Settings and on camera specifications, accessories, and troubleshooting. Reference: More on Photography (pages 30-50) Play with exposure and explore the creative ... you need to know for simple, "point-and-shoot" photography Read these chapters for use. Setup: Basic Camera Settings (pages 68-75) Basic camera setup, including formatting memory cards and setting the camera clock. Reference: More on Playback (pages 51-67) Learn more advanced settings. About ...
... shooting and playback options. Technical Notes (pages 101-103) Read this chapter for more information on Custom Settings and on camera specifications, accessories, and troubleshooting. Reference: More on Photography (pages 30-50) Play with exposure and explore the creative ... you need to know for simple, "point-and-shoot" photography Read these chapters for use. Setup: Basic Camera Settings (pages 68-75) Basic camera setup, including formatting memory cards and setting the camera clock. Reference: More on Playback (pages 51-67) Learn more advanced settings. About ...

D50 User's Manual
Page 4
...finder could result from the AC adapter (available separately), unplug the AC adapter and remove the battery immediately, taking care to a Nikon-authorized service center for inspection. After removing the battery, take the product to avoid burns. In the event of a malfunction, the product...adapter, be read them. Do not place strap around the neck of an infant or child Placing the camera strap around the neck of malfunction Should you are using this section are indicated by a qualified technician. Observe proper precautions when handling batteries Batteries may leak...
...finder could result from the AC adapter (available separately), unplug the AC adapter and remove the battery immediately, taking care to a Nikon-authorized service center for inspection. After removing the battery, take the product to avoid burns. In the event of a malfunction, the product...adapter, be read them. Do not place strap around the neck of an infant or child Placing the camera strap around the neck of malfunction Should you are using this section are indicated by a qualified technician. Observe proper precautions when handling batteries Batteries may leak...

D50 User's Manual
Page 5
...Avoid contact with the flash window touching a person or object. Before removing the battery, turn the camera off and allow the battery to cool. • Discontinue use immediately should you notice any changes in the battery, such as necklaces or hairpins. • Batteries are ...temporary visual impairment. Use appropriate cables When connecting cables to the input and output jacks, use , or when the product is not in use, attach the terminal cover and store in a cool place. • Immediately after use only the cables provided or sold by Nikon for an extended period...
...Avoid contact with the flash window touching a person or object. Before removing the battery, turn the camera off and allow the battery to cool. • Discontinue use immediately should you notice any changes in the battery, such as necklaces or hairpins. • Batteries are ...temporary visual impairment. Use appropriate cables When connecting cables to the input and output jacks, use , or when the product is not in use, attach the terminal cover and store in a cool place. • Immediately after use only the cables provided or sold by Nikon for an extended period...

D50 User's Manual
Page 6
.... Federal Communications Commission (FCC) Radio Frequency Interference Statement This equipment has been tested and D50 found to the attention ware described in these Nikon's prior written permission. Using oth- cal known to the State of California to • Connect the equipment into any...FCC requires the user to operate the equipin a particular installation. Nikon Inc., • Consult the dealer or an experienced 1300 Walt Whitman Road, Melville, New York radio/television technician for a Class B digital device, pursuant to er interface cables may be reproduced, trans-...
.... Federal Communications Commission (FCC) Radio Frequency Interference Statement This equipment has been tested and D50 found to the attention ware described in these Nikon's prior written permission. Using oth- cal known to the State of California to • Connect the equipment into any...FCC requires the user to operate the equipin a particular installation. Nikon Inc., • Consult the dealer or an experienced 1300 Walt Whitman Road, Melville, New York radio/television technician for a Class B digital device, pursuant to er interface cables may be reproduced, trans-...

D50 User's Manual
Page 7
...du Canada. local government bonds, even if such sued by means of a scanner, digital camera or other trade names mentioned in this product for customers in a foreign country is... certified documents stipulated by law is governed by • Comply with your Nikon product are trademarks or regis- righted creative works such as passes and meal coupons. The...reproduction of the Canadian Interference pecte toutes les exigences du Règlement Causing Equipment Regulations. Do not use by public agencies and private groups, ID cards, and tickets, such as books, music, paintings,...
...du Canada. local government bonds, even if such sued by means of a scanner, digital camera or other trade names mentioned in this product for customers in a foreign country is... certified documents stipulated by law is governed by • Comply with your Nikon product are trademarks or regis- righted creative works such as passes and meal coupons. The...reproduction of the Canadian Interference pecte toutes les exigences du Règlement Causing Equipment Regulations. Do not use by public agencies and private groups, ID cards, and tickets, such as books, music, paintings,...
D50 User's Manual
Page 8
... Adjusting Viewfinder Focus 13 Tutorial: Photography and Playback 14 Taking Photographs in Mode 14 Digital Vari-Programs 19 Choosing a Shooting Mode 21 Using the Self-timer or Remote Control 22 Basic Playback 24 Reference...25 Using Camera Menus 26 Reference: More on Photography 30 Image Quality and Size 30 Image Quality 31...
... Adjusting Viewfinder Focus 13 Tutorial: Photography and Playback 14 Taking Photographs in Mode 14 Digital Vari-Programs 19 Choosing a Shooting Mode 21 Using the Self-timer or Remote Control 22 Basic Playback 24 Reference...25 Using Camera Menus 26 Reference: More on Photography 30 Image Quality and Size 30 Image Quality 31...

D50 User's Manual
Page 9
... Slide Show ...85 Print Set ...86 Small Picture 86 Custom Settings 87 Technical Notes 101 Camera Settings 101 Optional Accessories 104 Caring for the Camera 115 Troubleshooting 120 Appendix ...126 Specifications 129 Index ...136 A two-button reset ... 50) and Custom Setting R (Menu Reset; Viewing Photographs on a Computer 59 Printing Photographs 62 Setup...68 Basic Camera Settings 68 Format ...68 CSM/Setup Menu 69 Date ...69 LCD Brightness 69 Video Mode 69 Language (LANG 70 Image...76 Optimize Image 76 Long Exp. page 87) can be used to restore factory default settings.
... Slide Show ...85 Print Set ...86 Small Picture 86 Custom Settings 87 Technical Notes 101 Camera Settings 101 Optional Accessories 104 Caring for the Camera 115 Troubleshooting 120 Appendix ...126 Specifications 129 Index ...136 A two-button reset ... 50) and Custom Setting R (Menu Reset; Viewing Photographs on a Computer 59 Printing Photographs 62 Setup...68 Basic Camera Settings 68 Format ...68 CSM/Setup Menu 69 Date ...69 LCD Brightness 69 Video Mode 69 Language (LANG 70 Image...76 Optimize Image 76 Long Exp. page 87) can be used to restore factory default settings.

D50 User's Manual
Page 10
... damages or lost profits that the camera is designed to be used with the latest product information, tips, answers to frequently-asked questions (FAQs), and general advice on digital imaging and photography. The D50, however, is functioning normally. Foreign Matter on the Low-Pass Filter Nikon takes every possible precaution to prevent foreign...
... damages or lost profits that the camera is designed to be used with the latest product information, tips, answers to frequently-asked questions (FAQs), and general advice on digital imaging and photography. The D50, however, is functioning normally. Foreign Matter on the Low-Pass Filter Nikon takes every possible precaution to prevent foreign...

D50 User's Manual
Page 11
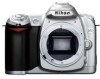
...6G ED lens is available elsewhere in this manual thoroughly before use , and keep it easier to find the information you through the process of a Nikon D50 single-lens reflex (SLR) digital camera with interchangeable lenses. This icon marks notes, information that should ...be read before using the PictureProject software provided with your camera. Read this manual or in this product also...
...6G ED lens is available elsewhere in this manual thoroughly before use , and keep it easier to find the information you through the process of a Nikon D50 single-lens reflex (SLR) digital camera with interchangeable lenses. This icon marks notes, information that should ...be read before using the PictureProject software provided with your camera. Read this manual or in this product also...

D50 User's Manual
Page 13
... Move cursor up Menu navigation ( 28) Display previous page Return to control the display of photo information during playback. Introduction-Getting to Know the Camera Camera Body (continued) Viewfinder eyepiece: 5, 13, 16 Viewfinder eyepiece cup: 13 (shooting mode) button: 21 [Reset button:...120 Tripod socket Monitor: 24, 26 Battery-chamber cover latch: 9 Battery-chamber cover: 9 Multi selector The multi selector is used for menu navigation and to previous menu Cancel Display next page Display sub-menu Make selection Hide/display photo information Move cursor down 3
... Move cursor up Menu navigation ( 28) Display previous page Return to control the display of photo information during playback. Introduction-Getting to Know the Camera Camera Body (continued) Viewfinder eyepiece: 5, 13, 16 Viewfinder eyepiece cup: 13 (shooting mode) button: 21 [Reset button:...120 Tripod socket Monitor: 24, 26 Battery-chamber cover latch: 9 Battery-chamber cover: 9 Multi selector The multi selector is used for menu navigation and to previous menu Cancel Display next page Display sub-menu Make selection Hide/display photo information Move cursor down 3

D50 User's Manual
Page 18
...18a quick charger. 1 Charge the battery 1.1 Connect the power cord to purchase another cable for use abroad; 8 consult with a local Nikon-authorized retailer or service representative. Do not use with any warnings and instructions provided by the battery manufacturer. During charging, the temperature should be ... the battery may be in the charger. The supplied power cable is complete when the CHARGE lamp stops blinking. wait for domestic use only. Failure to observe these precautions could damage the battery, impair its performance, or prevent it in. 1.2 Place the battery ...
...18a quick charger. 1 Charge the battery 1.1 Connect the power cord to purchase another cable for use abroad; 8 consult with a local Nikon-authorized retailer or service representative. Do not use with any warnings and instructions provided by the battery manufacturer. During charging, the temperature should be ... the battery may be in the charger. The supplied power cable is complete when the CHARGE lamp stops blinking. wait for domestic use only. Failure to observe these precautions could damage the battery, impair its performance, or prevent it in. 1.2 Place the battery ...

D50 User's Manual
Page 19
Close the battery chamber cover. Removing the Battery Turn the camera off , open the battery chamber cover. 2.2 Insert a fully charged battery as shown at right. Replace the terminal cover when the battery is off before removing the battery. Introduction-First Steps 2 Insert the battery 2.1 After confirming that the camera is not in use. 9
Close the battery chamber cover. Removing the Battery Turn the camera off , open the battery chamber cover. 2.2 Insert a fully charged battery as shown at right. Replace the terminal cover when the battery is off before removing the battery. Introduction-First Steps 2 Insert the battery 2.1 After confirming that the camera is not in use. 9

D50 User's Manual
Page 21
... the message shown at right until it can not be used in the "lock" position, the camera will light for use. Proceed to warn that photos can not be recorded or deleted and the memory card can be formatted. If the control panel shows the number ... card access lamp will display a message to Step 2. Close the memory card slot cover. 1.3 Turn the camera on Secure Digital (SD) memory cards (available separately). 1 Insert a memory card 1.1 Before inserting or removing memory cards, turn the camera off and open the card slot cover. 1.2 Slide the memory card in as shown at right...
... the message shown at right until it can not be used in the "lock" position, the camera will light for use. Proceed to warn that photos can not be recorded or deleted and the memory card can be formatted. If the control panel shows the number ... card access lamp will display a message to Step 2. Close the memory card slot cover. 1.3 Turn the camera on Secure Digital (SD) memory cards (available separately). 1 Insert a memory card 1.1 Before inserting or removing memory cards, turn the camera off and open the card slot cover. 1.2 Slide the memory card in as shown at right...

D50 User's Manual
Page 22
... photographs and other data they may drop if cards are formatted in to format memory cards. Begin formatting. Formatting Memory Cards Use the camera Format option to eject (ቢ). Do not turn camera off or remove battery or memory card until formatting is complete. 2.3 Monitor turns off when formatting is off. 2 Turn the...
... photographs and other data they may drop if cards are formatted in to format memory cards. Begin formatting. Formatting Memory Cards Use the camera Format option to eject (ቢ). Do not turn camera off or remove battery or memory card until formatting is complete. 2.3 Monitor turns off when formatting is off. 2 Turn the...

D50 User's Manual
Page 26
Focus area Using a Zoom Lens Use the zoom ring to zoom in on the subject so that it fills a larger area of the five focus areas. Tutorial-Taking Photographs in the final photograph. Zoom in the viewfinder with your left. Holding the Camera Hold the handgrip in your ...torso for support. 3.2 Frame a photo in Zoom out 16 Keep your elbows propped lightly against your right hand and cradle the camera body or lens with the main subject positioned in any of the frame, or zoom out to increase the area visible in Mode 3 Frame a photograph...
Focus area Using a Zoom Lens Use the zoom ring to zoom in on the subject so that it fills a larger area of the five focus areas. Tutorial-Taking Photographs in the final photograph. Zoom in the viewfinder with your left. Holding the Camera Hold the handgrip in your ...torso for support. 3.2 Frame a photo in Zoom out 16 Keep your elbows propped lightly against your right hand and cradle the camera body or lens with the main subject positioned in any of the frame, or zoom out to increase the area visible in Mode 3 Frame a photograph...

D50 User's Manual
Page 28
... until the flash-ready indicator is poor Flash off so that it gently downward until the latch clicks into place. Remove lens hoods when using the flash. Subjects outside the range of the flash (0.6-7.5 m/2´-24´7˝) may not be turned off 18 To turn the fl... in Mode The Built-in Flash If additional lighting is required for additional lighting. To save battery power when the flash is not in use, return it to the closed position by pressing it will pop up automatically when the shutter-release is pressed halfway. If the flash is...
... until the flash-ready indicator is poor Flash off so that it gently downward until the latch clicks into place. Remove lens hoods when using the flash. Subjects outside the range of the flash (0.6-7.5 m/2´-24´7˝) may not be turned off 18 To turn the fl... in Mode The Built-in Flash If additional lighting is required for additional lighting. To save battery power when the flash is not in use, return it to the closed position by pressing it will pop up automatically when the shutter-release is pressed halfway. If the flash is...

D50 User's Manual
Page 29
... take pictures in Digital Vari-Program modes: 1 Rotate the mode dial to camera; Portrait: Bringing out a Portrait Subject Use for best results. Increase distance between subject and background or use telephoto lens for portraits. Mode Description Portrait For portraits. Camera selects focus area containing...of light available. See "Taking Photographs in flash will pop up shots of six Digital Vari-Program modes. Selecting a program automatically optimizes settings to , the D50 offers a choice of small objects. Sports For moving subjects. The Built-in Flash If ...
... take pictures in Digital Vari-Program modes: 1 Rotate the mode dial to camera; Portrait: Bringing out a Portrait Subject Use for best results. Increase distance between subject and background or use telephoto lens for portraits. Mode Description Portrait For portraits. Camera selects focus area containing...of light available. See "Taking Photographs in flash will pop up shots of six Digital Vari-Program modes. Selecting a program automatically optimizes settings to , the D50 offers a choice of small objects. Sports For moving subjects. The Built-in Flash If ...

D50 User's Manual
Page 30
... balance between main subject and background in flash and AF-assist illuminator turn off automatically. Tutorial-Digital Vari-Programs Landscape: Capturing Nature's Majesty Use for snapshots of flowers, insects, and other small objects. • Camera focuses on subject in center focus area. • Tripod recommended to prevent blurring at slow shutter...
... balance between main subject and background in flash and AF-assist illuminator turn off automatically. Tutorial-Digital Vari-Programs Landscape: Capturing Nature's Majesty Use for snapshots of flowers, insects, and other small objects. • Camera focuses on subject in center focus area. • Tripod recommended to prevent blurring at slow shutter...

D50 User's Manual
Page 32
... Mode Description NO Timer Photos are taken about 2 s after shutter-release button is pressed. To use the self-timer: 1 Mount the camera on a tripod (recommended) or place the camera on remote control is pressed. Use the button to appear yourself. Photos are taken about 10 s after shutter-release button on a ... Mode Selection The self-timer/remote control mode can be selected by pressing the 22 and rotating the command dial. Tutorial-Using the Self-timer or Remote Control Using the Self-timer or Remote Control The self-timer or optional ML-L3 remote control can also be...
... Mode Description NO Timer Photos are taken about 2 s after shutter-release button is pressed. To use the self-timer: 1 Mount the camera on a tripod (recommended) or place the camera on remote control is pressed. Use the button to appear yourself. Photos are taken about 10 s after shutter-release button on a ... Mode Selection The self-timer/remote control mode can be selected by pressing the 22 and rotating the command dial. Tutorial-Using the Self-timer or Remote Control Using the Self-timer or Remote Control The self-timer or optional ML-L3 remote control can also be...

D50 User's Manual
Page 33
Remote control: From a distance of 5 m (16´) or less, point the remote control at the infrared receiver on the front of the camera and press the shutter-release button on the remote control. Self-timer: Press the shutter-release button all the way down to start the self-... released about eight seconds. The lamp stops blinking two seconds before the photograph is taken and remains lit until the shutter is pressed. 23 Tutorial-Using the Self-timer or Remote Control 5 Take the photograph.
Remote control: From a distance of 5 m (16´) or less, point the remote control at the infrared receiver on the front of the camera and press the shutter-release button on the remote control. Self-timer: Press the shutter-release button all the way down to start the self-... released about eight seconds. The lamp stops blinking two seconds before the photograph is taken and remains lit until the shutter is pressed. 23 Tutorial-Using the Self-timer or Remote Control 5 Take the photograph.


