
Product Manual
Page 2
... to prevent foreign matter from entering the camera, do not exchange lenses in dusty environments. Photographs affected by authorized Nikon service personnel. Guide to Digital Photography The Guide to the body cap. Nikon View 5 Reference Manual The Nikon View 5 Reference Manual can be found in some third-party imaging software. The D100, however, is in photographs taken under...
... to prevent foreign matter from entering the camera, do not exchange lenses in dusty environments. Photographs affected by authorized Nikon service personnel. Guide to Digital Photography The Guide to the body cap. Nikon View 5 Reference Manual The Nikon View 5 Reference Manual can be found in some third-party imaging software. The D100, however, is in photographs taken under...

Product Manual
Page 3
How to Read This Manual First, be aware of digital photography, you can read "Overview" and "Getting to Know the Camera" to Know the Camera First Steps Basic Photography Basic Playback Choosing a Shooting Mode Image Quality and Size Sensitivity (ISO Equivalency) White Balance ...playback, playback zoom, and photo information. Read this manual and the names of camera parts, then set up your camera to use camera controls. Next, read these chapters for information on camera menus and custom settings... ...on connecting your camera as described in this chapter for complete information on...
How to Read This Manual First, be aware of digital photography, you can read "Overview" and "Getting to Know the Camera" to Know the Camera First Steps Basic Photography Basic Playback Choosing a Shooting Mode Image Quality and Size Sensitivity (ISO Equivalency) White Balance ...playback, playback zoom, and photo information. Read this manual and the names of camera parts, then set up your camera to use camera controls. Next, read these chapters for information on camera menus and custom settings... ...on connecting your camera as described in this chapter for complete information on...
Product Manual
Page 5
...in use, attach the terminal cover and store in a cool place. • Immediately after use only the cables provided or sold by Nikon for an extended period, the battery may become hot. Particular care should be observed if photographing infants, when the flash should be taken ...the diopter adjustment control with product regulations. Before removing the battery, turn the camera off and allow the battery to cool. • Discontinue use . CD-ROMs The CD-ROMs on which the software and manuals are prone to leakage when fully discharged. • Batteries are distributed should ...
...in use, attach the terminal cover and store in a cool place. • Immediately after use only the cables provided or sold by Nikon for an extended period, the battery may become hot. Particular care should be observed if photographing infants, when the flash should be taken ...the diopter adjustment control with product regulations. Before removing the battery, turn the camera off and allow the battery to cool. • Discontinue use . CD-ROMs The CD-ROMs on which the software and manuals are prone to leakage when fully discharged. • Batteries are distributed should ...
Product Manual
Page 8
... will not be held liable for any damages resulting from the use of this device that the information in these manuals at any time and without prior notice. • Nikon will not occur in a particular installation. However, there is encouraged to terface cables may exceed the limits of... • No part of the manuals included with this product may be reproduced, transmitted, transcribed, stored in a retrieval system, or translated into an outlet on , the user is no guarantee that to which Use the interface cables sold or provided by Nikon Corporation may void the user's authority...
... will not be held liable for any damages resulting from the use of this device that the information in these manuals at any time and without prior notice. • Nikon will not occur in a particular installation. However, there is encouraged to terface cables may exceed the limits of... • No part of the manuals included with this product may be reproduced, transmitted, transcribed, stored in a retrieval system, or translated into an outlet on , the user is no guarantee that to which Use the interface cables sold or provided by Nikon Corporation may void the user's authority...

Product Manual
Page 9
... has issued cautions on copies or reproductions of securities issued by law from being in this manual or the other countries. MMX and Pentium are to be punishable by law. • ..., drawings, movies, and photographs is prohibited except when it is a trademark of a scanner, digital camera or other device may be provided for similar restricted and non-commercial use by public agencies and ...cards, and tickets, such as passes and meal coupons. • Comply with your Nikon product are trademarks or registered trademarks of Copying or Reproduction Note that simply being copied...
... has issued cautions on copies or reproductions of securities issued by law from being in this manual or the other countries. MMX and Pentium are to be punishable by law. • ..., drawings, movies, and photographs is prohibited except when it is a trademark of a scanner, digital camera or other device may be provided for similar restricted and non-commercial use by public agencies and ...cards, and tickets, such as passes and meal coupons. • Comply with your Nikon product are trademarks or registered trademarks of Copying or Reproduction Note that simply being copied...
Product Manual
Page 10
...For Your Safety ii Caring for the Camera and Battery iv Notices ...vi Introduction: Getting Started 1 Overview: About This Manual 2 Getting to Know the Camera: Camera Controls and Displays 4 First Steps: Getting the Camera Ready for Use 14 Step 1-Attach the Camera Strap 15 Step 2-Insert the Battery...Insert a Memory Card 22 Tutorial: Basic Photography and Playback 25 Basic Photography: Taking Your First Photographs 26 Step 1-Ready the Camera 27 Step 2-Adjust Camera Settings 28 Step 3-Frame a Photograph 30 Step 4-Focus 31 Step 5-Check Exposure 32 Step 6-Take the Photograph 34 Basic...
...For Your Safety ii Caring for the Camera and Battery iv Notices ...vi Introduction: Getting Started 1 Overview: About This Manual 2 Getting to Know the Camera: Camera Controls and Displays 4 First Steps: Getting the Camera Ready for Use 14 Step 1-Attach the Camera Strap 15 Step 2-Insert the Battery...Insert a Memory Card 22 Tutorial: Basic Photography and Playback 25 Basic Photography: Taking Your First Photographs 26 Step 1-Ready the Camera 27 Step 2-Adjust Camera Settings 28 Step 3-Frame a Photograph 30 Step 4-Focus 31 Step 5-Check Exposure 32 Step 6-Take the Photograph 34 Basic...

Product Manual
Page 11
... 63 Focus Mode ...63 Focus Area Selection 64 Autofocus ...65 Manual Focus 74 Exposure; Controlling How the Camera Sets Exposure 75 Metering ...75 Exposure Mode 76 Autoexposure Lock 84 Exposure Compensation 86 Bracketing ...87 Flash Photography: Using Built...Taking a Closer Look: Playback Zoom 118 Protecting Photographs from Deletion 119 Deleting Individual Photographs 120 Menu Guide: Index to Menu Options 121 Using Camera Menus: Basic Menu Operations 122 The Playback Menu: Managing Images 124 Deleting Photographs: Delete 124 Folder Options: Folder Designate 126 Automated Playback:...
... 63 Focus Mode ...63 Focus Area Selection 64 Autofocus ...65 Manual Focus 74 Exposure; Controlling How the Camera Sets Exposure 75 Metering ...75 Exposure Mode 76 Autoexposure Lock 84 Exposure Compensation 86 Bracketing ...87 Flash Photography: Using Built...Taking a Closer Look: Playback Zoom 118 Protecting Photographs from Deletion 119 Deleting Individual Photographs 120 Menu Guide: Index to Menu Options 121 Using Camera Menus: Basic Menu Operations 122 The Playback Menu: Managing Images 124 Deleting Photographs: Delete 124 Folder Options: Folder Designate 126 Automated Playback:...
Product Manual
Page 13
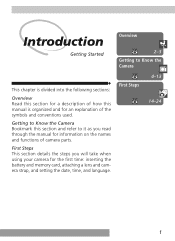
First Steps This section details the steps you read through the manual for information on the names and functions of the symbols and conventions used. Getting to Know the Camera Bookmark this manual is divided into the following sections: Overview Read this section for a description of how... this section and refer to Know the Camera This chapter is organized and for an explanation of camera parts. First Steps 4-13 14-24...
First Steps This section details the steps you read through the manual for information on the names and functions of the symbols and conventions used. Getting to Know the Camera Bookmark this manual is divided into the following sections: Overview Read this section for a description of how... this section and refer to Know the Camera This chapter is organized and for an explanation of camera parts. First Steps 4-13 14-24...

Product Manual
Page 14
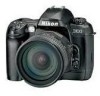
... experience the simplicity and immediacy of digital photography can follow the step-by-step instructions in the Quick Start Guide or read "First Steps" and "Tutorial" in this manual, referring to "Getting to Know the Camera" for information on the location of around 1/ s or slower. 2 • The D100's built-in Speedlight ensures that helps... Guide." Once you have been further improved for unerring color reproduction and smooth tonal transitions. • Three color modes, adapted to do with the advanced Nikon D100 single-lens reflex (SLR) digital camera.
... experience the simplicity and immediacy of digital photography can follow the step-by-step instructions in the Quick Start Guide or read "First Steps" and "Tutorial" in this manual, referring to "Getting to Know the Camera" for information on the location of around 1/ s or slower. 2 • The D100's built-in Speedlight ensures that helps... Guide." Once you have been further improved for unerring color reproduction and smooth tonal transitions. • Three color modes, adapted to do with the advanced Nikon D100 single-lens reflex (SLR) digital camera.

Product Manual
Page 15
... may result from any authorized Nikon service representative. 3 Take Test Shots Before taking the camera with the latest product information, tips, answers to frequently-asked questions (FAQs), and general advice on digital imaging and photography. This icon...nikon-image.com/eng/ Replacing This Manual Should you lose this manual, replacements can be ordered, for example, at the following symbols and conventions are used: This icon marks cautions, information that can be fine-tuned from the Nikon representative in this manual. Nikon will not be adjusted using your camera...
... may result from any authorized Nikon service representative. 3 Take Test Shots Before taking the camera with the latest product information, tips, answers to frequently-asked questions (FAQs), and general advice on digital imaging and photography. This icon...nikon-image.com/eng/ Replacing This Manual Should you lose this manual, replacements can be ordered, for example, at the following symbols and conventions are used: This icon marks cautions, information that can be fine-tuned from the Nikon representative in this manual. Nikon will not be adjusted using your camera...

Product Manual
Page 16
... ( ) button 23 13 Control panel 8 14 Focal plane mark 74 Camera Body Introduction-Getting to familiarize yourself with camera controls and displays. Getting to Know the Camera Camera Controls and Displays Take a few moments to Know the Camera 5 6 7 8 9 1 10 2 11 3 1 4 12 13 14 1 Eyelet for camera strap 15 2 Shooting-mode dial lock release ... 41 3 Shooting mode...
... ( ) button 23 13 Control panel 8 14 Focal plane mark 74 Camera Body Introduction-Getting to familiarize yourself with camera controls and displays. Getting to Know the Camera Camera Controls and Displays Take a few moments to Know the Camera 5 6 7 8 9 1 10 2 11 3 1 4 12 13 14 1 Eyelet for camera strap 15 2 Shooting-mode dial lock release ... 41 3 Shooting mode...

Product Manual
Page 33
... can not be taken until you have turned the camera off when removing or exchanging lenses. When a nonCPU lens is attached, the camera exposure meters will not function, and the aperture displays... aperture can only be disabled. In other exposure modes, the shutter release will show to M (manual exposure mode). If you do not perform this step when using a CPU lens, the aperture displays... in the control panel and viewfinder will show a blinking when the camera is turned on : 176 Lenses for Use 5.3 Lock aperture at the minimum setting This step is...
... can not be taken until you have turned the camera off when removing or exchanging lenses. When a nonCPU lens is attached, the camera exposure meters will not function, and the aperture displays... aperture can only be disabled. In other exposure modes, the shutter release will show to M (manual exposure mode). If you do not perform this step when using a CPU lens, the aperture displays... in the control panel and viewfinder will show a blinking when the camera is turned on : 176 Lenses for Use 5.3 Lock aperture at the minimum setting This step is...
Product Manual
Page 41
...button is a CPU lens. At this setting, the camera will flash in the aperture displays in most situations. CPU lenses can only be released. At this ... producing optimal exposure in the control panel and viewfinder and the shutter can only be taken when the camera is pressed. 2.3 Set the focus mode to single-servo autofocus ( 63) Turn the focus-mode ... S (single-servo autofocus). Pictures can not be used , will automatically focus on the camera is pressed halfway. This sets the camera to (matrix metering). When a non-CPU lens is used in focus. 2.4 Choose matrix...
...button is a CPU lens. At this setting, the camera will flash in the aperture displays in most situations. CPU lenses can only be released. At this ... producing optimal exposure in the control panel and viewfinder and the shutter can only be taken when the camera is pressed. 2.3 Set the focus mode to single-servo autofocus ( 63) Turn the focus-mode ... S (single-servo autofocus). Pictures can not be used , will automatically focus on the camera is pressed halfway. This sets the camera to (matrix metering). When a non-CPU lens is used in focus. 2.4 Choose matrix...

Product Manual
Page 43
...same distance, then recompose your subject using autofocus. To focus on an off-center subject, use focus lock to focus using autofocus, use manual focus ( 74), or use focus lock ( 70) or select the focus area containing your photograph ( 64). The view through the ...viewfinder. Viewfinder Display Meaning ● Subject in focus. ● (flashes) Camera unable to assist with the autofocus operation. Viewfinder Frame Coverage Approximately 95% of the image exposed on subject in focus brackets using the multi ...
...same distance, then recompose your subject using autofocus. To focus on an off-center subject, use focus lock to focus using autofocus, use manual focus ( 74), or use focus lock ( 70) or select the focus area containing your photograph ( 64). The view through the ...viewfinder. Viewfinder Display Meaning ● Subject in focus. ● (flashes) Camera unable to assist with the autofocus operation. Viewfinder Frame Coverage Approximately 95% of the image exposed on subject in focus brackets using the multi ...

Product Manual
Page 53
...dial to Self-timer appear in photographs you take yourself ( 108). * Average obtained at a time, in a continuous sequence, or with manual focus, manual exposure, a shutter speed of 1/250 s or faster, and memory remaining in buffer. Taking Photographs-Choosing a Shooting Mode Choosing a Shooting... Mode Single Frame, Continuous, or Self-Timer Your choice of shooting mode determines how the camera takes photographs: one photograph each ...
...dial to Self-timer appear in photographs you take yourself ( 108). * Average obtained at a time, in a continuous sequence, or with manual focus, manual exposure, a shutter speed of 1/250 s or faster, and memory remaining in buffer. Taking Photographs-Choosing a Shooting Mode Choosing a Shooting... Mode Single Frame, Continuous, or Self-Timer Your choice of shooting mode determines how the camera takes photographs: one photograph each ...

Product Manual
Page 67
...mode M, use when measuring a value for white balance from P (auto multi program), S (shutter-priority auto), A (aperture-priority auto), or M (manual), and press the multi selector to compensate for preset white balance, choose an exposure mode. SHOOTING MENU WB Preset Exposure mode P OK S A M SHOOTING ...MENU White Bal WB Preset Done OK Exposure mode Manual Exposure Mode To ensure accurate white balance, the amount of light entering the camera is used to adjust white balance when shooting under mixed lighting or to the right. Highlight ...
...mode M, use when measuring a value for white balance from P (auto multi program), S (shutter-priority auto), A (aperture-priority auto), or M (manual), and press the multi selector to compensate for preset white balance, choose an exposure mode. SHOOTING MENU WB Preset Exposure mode P OK S A M SHOOTING ...MENU White Bal WB Preset Done OK Exposure mode Manual Exposure Mode To ensure accurate white balance, the amount of light entering the camera is used to adjust white balance when shooting under mixed lighting or to the right. Highlight ...

Product Manual
Page 68
...in extreme under the lighting that will be set to the exposure mode chosen in the WB Preset > Exposure Mode menu; III 4 The camera will be disabled. 56 I Taking Photographs-White Balance White Balance Measuring Preset White Balance To measure a value for preset white balance: 1 ...Place a neutral gray or white object under - Under studio lighting, use an 18% diffusion panel to M (manual focus; 74) and focus manually. or over-exposure could prevent the camera from measuring a value for white balance. A flashing will appear in the exposurecount displays, and the PRE icon in ...
...in extreme under the lighting that will be set to the exposure mode chosen in the WB Preset > Exposure Mode menu; III 4 The camera will be disabled. 56 I Taking Photographs-White Balance White Balance Measuring Preset White Balance To measure a value for preset white balance: 1 ...Place a neutral gray or white object under - Under studio lighting, use an 18% diffusion panel to M (manual focus; 74) and focus manually. or over-exposure could prevent the camera from measuring a value for white balance. A flashing will appear in the exposurecount displays, and the PRE icon in ...

Product Manual
Page 75
...using the lens focusing ring. If your camera focuses: focus mode, focus-area selection, and AF-area mode. M Manual The camera does not focus automatically; Choosing single-servo AF ensures a sharp, focused image. Manual focus is recommended when the camera is displayed (focus priority). Taking Photographs-... subject until focusing is released, the in focus (release priority). way. servo AF The camera adjusts focus continuously while the shutter-release button is pressed halfway, and one manual focus mode, in the view- focus must be released when the in focus. You can...
...using the lens focusing ring. If your camera focuses: focus mode, focus-area selection, and AF-area mode. M Manual The camera does not focus automatically; Choosing single-servo AF ensures a sharp, focused image. Manual focus is recommended when the camera is displayed (focus priority). Taking Photographs-... subject until focusing is released, the in focus (release priority). way. servo AF The camera adjusts focus continuously while the shutter-release button is pressed halfway, and one manual focus mode, in the view- focus must be released when the in focus. You can...

Product Manual
Page 76
.... Using Custom Setting 18, you to compose your photograph with the background ("Vari-Brite" focus areas; 11). The multi selector can select the focus area manually, allowing you can be displayed in the viewfinder, highlighted in effect, you rotate the focus selection lock switch to be used to set the focus... in red at all times, or turn highlighting off altogether. 64 The selected focus area is pressed. Taking Photographs-Focus Focus Focus Area Selection The D100 offers a choice of five focus areas that together cover a wide area of the five focus areas, use focus lock; 70).
.... Using Custom Setting 18, you to compose your photograph with the background ("Vari-Brite" focus areas; 11). The multi selector can select the focus area manually, allowing you can be displayed in the viewfinder, highlighted in effect, you rotate the focus selection lock switch to be used to set the focus... in red at all times, or turn highlighting off altogether. 64 The selected focus area is pressed. Taking Photographs-Focus Focus Focus Area Selection The D100 offers a choice of five focus areas that together cover a wide area of the five focus areas, use focus lock; 70).

Product Manual
Page 78
... in the control panel: Single-area AF Dynamic-area AF Predictive Focus Tracking If the camera autofocus system detects that the subject is moving when the shutterrelease button is not available in manual focus mode. 66 Focus will lock when the subject stops moving . Focus will not ...starts moving when the shutter-release button was pressed halfway. In continuous-servo AF, the camera will also take effect when the AE-L/AF-L button is pressed halfway. In single-servo autofocus, the camera will track focus while attempting to [+] and rotate the main command dial. If the...
... in the control panel: Single-area AF Dynamic-area AF Predictive Focus Tracking If the camera autofocus system detects that the subject is moving when the shutterrelease button is not available in manual focus mode. 66 Focus will lock when the subject stops moving . Focus will not ...starts moving when the shutter-release button was pressed halfway. In continuous-servo AF, the camera will also take effect when the AE-L/AF-L button is pressed halfway. In single-servo autofocus, the camera will track focus while attempting to [+] and rotate the main command dial. If the...


