
Reference Manual
Page 2
Feature Highlights of the COOLPIX L610 Let your camera take over G (Easy Auto) Mode A 36 Simply point the camera at the subject and your pictures, and focus automatically on your compositioning. Spend less time changing camera settings and more time taking pictures! Add special effects to capture truly unique ...shots Special Effects Mode A 46 Brighten, darken, or soften your pictures, or keep a specific color in your camera selects the appropriate scene mode. There's no need to center the shot on that subject. Compose just the right shot Target Finding AF...
Feature Highlights of the COOLPIX L610 Let your camera take over G (Easy Auto) Mode A 36 Simply point the camera at the subject and your pictures, and focus automatically on your compositioning. Spend less time changing camera settings and more time taking pictures! Add special effects to capture truly unique ...shots Special Effects Mode A 46 Brighten, darken, or soften your pictures, or keep a specific color in your camera selects the appropriate scene mode. There's no need to center the shot on that subject. Compose just the right shot Target Finding AF...

Reference Manual
Page 3
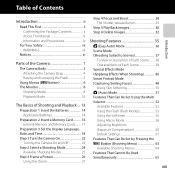
Introduction Parts of the Camera The Basics of Shooting and Playback Shooting Features Playback Features Recording and Playing Back Movies General Camera Setup Reference Section Technical Notes and Index i
Introduction Parts of the Camera The Basics of Shooting and Playback Shooting Features Playback Features Recording and Playing Back Movies General Camera Setup Reference Section Technical Notes and Index i

Reference Manual
Page 4
Introduction COOLPIX L610 Digital Camera Camera Strap LR6/L40 (AA-size) alkaline batteries (×2)* USB Cable UC-E6 Audio Video Cable EG-CP16 ViewNX 2 CD Reference Manual CD • Warranty * The ... included with the information provided in this manual handy and refer to it to enhance your enjoyment of your new camera. Confirming the Package Contents In the event that any items are for purchasing the Nikon COOLPIX L610 digital camera. ii After reading, please keep this manual. Introduction Read This First Thank you purchased the...
Introduction COOLPIX L610 Digital Camera Camera Strap LR6/L40 (AA-size) alkaline batteries (×2)* USB Cable UC-E6 Audio Video Cable EG-CP16 ViewNX 2 CD Reference Manual CD • Warranty * The ... included with the information provided in this manual handy and refer to it to enhance your enjoyment of your new camera. Confirming the Package Contents In the event that any items are for purchasing the Nikon COOLPIX L610 digital camera. ii After reading, please keep this manual. Introduction Read This First Thank you purchased the...

Reference Manual
Page 5
... bold. • In this manual, images are used in this manual may differ from monitor display samples so that should be read before using the camera right away, see "Parts of Shooting and Playback" (A 13). iii E: "Reference Section", F: "Technical Notes and Index." • SD, SDHC, and ...notes and information that is referred to as the "default setting." • The names of menu items displayed in the camera monitor, and the names of the camera and information that should be more clearly shown. • Illustrations and monitor content shown in the monitor, see "The ...
... bold. • In this manual, images are used in this manual may differ from monitor display samples so that should be read before using the camera right away, see "Parts of Shooting and Playback" (A 13). iii E: "Reference Section", F: "Technical Notes and Index." • SD, SDHC, and ...notes and information that is referred to as the "default setting." • The names of menu items displayed in the camera monitor, and the names of the camera and information that should be more clearly shown. • Illustrations and monitor content shown in the monitor, see "The ...

Reference Manual
Page 6
.... Introduction Information and Precautions Life-Long Learning As part of this Nikon digital camera are designed to ensure that may be held liable for contact information: http://imaging.nikon.com/ Use Only Nikon Brand Electronic Accessories Nikon COOLPIX cameras are engineered and proven to frequently asked questions (FAQs), and general advice on important occasions (such as at...
.... Introduction Information and Precautions Life-Long Learning As part of this Nikon digital camera are designed to ensure that may be held liable for contact information: http://imaging.nikon.com/ Use Only Nikon Brand Electronic Accessories Nikon COOLPIX cameras are engineered and proven to frequently asked questions (FAQs), and general advice on important occasions (such as at...

Reference Manual
Page 7
...or reproduced by means of a scanner, digital camera or other device may be reproduced, transmitted, transcribed, stored in a retrieval system, or translated into any language in any form, by any means, without prior notice. • Nikon will not be held liable for the purpose... paintings, woodcut prints, maps, drawings, movies, and photographs is governed by national and international copyright laws. Notice Concerning Prohibition of the Nikon representative in a foreign country is prohibited. The copying or reproduction of paper money, coins, or securities which are to be provided for...
...or reproduced by means of a scanner, digital camera or other device may be reproduced, transmitted, transcribed, stored in a retrieval system, or translated into any language in any form, by any means, without prior notice. • Nikon will not be held liable for the purpose... paintings, woodcut prints, maps, drawings, movies, and photographs is governed by national and international copyright laws. Notice Concerning Prohibition of the Nikon representative in a foreign country is prohibited. The copying or reproduction of paper money, coins, or securities which are to be provided for...

Reference Manual
Page 8
... Select an image option in the Welcome screen setting (A 98). Be sure to another person, erase all data using commercially available software, potentially resulting in camera memory does not completely erase the original image data. Introduction Disposing of Data Storage Devices Please note that deleting images or formatting data storage devices...
... Select an image option in the Welcome screen setting (A 98). Be sure to another person, erase all data using commercially available software, potentially resulting in camera memory does not completely erase the original image data. Introduction Disposing of Data Storage Devices Please note that deleting images or formatting data storage devices...

Reference Manual
Page 9
... the internal parts of the camera or AC adapter could result in injury. Should the camera or AC adapter break open as this equipment. vii This icon marks warnings, information that should be read before using this Nikon product, to a Nikon-authorized service representative for inspection...., unplug the AC adapter and remove the batteries immediately, taking care to a Nikon-authorized service representative for inspection, after unplugging the product and/or removing the batteries. Handle the camera strap with care Never place the strap around the neck of a fall or other...
... the internal parts of the camera or AC adapter could result in injury. Should the camera or AC adapter break open as this equipment. vii This icon marks warnings, information that should be read before using this Nikon product, to a Nikon-authorized service representative for inspection...., unplug the AC adapter and remove the batteries immediately, taking care to a Nikon-authorized service representative for inspection, after unplugging the product and/or removing the batteries. Handle the camera strap with care Never place the strap around the neck of a fall or other...

Reference Manual
Page 10
... or AC adapter for extended periods while the devices are on or in or expose to water. • Do not transport or store with Nikon digital cameras only, and are using an AC adapter, be sure it is unplugged. • Use only the batteries approved for extended periods may leak ... of the devices become hot. If you are compatible with the skin for use in this product (A 14). Leaving the devices in direct contact with COOLPIX L610. • Insert batteries in the correct orientation. • Do not short or disassemble batteries or attempt to remove or break battery insulation or casing....
... or AC adapter for extended periods while the devices are on or in or expose to water. • Do not transport or store with Nikon digital cameras only, and are using an AC adapter, be sure it is unplugged. • Use only the batteries approved for extended periods may leak ... of the devices become hot. If you are compatible with the skin for use in this product (A 14). Leaving the devices in direct contact with COOLPIX L610. • Insert batteries in the correct orientation. • Do not short or disassemble batteries or attempt to remove or break battery insulation or casing....

Reference Manual
Page 12
... a physician if necessary. Do not operate the flash with liquid crystal Should the monitor break, care should be taken to avoid injury caused by this camera may cause eye strain, nausea, or discomfort. Avoid contact with the flash window touching a person or object Failure to your subject's eyes could cause hearing...
... a physician if necessary. Do not operate the flash with liquid crystal Should the monitor break, care should be taken to avoid injury caused by this camera may cause eye strain, nausea, or discomfort. Avoid contact with the flash window touching a person or object Failure to your subject's eyes could cause hearing...
Reference Manual
Page 15
... Package Contents ii About This Manual iii Information and Precautions iv For Your Safety vii WARNINGS vii Notices xi Parts of the Camera 1 The Camera Body 2 Attaching the Camera Strap 4 Raising and Lowering the Flash 5 Using Menus (d Button 6 The Monitor 8 Shooting Mode 8 Playback Mode 10 ... Card.......... 16 Internal Memory and Memory Cards......... 17 Preparation 3 Set the Display Language, Date, and Time 18 Step 1 Turn the Camera On 22 Turning the Camera On and Off 23 Step 2 Select a Shooting Mode 24 Available Shooting Modes 25 Step 3 Frame a Picture 26 Using the Zoom ...
... Package Contents ii About This Manual iii Information and Precautions iv For Your Safety vii WARNINGS vii Notices xi Parts of the Camera 1 The Camera Body 2 Attaching the Camera Strap 4 Raising and Lowering the Flash 5 Using Menus (d Button 6 The Monitor 8 Shooting Mode 8 Playback Mode 10 ... Card.......... 16 Internal Memory and Memory Cards......... 17 Preparation 3 Set the Display Language, Date, and Time 18 Step 1 Turn the Camera On 22 Turning the Camera On and Off 23 Step 2 Select a Shooting Mode 24 Available Shooting Modes 25 Step 3 Frame a Picture 26 Using the Zoom ...

Reference Manual
Page 16
... 76 Available Playback Modes 76 Switching Between Playback Modes......... 77 Features That Can Be Set by Pressing the d Button (Playback Menu 78 Connecting the Camera to a TV, Computer, or Printer 80 Using ViewNX 2 82 Installing ViewNX 2 82 Transferring Images to the Computer ...... 85 Viewing Images 87 ... Movies.... 89 Recording Movies 90 Features That Can Be Set by Pressing the d Button (Movie Menu 93 Playing Back Movies 94 General Camera Setup 97 Features That Can Be Set by Date Mode E13 Viewing and Deleting Images Captured Continuously (Sequence E14 Viewing Images in a Sequence...
... 76 Available Playback Modes 76 Switching Between Playback Modes......... 77 Features That Can Be Set by Pressing the d Button (Playback Menu 78 Connecting the Camera to a TV, Computer, or Printer 80 Using ViewNX 2 82 Installing ViewNX 2 82 Transferring Images to the Computer ...... 85 Viewing Images 87 ... Movies.... 89 Recording Movies 90 Features That Can Be Set by Pressing the d Button (Movie Menu 93 Playing Back Movies 94 General Camera Setup 97 Features That Can Be Set by Date Mode E13 Viewing and Deleting Images Captured Continuously (Sequence E14 Viewing Images in a Sequence...

Reference Manual
Page 17
... Eye-Fi Upload E87 Reset All E88 Battery Type E92 Firmware Version E92 File and Folder Names E93 Optional Accessories E95 Attaching the AN-CP23 Camera Strap ... E96 Error Messages E97 xv Introduction E39 White Balance (Adjusting Hue E41 Continuous Shooting E44 ISO Sensitivity E46 Color Options E47 AF Area Mode... Individual Images E32 Printing Multiple Images E34 Editing Movies E37 The Shooting Menu (for A (Auto) Mode E39 Image Mode (Image Size and Quality)... Connecting the Camera to a TV (Viewing Images on a TV E27 Connecting the...
... Eye-Fi Upload E87 Reset All E88 Battery Type E92 Firmware Version E92 File and Folder Names E93 Optional Accessories E95 Attaching the AN-CP23 Camera Strap ... E96 Error Messages E97 xv Introduction E39 White Balance (Adjusting Hue E41 Continuous Shooting E44 ISO Sensitivity E46 Color Options E47 AF Area Mode... Individual Images E32 Printing Multiple Images E34 Editing Movies E37 The Shooting Menu (for A (Auto) Mode E39 Image Mode (Image Size and Quality)... Connecting the Camera to a TV (Viewing Images on a TV E27 Connecting the...

Reference Manual
Page 18
Introduction Technical Notes and Index F1 Caring for the Product F2 The Camera F2 Batteries F3 Memory Cards F5 Cleaning and Storage F6 Cleaning F6 Storage F7 Troubleshooting F8 Specifications F17 Approved Memory Cards F21 Supported Standards F21 Index F24 xvi
Introduction Technical Notes and Index F1 Caring for the Product F2 The Camera F2 Batteries F3 Memory Cards F5 Cleaning and Storage F6 Cleaning F6 Storage F7 Troubleshooting F8 Specifications F17 Approved Memory Cards F21 Supported Standards F21 Index F24 xvi

Reference Manual
Page 19
The Camera Body 2 Attaching the Camera Strap 4 Raising and Lowering the Flash 5 Using Menus (d Button 6 The Monitor 8 Shooting Mode 8 Playback Mode 10 If you want to start using the camera right away, see "The Basics of the camera and explains information that is displayed in the monitor. Parts of the Camera Parts of the Camera This chapter describes the parts of Shooting and Playback" (A 13). 1
The Camera Body 2 Attaching the Camera Strap 4 Raising and Lowering the Flash 5 Using Menus (d Button 6 The Monitor 8 Shooting Mode 8 Playback Mode 10 If you want to start using the camera right away, see "The Basics of the camera and explains information that is displayed in the monitor. Parts of the Camera Parts of the Camera This chapter describes the parts of Shooting and Playback" (A 13). 1

Reference Manual
Page 20
... 1 2 3 45 6 1 7 13 12 8 11 10 9 Lens cover closed 1 Eyelets for camera strap 4 Zoom control 27 f : Wide-angle 27 2 g : Telephoto 27 h : Thumbnail playback 75 i : Playback zoom 74 j : Help 38 3 Shutter-release button 28 4 Power switch/power-on ... lamp 56 AF-assist illuminator 98 6 Microphone (stereo 79, 90 7 Flash 5, 53 8 Lens cover 9 Lens 10 Power connector cover (for AC adapter available separately from Nikon)...... 15, E95 11 Connector cover 80 12 USB/audio/video output connector.......80 13 HDMI mini connector (Type C 80 2
... 1 2 3 45 6 1 7 13 12 8 11 10 9 Lens cover closed 1 Eyelets for camera strap 4 Zoom control 27 f : Wide-angle 27 2 g : Telephoto 27 h : Thumbnail playback 75 i : Playback zoom 74 j : Help 38 3 Shutter-release button 28 4 Power switch/power-on ... lamp 56 AF-assist illuminator 98 6 Microphone (stereo 79, 90 7 Flash 5, 53 8 Lens cover 9 Lens 10 Power connector cover (for AC adapter available separately from Nikon)...... 15, E95 11 Connector cover 80 12 USB/audio/video output connector.......80 13 HDMI mini connector (Type C 80 2

Reference Manual
Page 21
1 2 13 12 11 3 4 5 6 7 8 9 10 Parts of the Camera 1 K (flash pop-up) control 5, 53 2 Flash lamp 55 3 b (e movie-record) button 90 4 A (shooting mode) button 36, 37, 46, 48, 51 5 c (playback) button 30, 76 6 Multi selector 7 k (apply selection) button 8 l (delete) button 32 9 d button 6, 63, 78, 93, 98 10 Battery-chamber/ memory card slot cover 14, 16 11 Tripod socket F19 12 Monitor 8 13 Speaker 79, 94 3
1 2 13 12 11 3 4 5 6 7 8 9 10 Parts of the Camera 1 K (flash pop-up) control 5, 53 2 Flash lamp 55 3 b (e movie-record) button 90 4 A (shooting mode) button 36, 37, 46, 48, 51 5 c (playback) button 30, 76 6 Multi selector 7 k (apply selection) button 8 l (delete) button 32 9 d button 6, 63, 78, 93, 98 10 Battery-chamber/ memory card slot cover 14, 16 11 Tripod socket F19 12 Monitor 8 13 Speaker 79, 94 3

Reference Manual
Page 22
Parts of the Camera Attaching the Camera Strap Pass the strap through either the left or right strap eyelet and attach the strap. 2 1 4
Parts of the Camera Attaching the Camera Strap Pass the strap through either the left or right strap eyelet and attach the strap. 2 1 4

Reference Manual
Page 23
Parts of the Camera Raising and Lowering the Flash Slide the K (flash pop-up) control to raise the flash. • Flash settings ➝ "Using the Flash (Flash Modes)" (A 53) • Push the flash down gently to lower the flash until it clicks into place when not in use. 5
Parts of the Camera Raising and Lowering the Flash Slide the K (flash pop-up) control to raise the flash. • Flash settings ➝ "Using the Flash (Flash Modes)" (A 53) • Push the flash down gently to lower the flash until it clicks into place when not in use. 5

Reference Manual
Page 24
... Shooting menu Image mode White balance Continuous ISO sensitivity Color options AF area mode 3 Press H or I to select another tab. • The contents of the Camera Using Menus (d Button) You can now select items within the menu. Set up Welcome screen Time zone and date Monitor settings Print date Vibration reduction...
... Shooting menu Image mode White balance Continuous ISO sensitivity Color options AF area mode 3 Press H or I to select another tab. • The contents of the Camera Using Menus (d Button) You can now select items within the menu. Set up Welcome screen Time zone and date Monitor settings Print date Vibration reduction...


