
User Manual
Page 4
... AC adapter break open as this Nikon product, to prevent possible injury. Keep out of reach of children Particular care should be taken to prevent infants from the camera or AC adapter, unplug the AC adapter and remove the batteries immediately, taking care to avoid burns. WARNINGS Turn ... the product and/or removing the batteries. After removing or disconnecting the power source, take the product to a Nikon-authorized service representative for inspection. Do not use the camera or AC adapter in the presence of flammable gas Do not use the product will read the following symbol: This...
... AC adapter break open as this Nikon product, to prevent possible injury. Keep out of reach of children Particular care should be taken to prevent infants from the camera or AC adapter, unplug the AC adapter and remove the batteries immediately, taking care to avoid burns. WARNINGS Turn ... the product and/or removing the batteries. After removing or disconnecting the power source, take the product to a Nikon-authorized service representative for inspection. Do not use the camera or AC adapter in the presence of flammable gas Do not use the product will read the following symbol: This...
User Manual
Page 5
... if improperly handled. Do not use immediately should be sure it is unplugged. • Use only the batteries approved for use with Nikon digital cameras only, and are compatible with a dry cloth. To avoid damage to the product, be damaged and the wires become exposed, take ... remains. • Discontinue use EN-MH2 rechargeable batteries with plenty of the plug should you are using an AC adapter, be removed with COOLPIX L24. Should the insulation be sure to excessive heat. • Do not immerse in this product (A 12). Observe the following precautions when handling...
... if improperly handled. Do not use immediately should be sure it is unplugged. • Use only the batteries approved for use with Nikon digital cameras only, and are compatible with a dry cloth. To avoid damage to the product, be damaged and the wires become exposed, take ... remains. • Discontinue use EN-MH2 rechargeable batteries with plenty of the plug should you are using an AC adapter, be removed with COOLPIX L24. Should the insulation be sure to excessive heat. • Do not immerse in this product (A 12). Observe the following precautions when handling...

User Manual
Page 6
...the power off when using while in a hospital. The electromagnetic waves given out by the lens cover or other objects are not pinched by this camera may disrupt the electronic systems of the airplane or the instruments of the hospital when using inside an airplane or the hospital Turn the power...with travel converters or adapters designed to convert from the subject. For Your Safety • Do not use only the cables provided or sold by Nikon for the purpose, to observe this precaution could result in burns or fire. Failure to -AC inverters. CD-ROMs The CD-ROMs supplied with DC...
...the power off when using while in a hospital. The electromagnetic waves given out by the lens cover or other objects are not pinched by this camera may disrupt the electronic systems of the airplane or the instruments of the hospital when using inside an airplane or the hospital Turn the power...with travel converters or adapters designed to convert from the subject. For Your Safety • Do not use only the cables provided or sold by Nikon for the purpose, to observe this precaution could result in burns or fire. Failure to -AC inverters. CD-ROMs The CD-ROMs supplied with DC...

User Manual
Page 9
Table of Contents For Your Safety...ii WARNINGS...ii Notices ...v Introduction ...1 About This Manual ...1 Information and Precautions...2 Parts of the Camera...4 The Camera Body ...4 The Monitor...6 Basic Operations...8 A (shooting mode) Button...8 c (playback) Button ...8 The Multi Selector...9 d Button ...10 Switching ... Date and Time 14 Inserting Memory Cards ...16 Removing Memory Cards...17 G Basic Photography and Playback: Easy Auto Mode 18 Step 1 Turn the Camera On and Select G (Easy Auto) Mode 18 Indicators Displayed in G (Easy Auto) Mode 19 Step 2 Frame a Picture ...20 Using the...
Table of Contents For Your Safety...ii WARNINGS...ii Notices ...v Introduction ...1 About This Manual ...1 Information and Precautions...2 Parts of the Camera...4 The Camera Body ...4 The Monitor...6 Basic Operations...8 A (shooting mode) Button...8 c (playback) Button ...8 The Multi Selector...9 d Button ...10 Switching ... Date and Time 14 Inserting Memory Cards ...16 Removing Memory Cards...17 G Basic Photography and Playback: Easy Auto Mode 18 Step 1 Turn the Camera On and Select G (Easy Auto) Mode 18 Indicators Displayed in G (Easy Auto) Mode 19 Step 2 Frame a Picture ...20 Using the...

User Manual
Page 11
... Computers and Printers 56 Connecting to a TV...56 Connecting to a Computer...57 Before Connecting the Camera...57 Transferring Images from a Camera to a Computer 58 Connecting to a Printer...62 Connecting the Camera and Printer...63 Printing Pictures One at a Time ...64 Printing Multiple Pictures ...65 Creating a ... Shooting Menu 70 Displaying the Shooting Menu...71 A Image mode ...72 B White Balance...74 C Continuous ...76 F Color Options ...77 Camera Settings that Cannot Be Set at the Same Time 78 Playback Options: The Playback Menu 79 Displaying the Playback Menu...79 b Slide Show...81...
... Computers and Printers 56 Connecting to a TV...56 Connecting to a Computer...57 Before Connecting the Camera...57 Transferring Images from a Camera to a Computer 58 Connecting to a Printer...62 Connecting the Camera and Printer...63 Printing Pictures One at a Time ...64 Printing Multiple Pictures ...65 Creating a ... Shooting Menu 70 Displaying the Shooting Menu...71 A Image mode ...72 B White Balance...74 C Continuous ...76 F Color Options ...77 Camera Settings that Cannot Be Set at the Same Time 78 Playback Options: The Playback Menu 79 Displaying the Playback Menu...79 b Slide Show...81...

User Manual
Page 12
Table of Contents Basic Camera Setup: The Setup Menu 83 Displaying the Setup Menu...84 a Menus ...85 c Welcome Screen...86 d Date...87 e Monitor Settings ...90 f Date Imprint...92 w Electronic VR.........105 h Copy...106 r Firmware Version ...107 Technical Notes...108 Optional Accessories ...108 Approved Memory Cards ...109 Image File and Folder Names...110 Caring for the Camera ...111 Cleaning ...113 Storage ...114 Error Messages...115 Troubleshooting...118 Specifications ...123 Supported Standards ...126 Index ...127 x
Table of Contents Basic Camera Setup: The Setup Menu 83 Displaying the Setup Menu...84 a Menus ...85 c Welcome Screen...86 d Date...87 e Monitor Settings ...90 f Date Imprint...92 w Electronic VR.........105 h Copy...106 r Firmware Version ...107 Technical Notes...108 Optional Accessories ...108 Approved Memory Cards ...109 Image File and Folder Names...110 Caring for the Camera ...111 Cleaning ...113 Storage ...114 Error Messages...115 Troubleshooting...118 Specifications ...123 Supported Standards ...126 Index ...127 x

User Manual
Page 13
... setting at the time of purchase is referred to as the "default setting." • The names of menu items displayed in the camera monitor, and the names of a Nikon COOLPIX L24 digital camera. Read this manual thoroughly before use, and keep it where all new pictures will be stored on the memory card and delete...
... setting at the time of purchase is referred to as the "default setting." • The names of menu items displayed in the camera monitor, and the names of a Nikon COOLPIX L24 digital camera. Read this manual thoroughly before use, and keep it where all new pictures will be stored on the memory card and delete...

User Manual
Page 14
See the URL below for damages or lost profits that may result from the Nikon representative in your area (address provided separately). 2 Nikon will not be held liable for contact information: http://imaging.nikon.com/ Use Only Nikon Brand Electronic Accessories Nikon COOLPIX cameras are engineered and proven to operate within the operational and safety requirements of this...
See the URL below for damages or lost profits that may result from the Nikon representative in your area (address provided separately). 2 Nikon will not be held liable for contact information: http://imaging.nikon.com/ Use Only Nikon Brand Electronic Accessories Nikon COOLPIX cameras are engineered and proven to operate within the operational and safety requirements of this...

User Manual
Page 15
... notices The copying or reproduction of empty sky). Unless the prior permission of the government was digitally copied or reproduced by means of a scanner, digital camera or other device may be taken to avoid injury or damage to be recovered from being in a foreign country is prohibited. • Cautions on certain... privacy of making illegal copies or to also replace any pictures selected for example, pictures of copyrighted creative works such as memory cards or builtin camera memory does not completely erase the original image data.
... notices The copying or reproduction of empty sky). Unless the prior permission of the government was digitally copied or reproduced by means of a scanner, digital camera or other device may be taken to avoid injury or damage to be recovered from being in a foreign country is prohibited. • Cautions on certain... privacy of making illegal copies or to also replace any pictures selected for example, pictures of copyrighted creative works such as memory cards or builtin camera memory does not completely erase the original image data.

User Manual
Page 16
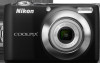
Introduction Parts of the Camera The Camera Body 12 3 4 98 7 Lens cover closed 5 6 10 11 1 Shutter-release button 22 Zoom control 21 f : wide 21 2 g : tele 21 h : Thumbnail playback 46 i : playback zoom 48 j : help 11 3 Power switch/Power-on lamp ....... 18, 97 4 Self-timer lamp 30 AF-assist illuminator 23, 95 5 Flash 28 6 Lens 113, 123 7 Speaker 55 8 Power connector cover (for connecting optional AC adapter 108 9 Eyelet for camera strap 11 10 Lens cover 111 11 Built-in microphone 53 4
Introduction Parts of the Camera The Camera Body 12 3 4 98 7 Lens cover closed 5 6 10 11 1 Shutter-release button 22 Zoom control 21 f : wide 21 2 g : tele 21 h : Thumbnail playback 46 i : playback zoom 48 j : help 11 3 Power switch/Power-on lamp ....... 18, 97 4 Self-timer lamp 30 AF-assist illuminator 23, 95 5 Flash 28 6 Lens 113, 123 7 Speaker 55 8 Power connector cover (for connecting optional AC adapter 108 9 Eyelet for camera strap 11 10 Lens cover 111 11 Built-in microphone 53 4

User Manual
Page 17
Parts of the Camera 1 2 34 5 67 89 Introduction 10 11 12 13 14 1 Monitor 6 2 d button 10, 54, 71, 79, 84 3 k (apply selection) button 9 4 A (shooting mode) button 8 5 Flash lamp 29 6 c (playback) button 8, 24 7 Multi selector 9 8 l (delete) button 24, 25, 55 9 Battery-chamber/ memory card slot cover 12, 16 10 Tripod socket 11 Pin cover 56, 58, 63 12 USB connector and audio/video output 56, 58, 63 13 Memory card slot 16 14 Battery-chamber 12 5
Parts of the Camera 1 2 34 5 67 89 Introduction 10 11 12 13 14 1 Monitor 6 2 d button 10, 54, 71, 79, 84 3 k (apply selection) button 9 4 A (shooting mode) button 8 5 Flash lamp 29 6 c (playback) button 8, 24 7 Multi selector 9 8 l (delete) button 24, 25, 55 9 Battery-chamber/ memory card slot cover 12, 16 10 Tripod socket 11 Pin cover 56, 58, 63 12 USB connector and audio/video output 56, 58, 63 13 Memory card slot 16 14 Battery-chamber 12 5

User Manual
Page 18
... 87, 115 11 Travel destination indicator 87 12 Date imprint 92 13 Movie options 54 14 Image mode 72 1m00 s b 1m00 s 18 a Number of the Camera Introduction The Monitor The following indicators may appear in the monitor during shooting and playback will turn off after a few seconds (A 90). Refer to the...
... 87, 115 11 Travel destination indicator 87 12 Date imprint 92 13 Movie options 54 14 Image mode 72 1m00 s b 1m00 s 18 a Number of the Camera Introduction The Monitor The following indicators may appear in the monitor during shooting and playback will turn off after a few seconds (A 90). Refer to the...

User Manual
Page 19
Parts of the Camera Introduction Playback 14 13 11 12 10 1 23 4 15/05/2011 12:00 9999.JPG 5 6 999 999 98 7 999 999 a 9999 9999 1m00s b 1m 00 s 1 ...
Parts of the Camera Introduction Playback 14 13 11 12 10 1 23 4 15/05/2011 12:00 9999.JPG 5 6 999 999 98 7 999 999 a 9999 9999 1m00s b 1m 00 s 1 ...

User Manual
Page 20
c (playback) Button During shooting mode, the camera enters the playback mode when c is pressed in playback mode, the camera enters shooting mode. Introduction Basic Operations A (shooting mode) Button When A is pressed. When A is pressed in playback mode. 8 When A is pressed ...while the shooting-mode selection menu is displayed, which allows you to change the shooting mode. If the camera is turned off, hold down c to shooting mode without changing the current shooting mode. Shooting-mode Selection Menu The multi selector (A 9) can be...
c (playback) Button During shooting mode, the camera enters the playback mode when c is pressed in playback mode, the camera enters shooting mode. Introduction Basic Operations A (shooting mode) Button When A is pressed. When A is pressed in playback mode. 8 When A is pressed ...while the shooting-mode selection menu is displayed, which allows you to change the shooting mode. If the camera is turned off, hold down c to shooting mode without changing the current shooting mode. Shooting-mode Selection Menu The multi selector (A 9) can be...

User Manual
Page 23
Press the shutterrelease button halfway to set focus and exposure, press the shutter-release button halfway, stopping when you feel resistance. Attaching the Camera Strap 2 3 1 11 To return to the original menu, rotate the zoom control to take a picture, press the shutter-release button the ... a two-stage shutter-release button. To set focus and exposure. Continuous Choose single frame, continuous mode, BSS (camera chooses sharpest shot in camera shake and blurred pictures. To release the shutter and take picture. Do not use force when pressing the shutter-release button, ...
Press the shutterrelease button halfway to set focus and exposure, press the shutter-release button halfway, stopping when you feel resistance. Attaching the Camera Strap 2 3 1 11 To return to the original menu, rotate the zoom control to take a picture, press the shutter-release button the ... a two-stage shutter-release button. To set focus and exposure. Continuous Choose single frame, continuous mode, BSS (camera chooses sharpest shot in camera shake and blurred pictures. To release the shutter and take picture. Do not use force when pressing the shutter-release button, ...

User Manual
Page 24
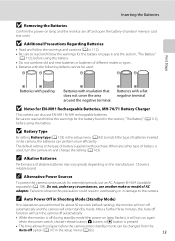
...Two FR6/L91 (AA-size) lithium batteries • Two EN-MH2 Ni-MH (nickel metal hydride) rechargeable batteries Turning On and Off the Camera Press the power switch to prevent the batteries from falling out. 1 2 2 Inserting the Batteries. Before opening the battery-chamber/memory card ...slot cover, hold down to turn the camera on . First Steps Inserting the Batteries 1 Open the battery-chamber/memory card slot 3 cover. Confirm that the positive (+) and negative (-) ...
...Two FR6/L91 (AA-size) lithium batteries • Two EN-MH2 Ni-MH (nickel metal hydride) rechargeable batteries Turning On and Off the Camera Press the power switch to prevent the batteries from falling out. 1 2 2 Inserting the Batteries. Before opening the battery-chamber/memory card ...slot cover, hold down to turn the camera on . First Steps Inserting the Batteries 1 Open the battery-chamber/memory card slot 3 cover. Confirm that the positive (+) and negative (-) ...
User Manual
Page 25
... of different makes or types. • Batteries with the following defects cannot be changed from the Auto off option (A 97) in the camera, the batteries can perform more efficiently. C Auto Power Off in damage to match the type of alkaline batteries may vary greatly depending on ... Batteries Confirm the power-on lamp and the monitor are performed for about 30 seconds (default setting), the monitor will turn off automatically and the camera will turn on again when the power switch, shutter-release button, A button, or c button is used : First Steps Batteries with peeling Batteries...
... of different makes or types. • Batteries with the following defects cannot be changed from the Auto off option (A 97) in the camera, the batteries can perform more efficiently. C Auto Power Off in damage to match the type of alkaline batteries may vary greatly depending on ... Batteries Confirm the power-on lamp and the monitor are performed for about 30 seconds (default setting), the monitor will turn off automatically and the camera will turn on again when the power switch, shutter-release button, A button, or c button is used : First Steps Batteries with peeling Batteries...

User Manual
Page 26
...selector to select your home time zone (city name) (A 89) and press k. Yes No Cancel London Casablanca Back D Daylight Saving Time To use the camera in an area where daylight saving time is in effect, press H on the home time zone in Step 4 to set . When the daylight saving ...desired language and press k. Setting Display Language, Date and Time A language-selection dialog is displayed the first time the camera is turned on. 1 Press the power switch to turn on the camera. To release the daylight saving time setting, press I. 14 London Casablanca Back If No is selected, the date ...
...selector to select your home time zone (city name) (A 89) and press k. Yes No Cancel London Casablanca Back D Daylight Saving Time To use the camera in an area where daylight saving time is in effect, press H on the home time zone in Step 4 to set . When the daylight saving ...desired language and press k. Setting Display Language, Date and Time A language-selection dialog is displayed the first time the camera is turned on. 1 Press the power switch to turn on the camera. To release the daylight saving time setting, press I. 14 London Casablanca Back If No is selected, the date ...

User Manual
Page 27
... set Date imprint (A 92) in which the day, month and year are displayed and press k or K. The shooting-mode selection menu will be displayed. The camera enters the shooting mode and you can take pictures in the following order. Press the multi selector H or I to the previous item. 6 Choose the order...
... set Date imprint (A 92) in which the day, month and year are displayed and press k or K. The shooting-mode selection menu will be displayed. The camera enters the shooting mode and you can take pictures in the following order. Press the multi selector H or I to the previous item. 6 Choose the order...

User Manual
Page 28
...card slot cover. Be sure to prevent the batteries from the internal memory. 1 Confirm the power-on lamp and the monitor are saved in the camera's internal memory (approximately 17 MB) or on removable Secure Digital (SD) memory cards (available separately) (A 109). First Steps Inserting Memory Cards ...down to turn off and open the battery-chamber/ 3 memory card slot cover. Make sure that the memory card is inserted in the camera, pictures are automatically stored on the memory card and pictures recorded to store pictures in correctly until it clicks into place. Slide the ...
...card slot cover. Be sure to prevent the batteries from the internal memory. 1 Confirm the power-on lamp and the monitor are saved in the camera's internal memory (approximately 17 MB) or on removable Secure Digital (SD) memory cards (available separately) (A 109). First Steps Inserting Memory Cards ...down to turn off and open the battery-chamber/ 3 memory card slot cover. Make sure that the memory card is inserted in the camera, pictures are automatically stored on the memory card and pictures recorded to store pictures in correctly until it clicks into place. Slide the ...


