
Reference Manual - English
Page 4
copyright, comments, text and logos) on pictures • Automatic update of credit information (e.g. Automatic picture transfer from camera to smart device thanks to two pieces of camera's date and time info and location info • Receive camera's firmware updates iv ...; Imprinting up to the constant connection between the two devices - making online photo sharing easier than ever Upload of photos and thumbnail images to the NIKON IMAGE SPACE cloud service A range of services that SnapBridge offers...
copyright, comments, text and logos) on pictures • Automatic update of credit information (e.g. Automatic picture transfer from camera to smart device thanks to two pieces of camera's date and time info and location info • Receive camera's firmware updates iv ...; Imprinting up to the constant connection between the two devices - making online photo sharing easier than ever Upload of photos and thumbnail images to the NIKON IMAGE SPACE cloud service A range of services that SnapBridge offers...
Reference Manual - English
Page 6
...about Nikon brand accessories, contact a local authorized Nikon dealer. Information and Precautions Life-Long Learning As part of this Nikon digital camera are designed to ensure that may be held liable for contact information. http://imaging.nikon.com/ Use Only Nikon Brand Electronic Accessories Nikon COOLPIX ...to keep up-to-date with this electronic circuitry. THE USE OF NON-NIKON ELECTRONIC ACCESSORIES COULD DAMAGE THE CAMERA AND MAY VOID YOUR NIKON WARRANTY. Before Taking Important Pictures Before taking the camera on digital imaging and photography. Visit the website below...
...about Nikon brand accessories, contact a local authorized Nikon dealer. Information and Precautions Life-Long Learning As part of this Nikon digital camera are designed to ensure that may be held liable for contact information. http://imaging.nikon.com/ Use Only Nikon Brand Electronic Accessories Nikon COOLPIX ...to keep up-to-date with this electronic circuitry. THE USE OF NON-NIKON ELECTRONIC ACCESSORIES COULD DAMAGE THE CAMERA AND MAY VOID YOUR NIKON WARRANTY. Before Taking Important Pictures Before taking the camera on digital imaging and photography. Visit the website below...

Reference Manual - English
Page 13
... Timer...44 Using Self-Collage...45 Setting Shooting Functions with the Multi Selector 46 Flash Mode...47 Self-timer ...49 Macro Mode (Taking Close-up Pictures 51 Exposure Compensation (Adjusting Brightness 52 Using the Zoom...53 Focusing...55 The Shutter-release Button...55 Using Target Finding AF ...55 Using Face Detection...
... Timer...44 Using Self-Collage...45 Setting Shooting Functions with the Multi Selector 46 Flash Mode...47 Self-timer ...49 Macro Mode (Taking Close-up Pictures 51 Exposure Compensation (Adjusting Brightness 52 Using the Zoom...53 Focusing...55 The Shutter-release Button...55 Using Target Finding AF ...55 Using Face Detection...

Reference Manual - English
Page 14
... D-Lighting: Enhancing Brightness and Contrast 70 Red-eye Correction: Correcting Red-eye When Shooting with the Flash 71 Glamour Retouch: Enhancing Human Faces 71 Small Picture: Reducing the Size of an Image 73 Crop: Creating a Cropped Copy...74 Movies ...75 Basic Operations of Movie Recording and Movie Playback 76 Capturing Still...
... D-Lighting: Enhancing Brightness and Contrast 70 Red-eye Correction: Correcting Red-eye When Shooting with the Flash 71 Glamour Retouch: Enhancing Human Faces 71 Small Picture: Reducing the Size of an Image 73 Crop: Creating a Cropped Copy...74 Movies ...75 Basic Operations of Movie Recording and Movie Playback 76 Capturing Still...

Reference Manual - English
Page 23
.../2016 12:00 21 20 17 16 19 18 12 13 14 15 1 List by date icon 66 2 Protect icon 126 Sequence display (when Individual 3 pictures is selected 128 4 Glamour retouch icon 71 5 Quick effects icon 69 6 D-Lighting icon 70 7 Quick retouch icon 70 8 Red-eye correction icon 71 9 Internal memory... 11 Movie length or elapsed playback time 12 Volume indicator 83 13 Image mode 105 14 Movie options 117 15 Easy panorama 40 16 Small picture icon 73 17 Crop icon 64, 74 Easy panorama playback guide 18 Sequence playback guide Movie playback guide 19 Quick effects guide 20 Time of...
.../2016 12:00 21 20 17 16 19 18 12 13 14 15 1 List by date icon 66 2 Protect icon 126 Sequence display (when Individual 3 pictures is selected 128 4 Glamour retouch icon 71 5 Quick effects icon 69 6 D-Lighting icon 70 7 Quick retouch icon 70 8 Red-eye correction icon 71 9 Internal memory... 11 Movie length or elapsed playback time 12 Volume indicator 83 13 Image mode 105 14 Movie options 117 15 Easy panorama 40 16 Small picture icon 73 17 Crop icon 64, 74 Easy panorama playback guide 18 Sequence playback guide Movie playback guide 19 Quick effects guide 20 Time of...
Reference Manual - English
Page 34
... can use the SnapBridge app. 18 Getting Started Camera Setup To upload movies to a smart device, use this option to automatically upload selected pictures that were not uploaded during shooting. • Use the Mark for upload option in the camera playback menu (A98) to the smart device.... B Notes About Auto Upload Movies cannot be used for a variety of pictures automatically uploaded. Embedding photo info Use the SnapBridge app to choose the information imprinted on photographs copied to choose the types of tasks once...
... can use the SnapBridge app. 18 Getting Started Camera Setup To upload movies to a smart device, use this option to automatically upload selected pictures that were not uploaded during shooting. • Use the Mark for upload option in the camera playback menu (A98) to the smart device.... B Notes About Auto Upload Movies cannot be used for a variety of pictures automatically uploaded. Embedding photo info Use the SnapBridge app to choose the information imprinted on photographs copied to choose the types of tasks once...
Reference Manual - English
Page 35
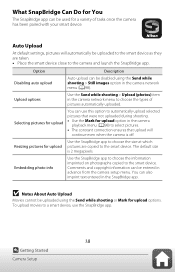
Wireless Networks Option Pairing Uploading pictures via Wi-Fi Description To pair the camera with a smart device (for example, with a new device or if you did not opt to pair with a ... use of wireless devices is prohibited, disable wireless features in the SnapBridge app to switch to only one at a time. and Password options. Viewing the pictures on the camera Use the smart device to view and download the...
Wireless Networks Option Pairing Uploading pictures via Wi-Fi Description To pair the camera with a smart device (for example, with a new device or if you did not opt to pair with a ... use of wireless devices is prohibited, disable wireless features in the SnapBridge app to switch to only one at a time. and Password options. Viewing the pictures on the camera Use the smart device to view and download the...

Reference Manual - English
Page 38
3 Frame the picture. • Move the zoom control or the side zoom control to change the zoom lens position. • If you lose sight of exposures remaining or ...
3 Frame the picture. • Move the zoom control or the side zoom control to change the zoom lens position. • If you lose sight of exposures remaining or ...

Reference Manual - English
Page 41
... Image Captured While in a sequence, press the k button to display them one image in the sequence (the key picture) is displayed in playback mode (default setting). • If you press the l button while a key picture is displayed for a sequence of images, all images in the sequence are saved as a sequence, and only...
... Image Captured While in a sequence, press the k button to display them one image in the sequence (the key picture) is displayed in playback mode (default setting). • If you press the l button while a key picture is displayed for a sequence of images, all images in the sequence are saved as a sequence, and only...

Reference Manual - English
Page 43
Shooting Features Selecting a Shooting Mode 28 A (Auto) Mode...29 Scene Mode (Shooting Suited to the Shooting Conditions 31 Creative Mode (Applying Effects When Shooting 41 Smart Portrait Mode (Enhancing Human Faces When Shooting 43 Setting Shooting Functions with the Multi Selector 46 Flash Mode...47 Self-timer ...49 Macro Mode (Taking Close-up Pictures 51 Exposure Compensation (Adjusting Brightness 52 Using the Zoom ...53 Focusing ...55 Default Settings (Flash, Self-timer, and Macro Mode 59 Functions That Cannot Be Used Simultaneously When Shooting 61 27 Shooting Features
Shooting Features Selecting a Shooting Mode 28 A (Auto) Mode...29 Scene Mode (Shooting Suited to the Shooting Conditions 31 Creative Mode (Applying Effects When Shooting 41 Smart Portrait Mode (Enhancing Human Faces When Shooting 43 Setting Shooting Functions with the Multi Selector 46 Flash Mode...47 Self-timer ...49 Macro Mode (Taking Close-up Pictures 51 Exposure Compensation (Adjusting Brightness 52 Using the Zoom ...53 Focusing ...55 Default Settings (Flash, Self-timer, and Macro Mode 59 Functions That Cannot Be Used Simultaneously When Shooting 61 27 Shooting Features

Reference Manual - English
Page 44
...A (Auto) mode Select this mode to shoot backlit subjects. - o (scene auto selector): The camera recognizes the shooting conditions when you frame a picture, and you can show ) mode The camera creates a short movie that is displayed. y: Press the d button and select a scene mode. -...30 seconds long (e 1080/30p or S 1080/25p) by recording and automatically combining multiple movie clips that include background scenery. - You can take pictures. • M (Short movie show or hide the descriptions using Help display in Monitor settings in a variety of shooting conditions. • y, ...
...A (Auto) mode Select this mode to shoot backlit subjects. - o (scene auto selector): The camera recognizes the shooting conditions when you frame a picture, and you can show ) mode The camera creates a short movie that is displayed. y: Press the d button and select a scene mode. -...30 seconds long (e 1080/30p or S 1080/25p) by recording and automatically combining multiple movie clips that include background scenery. - You can take pictures. • M (Short movie show or hide the descriptions using Help display in Monitor settings in a variety of shooting conditions. • y, ...

Reference Manual - English
Page 47
...a tripod is recommended, because the shutter speed is selected, the camera focuses on the shooting conditions, and you can take pictures. Scene Mode (Shooting Suited to the Shooting Conditions) Select any one of the following scene modes using a tripod to the... Shooting Conditions) o (scene auto selector) (A32) The camera recognizes the shooting conditions when you frame a picture, and you can take pictures in accordance with the appropriate settings for those conditions. Lighten3, 4 (A34) f Party/indoor2 (A35) Z Beach2 z Snow2 h Sunset2, 3 ...
...a tripod is recommended, because the shutter speed is selected, the camera focuses on the shooting conditions, and you can take pictures. Scene Mode (Shooting Suited to the Shooting Conditions) Select any one of the following scene modes using a tripod to the... Shooting Conditions) o (scene auto selector) (A32) The camera recognizes the shooting conditions when you frame a picture, and you can take pictures in accordance with the appropriate settings for those conditions. Lighten3, 4 (A34) f Party/indoor2 (A35) Z Beach2 z Snow2 h Sunset2, 3 ...

Reference Manual - English
Page 48
...shooting screen. • Z Tripod: - One image is set to On. 32 Shooting Features Scene Mode (Shooting Suited to take pictures in accordance with those conditions. • When the camera automatically recognizes the shooting conditions, the shooting mode icon displayed on the ...and saved. - Tips and Notes About Scene Mode o Scene auto selector • The camera automatically recognizes the shooting conditions when you frame a picture, making it easier to the Shooting Conditions) While the j icon on the shooting screen changes accordingly. j Night landscape • Press the d...
...shooting screen. • Z Tripod: - One image is set to On. 32 Shooting Features Scene Mode (Shooting Suited to take pictures in accordance with those conditions. • When the camera automatically recognizes the shooting conditions, the shooting mode icon displayed on the ...and saved. - Tips and Notes About Scene Mode o Scene auto selector • The camera automatically recognizes the shooting conditions when you frame a picture, making it easier to the Shooting Conditions) While the j icon on the shooting screen changes accordingly. j Night landscape • Press the d...

Reference Manual - English
Page 49
... or disable the high dynamic range (HDR) function in the same frame. - After taking a picture, do not turn the camera off before the screen switches to the shooting screen. - After taking pictures with the flash raised. - The angle of the image are combined into a single image and saved.... - If there is only enough memory to save one image. • On: Use when taking a picture, do not turn the camera off before shooting. • Press the d button to select Y Hand-held or Z Tripod in shadow. While the e...
... or disable the high dynamic range (HDR) function in the same frame. - After taking a picture, do not turn the camera off before the screen switches to the shooting screen. - After taking pictures with the flash raised. - The angle of the image are combined into a single image and saved.... - If there is only enough memory to save one image. • On: Use when taking a picture, do not turn the camera off before shooting. • Press the d button to select Y Hand-held or Z Tripod in shadow. While the e...

Reference Manual - English
Page 50
... taken at a shutter speed of 20 seconds every 25 seconds. The power-on the current image mode setting, the memory card used as the key picture (A67). 34 Shooting Features Scene Mode (Shooting Suited to the Shooting Conditions) If you have obtained the desired trails, end shooting. y M U Multiple exp. Option V Nightscape...
... taken at a shutter speed of 20 seconds every 25 seconds. The power-on the current image mode setting, the memory card used as the key picture (A67). 34 Shooting Features Scene Mode (Shooting Suited to the Shooting Conditions) If you have obtained the desired trails, end shooting. y M U Multiple exp. Option V Nightscape...

Reference Manual - English
Page 52
... auto release). • On the screen displayed when O Pet portrait is detected. When V Continuous is set to green. y M O Pet portrait • When you can take pictures continuously while holding down the shutter-release button all the way. When the camera acquires focus on the subject in the center of the Pet...
... auto release). • On the screen displayed when O Pet portrait is detected. When V Continuous is set to green. y M O Pet portrait • When you can take pictures continuously while holding down the shutter-release button all the way. When the camera acquires focus on the subject in the center of the Pet...

Reference Manual - English
Page 57
... images with an applied effect is selected as a sequence. Four types of the screen. B Notes About Creative Mode When Variety is used as the key picture (A67). One image with Select effect 3200 effects are not available. 41 Shooting Features Creative Mode (Applying Effects When Shooting)
... images with an applied effect is selected as a sequence. Four types of the screen. B Notes About Creative Mode When Variety is used as the key picture (A67). One image with Select effect 3200 effects are not available. 41 Shooting Features Creative Mode (Applying Effects When Shooting)

Reference Manual - English
Page 59
... screen and the saved image. • When Soft is set, some Movie options (A117) are not available. Skin softening Effect 3 Frame the picture and press the shutter-release button. Functions Available in Smart Portrait Mode • Smile timer (A44) • Self-Collage (A45) • Flash...Human Faces When Shooting) Slider 5 4 3 2 1 OFF B Notes About Smart Portrait Mode • The amount of effect. • You can take a picture with the glamour retouch function to enhance human faces. 1 Press the multi selector K. 2 Apply an effect. • Use JK to select the desired effect. ...
... screen and the saved image. • When Soft is set, some Movie options (A117) are not available. Skin softening Effect 3 Frame the picture and press the shutter-release button. Functions Available in Smart Portrait Mode • Smile timer (A44) • Self-Collage (A45) • Flash...Human Faces When Shooting) Slider 5 4 3 2 1 OFF B Notes About Smart Portrait Mode • The amount of effect. • You can take a picture with the glamour retouch function to enhance human faces. 1 Press the multi selector K. 2 Apply an effect. • Use JK to select the desired effect. ...

Reference Manual - English
Page 60
... flashes when the camera detects a face and flashes quickly immediately after the shutter is terminated. The shutter-release button can also be unable to take a picture, smile timer is released. 44 Shooting Features Smart Portrait Mode (Enhancing Human Faces When Shooting) Using Smile Timer When you press the multi selector J to...
... flashes when the camera detects a face and flashes quickly immediately after the shutter is terminated. The shutter-release button can also be unable to take a picture, smile timer is released. 44 Shooting Features Smart Portrait Mode (Enhancing Human Faces When Shooting) Using Smile Timer When you press the multi selector J to...

Reference Manual - English
Page 61
... press the k button. • A confirmation dialog is displayed. • When you want to use in Number of shots is saved as the key picture (A67). • When No is selected, the collage image is not saved. Collage before pressing J, you can capture a series of shots, Interval, and... Shutter sound (A115). • If you press the d button and select Self- The pictures that is set the effect before the camera takes the specified number of shots, shooting is canceled and the collage image is automatically released. •...
... press the k button. • A confirmation dialog is displayed. • When you want to use in Number of shots is saved as the key picture (A67). • When No is selected, the collage image is not saved. Collage before pressing J, you can capture a series of shots, Interval, and... Shutter sound (A115). • If you press the d button and select Self- The pictures that is set the effect before the camera takes the specified number of shots, shooting is canceled and the collage image is automatically released. •...


