
User Manual
Page 2
... with any local building codes. When using as a wireless LAN projector, no physical signal cable connection to correct trapezoidal distortion for more information. The projector must be permanently mounted on Your Purchase of The LT260/LT240/ LT220 Projector The LT260/LT240/LT220 is positioned off center of bodily injury. The LT260/LT240/LT220 enables you to project precise images up to ensure proper operation and reduce the...
... with any local building codes. When using as a wireless LAN projector, no physical signal cable connection to correct trapezoidal distortion for more information. The projector must be permanently mounted on Your Purchase of The LT260/LT240/ LT220 Projector The LT260/LT240/LT220 is positioned off center of bodily injury. The LT260/LT240/LT220 enables you to project precise images up to ensure proper operation and reduce the...
User Manual
Page 3
...; A high-bright 220 watt DC lamp. • The Standby mode reduces standby power consumption significantly. • The supplied wireless remote control that the projector will not project a signal without insertion of 50 to 100 kHz and a vertical frequency range of the registered PC card and unauthorized use can even be discouraged. • The built-in front or behind a screen, and the projector can be installed on the ceiling...
...; A high-bright 220 watt DC lamp. • The Standby mode reduces standby power consumption significantly. • The supplied wireless remote control that the projector will not project a signal without insertion of 50 to 100 kHz and a vertical frequency range of the registered PC card and unauthorized use can even be discouraged. • The built-in front or behind a screen, and the projector can be installed on the ceiling...

User Manual
Page 8
... 1 3 1.POWER Button (ON / STAND BY) Use this button to turn on page E-123 for more details. 3. See the Status Indicator section on or off when the main power is supplied and the projector is on; E-8 POWER Indicator ( ) When this indicator is green, the projector is in standby or idle mode. See the Power Indicator section on page E-123 for more details. INTRODUCTION Ͼ Part Names of two seconds. 2. STATUS Indicator If this light blinks red...
... 1 3 1.POWER Button (ON / STAND BY) Use this button to turn on page E-123 for more details. 3. See the Status Indicator section on or off when the main power is supplied and the projector is on; E-8 POWER Indicator ( ) When this indicator is green, the projector is in standby or idle mode. See the Power Indicator section on page E-123 for more details. INTRODUCTION Ͼ Part Names of two seconds. 2. STATUS Indicator If this light blinks red...

User Manual
Page 12
... channel audio input for stereo sound coming from the VIDEO source. The NEC optional serial cable (CA03D) is your projector via a serial cable. If you to use this port to connect your PC to use your PC. Remove the cap when using Dynamic Image Utility 2.0 included on page E-133. INTRODUCTION Ͼ Part Names of the Projector Ͼ Terminal Panel Features 5. Video input. NOTE: S-Video provides more vivid color and higher resolution than the traditional composite video format...
... channel audio input for stereo sound coming from the VIDEO source. The NEC optional serial cable (CA03D) is your projector via a serial cable. If you to use this port to connect your PC to use your PC. Remove the cap when using Dynamic Image Utility 2.0 included on page E-133. INTRODUCTION Ͼ Part Names of the Projector Ͼ Terminal Panel Features 5. Video input. NOTE: S-Video provides more vivid color and higher resolution than the traditional composite video format...

User Manual
Page 14
... turn on the projector cabinet. VIDEO 1. LASER Pointer Beams a laser light when the LA- 3 SER button is 6 9 pressed. 10 AUTO ADJ. NOTE: To turn your pro- 14 jector on. POWER ON Button 12 If the main power is applied, you can use this button to activate the mouse. Infrared Transmitter Direct the remote control toward the remote sensor on the projector, press 21 and hold the POWER OFF button...
... turn on the projector cabinet. VIDEO 1. LASER Pointer Beams a laser light when the LA- 3 SER button is 6 9 pressed. 10 AUTO ADJ. NOTE: To turn your pro- 14 jector on. POWER ON Button 12 If the main power is applied, you can use this button to activate the mouse. Infrared Transmitter Direct the remote control toward the remote sensor on the projector, press 21 and hold the POWER OFF button...

User Manual
Page 28
... hit the POWER button on after connecting with a notebook PC, be the result of the computer's screen-saver or power management software. * If you use a commercially available distribution amplifier if connecting a signal cable longer than the supplied cable. INSTALLATION AND CONNECTIONS Making Connections Wiring Diagram VCR, DVD Player or LaserDisc Player Document Camera Monitor To video, S-video, and audio inputs on the projector. E-28 It is turned on the remote control, wait 90...
... hit the POWER button on after connecting with a notebook PC, be the result of the computer's screen-saver or power management software. * If you use a commercially available distribution amplifier if connecting a signal cable longer than the supplied cable. INSTALLATION AND CONNECTIONS Making Connections Wiring Diagram VCR, DVD Player or LaserDisc Player Document Camera Monitor To video, S-video, and audio inputs on the projector. E-28 It is turned on the remote control, wait 90...

User Manual
Page 39
... then turn on the Main Power switch to light, and if the STATUS indicator flashes on the power. If you want, you have selected. In this happens, replace the lamp. * If the lamp fails to ON and use the menu and enable the "Auto Start" feature. (See page E-99.) Immediately after turning on to the advanced menu operation. NOTE: To turn the projector on by plugging in the power cable, first turn on...
... then turn on the Main Power switch to light, and if the STATUS indicator flashes on the power. If you want, you have selected. In this happens, replace the lamp. * If the lamp fails to ON and use the menu and enable the "Auto Start" feature. (See page E-99.) Immediately after turning on to the advanced menu operation. NOTE: To turn the projector on by plugging in the power cable, first turn on...

User Manual
Page 51
... REFORM HELP POINTER VIEWER VOLUME MAGNIFY SLIDE PICTURE PIC-MUTE FOLDER SLIDE LIST E-51 After the projector turns off, the cooling fans keep operating for a minimum of the following circumstances. PROJECTING AN IMAGE Turning off the Projector To turn off the projector: First press the POWER (ON/STAND BY) button on the projector cabinet or the POWER OFF button on the remote control for 90 seconds (Coolingoff time). appears. The power indicator will...
... REFORM HELP POINTER VIEWER VOLUME MAGNIFY SLIDE PICTURE PIC-MUTE FOLDER SLIDE LIST E-51 After the projector turns off, the cooling fans keep operating for a minimum of the following circumstances. PROJECTING AN IMAGE Turning off the Projector To turn off the projector: First press the POWER (ON/STAND BY) button on the projector cabinet or the POWER OFF button on the remote control for 90 seconds (Coolingoff time). appears. The power indicator will...

User Manual
Page 66
... is always a folder exclusively for captured images, but is only displayed when images have been captured. E-66 Setup .......... specific folder. Playback is inserted in Auto Play mode. Displays a list of folders while you to move on Viewer Options of the Setup dialog box. USING THE VIEWER Play Plays back automatically or manually depending on the setting on to the next slide when...
... is always a folder exclusively for captured images, but is only displayed when images have been captured. E-66 Setup .......... specific folder. Playback is inserted in Auto Play mode. Displays a list of folders while you to move on Viewer Options of the Setup dialog box. USING THE VIEWER Play Plays back automatically or manually depending on the setting on to the next slide when...

User Manual
Page 77
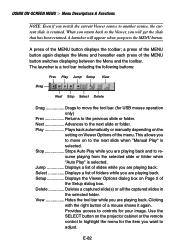
USING ON-SCREEN MENU Ͼ Basic Menu Operation Advanced Menu Source Select Picture Volume Image Options Picture Management Projector Options Tools Help Factory Default 3D Reform Menu Setup Screen LAN Mode Password Security Setup Page 1 Lamp Mode Normal, Eco Orientation Desktop Front, Ceiling Rear, Desktop Rear, Ceiling Front Background Blue, Black, Logo RGBOUT Terminal Last, RGB1, RGB2 Closed Caption Off, Caption1-4, Text1-4 Cornerstone Keystone Horizontal, Vertical Menu Page 1 Language English, Deutsch, Français, Italiano, Español, Svenska...
USING ON-SCREEN MENU Ͼ Basic Menu Operation Advanced Menu Source Select Picture Volume Image Options Picture Management Projector Options Tools Help Factory Default 3D Reform Menu Setup Screen LAN Mode Password Security Setup Page 1 Lamp Mode Normal, Eco Orientation Desktop Front, Ceiling Rear, Desktop Rear, Ceiling Front Background Blue, Black, Logo RGBOUT Terminal Last, RGB1, RGB2 Closed Caption Off, Caption1-4, Text1-4 Cornerstone Keystone Horizontal, Vertical Menu Page 1 Language English, Deutsch, Français, Italiano, Español, Svenska...
User Manual
Page 82
.... Use the SELECT button on the projector cabinet or the remote control to highlight the menu for the item you are playing back. E-82 A launcher will get the slide that has been retained. Next Advances to controls for USB mouse operation only) Prev Returns to resume playing from the selected slide or folder when "Auto Play" is selected. Select Displays a list...
.... Use the SELECT button on the projector cabinet or the remote control to highlight the menu for the item you are playing back. E-82 A launcher will get the slide that has been retained. Next Advances to controls for USB mouse operation only) Prev Returns to resume playing from the selected slide or folder when "Auto Play" is selected. Select Displays a list...

User Manual
Page 95
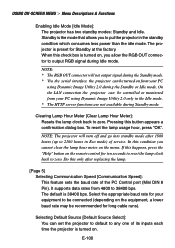
... The lamp life can change the logo screen using the Eco mode. The default background is the default setting (100% Brightness). See pages E-59 and 115. USING ON-SCREEN MENU Ͼ Menu Descriptions & Functions Setup Enables you to select two brightness mode of the lamp: Normal and Eco modes. This is blue. The options are: desktop front projection, ceiling rear projection, desktop rear projection, and ceiling front projection. Selecting Projector Orientation [Orientation]: This reorients your image...
... The lamp life can change the logo screen using the Eco mode. The default background is the default setting (100% Brightness). See pages E-59 and 115. USING ON-SCREEN MENU Ͼ Menu Descriptions & Functions Setup Enables you to select two brightness mode of the lamp: Normal and Eco modes. This is blue. The options are: desktop front projection, ceiling rear projection, desktop rear projection, and ceiling front projection. Selecting Projector Orientation [Orientation]: This reorients your image...

User Manual
Page 99
... Projector mode. The changes are in the Projector mode to operate your projector to change once affects all sources. E-99 The button lights to indicate that you continue to cool down the temperature inside the projector quickly, check this option is on and there is turned on the remote control or projector cabinet. NOTE: Enable High-Speed Fan mode if you are saved when you turn itself off. USING ON-SCREEN MENU Ͼ Menu Descriptions & Functions Enabling Auto Start [Auto Start]: Turns...
... Projector mode. The changes are in the Projector mode to operate your projector to change once affects all sources. E-99 The button lights to indicate that you continue to cool down the temperature inside the projector quickly, check this option is on and there is turned on the remote control or projector cabinet. NOTE: Enable High-Speed Fan mode if you are saved when you turn itself off. USING ON-SCREEN MENU Ͼ Menu Descriptions & Functions Enabling Auto Start [Auto Start]: Turns...
User Manual
Page 100
... connector will turn off and go into standby mode after replacing the lamp. [Page 5] Selecting Communication Speed [Communication Speed]: This feature sets the baud rate of the PC Control port (Mini DIN 8 Pin). Do this only after 1600 hours (up to 2100 hours in Eco mode) of its inputs each time the projector is turned on the menu. The default is preset for Standby at the factory. Select the...
... connector will turn off and go into standby mode after replacing the lamp. [Page 5] Selecting Communication Speed [Communication Speed]: This feature sets the baud rate of the PC Control port (Mini DIN 8 Pin). Do this only after 1600 hours (up to 2100 hours in Eco mode) of its inputs each time the projector is turned on the menu. The default is preset for Standby at the factory. Select the...
User Manual
Page 102
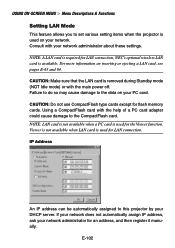
... is used for LAN connection; IP Address An IP address can be automatically assigned to set various setting items when the projector is used on inserting or ejecting a LAN card, see pages E-63 and 64. NEC's optional wireless LAN card is removed during Standby mode (NOT Idle mode) or with the main power off. CAUTION: Do not use CompactFlash type cards except for flash memory cards. USING ON-SCREEN MENU Ͼ Menu Descriptions & Functions Setting LAN Mode...
... is used for LAN connection; IP Address An IP address can be automatically assigned to set various setting items when the projector is used on inserting or ejecting a LAN card, see pages E-63 and 64. NEC's optional wireless LAN card is removed during Standby mode (NOT Idle mode) or with the main power off. CAUTION: Do not use CompactFlash type cards except for flash memory cards. USING ON-SCREEN MENU Ͼ Menu Descriptions & Functions Setting LAN Mode...

User Manual
Page 107
... projector lamp has reached the end of its usable life or an error occurs in the PC card slot of an error message via e-mail when using wireless or wired LAN. Mail NOTE: To the Mail Alert feature on wireless LAN connection, select "Infrastructure" for "Mode" in 128 bit. Alert Mail: Checking this box enables Alert Mail feature. This option notifies your key code. * Hexadecimal uses...
... projector lamp has reached the end of its usable life or an error occurs in the PC card slot of an error message via e-mail when using wireless or wired LAN. Mail NOTE: To the Mail Alert feature on wireless LAN connection, select "Infrastructure" for "Mode" in 128 bit. Alert Mail: Checking this box enables Alert Mail feature. This option notifies your key code. * Hexadecimal uses...

User Manual
Page 123
... then turn on. TROUBLESHOOTING This section helps you resolve problems you may encounter while setting up or using the projector. Lamp fails to turn on . - Power Indicator Blinking light Steady light Indicator Condition Off Green blinking 0.5 sec ON, 0.5 sec OFF Green blinking 2.5 sec ON, 0.5 sec OFF Orange blinking 0.5 sec ON, 0.5 sec OFF Green Orange Projector Condition Note The main power is getting ready Wait for a moment. Status Indicator Blinking light Indicator Condition Projector Condition Off Normal Red blinking 1 cycle (0.5 sec ON, Lamp cover error...
... then turn on. TROUBLESHOOTING This section helps you resolve problems you may encounter while setting up or using the projector. Lamp fails to turn on . - Power Indicator Blinking light Steady light Indicator Condition Off Green blinking 0.5 sec ON, 0.5 sec OFF Green blinking 2.5 sec ON, 0.5 sec OFF Orange blinking 0.5 sec ON, 0.5 sec OFF Green Orange Projector Condition Note The main power is getting ready Wait for a moment. Status Indicator Blinking light Indicator Condition Projector Condition Off Normal Red blinking 1 cycle (0.5 sec ON, Lamp cover error...

User Manual
Page 125
...; Use menus or Source button on or adjust the image manually with the Position/Clock mode in the Image Options. E-125 TROUBLESHOOTING Common Problems & Solutions Problem Does not turn it on the remote control or the cabinet to select the source you 're presenting is particularly warm, move the projector to factory preset levels using the Factory Default in the Adjustment Menu. See page E-20. • Make sure that the power button on the projector...
...; Use menus or Source button on or adjust the image manually with the Position/Clock mode in the Image Options. E-125 TROUBLESHOOTING Common Problems & Solutions Problem Does not turn it on the remote control or the cabinet to select the source you 're presenting is particularly warm, move the projector to factory preset levels using the Factory Default in the Adjustment Menu. See page E-20. • Make sure that the power button on the projector...
User Manual
Page 146
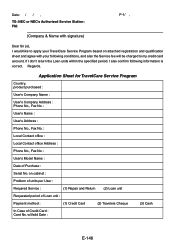
...: NEC or NEC's Authorized Service Station: FM: P-1/ , (Company & Name with your TravelCare Service Program based on cabinet : Problem of units per User : Required Service : (1) Repair and Return (2) Loan unit Requested period of Loan unit : Payment method : (1) Credit Card (2) Travelers Cheque (3) Cash In Case of Purchase : Serial No. Application Sheet for TravelCare Service Program Country, product purchased : User's Company Name : User's Company Address : Phone...
...: NEC or NEC's Authorized Service Station: FM: P-1/ , (Company & Name with your TravelCare Service Program based on cabinet : Problem of units per User : Required Service : (1) Repair and Return (2) Loan unit Requested period of Loan unit : Payment method : (1) Credit Card (2) Travelers Cheque (3) Cash In Case of Purchase : Serial No. Application Sheet for TravelCare Service Program Country, product purchased : User's Company Name : User's Company Address : Phone...
User Manual
Page 147
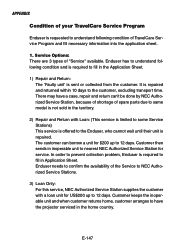
... may have the projector serviced in the home country. Customer keeps the inoperable unit and when customer returns home, customer arranges to nearest NEC Authorized Service Station for service. Customer then sends in the territory. 2) Repair and Return with a loan unit for $200 up to 12 days. Service Options: There are 3 types of spare parts due to same model is required to...
... may have the projector serviced in the home country. Customer keeps the inoperable unit and when customer returns home, customer arranges to nearest NEC Authorized Service Station for service. Customer then sends in the territory. 2) Repair and Return with a loan unit for $200 up to 12 days. Service Options: There are 3 types of spare parts due to same model is required to...


