
Manual
Page 2
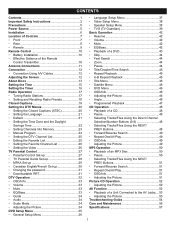
...Connection Using A/V Cables 12 Adjusting the Screen 12 About Discs 13 Setting the Time 15 Setting the Timer 16 Radio Operation 17 • Tuning Radio Stations 17 • Setting and Recalling Radio Presets 18 Closed Captions 19 Setting the DTV Menus 20 • Setting the Closed Captions (ATSC 20 •...37 • Video Setup Menu 38 • Speaker Setup Menu 38 • TVG (TV Guardian 39 Basic Operation 42 • Resume 42 • Volume 42 • Mute 42 • EQ/Bass 42 • Playback of a DVD 43 • Skip 44 • Fast Search 44 • Zoom 44 • ...
...Connection Using A/V Cables 12 Adjusting the Screen 12 About Discs 13 Setting the Time 15 Setting the Timer 16 Radio Operation 17 • Tuning Radio Stations 17 • Setting and Recalling Radio Presets 18 Closed Captions 19 Setting the DTV Menus 20 • Setting the Closed Captions (ATSC 20 •...37 • Video Setup Menu 38 • Speaker Setup Menu 38 • TVG (TV Guardian 39 Basic Operation 42 • Resume 42 • Volume 42 • Mute 42 • EQ/Bass 42 • Playback of a DVD 43 • Skip 44 • Fast Search 44 • Zoom 44 • ...
Manual
Page 3
... the equipment into an outlet on , the user is connected. • Consult the dealer or an experienced radio/TV technician for this equipment does cause harmful interference to radio or television reception, which the receiver is encouraged to try to correct the interference by the party responsible for AC... Insulation) CAUTION: THIS DIGITAL VIDEO DISC PLAYER EMPLOYS A LASER SYSTEM. FCC NOTICE: This equipment has been tested and found to radio communications. If this product. Lightning and power surges ARE NOT covered under license from that to which can radiate...
... the equipment into an outlet on , the user is connected. • Consult the dealer or an experienced radio/TV technician for this equipment does cause harmful interference to radio or television reception, which the receiver is encouraged to try to correct the interference by the party responsible for AC... Insulation) CAUTION: THIS DIGITAL VIDEO DISC PLAYER EMPLOYS A LASER SYSTEM. FCC NOTICE: This equipment has been tested and found to radio communications. If this product. Lightning and power surges ARE NOT covered under license from that to which can radiate...
Manual
Page 6
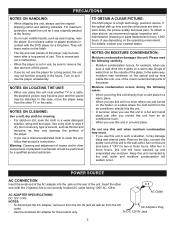
...Jack 5 NOTES ON LOCATING THE UNIT: • When you place this unit near the player. Insert the other TV or the radio. Do not use any moisture. TO OBTAIN A CLEAR PICTURE: The DVD player is not in use the player for a long time. To obtain a clear picture, we recommend regular ...it dry. Remove the disc, connect the power cord of the unit. For maximum protection, repack the unit as insect spray, near another TV or a radio, the playback picture may damage the surface of the AC adapter into a glass on the operating environment. Turn on the rear of this ...
...Jack 5 NOTES ON LOCATING THE UNIT: • When you place this unit near the player. Insert the other TV or the radio. Do not use any moisture. TO OBTAIN A CLEAR PICTURE: The DVD player is not in use the player for a long time. To obtain a clear picture, we recommend regular ...it dry. Remove the disc, connect the power cord of the unit. For maximum protection, repack the unit as insect spray, near another TV or a radio, the playback picture may damage the surface of the AC adapter into a glass on the operating environment. Turn on the rear of this ...
Manual
Page 15
.... ABOUT DISCS (CONTINUED) Notes on Copyright: It is forbidden by law to copy, broadcast, show, broadcast on cable, play back some DVD video discs on this player if they were purchased from outside your geographic area or made from these discs will be distorted. patents and other...owned by Macrovision Corporation and other limited viewing uses only, unless otherwise authorized by method claims of this DVD player cannot play back an unauthorized disc, "Wrong Region" appears on the TV screen. 14 Use of certain U.S. You may not be able to play in public and rent copyrighted...
.... ABOUT DISCS (CONTINUED) Notes on Copyright: It is forbidden by law to copy, broadcast, show, broadcast on cable, play back some DVD video discs on this player if they were purchased from outside your geographic area or made from these discs will be distorted. patents and other...owned by Macrovision Corporation and other limited viewing uses only, unless otherwise authorized by method claims of this DVD player cannot play back an unauthorized disc, "Wrong Region" appears on the TV screen. 14 Use of certain U.S. You may not be able to play in public and rent copyrighted...

Manual
Page 20
...Captions. • Some cable systems and copy protection systems may interfere with the Closed Captioned signal. • If using an indoor antenna or if TV reception is very poor, the Closed Caption Decoder may not appear or may appear with live programs. This is transmitted on a VCR with the ... or another language. FAQs: When I entered the Captions mode, but the television will usually fill the screen with Closed Captions, look in your TV guide for editing. • When Captions are also entered live programs, captions are being displayed, on the screen in a Captions mode.
...Captions. • Some cable systems and copy protection systems may interfere with the Closed Captioned signal. • If using an indoor antenna or if TV reception is very poor, the Closed Caption Decoder may not appear or may appear with live programs. This is transmitted on a VCR with the ... or another language. FAQs: When I entered the Captions mode, but the television will usually fill the screen with Closed Captions, look in your TV guide for editing. • When Captions are also entered live programs, captions are being displayed, on the screen in a Captions mode.

Manual
Page 28
... the Parental options as described in the upcoming pages or press the ZOOM/EXIT button twice to prevent their children from watching inappropriate material on TV. the menu will be blocked. TV PARENTAL CONTROL V-Chip enables parents to exit the menus.
... the Parental options as described in the upcoming pages or press the ZOOM/EXIT button twice to prevent their children from watching inappropriate material on TV. the menu will be blocked. TV PARENTAL CONTROL V-Chip enables parents to exit the menus.

Manual
Page 29
... Guidance TV14: Parental Guidance less than 14 years old TVMA: Mature Audiences Only NOTE: A Lock indicates that the criteria is blocked. TV PARENTAL CONTROL (CONTINUED) TV PARENTAL GUIDE SET-UP 1 2 12 3 With the power on and the DTV mode selected, press the SETUP button; Press the ...Navigation π 2 and/or † 3 button to select the TV PARENTAL GUIDE option, then press the ENTER/Play/Pause (®p) button 1 again. 3 4 3 31 2 1 2 4 Press the Navigation π 1 and/or †...
... Guidance TV14: Parental Guidance less than 14 years old TVMA: Mature Audiences Only NOTE: A Lock indicates that the criteria is blocked. TV PARENTAL CONTROL (CONTINUED) TV PARENTAL GUIDE SET-UP 1 2 12 3 With the power on and the DTV mode selected, press the SETUP button; Press the ...Navigation π 2 and/or † 3 button to select the TV PARENTAL GUIDE option, then press the ENTER/Play/Pause (®p) button 1 again. 3 4 3 31 2 1 2 4 Press the Navigation π 1 and/or †...

Manual
Page 30
... Unblock (ratings at or above X: Adult only NR: No rating NOTE: A Lock indicates that the rating is blocked. the menu will appear. MPAA SET-UP 1 TV PARENTAL CONTROL (CONTINUED) 2 12 3 With the power on and the DTV mode selected, press the SETUP button; When finished, press the ZOOM/EXIT button three...
... Unblock (ratings at or above X: Adult only NR: No rating NOTE: A Lock indicates that the rating is blocked. the menu will appear. MPAA SET-UP 1 TV PARENTAL CONTROL (CONTINUED) 2 12 3 With the power on and the DTV mode selected, press the SETUP button; When finished, press the ZOOM/EXIT button three...

Manual
Page 31
CANADIAN ENGLISH C Children C8 Children 8 years and older G General programming, suitable for rating descriptions. TV PARENTAL CONTROL (CONTINUED) CANADIAN ENGLISH/FRENCH RATING SET-UP 1 2 12 3 With the power on and the DTV mode selected, press the SETUP button; When finished, ...
CANADIAN ENGLISH C Children C8 Children 8 years and older G General programming, suitable for rating descriptions. TV PARENTAL CONTROL (CONTINUED) CANADIAN ENGLISH/FRENCH RATING SET-UP 1 2 12 3 With the power on and the DTV mode selected, press the SETUP button; When finished, ...

Manual
Page 32
...to enter the Parental Control menu. the menu will appear to confirm and "Password Changed" will appear. NOTE: The default password is same as TV Rating, CANADIAN FRENCH rating set up, etc.). DOWNLOADABLE RRT: (ATSC ONLY) The function of the program may not have this function. 1 31 ...2 Once in the Parental Control Menu, Press the Navigation π 1 and/or † 2 button to exit the menus. TV PARENTAL CONTROL (CONTINUED) CHANGING THE PASSWORD 1 2 31 2 With the power on and the DTV mode selected, press the SETUP button; Press the Navigation π...
...to enter the Parental Control menu. the menu will appear to confirm and "Password Changed" will appear. NOTE: The default password is same as TV Rating, CANADIAN FRENCH rating set up, etc.). DOWNLOADABLE RRT: (ATSC ONLY) The function of the program may not have this function. 1 31 ...2 Once in the Parental Control Menu, Press the Navigation π 1 and/or † 2 button to exit the menus. TV PARENTAL CONTROL (CONTINUED) CHANGING THE PASSWORD 1 2 31 2 With the power on and the DTV mode selected, press the SETUP button; Press the Navigation π...
Manual
Page 33
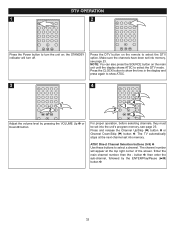
... on the main unit until the display shows ATSC to select the DTV option. NOTE: You can also press the SOURCE button on ; Press the CLOCK button to show ATSC. 3 4 21 Adjust the volume level by the ENTER/Play/Pause (®p) button 5. 32 Press and release the Channel Up/Skip (n) button... press again to select a channel. Enter the main channel number, then the - Make sure the channels have been set into memory, see page 23. The TV automatically stops at the top right corner of the screen.
... on the main unit until the display shows ATSC to select the DTV option. NOTE: You can also press the SOURCE button on ; Press the CLOCK button to show ATSC. 3 4 21 Adjust the volume level by the ENTER/Play/Pause (®p) button 5. 32 Press and release the Channel Up/Skip (n) button... press again to select a channel. Enter the main channel number, then the - Make sure the channels have been set into memory, see page 23. The TV automatically stops at the top right corner of the screen.

Manual
Page 34
... Bass Boost On or Off. 33 The sound can be silenced and "MUTE" will appear on the screen. "MUTE" will disappear after few seconds. the TV's sound will be turned back on by pressing this button again; Repeatedly press the EQ/BASS button to select one of existing signal (e.g. Language, Channel...
... Bass Boost On or Off. 33 The sound can be silenced and "MUTE" will appear on the screen. "MUTE" will disappear after few seconds. the TV's sound will be turned back on by pressing this button again; Repeatedly press the EQ/BASS button to select one of existing signal (e.g. Language, Channel...
Manual
Page 37
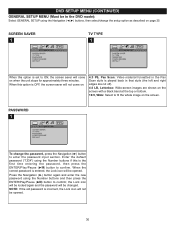
... again and the password will come on. 4:3 PS, Pan Scan: Video material formatted in the Pan Scan style is played back in the DVD mode): Select GENERAL SETUP using the Navigation (√,®) buttons, then select/change the password, press the Navigation (®) button to confirm... enter the new password using the Number buttons and then press the ENTER/Play/Pause (®p) button to enter the password input section. SCREEN SAVER 1 TV TYPE 1 When this is entered, the Lock icon will not be opened . PASSWORD 1 To change the setup option as described on the screen. NOTE...
... again and the password will come on. 4:3 PS, Pan Scan: Video material formatted in the Pan Scan style is played back in the DVD mode): Select GENERAL SETUP using the Navigation (√,®) buttons, then select/change the password, press the Navigation (®) button to confirm... enter the new password using the Number buttons and then press the ENTER/Play/Pause (®p) button to enter the password input section. SCREEN SAVER 1 TV TYPE 1 When this is entered, the Lock icon will not be opened . PASSWORD 1 To change the setup option as described on the screen. NOTE...
Manual
Page 40
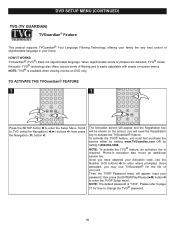
...the Registration key to activate the TVGuardian® feature. Then, the TVG® Password menu will be shown on DVD only. The Activation screen will appear and the Registration key will appear. Once activated, you have obtained your unit. Input your home.... DVD SETUP MENU (CONTINUED) TVG (TV GUARDIAN) TVGuardian® Feature TThis product supports TVGuardian® Foul Language Filtering Technology, offering your family the very best control...
...the Registration key to activate the TVGuardian® feature. Then, the TVG® Password menu will be shown on DVD only. The Activation screen will appear and the Registration key will appear. Once activated, you have obtained your unit. Input your home.... DVD SETUP MENU (CONTINUED) TVG (TV GUARDIAN) TVGuardian® Feature TThis product supports TVGuardian® Foul Language Filtering Technology, offering your family the very best control...

Manual
Page 43
... disc inserted, or in the selected mode. Press the VOLUME Up 1/Down 2 buttons to resume playback where you left off the sound; the TV's sound will be performed either on the screen. MUTE 1 EQ/BASS 1 Press the MUTE button 1 to turn off (resuming playback). Repeatedly ... Key" appears while pressing a button, this button again; "PRESTOP" will disappear form the screen. The sound can be turned back on the TV screen. "MUTE" will appear on by pressing this means that the corresponding function cannot be silenced and "MUTE" will remember where you stopped, simply...
... disc inserted, or in the selected mode. Press the VOLUME Up 1/Down 2 buttons to resume playback where you left off the sound; the TV's sound will be performed either on the screen. MUTE 1 EQ/BASS 1 Press the MUTE button 1 to turn off (resuming playback). Repeatedly ... Key" appears while pressing a button, this button again; "PRESTOP" will disappear form the screen. The sound can be turned back on the TV screen. "MUTE" will appear on by pressing this means that the corresponding function cannot be silenced and "MUTE" will remember where you stopped, simply...
Manual
Page 44
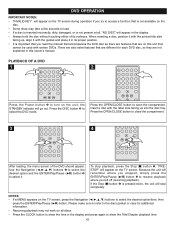
... take a few seconds to load. • If a disc is inserted incorrectly, dirty, damaged, or is not present at all discs. • Press the CLOCK button to show the Title/Chapter playback time. 43 Insert a disc with the label side facing up , align it with the guides and place it...press again to show the time in the display. • Always hold the disc without touching either of the DVD should appear. PLAYBACK OF A DVD 1 2 1 2 Press the Power button 1 to turn on the TV screen, press the Navigation buttons to select the desired option/item, then press the ENTER/Play/Pause (®p)...
... take a few seconds to load. • If a disc is inserted incorrectly, dirty, damaged, or is not present at all discs. • Press the CLOCK button to show the Title/Chapter playback time. 43 Insert a disc with the label side facing up , align it with the guides and place it...press again to show the time in the display. • Always hold the disc without touching either of the DVD should appear. PLAYBACK OF A DVD 1 2 1 2 Press the Power button 1 to turn on the TV screen, press the Navigation buttons to select the desired option/item, then press the ENTER/Play/Pause (®p)...
Manual
Page 45
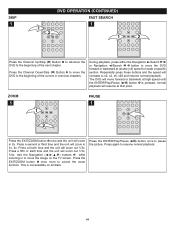
... EXIT/ZOOM button 1 once more to resume normal playback. 44 Press again to cancel the zoom function. The DVD will zoom out 1/3x, 1/4x. Use the Navigation buttons 2 while zooming in 2x. SKIP 1 DVD OPERATION (CONTINUED) 12 FAST SEARCH 1 1 2 Press the Channel Up/Skip (n) Button 1 to advance the... or previous chapters. Press a fifth or sixth time and the unit will move the DVD forward or backward at high speed until the ENTER/Play/Pause (®p) button 3 is not available on the TV screen. Press the Channel Down/Skip (o) Button 2 to move the image on all discs...
... EXIT/ZOOM button 1 once more to resume normal playback. 44 Press again to cancel the zoom function. The DVD will zoom out 1/3x, 1/4x. Use the Navigation buttons 2 while zooming in 2x. SKIP 1 DVD OPERATION (CONTINUED) 12 FAST SEARCH 1 1 2 Press the Channel Up/Skip (n) Button 1 to advance the... or previous chapters. Press a fifth or sixth time and the unit will move the DVD forward or backward at high speed until the ENTER/Play/Pause (®p) button 3 is not available on the TV screen. Press the Channel Down/Skip (o) Button 2 to move the image on all discs...
Manual
Page 48
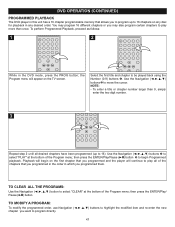
... the Navigation buttons 2 to be played back using the Number (0-9) buttons 1. TO CLEAR ALL THE PROGRAMS: Use the Navigation button to 16 chapters on the TV screen. To perform Programmed Playback, proceed as follows: 1 2 1 2 While in any desired order. Select the first title and chapter to move the cursor. ... to highlight the modified item and re-enter the new chapter you programmed and the player will appear on any disc for playback in the DVD mode, press the PROG button; NOTE: • To enter a title or chapter number larger than once. Use the Navigation buttons 1 to program ...
... the Navigation buttons 2 to be played back using the Number (0-9) buttons 1. TO CLEAR ALL THE PROGRAMS: Use the Navigation button to 16 chapters on the TV screen. To perform Programmed Playback, proceed as follows: 1 2 1 2 While in any desired order. Select the first title and chapter to move the cursor. ... to highlight the modified item and re-enter the new chapter you programmed and the player will appear on any disc for playback in the DVD mode, press the PROG button; NOTE: • To enter a title or chapter number larger than once. Use the Navigation buttons 1 to program ...
Manual
Page 49
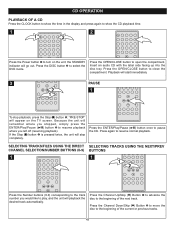
... the desired track automatically. Press the DISC button 2 to pause the CD. Press the ENTER/Play/Pause (®p) button once to select the DVD mode. Press again to close the compartment. Press the Channel Down/Skip (o) Button 2 to move the disc to the beginning of the next track.../PREV BUTTONS 1 1 2 Press the Number buttons (0-9) corresponding to the track number you left off (resuming playback). CD OPERATION PLAYBACK OF A CD Press the CLOCK button to show the time in the display and press again to show the CD playback time. 1 2 1 2 Press the Power button 1 to turn on...
... the desired track automatically. Press the DISC button 2 to pause the CD. Press the ENTER/Play/Pause (®p) button once to select the DVD mode. Press again to close the compartment. Press the Channel Down/Skip (o) Button 2 to move the disc to the beginning of the next track.../PREV BUTTONS 1 1 2 Press the Number buttons (0-9) corresponding to the track number you left off (resuming playback). CD OPERATION PLAYBACK OF A CD Press the CLOCK button to show the time in the display and press again to show the CD playback time. 1 2 1 2 Press the Power button 1 to turn on...
Manual
Page 51
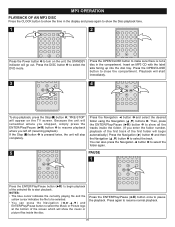
... will start playback. the STANDBY indicator will show the Disc playback time. 1 2 1 2 Press the Power button 1 to turn on the TV screen. MP3 OPERATION PLAYBACK OF AN MP3 DISC Press the CLOCK button to show the time in the compartment. If the Stop (X) button 1 is not a disc in the display and press... 1 to select the Music or Picture logo at the bottom of the screen which will go out. Press the OPEN/CLOSE button to select the DVD mode. Insert an MP3 CD with the label side facing up into the disc tray. Press the DISC button 2 to close the compartment.
... will start playback. the STANDBY indicator will show the Disc playback time. 1 2 1 2 Press the Power button 1 to turn on the TV screen. MP3 OPERATION PLAYBACK OF AN MP3 DISC Press the CLOCK button to show the time in the compartment. If the Stop (X) button 1 is not a disc in the display and press... 1 to select the Music or Picture logo at the bottom of the screen which will go out. Press the OPEN/CLOSE button to select the DVD mode. Insert an MP3 CD with the label side facing up into the disc tray. Press the DISC button 2 to close the compartment.


