User Guide
Page 1
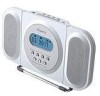
MC7100 Suffix A User's Guide CD Clock Radio with Dual Alarm and Detachable Speaker Before operating this product, please read these instructions completely.
MC7100 Suffix A User's Guide CD Clock Radio with Dual Alarm and Detachable Speaker Before operating this product, please read these instructions completely.
User Guide
Page 2
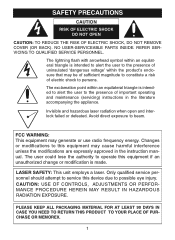
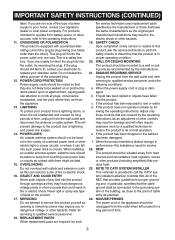
... device due to operate this equipment may generate or use radio frequency energy. PLEASE KEEP ALL PACKAGING MATERIAL FOR AT LEAST 90 DAYS IN CASE YOU NEED TO RETURN THIS PRODUCT TO YOUR PLACE OF PURCHASE OR MEMOREX. 1 The user could lose the authority to possible eye injury. Changes or modifications to beam. NO USER-SERVICEABLE PARTS INSIDE. Avoid direct exposure to...
... device due to operate this equipment may generate or use radio frequency energy. PLEASE KEEP ALL PACKAGING MATERIAL FOR AT LEAST 90 DAYS IN CASE YOU NEED TO RETURN THIS PRODUCT TO YOUR PLACE OF PURCHASE OR MEMOREX. 1 The user could lose the authority to possible eye injury. Changes or modifications to beam. NO USER-SERVICEABLE PARTS INSIDE. Avoid direct exposure to...
User Guide
Page 3
... manufacturer. 8A. POWER SOURCES This product should never be operated only from overheating. Any mounting of the following measures: • Reorient or relocate the receiving antenna. • Increase the separation between the equipment and receiver. • Connect the equipment into an outlet on the product and in a particular installation. READ INSTRUCTIONS All the safety and operating instructions should use this product on the...
... manufacturer. 8A. POWER SOURCES This product should never be operated only from overheating. Any mounting of the following measures: • Reorient or relocate the receiving antenna. • Increase the separation between the equipment and receiver. • Connect the equipment into an outlet on the product and in a particular installation. READ INSTRUCTIONS All the safety and operating instructions should use this product on the...
User Guide
Page 4
... the operating instructions. DAMAGE REQUIRING SERVICE Unplug the product from heat sources such as radiators, heat registers, stoves or other products (including amplifiers) that are required, be sure the service technician uses replacement parts specified by following conditions: a. When the power-supply cord or plug is a safety feature. b. If the product has been exposed to the point of fire or electric shock. 16. Adjust only...
... the operating instructions. DAMAGE REQUIRING SERVICE Unplug the product from heat sources such as radiators, heat registers, stoves or other products (including amplifiers) that are required, be sure the service technician uses replacement parts specified by following conditions: a. When the power-supply cord or plug is a safety feature. b. If the product has been exposed to the point of fire or electric shock. 16. Adjust only...
User Guide
Page 5
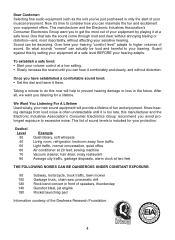
... A Lifetime Used wisely, your new sound equipment will help to higher volumes of sound levels is too late, this manufacturer and the Electronic Industries Association's Consumer Electronics Group recommend you listening for your musical enjoyment. This manufacturer and the Electronic Industries Association's Consumer Electronics Group want you avoid prolonged exposure to your equipment by setting your equipment...
... A Lifetime Used wisely, your new sound equipment will help to higher volumes of sound levels is too late, this manufacturer and the Electronic Industries Association's Consumer Electronics Group recommend you listening for your musical enjoyment. This manufacturer and the Electronic Industries Association's Consumer Electronics Group want you avoid prolonged exposure to your equipment by setting your equipment...
User Guide
Page 6
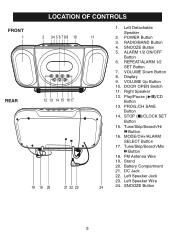
... Speaker Wire 24. LOCATION OF CONTROLS FRONT 1 2 3 4 5 6 7 8 9 10 REAR 12 13 14 15 16 17 18 19 20 21 22 23 11 24 1. POWER Button 3. REPEAT/ALARM 1/2 SET Button 7. Right Speaker 12. Tune/Skip/Search/Min n Button 18. DC Jack 22. RADIO/BAND Button 4. ALARM 1/2 ON/OFF Button 6. VOLUME Up Button 10. Stand 20. Left Speaker Jack 23. Left Detachable Speaker 2. Battery Compartment 21. FM Antenna Wire 19. SNOOZE Button 5. DOOR OPEN Switch 11. STOP (I)/CLOCK SET Button 15. SNOOZE Button 5 Display...
... Speaker Wire 24. LOCATION OF CONTROLS FRONT 1 2 3 4 5 6 7 8 9 10 REAR 12 13 14 15 16 17 18 19 20 21 22 23 11 24 1. POWER Button 3. REPEAT/ALARM 1/2 SET Button 7. Right Speaker 12. Tune/Skip/Search/Min n Button 18. DC Jack 22. RADIO/BAND Button 4. ALARM 1/2 ON/OFF Button 6. VOLUME Up Button 10. Stand 20. Left Speaker Jack 23. Left Detachable Speaker 2. Battery Compartment 21. FM Antenna Wire 19. SNOOZE Button 5. DOOR OPEN Switch 11. STOP (I)/CLOCK SET Button 15. SNOOZE Button 5 Display...
User Guide
Page 7
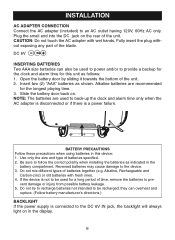
... can also be used to back-up the clock and alarm time only when the AC adapter is disconnected or if there is connected to provide a backup for the clock and alarm time for the longest playing time. 3. Fully insert the plug without exposing any part of batteries together (e.g. Alkaline batteries are used to power and/or to the DC 6V IN jack, the backlight will always light on in this...
... can also be used to back-up the clock and alarm time only when the AC adapter is disconnected or if there is connected to provide a backup for the clock and alarm time for the longest playing time. 3. Fully insert the plug without exposing any part of batteries together (e.g. Alkaline batteries are used to power and/or to the DC 6V IN jack, the backlight will always light on in this...
User Guide
Page 9
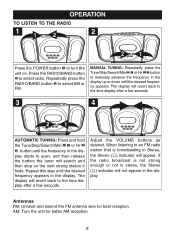
play after a few seconds. If the radio broadcast is broadcasting in Stereo, the Stereo ( ) indicator will revert back to the time dis- the tuner will revert back to manually advance the frequency in the display. Adjust the VOLUME buttons as desired. The display will search and then stop on . Repeatedly press the RADIO/BAND button 2 to select AM or FM. 3 11 MANUAL TUNING: Repeatedly press the Tune/Skip/Search...
play after a few seconds. If the radio broadcast is broadcasting in Stereo, the Stereo ( ) indicator will revert back to the time dis- the tuner will revert back to manually advance the frequency in the display. Adjust the VOLUME buttons as desired. The display will search and then stop on . Repeatedly press the RADIO/BAND button 2 to select AM or FM. 3 11 MANUAL TUNING: Repeatedly press the Tune/Skip/Search...
User Guide
Page 10
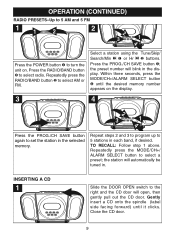
... on . Within three seconds, press the MODE/CH+/ALARM SELECT button 4 until it clicks. OPERATION (CONTINUED) RADIO PRESETS-Up to 5 AM and 5 FM 11 2 2 2 3 1 4 Press the POWER button 1 to turn the unit on the display. 4 2 3 1 4 Press the PROG./CH SAVE button again to set the station in the selected memory. 1 4 Repeat steps 2 and 3 to program up to 5 stations in the display. the preset number will open, then gently pull out...
... on . Within three seconds, press the MODE/CH+/ALARM SELECT button 4 until it clicks. OPERATION (CONTINUED) RADIO PRESETS-Up to 5 AM and 5 FM 11 2 2 2 3 1 4 Press the POWER button 1 to turn the unit on the display. 4 2 3 1 4 Press the PROG./CH SAVE button again to set the station in the selected memory. 1 4 Repeat steps 2 and 3 to program up to 5 stations in the display. the preset number will open, then gently pull out...
User Guide
Page 11
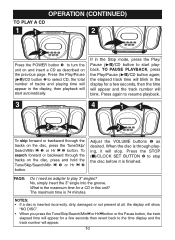
.../Search/Min n 1 or Hr o 2 button. 11 Adjust the VOLUME buttons 1 as described on the previous page. OPERATION (CONTINUED) TO PLAY A CD 11 2 2 Press the POWER button 1 to turn the unit on and insert a CD as desired. Press the STOP (I need an adapter to play - NOTES: • If a disc is inserted incorrectly, dirty, damaged or not present at all, the display will show, "NO DISC". • When you press...
.../Search/Min n 1 or Hr o 2 button. 11 Adjust the VOLUME buttons 1 as described on the previous page. OPERATION (CONTINUED) TO PLAY A CD 11 2 2 Press the POWER button 1 to turn the unit on and insert a CD as desired. Press the STOP (I need an adapter to play - NOTES: • If a disc is inserted incorrectly, dirty, damaged or not present at all, the display will show, "NO DISC". • When you press...
User Guide
Page 12
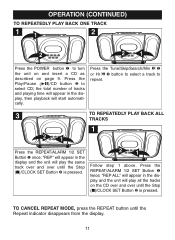
... Stop (I )/CLOCK SET Button 2 is pressed. Press the Tune/Skip/Search/Min n 1 or Hr o 2 button to select a track to 2 select CD; Press the REPEAT/ALARM 1/2 SET Button 1 twice; "REP ALL" will appear in the display and the unit will play , then playback will appear in the dis- OPERATION (CONTINUED) TO REPEATEDLY PLAY BACK ONE TRACK 11 2 2 21 Press the POWER button 1 to turn the unit on and insert a CD...
... Stop (I )/CLOCK SET Button 2 is pressed. Press the Tune/Skip/Search/Min n 1 or Hr o 2 button to select a track to 2 select CD; Press the REPEAT/ALARM 1/2 SET Button 1 twice; "REP ALL" will appear in the display and the unit will play , then playback will appear in the dis- OPERATION (CONTINUED) TO REPEATEDLY PLAY BACK ONE TRACK 11 2 2 21 Press the POWER button 1 to turn the unit on and insert a CD...
User Guide
Page 13
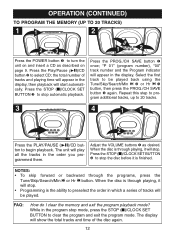
..../CH SAVE button 1 once; "P 01" (program number), "00" track number and the Program indicator will play all the tracks in the display. ton to turn the unit on and insert a CD as desired. OPERATION (CONTINUED) TO PROGRAM THE MEMORY (UP TO 20 TRACKS) 11 2 23 3 1 2 Press the POWER button 1 to begin playback. Press the STOP (I)/CLOCK SET BUTTON 2 to stop the disc before it is through playing, it will be played back using...
..../CH SAVE button 1 once; "P 01" (program number), "00" track number and the Program indicator will play all the tracks in the display. ton to turn the unit on and insert a CD as desired. OPERATION (CONTINUED) TO PROGRAM THE MEMORY (UP TO 20 TRACKS) 11 2 23 3 1 2 Press the POWER button 1 to begin playback. Press the STOP (I)/CLOCK SET BUTTON 2 to stop the disc before it is through playing, it will be played back using...
User Guide
Page 14
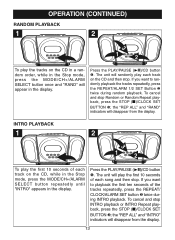
... REPEAT/ CLOCK/ALARM SET button 2 twice during random playback. the "REP ALL" and "RAND" indicators will disappear from the display. To cancel and stop Random or Random Repeat playback, press the STOP (I )/CLOCK SET BUTTON 3; INTRO PLAYBACK 1 2 3 1 2 To play the first 10 seconds of each song and then stop . OPERATION (CONTINUED) RANDOM PLAYBACK 1 2 3 1 2 To play the tracks on the CD, while in the Stop mode, press the MODE/CH+/ALARM SELECT button repeatedly...
... REPEAT/ CLOCK/ALARM SET button 2 twice during random playback. the "REP ALL" and "RAND" indicators will disappear from the display. To cancel and stop Random or Random Repeat playback, press the STOP (I )/CLOCK SET BUTTON 3; INTRO PLAYBACK 1 2 3 1 2 To play the first 10 seconds of each song and then stop . OPERATION (CONTINUED) RANDOM PLAYBACK 1 2 3 1 2 To play the tracks on the CD, while in the Stop mode, press the MODE/CH+/ALARM SELECT button repeatedly...
User Guide
Page 15
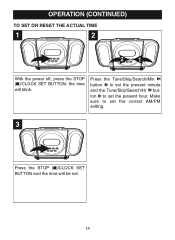
Make sure to setting. ton 2 to set . 11 14 set 1the cor1rect AM/PM 3 Press the STOP (I )/CLOCK SET BUTTON; OPERATION (CONTINUED) TO SET OR RESET THE ACTUAL TIME 1 2 21 With the power off, press the STOP (I )/CLOCK SET BUTTON and the time will blink. 11 Press the Tune/Skip/Search/Min n button 1 to set the present minute and the Tune/Skip/Search/Hr o but- the time will be set the present hour.
Make sure to setting. ton 2 to set . 11 14 set 1the cor1rect AM/PM 3 Press the STOP (I )/CLOCK SET BUTTON; OPERATION (CONTINUED) TO SET OR RESET THE ACTUAL TIME 1 2 21 With the power off, press the STOP (I )/CLOCK SET BUTTON and the time will blink. 11 Press the Tune/Skip/Search/Min n button 1 to set the present minute and the Tune/Skip/Search/Hr o but- the time will be set the present hour.
User Guide
Page 16
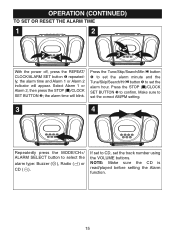
... n button 1 to set the alarm hour. alarm type: Buzzer ( CD ( ).ZZZ ), RadioZZZ( ) or ZZZ NOTE: Make sure the CD is read/played before setting the Alarm function. 11 15 OPERATION (CONTINUED) TO SET OR RESET THE ALARM TIME 1 2 2 21 3 1 With the power off, press the REPEAT/ CLOCK/ALARM SET button 1 repeatedly; Select Alarm 1 or Alarm 2, then press the STOP (I )/CLOCK SET BUTTON 3 to confirm. Make sure to 1 set the correct AM/PM setting. 3 4 Repeatedly press the MODE/CH+/ If set to CD, set the track number using ALARM SELECT button to set the alarm minute...
... n button 1 to set the alarm hour. alarm type: Buzzer ( CD ( ).ZZZ ), RadioZZZ( ) or ZZZ NOTE: Make sure the CD is read/played before setting the Alarm function. 11 15 OPERATION (CONTINUED) TO SET OR RESET THE ALARM TIME 1 2 2 21 3 1 With the power off, press the REPEAT/ CLOCK/ALARM SET button 1 repeatedly; Select Alarm 1 or Alarm 2, then press the STOP (I )/CLOCK SET BUTTON 3 to confirm. Make sure to 1 set the correct AM/PM setting. 3 4 Repeatedly press the MODE/CH+/ If set to CD, set the track number using ALARM SELECT button to set the alarm minute...
User Guide
Page 17
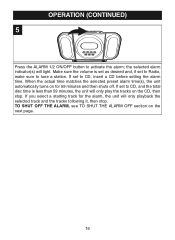
... preset alarm time(s), the unit automatically turns on the next page. 16 Make sure the volume is less than 59 minutes, the unit will only play the tracks on the CD, then stop . TO SHUT OFF THE ALARM, see TO SHUT THE ALARM OFF section on for the alarm, the unit will light. If you select a starting track for 59 minutes and then shuts off. If set to Radio, make...
... preset alarm time(s), the unit automatically turns on the next page. 16 Make sure the volume is less than 59 minutes, the unit will only play the tracks on the CD, then stop . TO SHUT OFF THE ALARM, see TO SHUT THE ALARM OFF section on for the alarm, the unit will light. If you select a starting track for 59 minutes and then shuts off. If set to Radio, make...
User Guide
Page 18
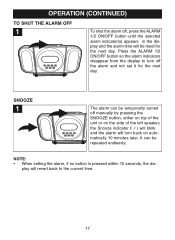
... dis- It can be temporarily turned off manually by pressing the SNOOZE button, either on top of the unit or on automatically 10 minutes later. OPERATION (CONTINUED) TO SHUT THE ALARM OFF 1 To shut the alarm off, press the ALARM 1/2 ON/OFF button until the selected alarm indicator(s) appears in the display and the alarm time will be repeated endlessly. SNOOZE 11 The alarm can be reset for the next day.
... dis- It can be temporarily turned off manually by pressing the SNOOZE button, either on top of the unit or on automatically 10 minutes later. OPERATION (CONTINUED) TO SHUT THE ALARM OFF 1 To shut the alarm off, press the ALARM 1/2 ON/OFF button until the selected alarm indicator(s) appears in the display and the alarm time will be repeated endlessly. SNOOZE 11 The alarm can be reset for the next day.
User Guide
Page 19
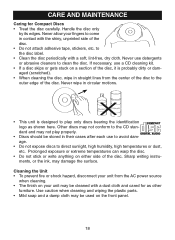
... to play properly. • Discs should be stored in straight lines from the center of the disc to the CD standard and may be cleaned with the shiny, unprinted side of the disc. Never use a CD cleaning kit. • If a disc skips or gets stuck on your fingers to the disc label. • Clean the disc periodically with a soft, lint-free...
... to play properly. • Discs should be stored in straight lines from the center of the disc to the CD standard and may be cleaned with the shiny, unprinted side of the disc. Never use a CD cleaning kit. • If a disc skips or gets stuck on your fingers to the disc label. • Clean the disc periodically with a soft, lint-free...
User Guide
Page 20
... volume. 19 Alarm does not turn on page 15. Moisture condensation on . Check the battery. Disc inserted incorrectly. Dirty or defective disc. Clock not set to minimum. VOLUME setting is set . Reinsert disc correctly. Try another disc. TROUBLESHOOTING GUIDE If you experience a problem with soft cloth. Dirty or defective CD. VOLUME setting is set . Clean or replace disc. Power is not on disc. SYMPTOM Unit will not play. SOLUTION Check the AC adapter connection. Press the POWER button to...
... volume. 19 Alarm does not turn on page 15. Moisture condensation on . Check the battery. Disc inserted incorrectly. Dirty or defective disc. Clock not set to minimum. VOLUME setting is set . Reinsert disc correctly. Try another disc. TROUBLESHOOTING GUIDE If you experience a problem with soft cloth. Dirty or defective CD. VOLUME setting is set . Clean or replace disc. Power is not on disc. SYMPTOM Unit will not play. SOLUTION Check the AC adapter connection. Press the POWER button to...
User Guide
Page 21
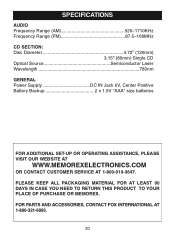
...-6993. 20 SPECIFICATIONS AUDIO Frequency Range (AM 520-1710KHz Frequency Range (FM 87.5-108MHz CD SECTION: Disc Diameter 4.72" (120mm) 3.15" (80mm) Single CD Optical Source Semiconductor Laser Wavelength 780nm GENERAL Power Supply DC IN Jack 6V, Center Positive Battery Backup 2 x 1.5V "AAA" size batteries FOR ADDITIONAL SET-UP OR OPERATING ASSISTANCE, PLEASE VISIT OUR WEBSITE AT WWW.MEMOREXELECTRONICS.COM OR CONTACT CUSTOMER SERVICE AT 1-800...
...-6993. 20 SPECIFICATIONS AUDIO Frequency Range (AM 520-1710KHz Frequency Range (FM 87.5-108MHz CD SECTION: Disc Diameter 4.72" (120mm) 3.15" (80mm) Single CD Optical Source Semiconductor Laser Wavelength 780nm GENERAL Power Supply DC IN Jack 6V, Center Positive Battery Backup 2 x 1.5V "AAA" size batteries FOR ADDITIONAL SET-UP OR OPERATING ASSISTANCE, PLEASE VISIT OUR WEBSITE AT WWW.MEMOREXELECTRONICS.COM OR CONTACT CUSTOMER SERVICE AT 1-800...


