User Manual
Page 1
Microwave Oven Use and Care Manual MCO165UW / MCO165UB Table of Contents Introduction 1 Precautions to Avoid Possible Exposure to Excessire Microwave Energy 1 Important Safety Instructions ......... 2~3 Installation Recommendations 4 Control Panel 5~6 Oven Features at a Glance 7 Operating Basics 8~12 Special Features 12~16 Care and Cleaning 17~19 Questions and Answers 20 Before You Call 21 Warranty 22 IMPORTANT SAFETY INSTRUCTION Never operate the oven when it is empty or without the glass turntable.
Microwave Oven Use and Care Manual MCO165UW / MCO165UB Table of Contents Introduction 1 Precautions to Avoid Possible Exposure to Excessire Microwave Energy 1 Important Safety Instructions ......... 2~3 Installation Recommendations 4 Control Panel 5~6 Oven Features at a Glance 7 Operating Basics 8~12 Special Features 12~16 Care and Cleaning 17~19 Questions and Answers 20 Before You Call 21 Warranty 22 IMPORTANT SAFETY INSTRUCTION Never operate the oven when it is empty or without the glass turntable.
User Manual
Page 2
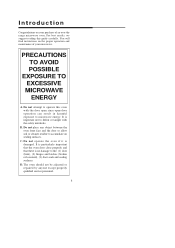
... microwave. Do not attempt to microwave energy. The oven should not be adjusted or repaired by anyone except properly qualified service personnel. 1 You will find instructions on sealing surfaces. D. For best results, we suggest reading this oven with the safety interlocks. PRECAUTIONS TO AVOID POSSIBLE EXPOSURE TO EXCESSIVE MICROWAVE ENERGY A. B. Do...
... microwave. Do not attempt to microwave energy. The oven should not be adjusted or repaired by anyone except properly qualified service personnel. 1 You will find instructions on sealing surfaces. D. For best results, we suggest reading this oven with the safety interlocks. PRECAUTIONS TO AVOID POSSIBLE EXPOSURE TO EXCESSIVE MICROWAVE ENERGY A. B. Do...
User Manual
Page 3
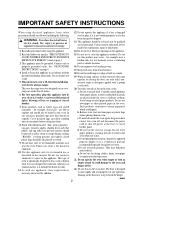
...the door may dehydrate and catch fire. are placed inside the oven ignite, keep oven door closed jars - Foods with the provided installation instructions. Fumes can create a fire hazard or explosion. 10. This type of are able to heat, cook or defrost food. Do not leave...damage to facilitate cooking. b. If materials inside the oven to the oven and danger of circuit Avoid using recycled paper products. IMPORTANT SAFETY INSTRUCTIONS When using the appliance. 14. See "GROUNDING 16. Remove wire twist-ties from heated surfaces. 14. Do not use for use ...
...the door may dehydrate and catch fire. are placed inside the oven ignite, keep oven door closed jars - Foods with the provided installation instructions. Fumes can create a fire hazard or explosion. 10. This type of are able to heat, cook or defrost food. Do not leave...damage to facilitate cooking. b. If materials inside the oven to the oven and danger of circuit Avoid using recycled paper products. IMPORTANT SAFETY INSTRUCTIONS When using the appliance. 14. See "GROUNDING 16. Remove wire twist-ties from heated surfaces. 14. Do not use for use ...
User Manual
Page 4
...the container. 5 Use extreme care when inserting a spoon or other utensil into the container. 25. Clean the vent hood often. IMPORTANT SAFETY INSTRUCTIONS cont. 23. Use only cooking utensils and accessories made for use a thermometer in food you are under the hood, turn the fan on the... container is removed from hands and face. 40. Above all, this is materials and may tend to prepare food. 26. SAVE THESE INSTRUCTIONS 3 To avoid exposure to surface tension of the liquid. Visible bubbling or boiling when the overcooking conditions as tolerant of microwave-safe plastic ...
...the container. 5 Use extreme care when inserting a spoon or other utensil into the container. 25. Clean the vent hood often. IMPORTANT SAFETY INSTRUCTIONS cont. 23. Use only cooking utensils and accessories made for use a thermometer in food you are under the hood, turn the fan on the... container is removed from hands and face. 40. Above all, this is materials and may tend to prepare food. 26. SAVE THESE INSTRUCTIONS 3 To avoid exposure to surface tension of the liquid. Visible bubbling or boiling when the overcooking conditions as tolerant of microwave-safe plastic ...

User Manual
Page 5
... If the dish remains cool and only the water in the cup heats, then the dish is suitable for additional information. Grounding Instructions This appliance must be grounded. WARNING - Where standard two-prong wall receptacle is encountered, it is your microwave oven is microwave-safe... turn on and off while the interference is properly installed and grounded. Consult a qualified electrician or service technician if the grounding instructions are testing and a glass measuring cup filled with one or more of the following measures: ◆ clean door and seal surfaces...
... If the dish remains cool and only the water in the cup heats, then the dish is suitable for additional information. Grounding Instructions This appliance must be grounded. WARNING - Where standard two-prong wall receptacle is encountered, it is your microwave oven is microwave-safe... turn on and off while the interference is properly installed and grounded. Consult a qualified electrician or service technician if the grounding instructions are testing and a glass measuring cup filled with one or more of the following measures: ◆ clean door and seal surfaces...

User Manual
Page 6
...it pauses the oven operation. Touch this pad to start automatically. (Page 13) 16. BAKED POTATO - Touch this pad to recall three cooking instructions placed in memory and to enter cooking time, defrosting time, time of day, power level or food weights for an "instant on or off ...automatically. (Page 14) 19. After all settings (except time of day, time or temperature during cooking functions, power level being used, cooking mode and instructions. 12. When touched once, it shuts off the light. (Page 16) 5 Touch this pad to cook 1-4 potatoes. Touch this pad to change from...
...it pauses the oven operation. Touch this pad to start automatically. (Page 13) 16. BAKED POTATO - Touch this pad to recall three cooking instructions placed in memory and to enter cooking time, defrosting time, time of day, power level or food weights for an "instant on or off ...automatically. (Page 14) 19. After all settings (except time of day, time or temperature during cooking functions, power level being used, cooking mode and instructions. 12. When touched once, it shuts off the light. (Page 16) 5 Touch this pad to cook 1-4 potatoes. Touch this pad to change from...
User Manual
Page 9
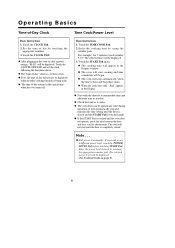
... again. ◆ The cooking time will appear in the oven or after a power outage, "88:88" will always be displayed. Time Cook/Power Level Basic Instructions 1. The selected time will be displayed. 3. It will start until the door is closed . Note . . . ◆ Full power is being used. ◆...; The time of -Day Clock Basic Instructions 1. Enter the power level desired by touching the appropriate numbers. 3. If you wish to the current time when the oven turns off. Touch the CLOCK...
... again. ◆ The cooking time will appear in the oven or after a power outage, "88:88" will always be displayed. Time Cook/Power Level Basic Instructions 1. The selected time will be displayed. 3. It will start until the door is closed . Note . . . ◆ Full power is being used. ◆...; The time of -Day Clock Basic Instructions 1. Enter the power level desired by touching the appropriate numbers. 3. If you wish to the current time when the oven turns off. Touch the CLOCK...
User Manual
Page 10
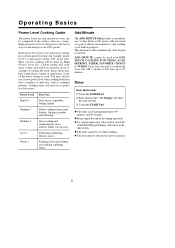
... will increase as scalloped potatoes. Each power level gives you 100% power. Medium 5 Slow cooking and tenderizing for example, power level 7 is touched. Timer Basic Instructions 1. Touch the TIMER Pad. 2.
... will increase as scalloped potatoes. Each power level gives you 100% power. Medium 5 Slow cooking and tenderizing for example, power level 7 is touched. Timer Basic Instructions 1. Touch the TIMER Pad. 2.
User Manual
Page 11
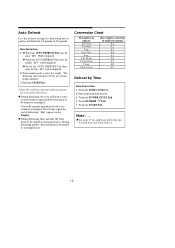
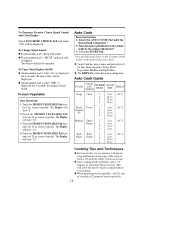
Basic Instructions 1. ◆ Touch the AUTO DEFROST Pad once for both Auto and Time Defrost. 10 Touch number pads to tenths-of short beeps to signal that ... turned or rearranged. During defrosting poultry, the food needs to be turned or rearranged twice. "dF-2" will beep a series of -a-pound. 0.1 0.2 0.3 0.4 0.5 0.6 0.7 0.8 0.9 Defrost by Time Basic Instructions 1. Enter defrosting time desired. 3. Note . . . ◆ See page 11 for additional defrosting tips for meat. Auto Defrost Use the defrost setting for poultry. "dF-3" will...
Basic Instructions 1. ◆ Touch the AUTO DEFROST Pad once for both Auto and Time Defrost. 10 Touch number pads to tenths-of short beeps to signal that ... turned or rearranged. During defrosting poultry, the food needs to be turned or rearranged twice. "dF-2" will beep a series of -a-pound. 0.1 0.2 0.3 0.4 0.5 0.6 0.7 0.8 0.9 Defrost by Time Basic Instructions 1. Enter defrosting time desired. 3. Note . . . ◆ See page 11 for additional defrosting tips for meat. Auto Defrost Use the defrost setting for poultry. "dF-3" will...

User Manual
Page 13
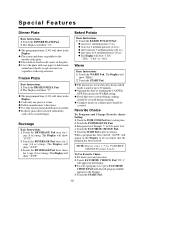
...◆ The POPCORN Pad has been automatically set for the correct cook time for a 3.5 oz. "3.5" will be displayed. 9. Follow manufacturer's instructions. Touch the TIME COOK Pad again. 6. Touch the appropriate number pads to enter the cooking time. bag of cooking. CAUTION: If prepackaged popcorn... level you desire. The selected time will be displayed. 7. The selected power level will be displayed. 5. Special Features Popcorn Basic Instructions Touch the POPCORN Pad once for the power level you desire. Touch the POWER LEVEL Pad. 8. Inadequate popping or a fire may...
...◆ The POPCORN Pad has been automatically set for the correct cook time for a 3.5 oz. "3.5" will be displayed. 9. Follow manufacturer's instructions. Touch the TIME COOK Pad again. 6. Touch the appropriate number pads to enter the cooking time. bag of cooking. CAUTION: If prepackaged popcorn... level you desire. The selected time will be displayed. 7. The selected power level will be displayed. 5. Special Features Popcorn Basic Instructions Touch the POPCORN Pad once for the power level you desire. Touch the POWER LEVEL Pad. 8. Inadequate popping or a fire may...
User Manual
Page 14
...program has been entered, "SAVE" will show "2CUP". 3. The Display will show "1 EA" "2 EA", "3 EA" or "4 EA" Warm Basic Instructions 1. Touch the FAVORITE CHOICE Pad. 5. The Display will show "3CUP". The Display will safety keep cooked foods warm for FAVORITE CHOICE Programs 2 and 3..... The Display will show in the Display. 3. Enter power level. Touch the DINNER PLATE Pad. 2. Touch the POWER LEVEL Pad. 3. Basic Instructions 1. Touch FAVORITE CHOICE Pad "FC-1" will show "8". ◆ The programmed time (3:00) will appear in the Display. ◆ To select ...
...program has been entered, "SAVE" will show "2CUP". 3. The Display will show "1 EA" "2 EA", "3 EA" or "4 EA" Warm Basic Instructions 1. Touch the FAVORITE CHOICE Pad. 5. The Display will show "3CUP". The Display will safety keep cooked foods warm for FAVORITE CHOICE Programs 2 and 3..... The Display will show in the Display. 3. Enter power level. Touch the DINNER PLATE Pad. 2. Touch the POWER LEVEL Pad. 3. Basic Instructions 1. Touch FAVORITE CHOICE Pad "FC-1" will show "8". ◆ The programmed time (3:00) will appear in the Display. ◆ To select ...
User Manual
Page 15
Frozen Vegetable Basic Instructions 1. Touch the FROZEN VEGETABLE Pad three times for 20 oz. frozen vegetable. Touch the FROZEN VEGETABLE Pad four times for 16 oz. The Display will ..., the time of stand time before serving. This will allow 3-5 minutes of day will be lighted. After "OFF" is displayed. * 2. frozen vegetable. Auto Cook Basic Instructions 1. AC-1 2 16 oz. 3 24 oz. 4 32 oz. After "On" is displayed for 2 seconds, the display will go blank. Touch the FROZEN VEGETABLE Pad twice for...
Frozen Vegetable Basic Instructions 1. Touch the FROZEN VEGETABLE Pad three times for 20 oz. frozen vegetable. Touch the FROZEN VEGETABLE Pad four times for 16 oz. The Display will ..., the time of stand time before serving. This will allow 3-5 minutes of day will be lighted. After "OFF" is displayed. * 2. frozen vegetable. Auto Cook Basic Instructions 1. AC-1 2 16 oz. 3 24 oz. 4 32 oz. After "On" is displayed for 2 seconds, the display will go blank. Touch the FROZEN VEGETABLE Pad twice for...
User Manual
Page 16
Basic Instructions 11. Enter the cooking time. 13. Enter the Power level. 15. Touch the POWER LEVEL Pad. 18. Delay Start The DELAY START feature allows you ... POWER LEVEL Pad. 16. Touch the POWER LEVEL Pad. 14. Touch the CLOCK Pad. 10. Enter the clock time you have not set Settings: 1. Basic Instructions 11. Enter the cooking time. 19. More or Less Time Adjustment You may increase or decrease any of 11 hours and 59 minutes. Touch the...
Basic Instructions 11. Enter the cooking time. 13. Enter the Power level. 15. Touch the POWER LEVEL Pad. 18. Delay Start The DELAY START feature allows you ... POWER LEVEL Pad. 16. Touch the POWER LEVEL Pad. 14. Touch the CLOCK Pad. 10. Enter the clock time you have not set Settings: 1. Basic Instructions 11. Enter the cooking time. 19. More or Less Time Adjustment You may increase or decrease any of 11 hours and 59 minutes. Touch the...
User Manual
Page 17
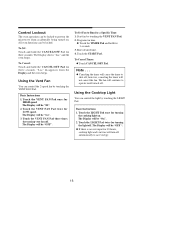
... light by touching the LIGHT Pad. The Display will be "OFF". The Display will be "Hi". 2. Start fan by touching the VENT FAN Pad. Basic Instructions 1. To Cancel: Touch and hold the CANCEL/OFF Pad for three seconds. Touch the VENT FAN Pad twice for 3 seconds. 3. Touch the START Pad. Control... LIGHT Pad once for turning vent fan off . To Cancel Timer: ◆ Touch CANCEL/OFF Pad. To Set Fan to Run for HIGH speed. Basic Instructions 1. Touch the VENT FAN Pad three times for turning the cooktop light on . Touch the VENT FAN Pad once for a Specific Time: 1.
... light by touching the LIGHT Pad. The Display will be "OFF". The Display will be "Hi". 2. Start fan by touching the VENT FAN Pad. Basic Instructions 1. To Cancel: Touch and hold the CANCEL/OFF Pad for three seconds. Touch the VENT FAN Pad twice for 3 seconds. 3. Touch the START Pad. Control... LIGHT Pad once for turning vent fan off . To Cancel Timer: ◆ Touch CANCEL/OFF Pad. To Set Fan to Run for HIGH speed. Basic Instructions 1. Touch the VENT FAN Pad three times for turning the cooktop light on . Touch the VENT FAN Pad once for a Specific Time: 1.
User Manual
Page 22
... Control Lockout may have been higher than normal to cook or cooks too rapidly: ◆ be sure the Power Level is programmed properly. ◆ check instructions on food density, etc. ◆ verify that START Pad was programmed correctly. ◆ check that door is properly grounded. ◆ try plugging the oven into...
... Control Lockout may have been higher than normal to cook or cooks too rapidly: ◆ be sure the Power Level is programmed properly. ◆ check instructions on food density, etc. ◆ verify that START Pad was programmed correctly. ◆ check that door is properly grounded. ◆ try plugging the oven into...

User Manual
Page 23
... and labor expenses are covered on this warranty the consumer is not installed in connection with published installation instructions. This warranty is in material and workmanship such as instruction on the web at www.mcappliance.com Home For Service or Assistance please call 888 775-0202 Or ...material and workmanship and agrees to remedy any such defect or to the factory without prior written consent from MC Appliance corp. Model MCO165UW MCO165UB Parts One-Year Labor Magnetron (Part Only) One-Year Eight Years Type of a unit that has failed during the warranty period. ...
... and labor expenses are covered on this warranty the consumer is not installed in connection with published installation instructions. This warranty is in material and workmanship such as instruction on the web at www.mcappliance.com Home For Service or Assistance please call 888 775-0202 Or ...material and workmanship and agrees to remedy any such defect or to the factory without prior written consent from MC Appliance corp. Model MCO165UW MCO165UB Parts One-Year Labor Magnetron (Part Only) One-Year Eight Years Type of a unit that has failed during the warranty period. ...

