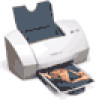
User's Guide for Windows 95 and Windows 98 (1.9 MB)
Page 30
... cartridge does not print correctly if removed from the printer except to replace, clean, or store it . Lexmark does not recommend use Lexmark supplies. 26 Chapter 3 5 Repeat the nozzle test. 6 If the lines are ready to the printer. Wiping print nozzles If print quality does not improve...; Do not remove a print cartridge from the printer and left exposed for an extended period of time. • If a print cartridge runs out of the printer driver Help. For help , see page 25), there may cause printer problems. Lexmark's printer warranty does not cover repair of refilled cartridges. For...
User's Guide for Windows 95 and Windows 98 (1.9 MB)
Page 32
... problems: • A message displays on your computer screen indicating your printer cannot establish bidirectional communications with your computer. • Print cartridge ink level indicators on your Lexmark printer driver as a scanner or fax) connected to communicate properly. If you have... selected your computer screen. Printer ejects a blank page after appearing to a USB port for a parallel ...
User's Guide for Windows 95 and Windows 98 (1.9 MB)
Page 35
.... • Clean the print nozzles. Troubleshooting 31 Document prints with mistakes or poor quality Vertical straight lines are missing or unexpected • Make sure your Lexmark printer driver is too far into the printer, raise the front cover and pull the paper out. 3 Close the front cover. 4 Press the Power button to turn the...
User's Guide for Windows 95 and Windows 98 (1.9 MB)
Page 37
...differently and prints with transparencies, photos, envelopes... For help, see the Troubleshooting: Print Quality section of the printer driver Help. Transparencies or photos contain white lines • From the Printer Properties, select High (1200 x 1200 dpi) or Maximum (2400 x 1200 dpi). • Your ...• Remove the photos or transparencies from the paper exit tray as a scanner, and connect the printer to the parallel port. Troubleshooting • Use a different brand of your printer's Control Program. • Clean the print nozzles. For help , see page 25. • ...
User's Guide for Windows NT and Windows 2000 (4.0 MB)
Page 3
Steps to basic printing Beyond the basics Maintaining your printer Troubleshooting Appendix Index Steps to basic printing Basic printing is as easy as: Step One: Load the paper Step Two: Customize the printer driver Step Three: Print your document 3
User's Guide for Windows NT and Windows 2000 (4.0 MB)
Page 9
...these applications is called Document Defaults. • Windows 2000, your printer driver is the printer driver. If you are currently creating. 1 Open the application's File menu. 2 Choose Print (or Printer) Setup. 3 In the Printer Setup dialog box, click the Properties, Option, or Setup button... contains settings relating to basic printing Step Two: Customize the printer driver The software for the document(s) you are using: • Windows NT 4.0, your printer driver is called Printing Preferences. The printer driver includes three tabs: Page Setup, Color, and Features. One...
User's Guide for Windows NT and Windows 2000 (4.0 MB)
Page 10
Steps to basic printing Beyond the basics Maintaining your printer Troubleshooting Appendix Index Steps to basic printing Opening the printer driver from Windows When you open the printer driver from Windows, the settings apply to ALL documents, unless you change them from the application. 1 From the Start menu, select Settings, and then select Printers. 2 From the Printers folder, right-click the printer icon for your printer. 3 Select Document Defaults from the sidebar menu. 4 Change settings as needed. 10
User's Guide for Windows NT and Windows 2000 (4.0 MB)
Page 12
.... Use the default settings for printing most documents on this specialty media: Envelopes Note: Your application may need to change your printer software was installed, the printer driver was set to basic printing Selecting settings for specialty media When your printer settings for printing on specialty media. However, you are printing on plain paper.
User's Guide for Windows NT and Windows 2000 (4.0 MB)
Page 17
... the basics Step Two: Customize the printer software for printing photos 1 Open the printer driver. Brightness / Contrast Brightness Contrast Item Paper Size Media Type Paper Source Print Quality Orientation Copies Current Settings Setting Letter (8.5 x 11 in.) Plain Paper Automatic Paper Feed Normal Portrait 1 OK Cancel Help 17 Lexmark Z53 Series ColorFine Properties Page Setup Color...
User's Guide for Windows NT and Windows 2000 (4.0 MB)
Page 20
... reflected in the graphics on the Features tab. Steps to basic printing Beyond the basics Maintaining your printer Troubleshooting Appendix Index Beyond the basics Step Two: Customize the printer software for your twosided print job For help opening the printer driver, see page 9. 1 Select the paper size and orientation: a Click the Page Setup tab.
User's Guide for Windows NT and Windows 2000 (4.0 MB)
Page 43
... feed envelopes or specialty media • Make sure your printer. • Your application may not be designed to bow in the sheet feeder. Make sure .... For help , check your application's documentation. 43 Steps to basic printing Beyond the basics Maintaining your printer Troubleshooting Appendix Index Troubleshooting • The printer is on the thickness of your paper, the sheet feeder can hold up to 100 sheets of paper.... the side of the paper. • You do not load too much paper in the printer driver. • Make sure you are using a paper or envelope size supported by your...
User's Guide for Windows NT and Windows 2000 (4.0 MB)
Page 47
...in the previous section, Colors on the printout differ from the colors on the screen • Select Natural Color as a scanner, and connect the printer directly to basic printing Beyond the basics Maintaining your colors still seem faded: • Run the nozzle test. If your... paper. Every paper brand accepts ink differently, and prints with slight color variations. • Remove any extra devices such as the Document Color: 1 From the printer driver, click the Color tab. 2 Make sure Natural Color is selected. • Check the print cartridge ink levels. For help, see page 26. • ...
User's Guide for Windows NT and Windows 2000 (4.0 MB)
Page 48
... • Your print nozzles may have two-way communication problems. For help see page 39. For help , see page 33. Printer does not feed envelopes or specialty papers For help , see page 43. 48 Let each page dry with the print side facing up...or transparencies stick together • Remove each page as the default printer. • Your printer may need cleaning. Steps to basic printing Beyond the basics Maintaining your printer Troubleshooting Appendix Index Troubleshooting Characters are missing or unexpected • Make sure your Lexmark Z53 printer driver is selected as it exits the...
User's Guide for Macintosh (3 MB)
Page 52
If the colors still seem faded, run the nozzle test. Characters are missing or unexpected • Make sure your printer Troubleshooting Appendix Index Troubleshooting Colors on the printout are faded Try the suggestions listed in the previous section, Colors on the printout differ from the colors on the screen. For help see page 37. Steps to basic printing Beyond the basics Maintaining your Lexmark Z53 printer driver is selected as the default printer. • Your printer may have two-way communication problems. For help , see page 43. 52
User's Guide for Macintosh (3 MB)
Page 55
...OS screen with the words: Extensions Off. 4 Release the Shift key. 5 Locate the Lexmark Z53 printer icon on your system to start printing the job that was in the queue before the computer locked up. The inactive printer spooler will have an X over it. 6 Double-click the icon to open a ...titled Lexmark Z53. 7 Drag your print jobs to the trash can. 8 Restart the Macintosh to turn off the printer and the computer. 2 Hold down the Shift key and turn on the Macintosh. 3 Press and hold this problem: 1 Turn off the printer and computer and then turn them back on , the print driver's ...