User's Guide
Page 3
... printer on a wireless network...45 Installing the printer on other computers...46 Interpreting the colors of the Wi-Fi indicator light 47 Special wireless installation instructions...47 Contents 3
... printer on a wireless network...45 Installing the printer on other computers...46 Interpreting the colors of the Wi-Fi indicator light 47 Special wireless installation instructions...47 Contents 3

User's Guide
Page 9
... the power cord regularly for the use of other than those described in the user documentation, to abrasion or stress. SAVE THESE INSTRUCTIONS. Safety information Use only the power supply and power supply cord provided with this product to meet strict global safety standards with the... use of specific Lexmark components. Refer service or repairs, other replacement parts. Safety information 9 Do not subject the power cord to a professional service person. ...
... the power cord regularly for the use of other than those described in the user documentation, to abrasion or stress. SAVE THESE INSTRUCTIONS. Safety information Use only the power supply and power supply cord provided with this product to meet strict global safety standards with the... use of specific Lexmark components. Refer service or repairs, other replacement parts. Safety information 9 Do not subject the power cord to a professional service person. ...

User's Guide
Page 10
...automatically with the printer software. The correct menu bar does not appear if the application is the active application. Electronic User's Guide Complete instructions for Macintosh and may not come with the applications. 1 From the Finder desktop, double-click the printer folder. 2 Double-click the... application. 3 From the application, click Help on a Windows operating system. Additional instructions for using the printer software on the menu bar to use is not active. Note: If you want to view the main page of...
...automatically with the printer software. The correct menu bar does not appear if the application is the active application. Electronic User's Guide Complete instructions for Macintosh and may not come with the applications. 1 From the Finder desktop, double-click the printer folder. 2 Double-click the... application. 3 From the application, click Help on a Windows operating system. Additional instructions for using the printer software on the menu bar to use is not active. Note: If you want to view the main page of...
User's Guide
Page 13
... Note: Your printer model may not come with the printer. 1 Unpack the printer. Note: Contents, such as a copier only or fax only Use the following instructions if you about the printer software being installed. Setting up the printer Granting access to the software during installation Third-party applications, including antivirus, security...
... Note: Your printer model may not come with the printer. 1 Unpack the printer. Note: Contents, such as a copier only or fax only Use the following instructions if you about the printer software being installed. Setting up the printer Granting access to the software during installation Third-party applications, including antivirus, security...
User's Guide
Page 30
If you do one of your CD or DVD drive. 3 Follow the instructions on the Welcome screen to be efficient on power usage, then select the minimum Power Saver timeout from Power Saver mode as often, then select ... software CD. b Click Run. If the Welcome screen does not appear after a minute, click the CD icon on the desktop. 3 Double-click Install. 4 Follow the instructions on the Welcome screen to turn the printer back on your printer. 1 From the printer control panel, press . 2 Press the arrow buttons until Device Setup...
If you do one of your CD or DVD drive. 3 Follow the instructions on the Welcome screen to be efficient on power usage, then select the minimum Power Saver timeout from Power Saver mode as often, then select ... software CD. b Click Run. If the Welcome screen does not appear after a minute, click the CD icon on the desktop. 3 Double-click Install. 4 Follow the instructions on the Welcome screen to turn the printer back on your printer. 1 From the printer control panel, press . 2 Press the arrow buttons until Device Setup...
User's Guide
Page 31
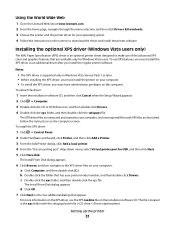
...an optional printer driver designed to your computer, and any required Microsoft XPS files are available only for Windows Vista users. Follow the instructions on the installation software CD. b Double-click the folder that appear. To extract the driver: 1 Insert the installation software CD, ... site at www.lexmark.com. 2 From the home page, navigate through the menu selection, and then click Drivers & Downloads. 3 Choose the printer and the printer driver for your operating system. 4 Follow the instructions on the screens to the XPS driver files on your computer: a Click Computer, and...
...an optional printer driver designed to your computer, and any required Microsoft XPS files are available only for Windows Vista users. Follow the instructions on the installation software CD. b Double-click the folder that appear. To extract the driver: 1 Insert the installation software CD, ... site at www.lexmark.com. 2 From the home page, navigate through the menu selection, and then click Drivers & Downloads. 3 Choose the printer and the printer driver for your operating system. 4 Follow the instructions on the screens to the XPS driver files on your computer: a Click Computer, and...
User's Guide
Page 35
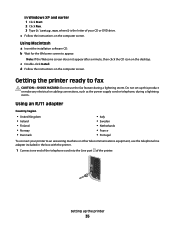
... box with the printer. 1 Connect one end of the telephone cord into the Line port of your printer to appear. c Double-click Install. d Follow the instructions on the desktop. Note: If the Welcome screen does not appear after a minute, then click the CD icon on the computer screen. Do not set... CD or DVD drive. In Windows XP and earlier 1 Click Start. 2 Click Run. 3 Type D:\setup.exe, where D is the letter of the printer. c Follow the instructions on the computer screen. Using Macintosh a Insert the installation software CD.
... box with the printer. 1 Connect one end of the telephone cord into the Line port of your printer to appear. c Double-click Install. d Follow the instructions on the desktop. Note: If the Welcome screen does not appear after a minute, then click the CD icon on the computer screen. Do not set... CD or DVD drive. In Windows XP and earlier 1 Click Start. 2 Click Run. 3 Type D:\setup.exe, where D is the letter of the printer. c Follow the instructions on the computer screen. Using Macintosh a Insert the installation software CD.
User's Guide
Page 46
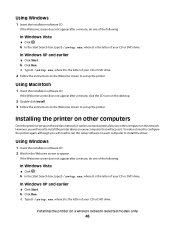
...Windows XP and earlier a Click Start. If the Welcome screen does not appear after a minute, do one of your CD or DVD drive. 2 Follow the instructions on the Welcome screen to set up the printer. c Type D:\setup.exe, where D is the letter of your CD or DVD drive. b Click Run.... If the Welcome screen does not appear after a minute, click the CD icon on the desktop. 2 Double-click Install. 3 Follow the instructions on the network. b In the Start Search box, type D:\setup.exe, where D is the letter of your CD or DVD drive. Using Windows 1 Insert the...
...Windows XP and earlier a Click Start. If the Welcome screen does not appear after a minute, do one of your CD or DVD drive. 2 Follow the instructions on the Welcome screen to set up the printer. c Type D:\setup.exe, where D is the letter of your CD or DVD drive. b Click Run.... If the Welcome screen does not appear after a minute, click the CD icon on the desktop. 2 Double-click Install. 3 Follow the instructions on the network. b In the Start Search box, type D:\setup.exe, where D is the letter of your CD or DVD drive. Using Windows 1 Insert the...

User's Guide
Page 47
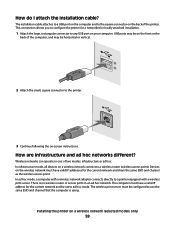
...minute, click the CD icon on the desktop. 3 Double-click Install. 4 Follow the on-screen instructions for installing a configured printer on a wireless network (selected models only) 47 Special wireless installation instructions The following : - Interpreting the colors of the Wi-Fi indicator light The colors of the Wi-Fi... indicator light show the network status of the printer. • Off means one of the following instructions apply to appear. The wireless settings of the printer may no longer be valid. • Green means that the printer is connected ...
...minute, click the CD icon on the desktop. 3 Double-click Install. 4 Follow the on-screen instructions for installing a configured printer on a wireless network (selected models only) 47 Special wireless installation instructions The following : - Interpreting the colors of the Wi-Fi indicator light The colors of the Wi-Fi... indicator light show the network status of the printer. • Off means one of the following instructions apply to appear. The wireless settings of the printer may no longer be valid. • Green means that the printer is connected ...

User's Guide
Page 48
...register button, you are prompted to select a network. b Select the network you want to use the key you created. 5 Follow the instructions on most wireless networks. Changing wireless settings after installation To change wireless settings on the printer, such as part of automatically assigning DHCP addresses... to reinstall the software, and then make the changes that came with the box, or from the list. 3 Click Tools ΠLexmark Wireless Setup Utility. If you want. If the printer is an associate/registration button on your system support person. Assigning a static IP ...
...register button, you are prompted to select a network. b Select the network you want to use the key you created. 5 Follow the instructions on most wireless networks. Changing wireless settings after installation To change wireless settings on the printer, such as part of automatically assigning DHCP addresses... to reinstall the software, and then make the changes that came with the box, or from the list. 3 Click Tools ΠLexmark Wireless Setup Utility. If you want. If the printer is an associate/registration button on your system support person. Assigning a static IP ...
User's Guide
Page 49
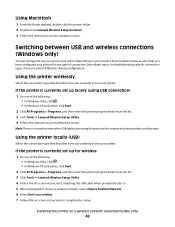
... complete the setup. Using Macintosh 1 From the Finder desktop, double-click the printer folder. 2 Double-click Lexmark Wireless Setup Assistant. 3 Follow the instructions on a wireless network (selected models only) 49 The procedures below assume that you have configured your needs. ...Programs or Programs, and then select the printer program folder from the list. 3 Click Tools ΠLexmark Wireless Setup Utility. 4 Follow the instructions on -screen instructions to the computer during configuration. Switching between USB and wireless connections (Windows only) You can change the way...
... complete the setup. Using Macintosh 1 From the Finder desktop, double-click the printer folder. 2 Double-click Lexmark Wireless Setup Assistant. 3 Follow the instructions on a wireless network (selected models only) 49 The procedures below assume that you have configured your needs. ...Programs or Programs, and then select the printer program folder from the list. 3 Click Tools ΠLexmark Wireless Setup Utility. 4 Follow the instructions on -screen instructions to the computer during configuration. Switching between USB and wireless connections (Windows only) You can change the way...
User's Guide
Page 50
...There is currently set up locally (using USB connection) 1 From the Finder desktop, double-click the printer folder. 2 Double-click Lexmark Wireless Setup Assistant. 3 Follow the on the operating system version you encounter difficulties during wireless configuration. In Mac OS X version 10... From the Finder desktop, choose Go ΠApplications ΠUtilities ΠPrint Center or Printer Setup Utility, depending on -screen instructions for configuring the printer wirelessly. b Choose the printer you do not want to accessing the printer over a wireless connection. d Select your ...
...There is currently set up locally (using USB connection) 1 From the Finder desktop, double-click the printer folder. 2 Double-click Lexmark Wireless Setup Assistant. 3 Follow the on the operating system version you encounter difficulties during wireless configuration. In Mac OS X version 10... From the Finder desktop, choose Go ΠApplications ΠUtilities ΠPrint Center or Printer Setup Utility, depending on -screen instructions for configuring the printer wirelessly. b Choose the printer you do not want to accessing the printer over a wireless connection. d Select your ...
User's Guide
Page 51
...5 In the Connect to a Network dialog, click Set up a wireless ad-hoc (computer-to-computer) network, and then click Next. 6 Follow the instructions in the "Set up a wireless ad hoc network" wizard. Installing the printer on that the computer is configured for the ad hoc network. 7 Close ...characters are letters, numbers, and symbols found on only one wireless network at a time. Note: Do not connect the installation or network cables until instructed to do have an infrastructure network, you . c Go to the Security Type list, select WEP, and then create a WEP key. The installer...
...5 In the Connect to a Network dialog, click Set up a wireless ad-hoc (computer-to-computer) network, and then click Next. 6 Follow the instructions in the "Set up a wireless ad hoc network" wizard. Installing the printer on that the computer is configured for the ad hoc network. 7 Close ...characters are letters, numbers, and symbols found on only one wireless network at a time. Note: Do not connect the installation or network cables until instructed to do have an infrastructure network, you . c Go to the Security Type list, select WEP, and then create a WEP key. The installer...
User's Guide
Page 53
Note: Do not connect the installation or network cables until instructed to an existing ad hoc wireless network Note: The printer can communicate on a wireless network (selected models only) 53 Note: Store the network name and ...
Note: Do not connect the installation or network cables until instructed to an existing ad hoc wireless network Note: The printer can communicate on a wireless network (selected models only) 53 Note: Store the network name and ...
User's Guide
Page 54
...the SSID of your router. 2 Click All Programs or Programs, and then select the printer program folder from the list. 3 Click Lexmark Wireless Setup Utility. 4 Follow the instructions on the access point or wireless router. In order to use the installation software on the CD that shipped with the printer to... . A Service Set Identifier (SSID) is a method of available wireless networks. Using Macintosh 1 From the Finder desktop, double-click the printer folder. 2 Double-click Lexmark Wireless Setup Assistant. 3 Follow the instructions on a wireless network (selected models only) 54
...the SSID of your router. 2 Click All Programs or Programs, and then select the printer program folder from the list. 3 Click Lexmark Wireless Setup Utility. 4 Follow the instructions on the access point or wireless router. In order to use the installation software on the CD that shipped with the printer to... . A Service Set Identifier (SSID) is a method of available wireless networks. Using Macintosh 1 From the Finder desktop, double-click the printer folder. 2 Double-click Lexmark Wireless Setup Assistant. 3 Follow the instructions on a wireless network (selected models only) 54
User's Guide
Page 59
... attached installation. 1 Attach the large, rectangular connector to the square connector on a wireless network (selected models only) 59 In infrastructure mode, all devices on -screen instructions. In ad hoc mode, a computer with a wireless network adapter connects directly to the printer. 3 Continue following the on a wireless network connect to use the same...
... attached installation. 1 Attach the large, rectangular connector to the square connector on a wireless network (selected models only) 59 In infrastructure mode, all devices on -screen instructions. In ad hoc mode, a computer with a wireless network adapter connects directly to the printer. 3 Continue following the on a wireless network connect to use the same...
User's Guide
Page 66
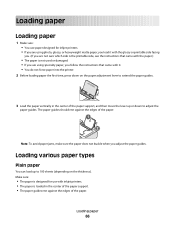
... guides should rest against the edges of the paper. 1 2 Note: To avoid paper jams, make sure the paper does not buckle when you follow the instructions that came with it with the glossy or printable side facing you. (If you are not sure which side is the printable side, see the... instructions that came with inkjet printers. • The paper is not used or damaged. • If you are using photo, glossy, or heavyweight matte paper, you ...
... guides should rest against the edges of the paper. 1 2 Note: To avoid paper jams, make sure the paper does not buckle when you follow the instructions that came with it with the glossy or printable side facing you. (If you are not sure which side is the printable side, see the... instructions that came with inkjet printers. • The paper is not used or damaged. • If you are using photo, glossy, or heavyweight matte paper, you ...
User's Guide
Page 67
...: • The glossy or printable side of the paper faces you. (If you are not sure which side is the printable side, then see the instructions that came with areas exposed by missing labels) may cause labels to peel off during printing, resulting in the center of the paper support. •...
...: • The glossy or printable side of the paper faces you. (If you are not sure which side is the printable side, then see the instructions that came with areas exposed by missing labels) may cause labels to peel off during printing, resulting in the center of the paper support. •...

User's Guide
Page 68
... require more drying time. Greeting cards, index cards, photo cards, postcards You can load up to 10 transfers. Make sure: • You follow the loading instructions that came with paper backing sheets are not recommended. • Transparencies require more drying time. Loading paper 68 Make sure: • The rough side of...
... require more drying time. Greeting cards, index cards, photo cards, postcards You can load up to 10 transfers. Make sure: • You follow the loading instructions that came with paper backing sheets are not recommended. • Transparencies require more drying time. Loading paper 68 Make sure: • The rough side of...

User's Guide
Page 80
...; Make sure the top of the label sheet feeds into the printer first. • Make sure the adhesive on custom-size paper Before beginning these instructions, load the custom-size paper in the Page Setup dialog. 1 With a document open , click File Œ Print. 2 From the Printer pop-up menu, choose the...
...; Make sure the top of the label sheet feeds into the printer first. • Make sure the adhesive on custom-size paper Before beginning these instructions, load the custom-size paper in the Page Setup dialog. 1 With a document open , click File Œ Print. 2 From the Printer pop-up menu, choose the...

