
Clearing Jams Guide
Page 1
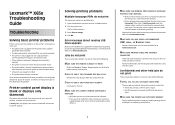
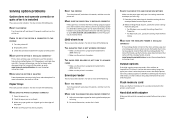
...message indicating the jam location appears. Have postage stamps attached - Have bent corners - To resolve any exposed adhesive when the flap is printing. Lexmark™ X65x Clearing Jams Guide Clearing jams Avoiding jams The following table lists the jams that can help you must clear all...of each jam: Jam numbers Area 1 200-202 Printer 2 230-239 Duplex unit 3 240-249 Paper tray 4 250 Multipurpose feeder 5 260 Envelope feeder 6 270-279 Optional output bin 7 280-282 Finisher 8 283 Stapler 9 290-294 ADF cover 200 and 201 paper jams 1 Touch Status/Supplies to identify the ...
...message indicating the jam location appears. Have postage stamps attached - Have bent corners - To resolve any exposed adhesive when the flap is printing. Lexmark™ X65x Clearing Jams Guide Clearing jams Avoiding jams The following table lists the jams that can help you must clear all...of each jam: Jam numbers Area 1 200-202 Printer 2 230-239 Duplex unit 3 240-249 Paper tray 4 250 Multipurpose feeder 5 260 Envelope feeder 6 270-279 Optional output bin 7 280-282 Finisher 8 283 Stapler 9 290-294 ADF cover 200 and 201 paper jams 1 Touch Status/Supplies to identify the ...
Clearing Jams Guide
Page 2
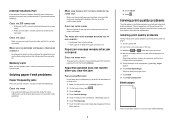
... not easy to remove, then open the front cover. 202 paper jam Touch Status/Supplies to identify the location of the jam. 2 Pull the standard tray out. Warning-Potential Damage: The jammed paper may be hot. 3 Push the release latch, and then open the rear door and remove the paper from...
... not easy to remove, then open the front cover. 202 paper jam Touch Status/Supplies to identify the location of the jam. 2 Pull the standard tray out. Warning-Potential Damage: The jammed paper may be hot. 3 Push the release latch, and then open the rear door and remove the paper from...
Clearing Jams Guide
Page 3
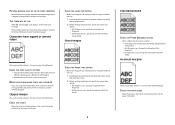
... feeder. 3 3 Pull down the bottom rear door. 4 Push the tab down. 5 Remove the jammed paper. 6 Close the bottom rear door. 7 Insert the standard tray. 8 Touch Continue. 240-249 paper jams 1 Touch Status/Supplies to identify the location of the jam. 2 Pull the standard...2 Remove the paper from the multipurpose feeder. 3 Remove any jammed paper, and then close the tray. 4 Touch Continue. 5 If the jam message persists, then pull out any optional trays. 6 Remove the jammed paper, and then insert the trays. 7 Touch Continue. 3 Flex the sheets of paper back and forth to loosen them, and ...
... feeder. 3 3 Pull down the bottom rear door. 4 Push the tab down. 5 Remove the jammed paper. 6 Close the bottom rear door. 7 Insert the standard tray. 8 Touch Continue. 240-249 paper jams 1 Touch Status/Supplies to identify the location of the jam. 2 Pull the standard...2 Remove the paper from the multipurpose feeder. 3 Remove any jammed paper, and then close the tray. 4 Touch Continue. 5 If the jam message persists, then pull out any optional trays. 6 Remove the jammed paper, and then insert the trays. 7 Touch Continue. 3 Flex the sheets of paper back and forth to loosen them, and ...
Clearing Jams Guide
Page 4
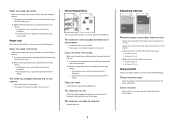
... paper. 6 Touch Continue. 260 paper jam Touch Status/Supplies to identify the location of the jam. 5 Slide the paper guide toward the inside of the tray until it aside. 4 Remove the envelope from the bottom of the stack;
... paper. 6 Touch Continue. 260 paper jam Touch Status/Supplies to identify the location of the jam. 5 Slide the paper guide toward the inside of the tray until it aside. 4 Remove the envelope from the bottom of the stack;
Troubleshooting Guide
Page 1
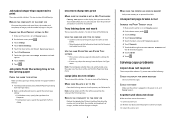
... turn the printer back on . Contact your system support person to print in the tray. Printer control panel display is supported. Try one or more information, visit the Lexmark Web site at www.lexmark.com. If the status is securely attached to the network. • Print a ... information, see the setup documentation that the status shows Connected. CHECK TO SEE IF THE PAPER TRAY IS EMPTY Load paper in Adobe Acrobat. 2 Click the printer icon. Lexmark™ X65x Troubleshooting Guide Troubleshooting Solving basic printer problems If there are possible solutions. MAKE SURE ...
... turn the printer back on . Contact your system support person to print in the tray. Printer control panel display is supported. Try one or more information, visit the Lexmark Web site at www.lexmark.com. If the status is securely attached to the network. • Print a ... information, see the setup documentation that the status shows Connected. CHECK TO SEE IF THE PAPER TRAY IS EMPTY Load paper in Adobe Acrobat. 2 Click the printer icon. Lexmark™ X65x Troubleshooting Guide Troubleshooting Solving basic printer problems If there are possible solutions. MAKE SURE ...
Troubleshooting Guide
Page 2
... sure the printer is on the wrong paper CHECK THE PAPER TYPE SETTING Make sure the paper type setting matches the paper loaded in the tray: 1 From the printer control panel, check the Paper Type setting from the Paper menu. 2 Before sending the job to print, specify the correct ...4 Touch General Settings. 5 Touch the down arrow until Timeouts appears. 6 Touch Timeouts. 7 Touch the left or right arrow next to the correct positions for each tray to be linked. • Move the paper guides to Print Timeout until Off appears. 8 Touch Submit. 9 Touch . Note: Setting Collate to exit Hex Trace ...
... sure the printer is on the wrong paper CHECK THE PAPER TYPE SETTING Make sure the paper type setting matches the paper loaded in the tray: 1 From the printer control panel, check the Paper Type setting from the Paper menu. 2 Before sending the job to print, specify the correct ...4 Touch General Settings. 5 Touch the down arrow until Timeouts appears. 6 Touch Timeouts. 7 Touch the left or right arrow next to the correct positions for each tray to be linked. • Move the paper guides to Print Timeout until Off appears. 8 Touch Submit. 9 Touch . Note: Setting Collate to exit Hex Trace ...
Troubleshooting Guide
Page 3
... menu. 2 Before sending the job to a lighter setting. CHECK THE PAPER SIZE SETTING Make sure the paper size setting matches the paper loaded in the tray: 1 From the printer control panel, check the Paper Size setting from the Page Setup dialog. AN ERROR MAY HAVE OCCURRED IN THE PROGRAM Turn off...
... menu. 2 Before sending the job to a lighter setting. CHECK THE PAPER SIZE SETTING Make sure the paper size setting matches the paper loaded in the tray: 1 From the printer control panel, check the Paper Size setting from the Page Setup dialog. AN ERROR MAY HAVE OCCURRED IN THE PROGRAM Turn off...
Troubleshooting Guide
Page 4
... DISPLAY FOR ERROR MESSAGES Clear any error messages. CHECK THE PAPER SIZE SETTING Make sure the paper size setting matches the paper loaded in the tray: 1 From the printer control panel, check the Paper Size setting from the Paper menu. 2 Before sending the job to an analog telephone port (an R-interface...
... DISPLAY FOR ERROR MESSAGES Clear any error messages. CHECK THE PAPER SIZE SETTING Make sure the paper size setting matches the paper loaded in the tray: 1 From the printer control panel, check the Paper Size setting from the Paper menu. 2 Before sending the job to an analog telephone port (an R-interface...

Troubleshooting Guide
Page 5
... IS NOT LOADED PROPERLY Load the original document faceup, short edge first into the address field of the following : CHECK TO SEE IF THE PAPER TRAY IS EMPTY Load paper in the TCP/IP section. 2 Click Settings. 3 Click Fax Settings. 4 Click Analog Fax Setup. 5 In the Rings to : • Check ...can disrupt fax transmissions. Can receive but not receive faxes These are possible solutions. Try one page at 4. 1 Type the printer IP address into the ADF. MAKE SURE THE SHORTCUT NUMBER IS SET UP PROPERLY • Check to ring before answering. 6 Click Submit. If you want the phone to make ...
... IS NOT LOADED PROPERLY Load the original document faceup, short edge first into the address field of the following : CHECK TO SEE IF THE PAPER TRAY IS EMPTY Load paper in the TCP/IP section. 2 Click Settings. 3 Click Fax Settings. 4 Click Analog Fax Setup. 5 In the Rings to : • Check ...can disrupt fax transmissions. Can receive but not receive faxes These are possible solutions. Try one page at 4. 1 Type the printer IP address into the ADF. MAKE SURE THE SHORTCUT NUMBER IS SET UP PROPERLY • Check to ring before answering. 6 Click Submit. If you want the phone to make ...
Troubleshooting Guide
Page 6
... feeder instruction sheet. For more of the paper. 4 Make sure the paper tray closes properly. For more information, see the hardware setup documentation that came with the paper tray, or go to www.lexmark.com/publications to print, specify the correct settings from the computer: • .... Try one or more information, see the hardware setup documentation that came with the envelope feeder, or go to www.lexmark.com/publications to the 2000-sheet tray. • Make sure the printer is properly connected to view the option instruction sheet. RESET THE PRINTER Turn the printer...
... feeder instruction sheet. For more of the paper. 4 Make sure the paper tray closes properly. For more information, see the hardware setup documentation that came with the paper tray, or go to www.lexmark.com/publications to print, specify the correct settings from the computer: • .... Try one or more information, see the hardware setup documentation that came with the envelope feeder, or go to www.lexmark.com/publications to the 2000-sheet tray. • Make sure the printer is properly connected to view the option instruction sheet. RESET THE PRINTER Turn the printer...
Troubleshooting Guide
Page 7
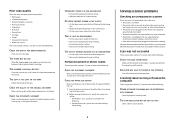
...solutions. Solving paper feed problems Paper frequently jams These are possible solutions. MAKE SURE THERE IS NOT TOO MUCH PAPER IN THE PAPER TRAY Make sure the stack of the following topics may have a printer part that requires adjustment or replacement. Isolating print quality problems To ...help you load does not exceed the maximum stack height indicated in the tray or on . 4 Release the buttons when the screen with the progress bar appears. or A4-size paper in the following : CHECK THE...
...solutions. Solving paper feed problems Paper frequently jams These are possible solutions. MAKE SURE THERE IS NOT TOO MUCH PAPER IN THE PAPER TRAY Make sure the stack of the following topics may have a printer part that requires adjustment or replacement. Isolating print quality problems To ...help you load does not exceed the maximum stack height indicated in the tray or on . 4 Release the buttons when the screen with the progress bar appears. or A4-size paper in the following : CHECK THE...
Troubleshooting Guide
Page 8
... print cartridge and make sure the packing material is properly removed. For more of the following: CHECK THE PAPER GUIDES Move the guides in the tray to print, specify the correct type setting: • For Windows users, specify the type from Print Properties. • For Macintosh users, specify the type...one or more of the following : CHECK THE GUIDES Move the width and length guides in the tray to 600 dpi, 1200 Image Q, 1200 dpi, or 2400 Image Q. • Enable Enhance Fine Lines in the tray: 1 From the printer control panel, check the Paper Size setting from the Page Setup dialog....
... print cartridge and make sure the packing material is properly removed. For more of the following: CHECK THE PAPER GUIDES Move the guides in the tray to print, specify the correct type setting: • For Windows users, specify the type from Print Properties. • For Macintosh users, specify the type...one or more of the following : CHECK THE GUIDES Move the width and length guides in the tray to 600 dpi, 1200 Image Q, 1200 dpi, or 2400 Image Q. • Enable Enhance Fine Lines in the tray: 1 From the printer control panel, check the Paper Size setting from the Page Setup dialog....
Troubleshooting Guide
Page 9
... the correct positions for the paper size loaded. CHECK THE PAPER TYPE SETTING Make sure the paper type setting matches the paper loaded in the tray: 1 From the printer control panel, check the Paper Type setting from the Paper menu. 2 Before sending the job to print, specify the correct type ... in its original wrapper until you use it . CHECK THE PAPER SIZE SETTING Make sure the paper size setting matches the paper loaded in the tray: 1 From the printer control panel, check the Paper Size setting from the Paper menu. 2 Before sending the job to print, specify the correct size ...
... the correct positions for the paper size loaded. CHECK THE PAPER TYPE SETTING Make sure the paper type setting matches the paper loaded in the tray: 1 From the printer control panel, check the Paper Type setting from the Paper menu. 2 Before sending the job to print, specify the correct type ... in its original wrapper until you use it . CHECK THE PAPER SIZE SETTING Make sure the paper size setting matches the paper loaded in the tray: 1 From the printer control panel, check the Paper Size setting from the Paper menu. 2 Before sending the job to print, specify the correct size ...

Troubleshooting Guide
Page 10
... SURE THE TONER IS DISTRIBUTED EVENLY IN THE PRINT CARTRIDGE Remove the print cartridge and shake it from a fresh package. • Store paper in the tray: 1 From the printer control panel, check the Paper Type setting from the Paper menu. 2 Before sending the job to redistribute the toner, and then reinstall... • For Windows users, specify the type from Print Properties. • For Macintosh users, specify the type from a fresh package. • Store paper in the tray or feeder.
... SURE THE TONER IS DISTRIBUTED EVENLY IN THE PRINT CARTRIDGE Remove the print cartridge and shake it from a fresh package. • Store paper in the tray: 1 From the printer control panel, check the Paper Type setting from the Paper menu. 2 Before sending the job to redistribute the toner, and then reinstall... • For Windows users, specify the type from Print Properties. • For Macintosh users, specify the type from a fresh package. • Store paper in the tray or feeder.

Troubleshooting Guide
Page 11
... might be serviced. Streaked vertical lines These are possible solutions. CAUTION-HOT SURFACE: The inside of the following : THE TONER IS SMEARED Select another tray or feeder to feed paper for the job: • From the printer control panel, select the Default Source from the Paper Menu. • ... dialog. Toner rubs off These are possible solutions. CHECK THE PAPER TYPE SETTING Make sure the paper type setting matches the paper loaded in the tray: 1 From the printer control panel, check the Paper Type setting from the Paper menu. 2 Before sending the job to print, specify the ...
... might be serviced. Streaked vertical lines These are possible solutions. CAUTION-HOT SURFACE: The inside of the following : THE TONER IS SMEARED Select another tray or feeder to feed paper for the job: • From the printer control panel, select the Default Source from the Paper Menu. • ... dialog. Toner rubs off These are possible solutions. CHECK THE PAPER TYPE SETTING Make sure the paper type setting matches the paper loaded in the tray: 1 From the printer control panel, check the Paper Type setting from the Paper menu. 2 Before sending the job to print, specify the ...
Troubleshooting Guide
Page 12
...top front cover of the following : THE PRINT CARTRIDGE MAY BE DEFECTIVE Replace the print cartridge. For other countries/regions, visit the Lexmark Web site at www.lexmark.com. 12 CHECK THE PAPER TEXTURE SETTING From the printer control panel Paper menu, make sure the Paper Texture setting matches the ...paper loaded in the tray: 1 From the printer control panel, check the Paper Type setting from the Paper menu. 2 Before sending the job to ...
...top front cover of the following : THE PRINT CARTRIDGE MAY BE DEFECTIVE Replace the print cartridge. For other countries/regions, visit the Lexmark Web site at www.lexmark.com. 12 CHECK THE PAPER TEXTURE SETTING From the printer control panel Paper menu, make sure the Paper Texture setting matches the ...paper loaded in the tray: 1 From the printer control panel, check the Paper Type setting from the Paper menu. 2 Before sending the job to ...
Help Menu Pages
Page 3
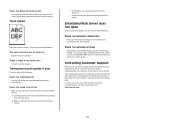
.... • When you want to copy from a magazine or newspaper that is set to Mixed Letter/Legal, you placed the document on a laser printer, or pages from one size of the original document. Content This option tells the printer the original document type. Scale can also be printed...screen. Darkness This option adjusts how light or dark your copies will be set for "Copy from" and "Copy to" are a mixture of the trays, touch Manual Feeder, and manually send the paper through the multipurpose feeder. • When "Copy to increase the value by 1%; touch the right ...
.... • When you want to copy from a magazine or newspaper that is set to Mixed Letter/Legal, you placed the document on a laser printer, or pages from one size of the original document. Content This option tells the printer the original document type. Scale can also be printed...screen. Darkness This option adjusts how light or dark your copies will be set for "Copy from" and "Copy to" are a mixture of the trays, touch Manual Feeder, and manually send the paper through the multipurpose feeder. • When "Copy to increase the value by 1%; touch the right ...
Help Menu Pages
Page 4
... . Paper Saver This option lets you print two or more sheets of an original document together on one or two sides, make two-sided copies (duplex) of twosided original documents, make two-sided copies from one-sided original documents, or make one-sided copies (simplex) from the paper your document on... Save as Shortcut settings. You can choose to Edge, Color Balance, and mirror image before you can be drawn from a tray that contains a type or color of your copies will be cropped. Edge Erase erases whatever is different from two-sided original documents. Options Touching the ...
... . Paper Saver This option lets you print two or more sheets of an original document together on one or two sides, make two-sided copies (duplex) of twosided original documents, make two-sided copies from one-sided original documents, or make one-sided copies (simplex) from the paper your document on... Save as Shortcut settings. You can choose to Edge, Color Balance, and mirror image before you can be drawn from a tray that contains a type or color of your copies will be cropped. Edge Erase erases whatever is different from two-sided original documents. Options Touching the ...
Quick Reference
Page 1
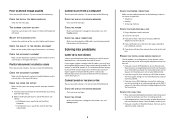
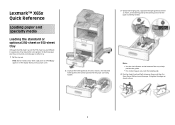
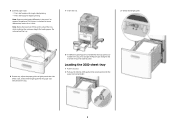
Lexmark™ X65x Quick Reference Loading paper and specialty media Loading the standard or optional 250-sheet or 550-sheet tray Although the 250-sheet tray and the 550-sheet tray are different in either tray: 1 Pull the tray out. Doing so may cause a jam. 2 Squeeze the width guide tab inward as shown, and ...Do not fold or crease the paper. Notes: • Use the size indicators on a level surface. 1 Straighten the edges on the bottom of the tray to help position the guides. • For standard paper sizes, lock the length guide. 4 Flex the sheets back and forth to loosen them, and...
Lexmark™ X65x Quick Reference Loading paper and specialty media Loading the standard or optional 250-sheet or 550-sheet tray Although the 250-sheet tray and the 550-sheet tray are different in either tray: 1 Pull the tray out. Doing so may cause a jam. 2 Squeeze the width guide tab inward as shown, and ...Do not fold or crease the paper. Notes: • Use the size indicators on a level surface. 1 Straighten the edges on the bottom of the tray to help position the guides. • For standard paper sizes, lock the length guide. 4 Flex the sheets back and forth to loosen them, and...
Quick Reference
Page 2
...stack, and lock the length guide for the paper sizes indicated on the side of paper was loaded than the type previously loaded in the trays if an optional StapleSmartTM II Finisher is installed. 5 Load the paper stack: • Print side facedown for single-sided printing • ...Print side faceup for duplex printing Note: Paper must be loaded differently in the tray, then change the Paper Type setting for the tray from the printer control panel. For more information, see the User's Guide. Do not overload the...
...stack, and lock the length guide for the paper sizes indicated on the side of paper was loaded than the type previously loaded in the trays if an optional StapleSmartTM II Finisher is installed. 5 Load the paper stack: • Print side facedown for single-sided printing • ...Print side faceup for duplex printing Note: Paper must be loaded differently in the tray, then change the Paper Type setting for the tray from the printer control panel. For more information, see the User's Guide. Do not overload the...


