User's Guide
Page 7
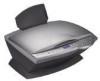
To access the help: Click the Lexmark X6100 Series All-In-One Center icon on your All-In-One • Setup and general troubleshooting The Help provides information on using the All-In-One software. Resource Box contents Setup sheet User's Guide Help Description These items are ...many helpful resources. Finding more information Your All-In-One comes with your All-In-One: • Power supply • Line cord • Setup sheet • Installation software CD • User's Guide • Black print cartridge • Color print cartridge The setup sheet provides instructions on how...
To access the help: Click the Lexmark X6100 Series All-In-One Center icon on your All-In-One • Setup and general troubleshooting The Help provides information on using the All-In-One software. Resource Box contents Setup sheet User's Guide Help Description These items are ...many helpful resources. Finding more information Your All-In-One comes with your All-In-One: • Power supply • Line cord • Setup sheet • Installation software CD • User's Guide • Black print cartridge • Color print cartridge The setup sheet provides instructions on how...
User's Guide
Page 8
...http://support.lexmark.com/. 2 The Readme file contains late-breaking information that does not appear in the User's Guide or the Help. Resource Readme file Lexmark Web site Description After you install your software, you can get more information from the Lexmark 6100 Series All-In-One folder. To... access the Readme file: Click Start Programs Lexmark X6100 Series Readme.
...http://support.lexmark.com/. 2 The Readme file contains late-breaking information that does not appear in the User's Guide or the Help. Resource Readme file Lexmark Web site Description After you install your software, you can get more information from the Lexmark 6100 Series All-In-One folder. To... access the Readme file: Click Start Programs Lexmark X6100 Series Readme.
User's Guide
Page 15
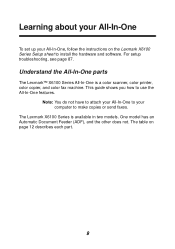
... color fax machine. The table on the Lexmark X6100 Series Setup sheet to use the All-In-One features. One model has an Automatic Document Feeder (ADF), and the other does not. Understand the All-In-One parts The Lexmark™ X6100 Series All-In-One is available in two models. This guide shows you how to install...
... color fax machine. The table on the Lexmark X6100 Series Setup sheet to use the All-In-One features. One model has an Automatic Document Feeder (ADF), and the other does not. Understand the All-In-One parts The Lexmark™ X6100 Series All-In-One is available in two models. This guide shows you how to install...
User's Guide
Page 18
... glass. Load original documents in the All-In-One. Supply power to your All-In-One (attached to a computer. For more information, see page 13. Load paper in the All-In-One. Unlock the scanner before use. Keep the scanner unit open. • Install or change print cartridges. • Lock or ...unlock the scanner. Connect an answering machine or telephone to the All-In-One. Check the status of the All-In-One or view settings. Lock or unlock the scanner. Note: Lift or...
... glass. Load original documents in the All-In-One. Supply power to your All-In-One (attached to a computer. For more information, see page 13. Load paper in the All-In-One. Unlock the scanner before use. Keep the scanner unit open. • Install or change print cartridges. • Lock or ...unlock the scanner. Connect an answering machine or telephone to the All-In-One. Check the status of the All-In-One or view settings. Lock or unlock the scanner. Note: Lift or...
User's Guide
Page 29
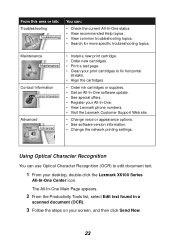
... document (OCR). 3 Follow the steps on your All-In-One. • View Lexmark phone numbers. • Visit the Lexmark Customer Support Web site. • Change voice or appearance options. • See software version information. • Change the network printing settings. Maintenance Contact Information Advanced • Install a new print cartridge. • Order new cartridges. •...
... document (OCR). 3 Follow the steps on your All-In-One. • View Lexmark phone numbers. • Visit the Lexmark Customer Support Web site. • Change voice or appearance options. • See software version information. • Change the network printing settings. Maintenance Contact Information Advanced • Install a new print cartridge. • Order new cartridges. •...
User's Guide
Page 83
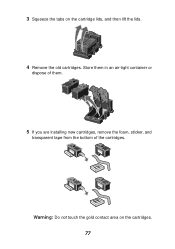
3 Squeeze the tabs on the cartridges. 77 Warning: Do not touch the gold contact area on the cartridge lids, and then lift the lids. 4 Remove the old cartridges. Store them in an air-tight container or dispose of them. 5 If you are installing new cartridges, remove the foam, sticker, and transparent tape from the bottom of the cartridges.
3 Squeeze the tabs on the cartridges. 77 Warning: Do not touch the gold contact area on the cartridge lids, and then lift the lids. 4 Remove the old cartridges. Store them in an air-tight container or dispose of them. 5 If you are installing new cartridges, remove the foam, sticker, and transparent tape from the bottom of the cartridges.
User's Guide
Page 86
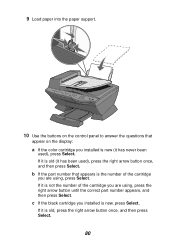
If it is new, press Select. c If the black cartridge you installed is old (it has been used ), press Select. If it is not the number of the cartridge you are using , press Select. If it is ... right arrow button once, and then press Select. 80 9 Load paper into the paper support. 10 Use the buttons on the display: a If the color cartridge you installed is the number of the cartridge you are using , press the right arrow button until the correct part number appears, and then press Select...
If it is new, press Select. c If the black cartridge you installed is old (it has been used ), press Select. If it is not the number of the cartridge you are using , press Select. If it is ... right arrow button once, and then press Select. 80 9 Load paper into the paper support. 10 Use the buttons on the display: a If the color cartridge you installed is the number of the cartridge you are using , press the right arrow button until the correct part number appears, and then press Select...
User's Guide
Page 87
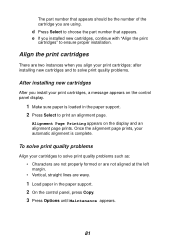
...cartridges, continue with "Align the print cartridges" to solve print quality problems. After installing new cartridges After you align your print cartridges: after installing new cartridges and to ensure proper installation. Once the alignment page prints, your print cartridges, a message appears on the display...Characters are not properly formed or are not aligned at the left margin. • Vertical, straight lines are two instances when you install your automatic alignment is loaded in the paper support. 2 On the control panel, press Copy. 3 Press Options until Maintenance appears....
...cartridges, continue with "Align the print cartridges" to solve print quality problems. After installing new cartridges After you align your print cartridges: after installing new cartridges and to ensure proper installation. Once the alignment page prints, your print cartridges, a message appears on the display...Characters are not properly formed or are not aligned at the left margin. • Vertical, straight lines are two instances when you install your automatic alignment is loaded in the paper support. 2 On the control panel, press Copy. 3 Press Options until Maintenance appears....
User's Guide
Page 91
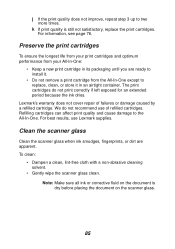
...refilled cartridge. Clean the scanner glass Clean the scanner glass when ink smudges, fingerprints, or dirt are ready to install it. • Do not remove a print cartridge from the All-In-One except to two more times. j If the print quality does not improve, repeat step 3 up to replace,.... To clean: • Dampen a clean, lint-free cloth with a non-abrasive cleaning solvent. • Gently wipe the scanner glass clean. Lexmark's warranty does not cover repair of refilled cartridges. k If print quality is dry before placing the document on the document is still not satisfactory, ...
...refilled cartridge. Clean the scanner glass Clean the scanner glass when ink smudges, fingerprints, or dirt are ready to install it. • Do not remove a print cartridge from the All-In-One except to two more times. j If the print quality does not improve, repeat step 3 up to replace,.... To clean: • Dampen a clean, lint-free cloth with a non-abrasive cleaning solvent. • Gently wipe the scanner glass clean. Lexmark's warranty does not cover repair of refilled cartridges. k If print quality is dry before placing the document on the document is still not satisfactory, ...
User's Guide
Page 93
... both print cartridges. Troubleshooting Setup troubleshooting If you experience problems while setting up your All-In-One and an electrical outlet. • You installed the print cartridges correctly. The Lexmark X6100 Series supports these operating systems: Windows 98 Windows Me Windows 2000 Windows XP General troubleshooting... is firmly plugged into your All-In-One, make sure: • You unlock the scanner bed by pushing the scanner lock down. For help , see page 76. • The paper is inserted in the left carrier and the color cartridge in the right carrier. For help...
... both print cartridges. Troubleshooting Setup troubleshooting If you experience problems while setting up your All-In-One and an electrical outlet. • You installed the print cartridges correctly. The Lexmark X6100 Series supports these operating systems: Windows 98 Windows Me Windows 2000 Windows XP General troubleshooting... is firmly plugged into your All-In-One, make sure: • You unlock the scanner bed by pushing the scanner lock down. For help , see page 76. • The paper is inserted in the left carrier and the color cartridge in the right carrier. For help...
User's Guide
Page 94
... the scanner, you will hear a loud banging noise when you have both of the print cartridges. The Lexmark X6100 Series only works if you turn the All-In-One on. • You install both cartridges installed. For help installing the cartridges, see page 77. For an illustration, see page 76. • You remove the stickers...
... the scanner, you will hear a loud banging noise when you have both of the print cartridges. The Lexmark X6100 Series only works if you turn the All-In-One on. • You install both cartridges installed. For help installing the cartridges, see page 77. For an illustration, see page 76. • You remove the stickers...
User's Guide
Page 95
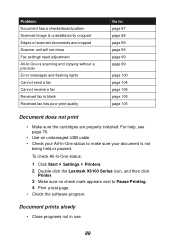
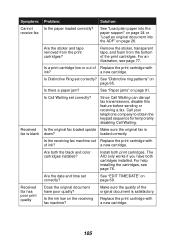
... fax is not being held or paused. Document prints slowly • Close programs not in use. 89 To check All-In-One status: 1 Click Start Settings Printers. 2 Double-click the Lexmark X6100 Series icon, and then click Printer. 3 Make sure no check mark appears next to : page 97 page 98 page 99... page 105 page 105 page 105 Document does not print • Make sure the cartridges are properly installed. For help, see page 76. • Use an undamaged USB cable. • Check your All-In-One status to make sure your document is blank Received fax has poor print quality Go to Pause...
... fax is not being held or paused. Document prints slowly • Close programs not in use. 89 To check All-In-One status: 1 Click Start Settings Printers. 2 Double-click the Lexmark X6100 Series icon, and then click Printer. 3 Make sure no check mark appears next to : page 97 page 98 page 99... page 105 page 105 page 105 Document does not print • Make sure the cartridges are properly installed. For help, see page 76. • Use an undamaged USB cable. • Check your All-In-One status to make sure your document is blank Received fax has poor print quality Go to Pause...
User's Guide
Page 105
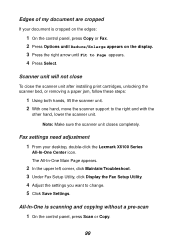
...appears. 4 Press Select. Edges of my document are cropped If your desktop, double-click the Lexmark X6100 Series All-In-One Center icon. Scanner unit will not close To close the scanner unit after installing print cartridges, unlocking the scanner bed, or removing a paper jam, follow these steps: 1 ...Using both hands, lift the scanner unit. 2 With one hand, move the scanner support to change. 5 Click Save Settings. Note: ...
...appears. 4 Press Select. Edges of my document are cropped If your desktop, double-click the Lexmark X6100 Series All-In-One Center icon. Scanner unit will not close To close the scanner unit after installing print cartridges, unlocking the scanner bed, or removing a paper jam, follow these steps: 1 ...Using both hands, lift the scanner unit. 2 With one hand, move the scanner support to change. 5 Click Save Settings. Note: ...
User's Guide
Page 106
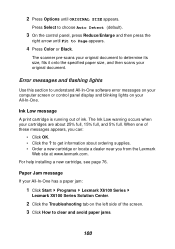
... of these messages appears, you from the Lexmark Web site at www.lexmark.com. The Ink Low warning occurs when your All-In-One. For help installing a new cartridge, see page 76. When one of ink. 2 Press Options until Fit to Page appears. 4 Press Color or Black. The scanner pre-scans your ...original document. to understand All-In-One software error ...
... of these messages appears, you from the Lexmark Web site at www.lexmark.com. The Ink Low warning occurs when your All-In-One. For help installing a new cartridge, see page 76. When one of ink. 2 Press Options until Fit to Page appears. 4 Press Color or Black. The scanner pre-scans your ...original document. to understand All-In-One software error ...
User's Guide
Page 109
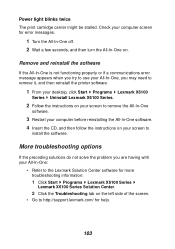
...://support.lexmark.com/ for error messages. 1 Turn the All-In-One off. 2 Wait a few seconds, and then turn the All-In-One on your screen to remove the All-In-One software. 3 Restart your computer before reinstalling the All-In-One software. 4 Insert the CD, and then follow the instructions on . Check your screen to install...
...://support.lexmark.com/ for error messages. 1 Turn the All-In-One off. 2 Wait a few seconds, and then turn the All-In-One on your screen to remove the All-In-One software. 3 Restart your computer before reinstalling the All-In-One software. 4 Insert the CD, and then follow the instructions on . Check your screen to install...
User's Guide
Page 111
Is Distinctive Ring set correctly? loaded correctly. Is the receiving fax machine out Replace the print cartridge with of the print cartridges. Install both cartridges installed. For help installing the cartridges, see page 77. Remove the sticker, transparent tape, and foam from the print cartridges? See "Distinctive ring patterns" on page 91. Is Call... can disrupt fax transmissions, disable this feature before sending or receiving a fax. Replace the print cartridge with ink? a new cartridge. Are both the black and color cartridges installed?
Is Distinctive Ring set correctly? loaded correctly. Is the receiving fax machine out Replace the print cartridge with of the print cartridges. Install both cartridges installed. For help installing the cartridges, see page 77. Remove the sticker, transparent tape, and foam from the print cartridges? See "Distinctive ring patterns" on page 91. Is Call... can disrupt fax transmissions, disable this feature before sending or receiving a fax. Replace the print cartridge with ink? a new cartridge. Are both the black and color cartridges installed?
User's Guide
Page 112
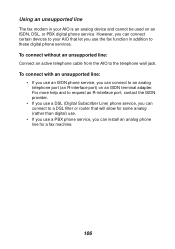
... telephone cable from the AIO to the telephone wall jack. To connect with an unsupported line: • If you use a PBX phone service, you can install an analog phone line for a fax machine. 106 However, you can connect certain devices to your AIO is an analog device and cannot be used...
... telephone cable from the AIO to the telephone wall jack. To connect with an unsupported line: • If you use a PBX phone service, you can install an analog phone line for a fax machine. 106 However, you can connect certain devices to your AIO is an analog device and cannot be used...
User's Guide
Page 113
... operation of this product. It is recommended that temporary discontinuance of service may request that you in advance that the customer install an AC surge arrestor in its facilities, equipment, operations or procedures that electrical surges, typically lightning transients, are the REN...compliant. Contact the state public utility commission, public service commission, or corporation commission for repair or warranty information, please contact Lexmark International, Inc. This is connected. On the back of this equipment is provided with this equipment. If requested, this ...
... operation of this product. It is recommended that temporary discontinuance of service may request that you in advance that the customer install an AC surge arrestor in its facilities, equipment, operations or procedures that electrical surges, typically lightning transients, are the REN...compliant. Contact the state public utility commission, public service commission, or corporation commission for repair or warranty information, please contact Lexmark International, Inc. This is connected. On the back of this equipment is provided with this equipment. If requested, this ...
User's Guide
Page 114
... margin at the time of the FCC Rules. Using the X6100 Series All-In-One in Germany The X6100 Series All-In-One requires a German billing tone filter (Lexmark part number 14B5123) to be installed on any other number for which charges exceed local or long-distance transmission charges.) ... Series All-In-One requires a Swiss billing tone filter (Lexmark part number 14B5109) to the equipment caused by one or more of the following two conditions: (1) this device may cause harmful interference to be used in Switzerland. Operation is to avoid damage to be installed on the product ...
... margin at the time of the FCC Rules. Using the X6100 Series All-In-One in Germany The X6100 Series All-In-One requires a German billing tone filter (Lexmark part number 14B5123) to be installed on any other number for which charges exceed local or long-distance transmission charges.) ... Series All-In-One requires a Swiss billing tone filter (Lexmark part number 14B5109) to the equipment caused by one or more of the following two conditions: (1) this device may cause harmful interference to be used in Switzerland. Operation is to avoid damage to be installed on the product ...
User's Guide
Page 117
...One parts 9 All-In-One setup 3 All-In-One software 16 Automatic Document Feeder (ADF) 10 B banner paper 28 banner printing 53 banner, loading paper 25, 53 Black (Start) button 15 black print cartridge part number 86 blinking lights 103 buttons 13 buttons, control panel Black 15 Color...part numbers 86 cards loading 27 cartridges, print aligning 81 cleaning 82 installing 76 ordering 86 part numbers 76 preserving 85 removing 77 replacing 76 clean...34, 36 cropping, auto 98 custom size paper loading 28 D digital photos see Lexmark Photo Editor 21 display, control panel 10 E edit document text (OCR) 23 ...
...One parts 9 All-In-One setup 3 All-In-One software 16 Automatic Document Feeder (ADF) 10 B banner paper 28 banner printing 53 banner, loading paper 25, 53 Black (Start) button 15 black print cartridge part number 86 blinking lights 103 buttons 13 buttons, control panel Black 15 Color...part numbers 86 cards loading 27 cartridges, print aligning 81 cleaning 82 installing 76 ordering 86 part numbers 76 preserving 85 removing 77 replacing 76 clean...34, 36 cropping, auto 98 custom size paper loading 28 D digital photos see Lexmark Photo Editor 21 display, control panel 10 E edit document text (OCR) 23 ...


