User Guide
Page 7
... color imaging kit ...174 Replacing a toner cartridge...179 Replacing a developer unit ...181 Recycling Lexmark products...187 Cleaning the exterior of the printer...187 Cleaning the scanner glass...188 Moving the printer...188 Before moving the printer ...188 Moving the printer to another location...189 Shipping the printer ...Setting up e-mail alerts...191 Viewing reports...192 Troubleshooting 193 Solving basic printer problems...193 Solving printing problems...193 Multiple-language PDFs do not print...193 Printer control panel display is blank or displays only diamonds 193 Error message ...
... color imaging kit ...174 Replacing a toner cartridge...179 Replacing a developer unit ...181 Recycling Lexmark products...187 Cleaning the exterior of the printer...187 Cleaning the scanner glass...188 Moving the printer...188 Before moving the printer ...188 Moving the printer to another location...189 Shipping the printer ...Setting up e-mail alerts...191 Viewing reports...192 Troubleshooting 193 Solving basic printer problems...193 Solving printing problems...193 Multiple-language PDFs do not print...193 Printer control panel display is blank or displays only diamonds 193 Error message ...

User Guide
Page 55
... ties, or folding bars - Have an interlocking design - Have any way - Tips on using paper labels Print samples on the labels being considered for laser printers. Label adhesives, face sheet (printable stock), and topcoats can withstand up to fit the width of the adhesive at least 1 mm (0.04 in.) away... from 60 g/m2 (16 lb bond) paper. Partial sheets also contaminate the printer and the cartridge with adhesive, and could void the warranty. Are stuck together or damaged in .) of the edge of the label, of the perforations, or ...
... ties, or folding bars - Have an interlocking design - Have any way - Tips on using paper labels Print samples on the labels being considered for laser printers. Label adhesives, face sheet (printable stock), and topcoats can withstand up to fit the width of the adhesive at least 1 mm (0.04 in.) away... from 60 g/m2 (16 lb bond) paper. Partial sheets also contaminate the printer and the cartridge with adhesive, and could void the warranty. Are stuck together or damaged in .) of the edge of the label, of the perforations, or ...
User Guide
Page 108
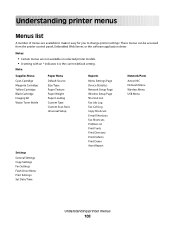
Note: Supplies Menu Cyan Cartridge Magenta Cartridge Yellow Cartridge Black Cartridge Imaging Kit Waste Toner Bottle Paper Menu Default Source Size/Type Paper Texture Paper Weight Paper Loading Custom Type Custom Scan Sizes Universal Setup ... Drive Menu Print Settings Set Date/Time Understanding printer menus 108 Understanding printer menus Menus list A number of menus are not available on selected printer models. • A setting with an * indicates it easy for you to change printer settings: These menus can be accessed from the printer control panel, Embedded Web Server, or the ...
Note: Supplies Menu Cyan Cartridge Magenta Cartridge Yellow Cartridge Black Cartridge Imaging Kit Waste Toner Bottle Paper Menu Default Source Size/Type Paper Texture Paper Weight Paper Loading Custom Type Custom Scan Sizes Universal Setup ... Drive Menu Print Settings Set Date/Time Understanding printer menus 108 Understanding printer menus Menus list A number of menus are not available on selected printer models. • A setting with an * indicates it easy for you to change printer settings: These menus can be accessed from the printer control panel, Embedded Web Server, or the ...

User Guide
Page 109
...job. • If the same size and type of the toner cartridges Early Warning Note: 88 Replace Cartridge indicates Low the cartridge is empty, the job prints using the linked tray. Understanding printer menus 109 Replace Missing or Defective OK Unsupported Imaging Kit OK Replace Black... Imaging Kit Replace Black and Color Imaging Kit Shows the status of ...
...job. • If the same size and type of the toner cartridges Early Warning Note: 88 Replace Cartridge indicates Low the cartridge is empty, the job prints using the linked tray. Understanding printer menus 109 Replace Missing or Defective OK Unsupported Imaging Kit OK Replace Black... Imaging Kit Replace Black and Color Imaging Kit Shows the status of ...
User Guide
Page 124
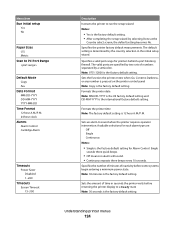
... YYYY-MM-DD Time Format 12 hour A.M./P.M. 24 hour clock Alarms Alarm Control Cartridge Alarm Timeouts Power Saver Disabled 1-240 Timeouts Screen Timeout 15-300 Description Instructs the printer to sound when the printer requires operator intervention. Specifies a valid port range for Alarm Control. Single sounds ...a semicolon. Sets an alarm to run the setup wizard Notes: • Yes is determined by the country selection in seconds the printer waits before some systems begin entering a minimum power state. Sets the amount of numbers separated by selecting Done at the Country select ...
... YYYY-MM-DD Time Format 12 hour A.M./P.M. 24 hour clock Alarms Alarm Control Cartridge Alarm Timeouts Power Saver Disabled 1-240 Timeouts Screen Timeout 15-300 Description Instructs the printer to sound when the printer requires operator intervention. Specifies a valid port range for Alarm Control. Single sounds ...a semicolon. Sets an alarm to run the setup wizard Notes: • Yes is determined by the country selection in seconds the printer waits before some systems begin entering a minimum power state. Sets the amount of numbers separated by selecting Done at the Country select ...

User Guide
Page 149
Low Replace the toner cartridge, and then wait for the message to print a color fax. Warning-Potential Damage: Do not turn off , wait about 10 seconds, and then turn the printer off or touch the printer while this message appears on the display. Hex Trace The printer is receiving a code to be sent.... using manual fax mode. Press to print a black only fax or to clear. Dialing A fax number is complete. DO NOT TOUCH The printer is in hexadecimal and character representation. Fax failed The fax failed to update a file. Wait for the message to clear the message and continue...
Low Replace the toner cartridge, and then wait for the message to print a color fax. Warning-Potential Damage: Do not turn off , wait about 10 seconds, and then turn the printer off or touch the printer while this message appears on the display. Hex Trace The printer is receiving a code to be sent.... using manual fax mode. Press to print a black only fax or to clear. Dialing A fax number is complete. DO NOT TOUCH The printer is in hexadecimal and character representation. Fax failed The fax failed to update a file. Wait for the message to clear the message and continue...
User Guide
Page 151
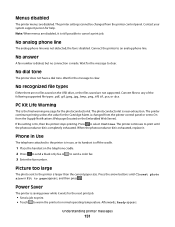
No analog phone line The analog phone line was not detected; Connect the printer to send a color fax. 3 Enter the fax number. PC Kit Life Warning This is disabled. Phone in Use The telephone attached to the printer is in use, or its handset is off the cradle. 1 Place ..., .jpeg, .jpg, .bmp, .png, .tiff, .tif, .pcx, or .dcx. Convert files to select Continue. Picture too large The photo sent to clear. Understanding printer messages 151 Wait for the Cartridge Alarm is made. No answer A fax number is completely exhausted. If the setting is near exhaustion. The...
No analog phone line The analog phone line was not detected; Connect the printer to send a color fax. 3 Enter the fax number. PC Kit Life Warning This is disabled. Phone in Use The telephone attached to the printer is in use, or its handset is off the cradle. 1 Place ..., .jpeg, .jpg, .bmp, .png, .tiff, .tif, .pcx, or .dcx. Convert files to select Continue. Picture too large The photo sent to clear. Understanding printer messages 151 Wait for the Cartridge Alarm is made. No answer A fax number is completely exhausted. If the setting is near exhaustion. The...

User Guide
Page 152
... clear and then try sending the job again. Wait for the message to clear. Reading error (Remove drive) The printer was not successfully received. Ready The printer is reading data from the device. Remove paper from standard output bin Remove the stack of pages received. Understanding...while this message appears on the display. Wait for and remove any packaging materials from the toner cartridges. The USB drive must be removed from the printer to clear. Programming Code The printer is receiving a file that is a code update. Remove packaging material Check for the message to...
... clear and then try sending the job again. Wait for the message to clear. Reading error (Remove drive) The printer was not successfully received. Ready The printer is reading data from the device. Remove paper from standard output bin Remove the stack of pages received. Understanding...while this message appears on the display. Wait for and remove any packaging materials from the toner cartridges. The USB drive must be removed from the printer to clear. Programming Code The printer is receiving a file that is a code update. Remove packaging material Check for the message to...
User Guide
Page 153
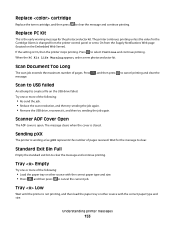
...job again. Standard Exit Bin Full Empty the standard exit bin to clear the message and continue printing. Understanding printer messages 153 Replace cartridge Replace the toner cartridge, and then press to clear the message and continue printing. If the setting is closed. Scan Document Too... for the photoconductor kit. pXX represents the number of pages. The printer continues printing unless the value for the message to select Continue and continue printing. Press to clear. Wait for the Cartridge Alarm is changed from the Supply Notifications Web page (located on the...
...job again. Standard Exit Bin Full Empty the standard exit bin to clear the message and continue printing. Understanding printer messages 153 Replace cartridge Replace the toner cartridge, and then press to clear the message and continue printing. If the setting is closed. Scan Document Too... for the photoconductor kit. pXX represents the number of pages. The printer continues printing unless the value for the message to select Continue and continue printing. Press to clear. Wait for the Cartridge Alarm is changed from the Supply Notifications Web page (located on the...

User Guide
Page 154
.... USB drive disabled A USB drive was inserted into the printer. Use camera controls to print A recognized PictBridge-compatible camera is attached to clear the message and continue printing. 31.yy Defective Cartridge Replace the defective toner cartridge with a new one or more of the following: •...; Press to print, but is waiting for the message to PictBridge. Try one . 31 Defective Imaging Kit Replace the imaging kit. Understanding printer messages 154 Reconnect the...
.... USB drive disabled A USB drive was inserted into the printer. Use camera controls to print A recognized PictBridge-compatible camera is attached to clear the message and continue printing. 31.yy Defective Cartridge Replace the defective toner cartridge with a new one or more of the following: •...; Press to print, but is waiting for the message to PictBridge. Try one . 31 Defective Imaging Kit Replace the imaging kit. Understanding printer messages 154 Reconnect the...
User Guide
Page 155
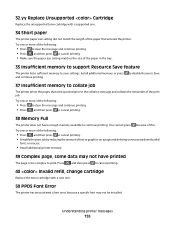
... more of the paper in the tray. 35 Insufficient memory to support Resource Save feature The printer lacks sufficient memory to cancel printing. 40 Invalid refill, change cartridge Replace the toner cartridge with a supported one. 34 Short paper The printer paper size setting did not match the length of this. 32.yy Replace Unsupported...
... more of the paper in the tray. 35 Insufficient memory to support Resource Save feature The printer lacks sufficient memory to cancel printing. 40 Invalid refill, change cartridge Replace the toner cartridge with a supported one. 34 Short paper The printer paper size setting did not match the length of this. 32.yy Replace Unsupported...

User Guide
Page 157
...power cord to a properly grounded outlet. 5 Turn the printer back on page 165. 82.yy Waste toner box missing Replace the waste toner bottle, and then press to clear the message and continue printing. 88.yy Cartridge is low Press to clear the message and continue printing.... 88.yy Replace Cartridge Replace the toner cartridge. 150 displayed The USB drive contains more than 150 files; For more information, see "Replacing the waste toner bottle" on . 59 Incompatible tray Only options designed specifically for this printer are supported. Understanding printer messages 157 Try one...
...power cord to a properly grounded outlet. 5 Turn the printer back on page 165. 82.yy Waste toner box missing Replace the waste toner bottle, and then press to clear the message and continue printing. 88.yy Cartridge is low Press to clear the message and continue printing.... 88.yy Replace Cartridge Replace the toner cartridge. 150 displayed The USB drive contains more than 150 files; For more information, see "Replacing the waste toner bottle" on . 59 Incompatible tray Only options designed specifically for this printer are supported. Understanding printer messages 157 Try one...

User Guide
Page 160
... make sure it is installed properly. Understanding printer messages 160 4 Adjust the ADF guides. 5 From the printer control panel, press to start a black only job or to start a color job. Call for service. 941.02 The magenta toner cartridge needs maintenance. Note: If turning the printer off and then on again does not clear the...
... make sure it is installed properly. Understanding printer messages 160 4 Adjust the ADF guides. 5 From the printer control panel, press to start a black only job or to start a color job. Call for service. 941.02 The magenta toner cartridge needs maintenance. Note: If turning the printer off and then on again does not clear the...

User Guide
Page 161
Call for service. 943.02 The black toner cartridge needs maintenance. If the service message appears again, contact Customer Support, and report the message. 942.02 The yellow toner cartridge needs maintenance. Call for service. 900-999 Service 1 Turn the printer off. 2 Unplug the power cord from the wall outlet. 3 Check all cable connections. 4 Connect the power cord to a properly grounded outlet. 5 Turn the printer back on. Understanding printer messages 161
Call for service. 943.02 The black toner cartridge needs maintenance. If the service message appears again, contact Customer Support, and report the message. 942.02 The yellow toner cartridge needs maintenance. Call for service. 900-999 Service 1 Turn the printer off. 2 Unplug the power cord from the wall outlet. 3 Check all cable connections. 4 Connect the power cord to a properly grounded outlet. 5 Turn the printer back on. Understanding printer messages 161

User Guide
Page 163
...: All life estimates for information about Lexmark authorized supplies dealers in the U.S., contact Lexmark at www.lexmark.com or contact the place where you purchased the printer. If you need to print several copies, you must replace the specified toner cartridge. In other countries or regions, visit the Lexmark Web Site at 1-800-539-6275 for...
...: All life estimates for information about Lexmark authorized supplies dealers in the U.S., contact Lexmark at www.lexmark.com or contact the place where you purchased the printer. If you need to print several copies, you must replace the specified toner cartridge. In other countries or regions, visit the Lexmark Web Site at 1-800-539-6275 for...

User Guide
Page 164
... toner bottle Part number C540X75G Maintaining the printer 164 Part name Part number Black Extra High Yield Return C544X1KG Program Toner Cartridge Cyan Extra High Yield Return C544X1CG Program Toner Cartridge Magenta Extra High Yield Return Program Toner Cartridge C544X1MG Yellow Extra High Yield Return Program Toner Cartridge C544X1YG Black Extra High Yield Toner C544X2KG...
... toner bottle Part number C540X75G Maintaining the printer 164 Part name Part number Black Extra High Yield Return C544X1KG Program Toner Cartridge Cyan Extra High Yield Return C544X1CG Program Toner Cartridge Magenta Extra High Yield Return Program Toner Cartridge C544X1MG Yellow Extra High Yield Return Program Toner Cartridge C544X1YG Black Extra High Yield Toner C544X2KG...

User Guide
Page 169
3 Remove the toner cartridges by lifting the handles, and then gently pulling away from the imaging kit. 4 Remove the right side cover. 5 Press the green levers on each side of the waste toner bottle, and then remove it. Maintaining the printer 169
3 Remove the toner cartridges by lifting the handles, and then gently pulling away from the imaging kit. 4 Remove the right side cover. 5 Press the green levers on each side of the waste toner bottle, and then remove it. Maintaining the printer 169

User Guide
Page 173
Maintaining the printer 173 19 Replace the toner cartridges. 20 Close the top door. 21 Close the front door.
Maintaining the printer 173 19 Replace the toner cartridges. 20 Close the top door. 21 Close the front door.

User Guide
Page 175
Maintaining the printer 175 3 Remove the toner cartridges by lifting the handles, and then gently pulling away from the imaging kit. 4 Remove the right side cover. 5 Press the green levers on each side of the waste toner bottle, and remove it.
Maintaining the printer 175 3 Remove the toner cartridges by lifting the handles, and then gently pulling away from the imaging kit. 4 Remove the right side cover. 5 Press the green levers on each side of the waste toner bottle, and remove it.

User Guide
Page 178
Maintaining the printer 178 15 Replace the right side cover. 16 Replace the toner cartridges. 17 Close the top door.
Maintaining the printer 178 15 Replace the right side cover. 16 Replace the toner cartridges. 17 Close the top door.


