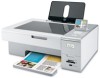
User's Guide
Page 8
... page...120 Print speed is slow...121 Partial document or photo prints...121 Photo smudges or scratches ...121 Checking the print cartridges...122 Ink levels seem incorrect ...122 Ink levels seem to go down too quickly ...122 A blank or incorrect page prints...122 Characters on printout are missing or unexpected 123 Colors...
... page...120 Print speed is slow...121 Partial document or photo prints...121 Photo smudges or scratches ...121 Checking the print cartridges...122 Ink levels seem incorrect ...122 Ink levels seem to go down too quickly ...122 A blank or incorrect page prints...122 Characters on printout are missing or unexpected 123 Colors...
User's Guide
Page 9
... a computer over a network 146 Error messages on the printer display 147 Alignment Error...147 Cartridge Error (1102, 1203, 1204, or 120F 147 Black Ink Low / Color Ink Low / Photo Ink Low 148 Clear Carrier Jam ...148 Cover Open ...148 Error 1104...148 Invalid Device ...148 Left Cartridge Error / Right Cartridge Error 149 Left...
... a computer over a network 146 Error messages on the printer display 147 Alignment Error...147 Cartridge Error (1102, 1203, 1204, or 120F 147 Black Ink Low / Color Ink Low / Photo Ink Low 148 Clear Carrier Jam ...148 Cover Open ...148 Error 1104...148 Invalid Device ...148 Left Cartridge Error / Right Cartridge Error 149 Left...
User's Guide
Page 10
... 153 Error messages on the computer screen 153 Clearing error messages ...153 Left/Right Cartridge Missing ...154 Communication not available ...154 General Printing Problem ...154 Ink Low ...154 Out of Memory...154 Out of Paper ...155 Fixing a printing failure ...155 Paper Jam ...155 Multiple All-In-Ones found ...155 Print File...
... 153 Error messages on the computer screen 153 Clearing error messages ...153 Left/Right Cartridge Missing ...154 Communication not available ...154 General Printing Problem ...154 Ink Low ...154 Out of Memory...154 Out of Paper ...155 Fixing a printing failure ...155 Paper Jam ...155 Multiple All-In-Ones found ...155 Print File...
User's Guide
Page 24
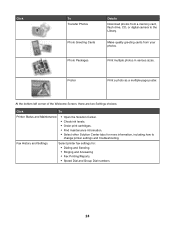
... bottom left corner of the Welcome Screen, there are two Settings choices: Click To Printer Status and Maintenance • Open the Solution Center. • Check ink levels. • Order print cartridges. • Find maintenance information. • Select other Solution Center tabs for : • Dialing and Sending • Ringing and Answering •...
... bottom left corner of the Welcome Screen, there are two Settings choices: Click To Printer Status and Maintenance • Open the Solution Center. • Check ink levels. • Order print cartridges. • Find maintenance information. • Select other Solution Center tabs for : • Dialing and Sending • Ringing and Answering •...
User's Guide
Page 25
... earlier, click Start. 2 Click Programs or All Programs Œ Lexmark 4800 Series. 3 Select Solution Center. Troubleshooting • Learn tips about the current status. • Solve printer problems. • View ink levels and order new print cartridges. Print projects such as printing photos... Share information with the Maintenance tab open the Solution Center, use the printer. • Obtain software version information. • View ink levels and order new print cartridges. • Install a new print cartridge. Advanced Maintenance • Change the appearance of the Printing...
... earlier, click Start. 2 Click Programs or All Programs Œ Lexmark 4800 Series. 3 Select Solution Center. Troubleshooting • Learn tips about the current status. • Solve printer problems. • View ink levels and order new print cartridges. Print projects such as printing photos... Share information with the Maintenance tab open the Solution Center, use the printer. • Obtain software version information. • View ink levels and order new print cartridges. • Install a new print cartridge. Advanced Maintenance • Change the appearance of the Printing...

User's Guide
Page 26
..., or scan process. Understanding the control panel Using the control panel The display shows: • Mode indicators • Main menu art messages • Icons • Ink cartridge levels Mode 1 2 3 4 5 6 7 8 9 10 11 A Main Menu Area Message • Scroll through submenus. • Increase the numbers of the Print dialog. Selects submenus (such as...
..., or scan process. Understanding the control panel Using the control panel The display shows: • Mode indicators • Main menu art messages • Icons • Ink cartridge levels Mode 1 2 3 4 5 6 7 8 9 10 11 A Main Menu Area Message • Scroll through submenus. • Increase the numbers of the Print dialog. Selects submenus (such as...
User's Guide
Page 41
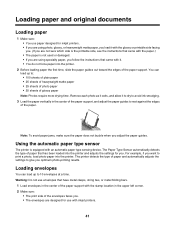
... that have metal clasps, string ties, or metal folding bars. 1 Load envelopes in the center of the paper support with it to dry to avoid ink smudging. 3 Load the paper vertically in the center of the paper support, and adjust the paper guides to give you adjust the paper guides. The...
... that have metal clasps, string ties, or metal folding bars. 1 Load envelopes in the center of the paper support with it to dry to avoid ink smudging. 3 Load the paper vertically in the center of the paper support, and adjust the paper guides to give you adjust the paper guides. The...
User's Guide
Page 42
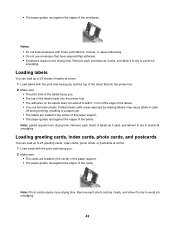
Notes: • Do not load envelopes with areas exposed by missing labels) may cause labels to avoid ink smudging. Partial sheets (with holes, perforations, cutouts, or deep embossing. • Do not use full label sheets. Remove each sheet of labels as it exits, ... labels feeds into the printer first. • The adhesive on the labels does not extend to avoid ink smudging. Loading greeting cards, index cards, photo cards, and postcards You can load up to avoid ink smudging. 42 Remove each photo card as it exits, and allow it to dry to within 1 mm...
Notes: • Do not load envelopes with areas exposed by missing labels) may cause labels to avoid ink smudging. Partial sheets (with holes, perforations, cutouts, or deep embossing. • Do not use full label sheets. Remove each sheet of labels as it exits, ... labels feeds into the printer first. • The adhesive on the labels does not extend to avoid ink smudging. Loading greeting cards, index cards, photo cards, and postcards You can load up to avoid ink smudging. 42 Remove each photo card as it exits, and allow it to dry to within 1 mm...
User's Guide
Page 43
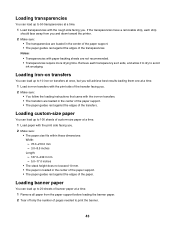
... once, but you . Loading iron-on transfers You can load up to 10 iron-on transfers with the print side of pages needed to avoid ink smudging.
... once, but you . Loading iron-on transfers You can load up to 10 iron-on transfers with the print side of pages needed to avoid ink smudging.

User's Guide
Page 50
... landscape orientation. • Make sure the same orientation is used specifically for printing professional quality photos with genuine Lexmark evercolorTM 2 ink, providing photos that can be ironed onto fabric. Notes: • Most envelopes use with Lexmark printers, but compatible with all inkjet printers. Printing specialty documents Choosing compatible specialty paper types • Heavyweight...
... landscape orientation. • Make sure the same orientation is used specifically for printing professional quality photos with genuine Lexmark evercolorTM 2 ink, providing photos that can be ironed onto fabric. Notes: • Most envelopes use with Lexmark printers, but compatible with all inkjet printers. Printing specialty documents Choosing compatible specialty paper types • Heavyweight...
User's Guide
Page 96
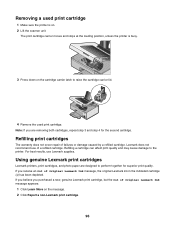
Note: If you are designed to perform together for the second cartridge. If you purchased a new, genuine Lexmark print cartridge, but the Out of Original Lexmark Ink message, the original Lexmark ink in the indicated cartridge (s) has been depleted. WI F I PRINTING 4 Remove the used print cartridge 1 ...printer is busy. 3 Press down on the message. 2 Click Report a non-Lexmark print cartridge. 96 Lexmark does not recommend use Lexmark supplies. If you believe you receive an Out of Original Lexmark Ink message appears: 1 Click Learn More on the cartridge carrier latch to the printer...
Note: If you are designed to perform together for the second cartridge. If you purchased a new, genuine Lexmark print cartridge, but the Out of Original Lexmark Ink message, the original Lexmark ink in the indicated cartridge (s) has been depleted. WI F I PRINTING 4 Remove the used print cartridge 1 ...printer is busy. 3 Press down on the message. 2 Click Report a non-Lexmark print cartridge. 96 Lexmark does not recommend use Lexmark supplies. If you believe you receive an Out of Original Lexmark Ink message appears: 1 Click Learn More on the cartridge carrier latch to the printer...

User's Guide
Page 97
... not cover damage caused by non-Lexmark ink or print cartridges. Aligning print cartridges 1 Load plain paper. 2 Press repeatedly until Maintenance is highlighted. 3 Press . 4 Press repeatedly until Clean Cartridges is highlighted. 5 Press .... improved, clean the print cartridge nozzles. Wiping the print cartridge nozzles and contacts 1 Remove the print cartridges. 2 Dampen a clean, lint-free cloth with new Lexmark print cartridge(s). • If you are using the printer without a computer, press Cancel. An alignment page prints. Cleaning the print cartridge nozzles 1 Load plain ...
... not cover damage caused by non-Lexmark ink or print cartridges. Aligning print cartridges 1 Load plain paper. 2 Press repeatedly until Maintenance is highlighted. 3 Press . 4 Press repeatedly until Clean Cartridges is highlighted. 5 Press .... improved, clean the print cartridge nozzles. Wiping the print cartridge nozzles and contacts 1 Remove the print cartridges. 2 Dampen a clean, lint-free cloth with new Lexmark print cartridge(s). • If you are using the printer without a computer, press Cancel. An alignment page prints. Cleaning the print cartridge nozzles 1 Load plain ...
User's Guide
Page 99
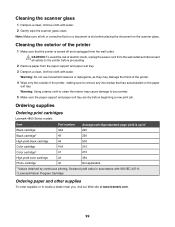
...: Do not use household cleaners or detergents, as they may cause damage to remove any ink residue that the printer is turned off and unplugged from the wall outlet and disconnect all ink or corrective fluid on a document is up to1 Black cartridge 42A 220 Black cartridge2 42 ... the scanner glass. Note: Make sure all cables to locate a dealer near you, visit our Web site at www.lexmark.com. 99 Ordering supplies Ordering print cartridges Lexmark 4800 Series models Item Part number Average cartridge standard page yield is dry before proceeding. 2 Remove paper from the paper...
...: Do not use household cleaners or detergents, as they may cause damage to remove any ink residue that the printer is turned off and unplugged from the wall outlet and disconnect all ink or corrective fluid on a document is up to1 Black cartridge 42A 220 Black cartridge2 42 ... the scanner glass. Note: Make sure all cables to locate a dealer near you, visit our Web site at www.lexmark.com. 99 Ordering supplies Ordering print cartridges Lexmark 4800 Series models Item Part number Average cartridge standard page yield is dry before proceeding. 2 Remove paper from the paper...
User's Guide
Page 103
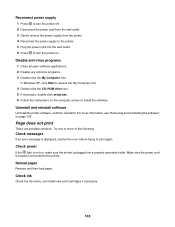
Page does not print These are possible solutions. Reload paper Remove and then load paper. Check ink Check the ink levels, and install new print cartridges if necessary. 103 For more of the following: Check messages If an error message is plugged into the wall ...
Page does not print These are possible solutions. Reload paper Remove and then load paper. Check ink Check the ink levels, and install new print cartridges if necessary. 103 For more of the following: Check messages If an error message is plugged into the wall ...
User's Guide
Page 119
...• Smudges • Streaks • White lines in print These are printing photos or other high-quality images, for best results use Lexmark photo papers. If print quality is still not satisfactory, replace the print cartridges. Check print cartridges If the document still does not have the.... 4 Wipe the print nozzles and contacts. Use a different brand of the following media, remove each sheet as they are printed To avoid ink smudging when you want, follow these steps: 1 Align the print cartridges. Check paper condition Use only new, unwrinkled paper. 119 For more...
...• Smudges • Streaks • White lines in print These are printing photos or other high-quality images, for best results use Lexmark photo papers. If print quality is still not satisfactory, replace the print cartridges. Check print cartridges If the document still does not have the.... 4 Wipe the print nozzles and contacts. Use a different brand of the following media, remove each sheet as they are printed To avoid ink smudging when you want, follow these steps: 1 Align the print cartridges. Check paper condition Use only new, unwrinkled paper. 119 For more...
User's Guide
Page 122
... 99. Are you printing photos or documents with the Best Quality/Speed setting? Make sure the sticker and tape are printing on page 94. Ink levels seem incorrect These are printing a large file. Try one of the following : Are you printing with a large number of the following ...: • In Windows Vista, click . • In Windows XP and earlier, click Start. 2 Click Programs or All Programs Œ Lexmark 4800 Series. 3 Click Solution Center. 4 If an exclamation point (!) appears on the cartridge carrier latches to raise the cartridge carrier lids. Use the Quick ...
... 99. Are you printing photos or documents with the Best Quality/Speed setting? Make sure the sticker and tape are printing on page 94. Ink levels seem incorrect These are printing a large file. Try one of the following : Are you printing with a large number of the following ...: • In Windows Vista, click . • In Windows XP and earlier, click Start. 2 Click Programs or All Programs Œ Lexmark 4800 Series. 3 Click Solution Center. 4 If an exclamation point (!) appears on the cartridge carrier latches to raise the cartridge carrier lids. Use the Quick ...
User's Guide
Page 123
...are open files in the program you , check for the next time you are using a black or photo cartridge, make sure it is available on ink? 1 Do one or more information. The printer prints a blank page when too many files are trying to print. Make sure the document was formatted... the following : • In Windows Vista, click Œ Control Panel. • In Windows XP or 2000, click Start. 2 Click Programs or All Programs Œ Lexmark 4800 Series. 123 When you think you have solved the problem, test the solution by the USB symbol. You may change with the font.
...are open files in the program you , check for the next time you are using a black or photo cartridge, make sure it is available on ink? 1 Do one or more information. The printer prints a blank page when too many files are trying to print. Make sure the document was formatted... the following : • In Windows Vista, click Œ Control Panel. • In Windows XP or 2000, click Start. 2 Click Programs or All Programs Œ Lexmark 4800 Series. 123 When you think you have solved the problem, test the solution by the USB symbol. You may change with the font.
User's Guide
Page 124
...Quality/Speed setting is useful to have the default printer set to be available in the program font selection box. It is appropriate for the ink to print may not be the printer you using the Normal setting. Print is a TrueType font. Glossy photo paper or transparencies stick together... Do photos or transparencies dry and stick together on either of the print cartridges, the ink level is available on the computer The font you are designed to dry before handling the paper Remove the paper as they exit the printer...
...Quality/Speed setting is useful to have the default printer set to be available in the program font selection box. It is appropriate for the ink to print may not be the printer you using the Normal setting. Print is a TrueType font. Glossy photo paper or transparencies stick together... Do photos or transparencies dry and stick together on either of the print cartridges, the ink level is available on the computer The font you are designed to dry before handling the paper Remove the paper as they exit the printer...
User's Guide
Page 128
...cartridges, the ink level is marked by the USB symbol. Verify that the light is a TrueType font. make sure the font is on either of the following: • In Windows Vista, click . • In Windows XP and earlier, click Start. 2 Click Programs or All Programs Œ Lexmark 4800 Series....appears on . The USB port on the computer? For Windows XP, click Start Œ Settings Œ Printers or Printers and Faxes. 2 Right-click the Lexmark 4800 Series icon. 3 Select Properties. 4 Click the Advanced tab. 5 At the bottom of the USB cable is plugged into this port. 2 Make sure...
...cartridges, the ink level is marked by the USB symbol. Verify that the light is a TrueType font. make sure the font is on either of the following: • In Windows Vista, click . • In Windows XP and earlier, click Start. 2 Click Programs or All Programs Œ Lexmark 4800 Series....appears on . The USB port on the computer? For Windows XP, click Start Œ Settings Œ Printers or Printers and Faxes. 2 Right-click the Lexmark 4800 Series icon. 3 Select Properties. 4 Click the Advanced tab. 5 At the bottom of the USB cable is plugged into this port. 2 Make sure...
User's Guide
Page 143
... print • Dark print • Skewed lines • Smudges • Streaks • Unexpected characters • White lines in the lower right corner. 143 Check ink Check the ink levels, and install a new print cartridge if necessary. Are you are copying or scanning from photo or glossy paper, a magazine, or a newspaper, see "Error...
... print • Dark print • Skewed lines • Smudges • Streaks • Unexpected characters • White lines in the lower right corner. 143 Check ink Check the ink levels, and install a new print cartridge if necessary. Are you are copying or scanning from photo or glossy paper, a magazine, or a newspaper, see "Error...


