User's Guide
Page 2
... Using the Setup menu ...25 Saving settings...26 Using the printer software...28 Installing printer software ...28 Installing the optional XPS driver (Windows Vista users only 29 Using the Windows printer software...30 Using the Macintosh printer software...31 Switching between the rear USB port and the Quick Connect laptop port (selected...
... Using the Setup menu ...25 Saving settings...26 Using the printer software...28 Installing printer software ...28 Installing the optional XPS driver (Windows Vista users only 29 Using the Windows printer software...30 Using the Macintosh printer software...31 Switching between the rear USB port and the Quick Connect laptop port (selected...
User's Guide
Page 5
...94 Maintaining print cartridges...94 Installing print cartridges...94 Removing a used print cartridge ...95 Refilling print cartridges...96 Using genuine Lexmark print cartridges...96 Aligning print cartridges ...97 Cleaning the print cartridge nozzles...97 Checking ink levels...98 Wiping the print cartridge ... ...101 Ordering paper and other supplies...102 Resetting to factory settings...102 Troubleshooting 103 Using the printer troubleshooting software (Windows only 103 Setup troubleshooting...103 Incorrect language appears on the display...103 Power button is not lit ...104 Software did...
...94 Maintaining print cartridges...94 Installing print cartridges...94 Removing a used print cartridge ...95 Refilling print cartridges...96 Using genuine Lexmark print cartridges...96 Aligning print cartridges ...97 Cleaning the print cartridge nozzles...97 Checking ink levels...98 Wiping the print cartridge ... ...101 Ordering paper and other supplies...102 Resetting to factory settings...102 Troubleshooting 103 Using the printer troubleshooting software (Windows only 103 Setup troubleshooting...103 Incorrect language appears on the display...103 Power button is not lit ...104 Software did...
User's Guide
Page 8
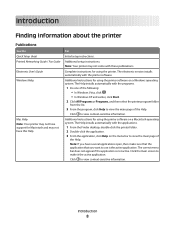
...bar to use is not active. The Help installs automatically with the programs. 1 Do one of the following: • In Windows Vista, click . • In Windows XP and earlier, click Start. 2 Click All Programs or Programs, and then select the printer program folder from the list..... 1 From the Finder desktop, double-click the printer folder. 2 Double-click the application. 3 From the application, click Help on a Windows operating system. Note: Your printer may not have this Help. Additional instructions for using the printer. to view context-sensitive information. The correct ...
...bar to use is not active. The Help installs automatically with the programs. 1 Do one of the following: • In Windows Vista, click . • In Windows XP and earlier, click Start. 2 Click All Programs or Programs, and then select the printer program folder from the list..... 1 From the Finder desktop, double-click the printer folder. 2 Double-click the application. 3 From the application, click Help on a Windows operating system. Note: Your printer may not have this Help. Additional instructions for using the printer. to view context-sensitive information. The correct ...
User's Guide
Page 28
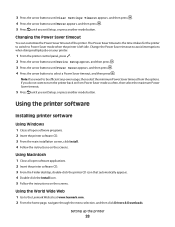
...Setup, or press another mode button. The Power Saver timeout is the time it takes for the printer to switch to the Lexmark Web site at www.lexmark.com. 2 From the home page, navigate through the menu selection, and then click Drivers & Downloads. Using the printer ...software Installing printer software Using Windows 1 Close all open software programs. 2 Insert the printer software CD. 3 From the main installation screen, click Install. 4 Follow the ...
...Setup, or press another mode button. The Power Saver timeout is the time it takes for the printer to switch to the Lexmark Web site at www.lexmark.com. 2 From the home page, navigate through the menu selection, and then click Drivers & Downloads. Using the printer ...software Installing printer software Using Windows 1 Close all open software programs. 2 Insert the printer software CD. 3 From the main installation screen, click Install. 4 Follow the ...
User's Guide
Page 29
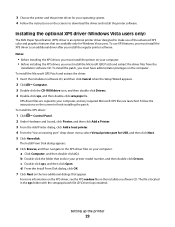
... printer driver designed to finish installing the patch. To use of the advanced XPS color and graphics features that are available only for Windows Vista users. To install the Microsoft QFE Patch and extract the driver: 1 Insert the installation software CD, and then click Cancel ...in the xps folder with the setupxps batch file (D:\Drivers\xps\readme). b Double-click the folder that appear. Installing the optional XPS driver (Windows Vista users only) The XML Paper Specification (XPS) driver is located in your operating system. 4 Follow the instructions on your computer, and ...
... printer driver designed to finish installing the patch. To use of the advanced XPS color and graphics features that are available only for Windows Vista users. To install the Microsoft QFE Patch and extract the driver: 1 Insert the installation software CD, and then click Cancel ...in the xps folder with the setupxps batch file (D:\Drivers\xps\readme). b Double-click the folder that appear. Installing the optional XPS driver (Windows Vista users only) The XML Paper Specification (XPS) driver is located in your operating system. 4 Follow the instructions on your computer, and ...
User's Guide
Page 30
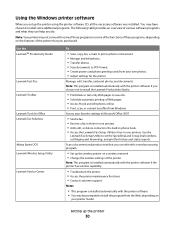
Using the Windows printer software When you set Ringing and Answering, and print fax history and status reports. Use the LexmarkTM Productivity Studio Lexmark Fast Pics Lexmark Toolbar Lexmark Tools for the printer. Manage, edit, transfer, and print photos and documents. Scan a document and produce text ...Print black or text-only Web pages to install this program from your own photos. • Adjust settings for Office Lexmark Fax Solutions Abbyy Sprint OCR Lexmark Wireless Setup Utility Lexmark Service Center To • Scan, copy, fax, e-mail, or print a photo or document. • Manage...
Using the Windows printer software When you set Ringing and Answering, and print fax history and status reports. Use the LexmarkTM Productivity Studio Lexmark Fast Pics Lexmark Toolbar Lexmark Tools for the printer. Manage, edit, transfer, and print photos and documents. Scan a document and produce text ...Print black or text-only Web pages to install this program from your own photos. • Adjust settings for Office Lexmark Fax Solutions Abbyy Sprint OCR Lexmark Wireless Setup Utility Lexmark Service Center To • Scan, copy, fax, e-mail, or print a photo or document. • Manage...
User's Guide
Page 32
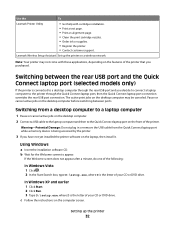
...alignment page. • Clean the print cartridge nozzles. • Order ink or supplies. • Register the printer. • Contact customer support. Using Windows a Insert the installation software CD. c Follow the instructions on the computer screen. If the Welcome screen does not appear after a minute, do one of... printer through the rear USB port and you have not yet installed the printer software on the laptop, then install it. Lexmark Wireless Setup Assistant Set up the printer 32 Pause or cancel active jobs on the desktop computer before switching between the rear ...
...alignment page. • Clean the print cartridge nozzles. • Order ink or supplies. • Register the printer. • Contact customer support. Using Windows a Insert the installation software CD. c Follow the instructions on the computer screen. If the Welcome screen does not appear after a minute, do one of... printer through the rear USB port and you have not yet installed the printer software on the laptop, then install it. Lexmark Wireless Setup Assistant Set up the printer 32 Pause or cancel active jobs on the desktop computer before switching between the rear ...
User's Guide
Page 35
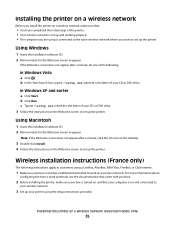
Wireless installation instructions (France only) The following : In Windows Vista a Click . If the Welcome screen does not appear after a minute, click the CD icon on the desktop. 3 Double-click Install. 4 Follow the instructions on ... on and connected to work on a wireless network. For more information about configuring the box to your CD or DVD drive. In Windows XP and earlier a Click Start. Using Windows 1 Insert the installation software CD. 2 Wait a minute for the Welcome screen to appear. Installing the printer on a wireless network (selected models only...
Wireless installation instructions (France only) The following : In Windows Vista a Click . If the Welcome screen does not appear after a minute, click the CD icon on the desktop. 3 Double-click Install. 4 Follow the instructions on ... on and connected to work on a wireless network. For more information about configuring the box to your CD or DVD drive. In Windows XP and earlier a Click Start. Using Windows 1 Insert the installation software CD. 2 Wait a minute for the Welcome screen to appear. Installing the printer on a wireless network (selected models only...

User's Guide
Page 37
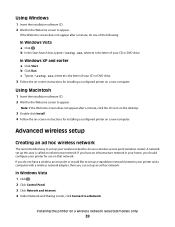
...software, and then make the changes that : - Using Macintosh 1 From the Finder desktop, double-click the printer folder. 2 Double-click Lexmark Wireless Setup Assistant. 3 Follow the instructions on a wireless network (selected models only) 37 Changing wireless settings after installation To change wireless ..., click . • In Windows XP and earlier, click Start. 2 Click All Programs or Programs, and then select the printer program folder from the list. 3 Click Tools Lexmark Wireless Setup Utility. The printer is trying to communicate with the wireless access point (wireless ...
...software, and then make the changes that : - Using Macintosh 1 From the Finder desktop, double-click the printer folder. 2 Double-click Lexmark Wireless Setup Assistant. 3 Follow the instructions on a wireless network (selected models only) 37 Changing wireless settings after installation To change wireless ..., click . • In Windows XP and earlier, click Start. 2 Click All Programs or Programs, and then select the printer program folder from the list. 3 Click Tools Lexmark Wireless Setup Utility. The printer is trying to communicate with the wireless access point (wireless ...
User's Guide
Page 39
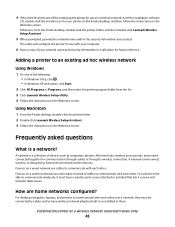
... your CD or DVD drive. Advanced wireless setup Creating an ad hoc wireless network The recommended way to set up an ad hoc network. Using Windows 1 Insert the installation software CD. 2 Wait for installing a configured printer on a new computer. c Type D:\setup.exe, where D is called ...If you have a wireless access point or would like to set up this way is the letter of the following: In Windows Vista a Click . In Windows XP and earlier a Click Start. In Windows Vista 1 Click . 2 Click Control Panel. 3 Click Network and Internet. 4 Under Network and Sharing Center, click ...
... your CD or DVD drive. Advanced wireless setup Creating an ad hoc wireless network The recommended way to set up an ad hoc network. Using Windows 1 Insert the installation software CD. 2 Wait for installing a configured printer on a new computer. c Type D:\setup.exe, where D is called ...If you have a wireless access point or would like to set up this way is the letter of the following: In Windows Vista a Click . In Windows XP and earlier a Click Start. In Windows Vista 1 Click . 2 Click Control Panel. 3 Click Network and Internet. 4 Under Network and Sharing Center, click ...
User's Guide
Page 40
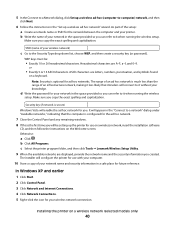
... a network name or SSID for future reference. b Click All Programs. c Select the printer program folder, and then click Tools Lexmark Wireless Setup Utility. 9 When the available networks are displayed, provide the network name and the security information you copy the exact spelling and capitalization... a Click . As part of your printer. WEP keys must be setting up a wireless ad hoc network" wizard. Make sure you created. In Windows XP and earlier 1 Click Start. 2 Click Control Panel. 3 Click Network and Internet Connections. 4 Click Network Connections. 5 Right-click the icon...
... a network name or SSID for future reference. b Click All Programs. c Select the printer program folder, and then click Tools Lexmark Wireless Setup Utility. 9 When the available networks are displayed, provide the network name and the security information you copy the exact spelling and capitalization... a Click . As part of your printer. WEP keys must be setting up a wireless ad hoc network" wizard. Make sure you created. In Windows XP and earlier 1 Click Start. 2 Click Control Panel. 3 Click Network and Internet Connections. 4 Click Network Connections. 5 Right-click the icon...
User's Guide
Page 41
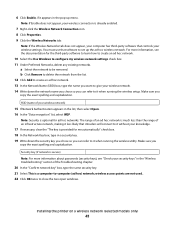
...(security keys), see the documentation for the third-party software to learn how to create an ad hoc network. 10 Select the Use Windows to configure my wireless network settings check box. 11 Under Preferred Networks, delete any existing networks. a Select the network to close the two... open windows. Installing the printer on a wireless network (selected models only) 41 Note: If Enable does not appear, your wireless connection is optional for...
...(security keys), see the documentation for the third-party software to learn how to create an ad hoc network. 10 Select the Use Windows to configure my wireless network settings check box. 11 Under Preferred Networks, delete any existing networks. a Select the network to close the two... open windows. Installing the printer on a wireless network (selected models only) 41 Note: If Enable does not appear, your wireless connection is optional for...
User's Guide
Page 43
... networks configured? Installing the printer on the Welcome screen. Using Macintosh 1 From the Finder desktop, double-click the printer folder. 2 Double-click Lexmark Wireless Setup Assistant. 3 Follow the instructions on a wireless network (selected models only) 43 A network is a network? Devices on a wired ..., click . • In Windows XP and earlier, click Start. 2 Click All Programs or Programs, and then select the printer program folder from the Finder desktop, double-click the printer folder, and then double-click Lexmark Wireless Setup Assistant. 5 When prompted, provide the...
... networks configured? Installing the printer on the Welcome screen. Using Macintosh 1 From the Finder desktop, double-click the printer folder. 2 Double-click Lexmark Wireless Setup Assistant. 3 Follow the instructions on a wireless network (selected models only) 43 A network is a network? Devices on a wired ..., click . • In Windows XP and earlier, click Start. 2 Click All Programs or Programs, and then select the printer program folder from the Finder desktop, double-click the printer folder, and then double-click Lexmark Wireless Setup Assistant. 5 When prompted, provide the...

User's Guide
Page 49
... point will not block the wireless signal. If it passes through an object, it can block the signal, including: • Cubicle walls • Ducts • Window frames • Poles and interior support columns • Metal office furniture and cabinets • Elevators • Steel doors • Walls and other structural elements reinforced...
... point will not block the wireless signal. If it passes through an object, it can block the signal, including: • Cubicle walls • Ducts • Window frames • Poles and interior support columns • Metal office furniture and cabinets • Elevators • Steel doors • Walls and other structural elements reinforced...
User's Guide
Page 52
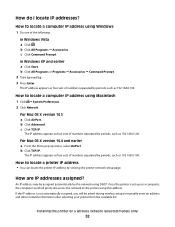
... by the network using this address. b Click All Programs Accessories. The IP address appears as four sets of the following: In Windows Vista a Click . b Click Advanced. b Click TCP/IP. An IP address may be asked during wireless setup to locate a computer IP address using...AirPort. c Click TCP/IP. Once the printer is not automatically assigned, you will be assigned automatically by viewing the printer network setup page. In Windows XP and earlier a Click Start. The IP address appears as four sets of numbers separated by periods, such as 192.168.0.100. For Mac ...
... by the network using this address. b Click All Programs Accessories. The IP address appears as four sets of the following: In Windows Vista a Click . b Click Advanced. b Click TCP/IP. An IP address may be asked during wireless setup to locate a computer IP address using...AirPort. c Click TCP/IP. Once the printer is not automatically assigned, you will be assigned automatically by viewing the printer network setup page. In Windows XP and earlier a Click Start. The IP address appears as four sets of numbers separated by periods, such as 192.168.0.100. For Mac ...
User's Guide
Page 60
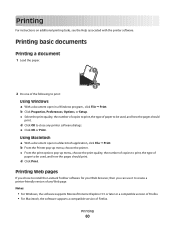
Printing Web pages If you chose to install the Lexmark Toolbar software for your Web browser, then you can use it to print: Using Windows a With a document open in a Windows program , click File Print. b Click Properties, Preferences, Options, or Setup. e Click OK or Print. c ... the print quality, the number of copies to be used , and how the pages should print. d Click Print. Notes: • For Windows, the software supports Microsoft Internet Explorer 5.5 or later or a compatible version of Firefox. • For Macintosh, the software supports a compatible version...
Printing Web pages If you chose to install the Lexmark Toolbar software for your Web browser, then you can use it to print: Using Windows a With a document open in a Windows program , click File Print. b Click Properties, Preferences, Options, or Setup. e Click OK or Print. c ... the print quality, the number of copies to be used , and how the pages should print. d Click Print. Notes: • For Windows, the software supports Microsoft Internet Explorer 5.5 or later or a compatible version of Firefox. • For Macintosh, the software supports a compatible version...

User's Guide
Page 61
... browser. 3 Select a print option to print the copies as a set (collated) or to print the page. Printing 61 Printing multiple copies of a document Using Windows 1 With a document open , click File Print. 2 From the Printer pop-up menu, choose the printer. 3 In the Copies field, enter the... tab, enter the number of copies that you want to print. 4 Click OK to print, and then select Collate Copies. Collated Not collated Using Windows 1 With a document open, click File Print. 2 Click Properties, Preferences, Options, or Setup. 3 From the Copies section of the Print...
... browser. 3 Select a print option to print the copies as a set (collated) or to print the page. Printing 61 Printing multiple copies of a document Using Windows 1 With a document open , click File Print. 2 From the Printer pop-up menu, choose the printer. 3 In the Copies field, enter the... tab, enter the number of copies that you want to print. 4 Click OK to print, and then select Collate Copies. Collated Not collated Using Windows 1 With a document open, click File Print. 2 Click Properties, Preferences, Options, or Setup. 3 From the Copies section of the Print...

User's Guide
Page 62
... Reverse. For Mac OS X version 10.3 a From the print options pop-up menu, choose Paper Handling. Printing the last page first (reverse page order) Using Windows 1 With a document open , click File Print. 2 From the Printer pop-up menu, choose the printer. 3 Do one of the Print Setup tab, select Print...
... Reverse. For Mac OS X version 10.3 a From the print options pop-up menu, choose Paper Handling. Printing the last page first (reverse page order) Using Windows 1 With a document open , click File Print. 2 From the Printer pop-up menu, choose the printer. 3 Do one of the Print Setup tab, select Print...

User's Guide
Page 63
... choose an option from the Border pop-up menu, choose the number of page images that you want to print on one sheet (N-Up) Using Windows 1 With a document open , click File Print. 2 From the print options pop-up menu, choose Layout. • From the Pages per Sheet pop-up menu...
... choose an option from the Border pop-up menu, choose the number of page images that you want to print on one sheet (N-Up) Using Windows 1 With a document open , click File Print. 2 From the print options pop-up menu, choose Layout. • From the Pages per Sheet pop-up menu...

User's Guide
Page 65
..., and then specify the height and width of the envelope. b Customize the settings as greeting cards. • Iron-On transfer-A type of the following: Using Windows a With a document open , click File Print. 2 From the Printer pop-up menu, choose the envelope size. Notes: • Most envelopes use . 3 Click Print. g Click...
..., and then specify the height and width of the envelope. b Customize the settings as greeting cards. • Iron-On transfer-A type of the following: Using Windows a With a document open , click File Print. 2 From the Printer pop-up menu, choose the envelope size. Notes: • Most envelopes use . 3 Click Print. g Click...

