
Embedded Web Server Administrator's Guide
Page 14
... default values. An administrator can store only one used as needed. 5 To sync to an NTP server rather than manage date and time settings manually, click the Enable NTP check box, and then type the IP address or hostname of the NTP Server. 6 If the NTP server requires authentication...it is observed in your area, click the Automatically Observe DST check box. 4 If you are encouraged to securely end each device can be updated manually, or set to use Network Time Protocol (NTP), to automatically sync with a trusted clock-typically the same one NTLM configuration on the user's password...
... default values. An administrator can store only one used as needed. 5 To sync to an NTP server rather than manage date and time settings manually, click the Enable NTP check box, and then type the IP address or hostname of the NTP Server. 6 If the NTP server requires authentication...it is observed in your area, click the Automatically Observe DST check box. 4 If you are encouraged to securely end each device can be updated manually, or set to use Network Time Protocol (NTP), to automatically sync with a trusted clock-typically the same one NTLM configuration on the user's password...

Embedded Web Server Administrator's Guide
Page 23
... with multiple passes for greater security. Notes: • The Scheduled Disk Wiping option will not appear until Manual mode has been selected and submitted. • Clicking Submit after choosing a Wiping Mode will be performed manually, automatically, or on your device. 2 From the Wiping Mode list, select Off (for no wiping), ...Auto (for automatic wiping), or Manual (for securely erasing data from the device and free up disk wiping 1 From the Embedded Web Server Home screen, browse to make further ...
... with multiple passes for greater security. Notes: • The Scheduled Disk Wiping option will not appear until Manual mode has been selected and submitted. • Clicking Submit after choosing a Wiping Mode will be performed manually, automatically, or on your device. 2 From the Wiping Mode list, select Off (for no wiping), ...Auto (for automatic wiping), or Manual (for securely erasing data from the device and free up disk wiping 1 From the Embedded Web Server Home screen, browse to make further ...

Embedded Web Server Administrator's Guide
Page 24
... turning the printer back on the main Settings screen for Disk Wiping, choose Single Pass, or Multi-pass for each method of disk wiping (Automatic, Manual, and Scheduled). 6 Click Submit to finalize changes. Encrypting the hard disk Hard disk encryption helps prevent loss of sensitive data in the event your printer... day will be turned on only at the device (not through the configuration menus until the printer status bar reaches %100. 3 If you have enabled Manual mode and wish to set up , the printer touch screen should occur, and then click Add.
... turning the printer back on the main Settings screen for Disk Wiping, choose Single Pass, or Multi-pass for each method of disk wiping (Automatic, Manual, and Scheduled). 6 Click Submit to finalize changes. Encrypting the hard disk Hard disk encryption helps prevent loss of sensitive data in the event your printer... day will be turned on only at the device (not through the configuration menus until the printer status bar reaches %100. 3 If you have enabled Manual mode and wish to set up , the printer touch screen should occur, and then click Add.
Sending a fax using the computer
Page 2
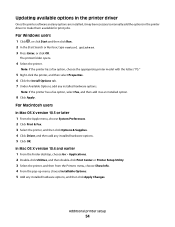
...available for print jobs. Updating available options in the printer driver Once the printer software and any options are installed, it may be necessary to manually add the options in the printer driver to accept the licensing agreement. 6 From the Drivers and Utilities dialog, select Custom, and then click ... 9 Click Add Printer. 10 Click Finish, and then follow the instructions on the screen. Using the World Wide Web 1 Go to the Lexmark Web site at www.lexmark.com. For Windows users 1 Click , or click Start and then click Run. 2 In the Start Search or Run box, type control printers...
...available for print jobs. Updating available options in the printer driver Once the printer software and any options are installed, it may be necessary to manually add the options in the printer driver to accept the licensing agreement. 6 From the Drivers and Utilities dialog, select Custom, and then click ... 9 Click Add Printer. 10 Click Finish, and then follow the instructions on the screen. Using the World Wide Web 1 Go to the Lexmark Web site at www.lexmark.com. For Windows users 1 Click , or click Start and then click Run. 2 In the Start Search or Run box, type control printers...
Wireless Setup Guide
Page 20
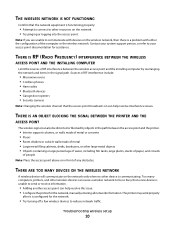
... BLOCKING THE SIGNAL BETWEEN THE PRINTER AND THE ACCESS POINT The wireless signal can help resolve this issue. • Configure the printer for the network, manually entering all network information. Note: If you are unable to communicate with either the configuration of RF interference include: • Microwave ovens • Cordless phones...
... BLOCKING THE SIGNAL BETWEEN THE PRINTER AND THE ACCESS POINT The wireless signal can help resolve this issue. • Configure the printer for the network, manually entering all network information. Note: If you are unable to communicate with either the configuration of RF interference include: • Microwave ovens • Cordless phones...

Wireless Setup Guide
Page 25
All devices on the network must use DHCP, but no DHCP server is available, an AutoIP address may be assigned manually by you are using an access point or router A device that lets computers and printers talk to each other over a network A device that gives a unique ...
All devices on the network must use DHCP, but no DHCP server is available, an AutoIP address may be assigned manually by you are using an access point or router A device that lets computers and printers talk to each other over a network A device that gives a unique ...

Wireless Setup Guide
Page 26
... a printer to a wireless network, the printer needs to a wireless network. A lightweight, flexible cable that helps prevent unauthorized access to support this. An IP address assigned manually A device similar to a network hub that can connect different networks together An address assigned to as a wireless access point An industry term that describes the...
... a printer to a wireless network, the printer needs to a wireless network. A lightweight, flexible cable that helps prevent unauthorized access to support this. An IP address assigned manually A device similar to a network hub that can connect different networks together An address assigned to as a wireless access point An industry term that describes the...

User's Guide
Page 10
... messages...254 Answering ...254 Change to modem, fax is set up ...256 Insert Tray ...257 Install Tray ...257 Invalid PIN...257 Load with ...257 Load manual feeder with ...257 Memory full, cannot print faxes...258 Network/Network ...258 No analog phone line connected to ...255 Check tray connection ...255 Close front...
... messages...254 Answering ...254 Change to modem, fax is set up ...256 Insert Tray ...257 Install Tray ...257 Invalid PIN...257 Load with ...257 Load manual feeder with ...257 Memory full, cannot print faxes...258 Network/Network ...258 No analog phone line connected to ...255 Check tray connection ...255 Close front...
User's Guide
Page 23
In the Fax To field, a Dial Pause is deleted, another press of a number entered manually. Press to return to redial a fax number. • The button functions only within the Fax menu or with fax functions. In the E-mail Destination List, ...
In the Fax To field, a Dial Pause is deleted, another press of a number entered manually. Press to return to redial a fax number. • The button functions only within the Fax menu or with fax functions. In the E-mail Destination List, ...
User's Guide
Page 54
Note: If the printer has a fax option, select Fax, and then add it may be necessary to manually add the options in the printer driver Once the printer software and any installed hardware options. Additional printer setup 54 The printer folder opens. 4 Select ...
Note: If the printer has a fax option, select Fax, and then add it may be necessary to manually add the options in the printer driver Once the printer software and any installed hardware options. Additional printer setup 54 The printer folder opens. 4 Select ...

User's Guide
Page 76
The Paper Type setting must be set manually from the Paper Size menu. The factory default Paper Type setting is 76 x 76 mm (3 x 3 in.); Loading paper and specialty media 76 Specify the Universal ... Plain Paper. Setting the Paper Size and Paper Type The Paper Size setting for the standard 250 tray and the multipurpose feeder must be set manually for the specified tray to the home screen.
The Paper Type setting must be set manually from the Paper Size menu. The factory default Paper Type setting is 76 x 76 mm (3 x 3 in.); Loading paper and specialty media 76 Specify the Universal ... Plain Paper. Setting the Paper Size and Paper Type The Paper Size setting for the standard 250 tray and the multipurpose feeder must be set manually for the specified tray to the home screen.

User's Guide
Page 77
... loading paper. Make sure the stack height does not exceed the indicated maximum height. • Make sure the guides in the paper tray or the manual feeder are properly positioned and are set correctly in the paper tray. • Do not remove the paper tray while the printer is printing. •...
... loading paper. Make sure the stack height does not exceed the indicated maximum height. • Make sure the guides in the paper tray or the manual feeder are properly positioned and are set correctly in the paper tray. • Do not remove the paper tray while the printer is printing. •...
User's Guide
Page 87
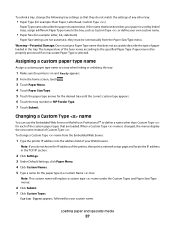
... under the Custom Types and Paper Size/Type menus. 6 Click Submit. 7 Click Custom Types. When a Custom Type name is selected. Paper may not be set manually from the Embedded Web Server: 1 Type the printer IP address into the address field of Custom Type . Assigning a custom paper type name Assign a custom paper...
... under the Custom Types and Paper Size/Type menus. 6 Click Submit. 7 Click Custom Types. When a Custom Type name is selected. Paper may not be set manually from the Embedded Web Server: 1 Type the printer IP address into the address field of Custom Type . Assigning a custom paper type name Assign a custom paper...

User's Guide
Page 93
...; Plain • Light • Heavy • Rough/Cotton • Recycled • Custom Bond Standard Optional 250- or Multipurpose 250-sheet tray 550-sheet tray feeder Manual feeder Duplex path Letterhead Preprinted Colored Paper Card stock Glossy paper X X X X X 1 Single-sided paper labels designed for laser printers are not supported. 2 Use envelopes that...
...; Plain • Light • Heavy • Rough/Cotton • Recycled • Custom Bond Standard Optional 250- or Multipurpose 250-sheet tray 550-sheet tray feeder Manual feeder Duplex path Letterhead Preprinted Colored Paper Card stock Glossy paper X X X X X 1 Single-sided paper labels designed for laser printers are not supported. 2 Use envelopes that...

User's Guide
Page 94
... card stock 7 envelopes Notes Note: Vinyl, pharmacy, or dual-sided labels are based on a table facedown. or Multipurpose 250-sheet tray 550-sheet tray feeder Manual feeder Duplex path X Transparencies Envelopes X X X (smooth)2 1 Single-sided paper labels designed for laser printers are supported for occasional use . Load up to print no more...
... card stock 7 envelopes Notes Note: Vinyl, pharmacy, or dual-sided labels are based on a table facedown. or Multipurpose 250-sheet tray 550-sheet tray feeder Manual feeder Duplex path X Transparencies Envelopes X X X (smooth)2 1 Single-sided paper labels designed for laser printers are supported for occasional use . Load up to print no more...

User's Guide
Page 105
... the upper left corner. 2 On the home screen, touch Copy, or use the keypad to , and then touch the tray that contains transparencies, or touch Manual Feeder and then place transparencies in the multipurpose feeder. 6 Touch the desired size of copies. Copying on the scanner glass, and then touch Scan the...
... the upper left corner. 2 On the home screen, touch Copy, or use the keypad to , and then touch the tray that contains transparencies, or touch Manual Feeder and then place transparencies in the multipurpose feeder. 6 Touch the desired size of copies. Copying on the scanner glass, and then touch Scan the...
User's Guide
Page 106
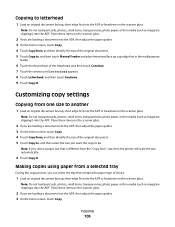
... select the tray that is different from the "Copy from , and then identify the size of the original document. 5 Touch Copy to, and then touch Manual Feeder and place letterhead face up, top edge first in the multipurpose feeder. 6 Touch the desired size of choice. 1 Load an original document faceup, short...
... select the tray that is different from the "Copy from , and then identify the size of the original document. 5 Touch Copy to, and then touch Manual Feeder and place letterhead face up, top edge first in the multipurpose feeder. 6 Touch the desired size of choice. 1 Load an original document faceup, short...

User's Guide
Page 107
... that contains the paper type you want 2-sided copies. Place these items on both sides of the original document size. Note: If you choose Manual Feeder, then you want . For example, select 1-sided to 2-sided if you have 1-sided original documents and you want your copies. Touching..., photos, small items, transparencies, photo paper, or thin media (such as magazine clippings) into the ADF. 4 Touch Copy from " after setting Scale manually changes the scale value back to Auto. 5 Touch Copy It. Note: Do not load postcards, photos, small items, transparencies, photo paper, or thin ...
... that contains the paper type you want 2-sided copies. Place these items on both sides of the original document size. Note: If you choose Manual Feeder, then you want . For example, select 1-sided to 2-sided if you have 1-sided original documents and you want your copies. Touching..., photos, small items, transparencies, photo paper, or thin media (such as magazine clippings) into the ADF. 4 Touch Copy from " after setting Scale manually changes the scale value back to Auto. 5 Touch Copy It. Note: Do not load postcards, photos, small items, transparencies, photo paper, or thin ...

User's Guide
Page 112
... original document. Scale can enter the size of the documents you want to copy onto is not loaded in one of the trays, touch Manual Feeder, and manually send the paper through the multipurpose feeder. • When "Copy to" is not in relation to scan, but emphasizes a reproduction of the full dynamic...
... original document. Scale can enter the size of the documents you want to copy onto is not loaded in one of the trays, touch Manual Feeder, and manually send the paper through the multipurpose feeder. • When "Copy to" is not in relation to scan, but emphasizes a reproduction of the full dynamic...
User's Guide
Page 132
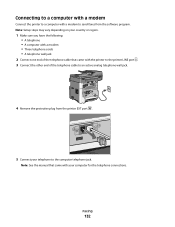
... the printer EXT port . 5 Connect your telephone to an active analog telephone wall jack. 4 Remove the protective plug from the software program. Note: See the manual that came with your computer for the telephone connections. Faxing 132
... the printer EXT port . 5 Connect your telephone to an active analog telephone wall jack. 4 Remove the protective plug from the software program. Note: See the manual that came with your computer for the telephone connections. Faxing 132


