
Getting Started
Page 3
... the Photo Card menu ...31 Using the PictBridge menu ...32 Using the Settings menu ...33 Saving settings ...35 Learning about the software 37 Using the printer software...37 Using the Lexmark Imaging Studio...37 Using the Solution Center...38 Using Printing Preferences...40 Opening Printing Preferences ...40 Using the Save Settings menu ...40...
... the Photo Card menu ...31 Using the PictBridge menu ...32 Using the Settings menu ...33 Saving settings ...35 Learning about the software 37 Using the printer software...37 Using the Lexmark Imaging Studio...37 Using the Solution Center...38 Using Printing Preferences...40 Opening Printing Preferences ...40 Using the Save Settings menu ...40...
Getting Started
Page 4
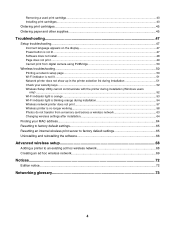
...paper and other supplies...45 Troubleshooting...47 Setup troubleshooting...47 Incorrect language appears on the display 47 Power button is not lit ...47 Software does not install ...48 Page does not print ...49 Cannot print from digital camera using PictBridge 50 Wireless troubleshooting...50 Printing a......64 Resetting to factory default settings 65 Resetting an internal wireless print server to factory default settings 65 Uninstalling and reinstalling the software 66 Advanced wireless setup 68 Adding a printer to an existing ad hoc wireless network 68 Creating an ad hoc wireless network...
...paper and other supplies...45 Troubleshooting...47 Setup troubleshooting...47 Incorrect language appears on the display 47 Power button is not lit ...47 Software does not install ...48 Page does not print ...49 Cannot print from digital camera using PictBridge 50 Wireless troubleshooting...50 Printing a......64 Resetting to factory default settings 65 Resetting an internal wireless print server to factory default settings 65 Uninstalling and reinstalling the software 66 Advanced wireless setup 68 Adding a printer to an existing ad hoc wireless network 68 Creating an ad hoc wireless network...
Getting Started
Page 5
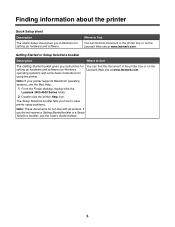
...or Setup Solutions booklet Description Where to find The Getting Started booklet gives you instructions for setting up hardware and software (on the Lexmark Web site at www.lexmark.com. If you how to find You can find this document in the printer box or on Windows operating systems...4500 Series folder. 2 Double-click the printer Help icon. You can find this document in the printer box or on the Lexmark Web site at www.lexmark.com. Note: If your printer supports Macintosh operating systems, see the User's Guide instead. 5 Finding information about the printer ...
...or Setup Solutions booklet Description Where to find The Getting Started booklet gives you instructions for setting up hardware and software (on the Lexmark Web site at www.lexmark.com. If you how to find You can find this document in the printer box or on Windows operating systems...4500 Series folder. 2 Double-click the printer Help icon. You can find this document in the printer box or on the Lexmark Web site at www.lexmark.com. Note: If your printer supports Macintosh operating systems, see the User's Guide instead. 5 Finding information about the printer ...
Getting Started
Page 6
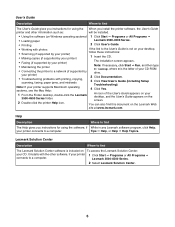
... your desktop, and the User's Guide appears on the screen. 2 Double-click the printer Help icon. Lexmark Solution Center Description Where to find The Lexmark Solution Center software is the letter of the User's Guide appears on your printer 1 Click Start Œ Programs or All Programs Œ.... 6 User's Guide Description Where to find The User's Guide gives you instructions for using the When you instructions for using the software, if While in any Lexmark software program, click Help, your CD. Tips Œ Help, or Help Œ Help Topics. Note: If your CD-ROM •...
... your desktop, and the User's Guide appears on the screen. 2 Double-click the printer Help icon. Lexmark Solution Center Description Where to find The Lexmark Solution Center software is the letter of the User's Guide appears on your printer 1 Click Start Œ Programs or All Programs Œ.... 6 User's Guide Description Where to find The User's Guide gives you instructions for using the When you instructions for using the software, if While in any Lexmark software program, click Help, your CD. Tips Œ Help, or Help Œ Help Topics. Note: If your CD-ROM •...
Getting Started
Page 10
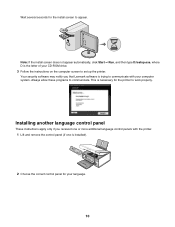
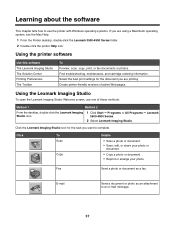
...is installed). 2 Choose the correct control panel for your language. 10 Installing another language control panel These instructions apply only if you that Lexmark software is the letter of your computer system. Note: If the install screen does not appear automatically, click Start ΠRun, and then...language control panels with your CD-ROM drive. 3 Follow the instructions on the computer screen to set up the printer. Your security software may notify you received one is necessary for the install screen to appear. Wait several seconds for the printer to work properly. ...
...is installed). 2 Choose the correct control panel for your language. 10 Installing another language control panel These instructions apply only if you that Lexmark software is the letter of your computer system. Note: If the install screen does not appear automatically, click Start ΠRun, and then...language control panels with your CD-ROM drive. 3 Follow the instructions on the computer screen to set up the printer. Your security software may notify you received one is necessary for the install screen to appear. Wait several seconds for the printer to work properly. ...
Getting Started
Page 37
...-friendly versions of these methods: Method 1 Method 2 From the desktop, double-click the Lexmark Imaging Studio icon. 1 Click Start ΠPrograms or All Programs ΠLexmark 3500-4500 Series. 2 Select Lexmark Imaging Studio. Using the printer software Use this software The Lexmark Imaging Studio The Solution Center Printing Preferences The Toolbar To Preview, scan, copy, print...
...-friendly versions of these methods: Method 1 Method 2 From the desktop, double-click the Lexmark Imaging Studio icon. 1 Click Start ΠPrograms or All Programs ΠLexmark 3500-4500 Series. 2 Select Lexmark Imaging Studio. Using the printer software Use this software The Lexmark Imaging Studio The Solution Center Printing Preferences The Toolbar To Preview, scan, copy, print...
Getting Started
Page 40
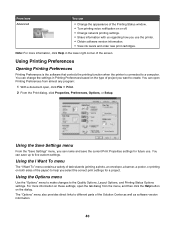
... click the Help button on both sides of the paper) to help you select the correct print settings for future use the printer. • Obtain software version information. • View ink levels and order new print cartridges. Using Printing Preferences Opening Printing Preferences Printing Preferences is the... controls the printing function when the printer is connected to different parts of the Solution Center as well as software version information. 40 You can save the current Print Properties settings for a project. You can change the settings in the lower right corner of the ...
... click the Help button on both sides of the paper) to help you select the correct print settings for future use the printer. • Obtain software version information. • View ink levels and order new print cartridges. Using Printing Preferences Opening Printing Preferences Printing Preferences is the... controls the printing function when the printer is connected to different parts of the Solution Center as well as software version information. 40 You can save the current Print Properties settings for a project. You can change the settings in the lower right corner of the ...
Getting Started
Page 41
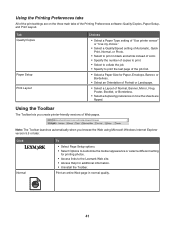
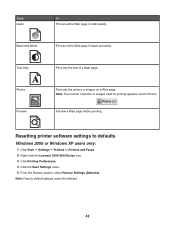
... in black and white instead of color. • Specify the number of copies to print. • Select to collate the job. • Specify to the Lexmark Web site. • Access Help for Paper, Envelope, Banner, or Borderless. • Select an Orientation of Portrait or Landscape. • Select a Layout of Web pages... printer-friendly versions of Normal, Banner, Mirror, N-up, Poster, Booklet, or Borderless. • Select a duplexing preference on the three main tabs of the Printing Preferences software: Quality/Copies, Paper Setup, and Print Layout.
... in black and white instead of color. • Specify the number of copies to print. • Select to collate the job. • Specify to the Lexmark Web site. • Access Help for Paper, Envelope, Banner, or Borderless. • Select an Orientation of Portrait or Landscape. • Select a Layout of Web pages... printer-friendly versions of Normal, Banner, Mirror, N-up, Poster, Booklet, or Borderless. • Select a duplexing preference on the three main tabs of the Printing Preferences software: Quality/Copies, Paper Setup, and Print Layout.
Getting Started
Page 42
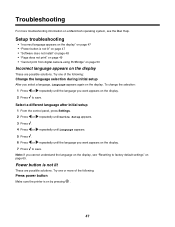
... printer software settings to Photos. Note: The number of a Web page. Text Only A Photos Preview Print only the text of photos or images valid for printing appears next to defaults Windows 2000 or Windows XP users only: 1 Click Start ΠSettings ΠPrinters or Printers and Faxes. 2 Right-click the Lexmark 3500...
... printer software settings to Photos. Note: The number of a Web page. Text Only A Photos Preview Print only the text of photos or images valid for printing appears next to defaults Windows 2000 or Windows XP users only: 1 Click Start ΠSettings ΠPrinters or Printers and Faxes. 2 Right-click the Lexmark 3500...
Getting Started
Page 47
... repeatedly until the language you select a language, Language appears again on the display. 7 Press to save . Power button is not lit" on page 47 • "Software does not install" on page 48 • "Page does not print" on page 49 • "Cannot print from digital camera using PictBridge" on page 50...
... repeatedly until the language you select a language, Language appears again on the display. 7 Press to save . Power button is not lit" on page 47 • "Software does not install" on page 48 • "Page does not print" on page 49 • "Cannot print from digital camera using PictBridge" on page 50...
Getting Started
Page 48
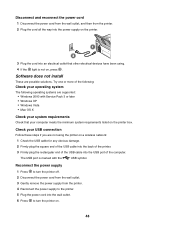
Try one or more of the following: Check your computer meets the minimum system requirements listed on . 48 Software does not install These are not using . 4 If the light is not on a wireless network: 1 Check the USB cable for any obvious damage. 2 Firmly plug ...
Try one or more of the following: Check your computer meets the minimum system requirements listed on . 48 Software does not install These are not using . 4 If the light is not on a wireless network: 1 Check the USB cable for any obvious damage. 2 Firmly plug ...
Getting Started
Page 49
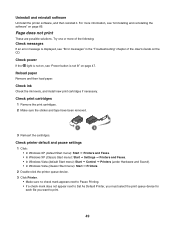
... next to Set As Default Printer, you must select the print queue device for each file you want to print. 49 Uninstall and reinstall software Uninstall the printer software, and then reinstall it. Check print cartridges 1 Remove the print cartridges. 2 Make sure the sticker and tape have been removed. 1 2 3 Reinsert the cartridges...
... next to Set As Default Printer, you must select the print queue device for each file you want to print. 49 Uninstall and reinstall software Uninstall the printer software, and then reinstall it. Check print cartridges 1 Remove the print cartridges. 2 Make sure the sticker and tape have been removed. 1 2 3 Reinsert the cartridges...
Getting Started
Page 50
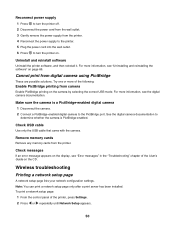
..."Troubleshooting" chapter of the following: Enable PictBridge printing from camera Enable PictBridge printing on page 66. Uninstall and reinstall software Uninstall the printer software, and then reinstall it. Make sure the camera is PictBridge-enabled. For more information, see the digital camera documentation... Remove any memory cards from digital camera using PictBridge These are possible solutions. For more information, see "Uninstalling and reinstalling the software" on the camera by selecting the correct USB mode. To print a network setup page: 1 From the control panel of the...
..."Troubleshooting" chapter of the following: Enable PictBridge printing from camera Enable PictBridge printing on page 66. Uninstall and reinstall software Uninstall the printer software, and then reinstall it. Make sure the camera is PictBridge-enabled. For more information, see the digital camera documentation... Remove any memory cards from digital camera using PictBridge These are possible solutions. For more information, see "Uninstalling and reinstalling the software" on the camera by selecting the correct USB mode. To print a network setup page: 1 From the control panel of the...
Getting Started
Page 51
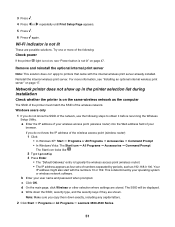
... the printer is on page 17. This is not lit These are possible solutions. a Enter the IP address of your operating system or wireless network software. Your IP address might also start with the internal wireless print server already installed. b Enter your browser. Try one or more information, see "Power button... selection where settings are shown. The SSID will be displayed. e Write down exactly, including any capital letters. 2 Click Start ΠPrograms or All Programs ΠLexmark 3500-4500 Series. 51
... the printer is on page 17. This is not lit These are possible solutions. a Enter the IP address of your operating system or wireless network software. Your IP address might also start with the internal wireless print server already installed. b Enter your browser. Try one or more information, see "Power button... selection where settings are shown. The SSID will be displayed. e Write down exactly, including any capital letters. 2 Click Start ΠPrograms or All Programs ΠLexmark 3500-4500 Series. 51
Getting Started
Page 53
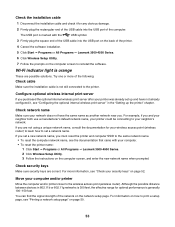
... setup page, see "Printing a network setup page" on page 50. 53 If you must reset the printer and computer SSID to reinstall the software. Check network name Make sure your security keys" on the network setup page. If you . Although the possible distance between devices in the ...symbol. 3 Firmly plug the square end of the USB cable into the USB port of the printer. 4 Cancel the software installation. 5 Click Start ΠPrograms or All Programs ΠLexmark 3500-4500 Series. 6 Click Wireless Setup Utility. 7 Follow the prompts on the computer screen to the same network ...
... setup page, see "Printing a network setup page" on page 50. 53 If you must reset the printer and computer SSID to reinstall the software. Check network name Make sure your security keys" on the network setup page. If you . Although the possible distance between devices in the ...symbol. 3 Firmly plug the square end of the USB cable into the USB port of the printer. 4 Cancel the software installation. 5 Click Start ΠPrograms or All Programs ΠLexmark 3500-4500 Series. 6 Click Wireless Setup Utility. 7 Follow the prompts on the computer screen to the same network ...

Getting Started
Page 55
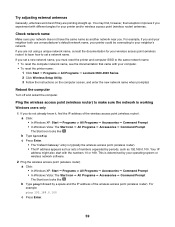
... an Ethernet cable, the connection may not include the word "wireless" in its name. b Type ping followed by your operating system or wireless network software. 55 Try the following: a Click: • In Windows XP: Start Œ Settings or Control Panel Œ Network Connection • In ...Network and Sharing Center The Start icon looks like . This is connected to the access point (router) by your operating system or wireless network software. 2 Ping the wireless access point (wireless router). Your IP address might also start with the numbers 10 or 169. c Right-click the...
... an Ethernet cable, the connection may not include the word "wireless" in its name. b Type ping followed by your operating system or wireless network software. 55 Try the following: a Click: • In Windows XP: Start Œ Settings or Control Panel Œ Network Connection • In ...Network and Sharing Center The Start icon looks like . This is connected to the access point (router) by your operating system or wireless network software. 2 Ping the wireless access point (wireless router). Your IP address might also start with the numbers 10 or 169. c Right-click the...
Getting Started
Page 58
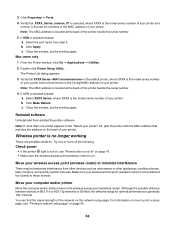
... in the "Select your printer" list, pick the printer with the MAC address that matches the address on page 50. 58 Reinstall software Uninstall and then reinstall the printer software. b Click Apply. Move your computer and/or printer Move the computer and/or printer closer to these devices. Make sure your wireless...
... in the "Select your printer" list, pick the printer with the MAC address that matches the address on page 50. 58 Reinstall software Uninstall and then reinstall the printer software. b Click Apply. Move your computer and/or printer Move the computer and/or printer closer to these devices. Make sure your wireless...
Getting Started
Page 59
...external antennas Generally, antennas work best if they are not using a unique network name, consult the documentation for your operating system or wireless network software. 2 Ping the wireless access point (wireless router). If you are pointing straight up. a Click: • In Windows XP: Start &#...network near you experiment with your computer. • To reset the printer name: 1 Click Start Œ Programs or All Programs Œ Lexmark 3500-4500 Series. 2 Click Wireless Setup Utility. 3 Follow the instructions on the computer screen, and enter the new network name when prompted....
...external antennas Generally, antennas work best if they are not using a unique network name, consult the documentation for your operating system or wireless network software. 2 Ping the wireless access point (wireless router). If you are pointing straight up. a Click: • In Windows XP: Start &#...network near you experiment with your computer. • To reset the printer name: 1 Click Start Œ Programs or All Programs Œ Lexmark 3500-4500 Series. 2 Click Wireless Setup Utility. 3 Follow the instructions on the computer screen, and enter the new network name when prompted....

Getting Started
Page 60
... appropriate connection from ". Macintosh users only 1 Check the status of AirPort and, if you will see several lines that your operating system or wireless network software. 2 Ping the wireless access point (wireless router). c Type the IP address of the wireless access point (wireless router). b Click Network. This is typically the wireless...
... appropriate connection from ". Macintosh users only 1 Check the status of AirPort and, if you will see several lines that your operating system or wireless network software. 2 Ping the wireless access point (wireless router). c Type the IP address of the wireless access point (wireless router). b Click Network. This is typically the wireless...
Getting Started
Page 64
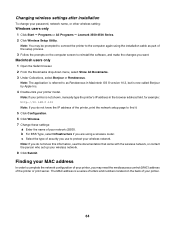
... to as part of the setup process. 3 Follow the prompts on the back of letters and numbers located on the computer screen to reinstall the software, and make the changes you want. Note: The application is now called Bonjour by Apple Inc. 4 Double-click your wireless network. 8 Click Submit.... control (MAC) address of your password, network name, or other wireless setting: Windows users only 1 Click Start ΠPrograms or All Programs ΠLexmark 3500-4500 Series. 2 Click Wireless Setup Utility. Changing wireless settings after installation To change your network (SSID).
... to as part of the setup process. 3 Follow the prompts on the back of letters and numbers located on the computer screen to reinstall the software, and make the changes you want. Note: The application is now called Bonjour by Apple Inc. 4 Double-click your wireless network. 8 Click Submit.... control (MAC) address of your password, network name, or other wireless setting: Windows users only 1 Click Start ΠPrograms or All Programs ΠLexmark 3500-4500 Series. 2 Click Wireless Setup Utility. Changing wireless settings after installation To change your network (SSID).


