User's Guide
Page 5
...50 Sending a fax using the software...50 Receiving a fax using the software...50 Maintaining the printer 52 Changing a print cartridge...52 Removing a used print cartridge...52 Installing a print cartridge...52 Achieving better print quality...54 Improving print quality...54 Aligning the print ...Ordering supplies...56 Using genuine Lexmark print cartridges 56 Refilling a print cartridge...57 Recycling Lexmark products...57 Troubleshooting...58 Setup troubleshooting...58 Incorrect language appears on the display 58 Power button is not lit...58 Software does not install...58 Page does not ...
...50 Sending a fax using the software...50 Receiving a fax using the software...50 Maintaining the printer 52 Changing a print cartridge...52 Removing a used print cartridge...52 Installing a print cartridge...52 Achieving better print quality...54 Improving print quality...54 Aligning the print ...Ordering supplies...56 Using genuine Lexmark print cartridges 56 Refilling a print cartridge...57 Recycling Lexmark products...57 Troubleshooting...58 Setup troubleshooting...58 Incorrect language appears on the display 58 Power button is not lit...58 Software does not install...58 Page does not ...
User's Guide
Page 9
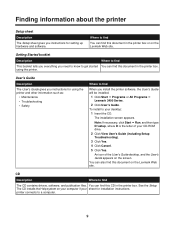
... find You can find When you install the printer software, the User's Guide will be installed. 1 Click Start ΠPrograms or All Programs ΠLexmark 3400 Series. 2 Click User's Guide. Where to find this CD in the printer box. using the printer and other information such as: &#...setting up hardware and software. Finding information about the printer Setup sheet Description The Setup sheet gives you instructions for installation instructions. See the Setup The CD installs the Help system on the Lexmark Web site. Getting Started booklet Description Where to ...
... find You can find When you install the printer software, the User's Guide will be installed. 1 Click Start ΠPrograms or All Programs ΠLexmark 3400 Series. 2 Click User's Guide. Where to find this CD in the printer box. using the printer and other information such as: &#...setting up hardware and software. Finding information about the printer Setup sheet Description The Setup sheet gives you instructions for installation instructions. See the Setup The CD installs the Help system on the Lexmark Web site. Getting Started booklet Description Where to ...
User's Guide
Page 10
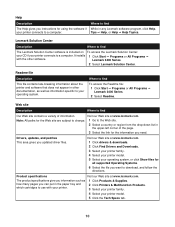
... paths for the information you need. The product specifications give you information such as information specific to your printer connects to a computer. Lexmark Solution Center Description Where to find Our Web site contains a variety of the page. 3 Select the...you want to download, and follow the directions. It installs 1 Click Start ΠPrograms or All Programs Πwith your printer. 1 Click Products & Supplies. 2 Click Printers & Multifunction Products. 3 Select your printer family. 4 Select your printer connects to a computer. Where to find While in ...
... paths for the information you need. The product specifications give you information such as information specific to your printer connects to a computer. Lexmark Solution Center Description Where to find Our Web site contains a variety of the page. 3 Select the...you want to download, and follow the directions. It installs 1 Click Start ΠPrograms or All Programs Πwith your printer. 1 Click Products & Supplies. 2 Click Printers & Multifunction Products. 3 Select your printer family. 4 Select your printer connects to a computer. Where to find While in ...
User's Guide
Page 13
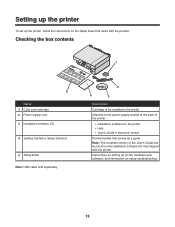
... Solutions 5 Setup sheet Note: USB cable sold separately 2 4 3 Description Cartridge to be installed in the printer Attaches to the power supply located at the back of the printer • Installation software for the printer • Help • User's Guide in electronic format Printed booklet that serves as a guide... Note: The complete version of the User's Guide can be found on the installation software CD that came with the printer. Instructions on setting up the printer, follow the instructions on the Setup sheet that shipped with the product. Setting up the...
... Solutions 5 Setup sheet Note: USB cable sold separately 2 4 3 Description Cartridge to be installed in the printer Attaches to the power supply located at the back of the printer • Installation software for the printer • Help • User's Guide in electronic format Printed booklet that serves as a guide... Note: The complete version of the User's Guide can be found on the installation software CD that came with the printer. Instructions on setting up the printer, follow the instructions on the Setup sheet that shipped with the product. Setting up the...
User's Guide
Page 15
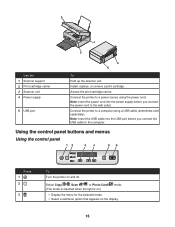
... option that appears on and off. Install, replace, or remove a print cartridge. Note: Insert the power cord into the USB port before you connect the USB cable to the wall outlet. Using the control panel buttons and menus Using the control panel Press 1 2 3 To Turn the printer on the display. 15 3 1 2 Use...
... option that appears on and off. Install, replace, or remove a print cartridge. Note: Insert the power cord into the USB port before you connect the USB cable to the wall outlet. Using the control panel buttons and menus Using the control panel Press 1 2 3 To Turn the printer on the display. 15 3 1 2 Use...
User's Guide
Page 23
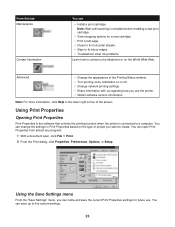
.... Using Print Properties Opening Print Properties Print Properties is the software that controls the printing function when the printer is complete before installing a new print cartridge. • View shopping options for future use the printer. • Obtain software version information. Using the Save Settings menu From the "Save Settings" menu, you can name...
.... Using Print Properties Opening Print Properties Print Properties is the software that controls the printing function when the printer is complete before installing a new print cartridge. • View shopping options for future use the printer. • Obtain software version information. Using the Save Settings menu From the "Save Settings" menu, you can name...

User's Guide
Page 48
... Otherwise, continue with the Scanning & Copying tab expanded. 4 To scan only a portion of the document: a Click Preview Now. The All-In-One Center appears with step 5. 5 Select a word-processing program to select a specific area of the scanned document appears in the preview section. For more... information, see the documentation that ABBYY Fine Reader is installed. 1 Load an original document facedown on the computer screen. The document will appear in your text-editing program. 7 Make your editing...
... Otherwise, continue with the Scanning & Copying tab expanded. 4 To scan only a portion of the document: a Click Preview Now. The All-In-One Center appears with step 5. 5 Select a word-processing program to select a specific area of the scanned document appears in the preview section. For more... information, see the documentation that ABBYY Fine Reader is installed. 1 Load an original document facedown on the computer screen. The document will appear in your text-editing program. 7 Make your editing...
User's Guide
Page 52
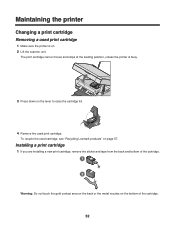
...Remove the used print cartridge 1 Make sure the printer is on. 2 Lift the scanner unit. Warning: Do not touch the gold contact area on the back or the metal nozzles on page 57. Installing a print cartridge 1 If you are installing a new print cartridge, remove the sticker and ...tape from the back and bottom of the cartridge. 52 Maintaining the printer Changing a print cartridge Removing a used print cartridge. To recycle the used cartridge, see "Recycling Lexmark products" on ...
...Remove the used print cartridge 1 Make sure the printer is on. 2 Lift the scanner unit. Warning: Do not touch the gold contact area on the back or the metal nozzles on page 57. Installing a print cartridge 1 If you are installing a new print cartridge, remove the sticker and ...tape from the back and bottom of the cartridge. 52 Maintaining the printer Changing a print cartridge Removing a used print cartridge. To recycle the used cartridge, see "Recycling Lexmark products" on ...
User's Guide
Page 54
...blurry edges. 6 Click Print. For more information, see "Wiping the print cartridge nozzles and contacts" on the computer screen. For more information, see "Installing a print cartridge" on page 52. 1 Load paper. 2 From the desktop, double-click the Imaging Studio icon. 3 Click the Maintain/Troubleshoot button.... 4 Click Maintenance. 5 Click Align to step 4. 4 Wipe the print nozzles and contacts. Use Lexmark Premium Photo Paper if you are printing photos or other high-quality images. • Make sure the glossy or printable side faces you. ...
...blurry edges. 6 Click Print. For more information, see "Wiping the print cartridge nozzles and contacts" on the computer screen. For more information, see "Installing a print cartridge" on page 52. 1 Load paper. 2 From the desktop, double-click the Imaging Studio icon. 3 Click the Maintain/Troubleshoot button.... 4 Click Maintenance. 5 Click Align to step 4. 4 Wipe the print nozzles and contacts. Use Lexmark Premium Photo Paper if you are printing photos or other high-quality images. • Make sure the glossy or printable side faces you. ...
User's Guide
Page 56
...the check box, and click Close. • If you , visit our Web site at www.lexmark.com. Ordering supplies To order supplies or to locate a dealer near you are ready to install it in an airtight container. Item Part number Print cartridge 1 USB cable 12A2405... Lexmark Photo Paper and Premium Photo Paper Varies by non-Lexmark ink or print cartridges. 56 Lexmark's warranty does not cover damage caused by country or region Using genuine Lexmark print cartridges Lexmark printers,...
...the check box, and click Close. • If you , visit our Web site at www.lexmark.com. Ordering supplies To order supplies or to locate a dealer near you are ready to install it in an airtight container. Item Part number Print cartridge 1 USB cable 12A2405... Lexmark Photo Paper and Premium Photo Paper Varies by non-Lexmark ink or print cartridges. 56 Lexmark's warranty does not cover damage caused by country or region Using genuine Lexmark print cartridges Lexmark printers,...
User's Guide
Page 58
... you want appears on the display. 5 Press to turn off the printer. 2 Press and hold followed by 3 Release the buttons. Power button is not lit 1 Disconnect the power cord from the wall outlet, and then from the printer. 2 Plug the cord all the way into the power supply on ...the printer. 2 1 3 Plug the cord into an electrical outlet that other electrical devices have been using. 4 If the light is not on, press . Software does not install The following operating systems are supported: • Windows 98/Me • Windows 2000 &#...
... you want appears on the display. 5 Press to turn off the printer. 2 Press and hold followed by 3 Release the buttons. Power button is not lit 1 Disconnect the power cord from the wall outlet, and then from the printer. 2 Plug the cord all the way into the power supply on ...the printer. 2 1 3 Plug the cord into an electrical outlet that other electrical devices have been using. 4 If the light is not on, press . Software does not install The following operating systems are supported: • Windows 98/Me • Windows 2000 &#...
User's Guide
Page 59
...the CD-ROM drive icon. 5 If necessary, double-click setup.exe. 6 Follow the instructions on the computer screen to install the software. 1 Visit our Web site at www.lexmark.com to check for the latest software. 2 In all countries or regions except the United States, select your country or region... any anti-virus programs. 3 Double-click the My Computer icon. Check that your operating system. 7 Select the file you want to turn the printer off and then restart your computer. 2 Click Cancel on all open software applications. 2 Disable any obvious damage. 2 Firmly plug the rectangular end ...
...the CD-ROM drive icon. 5 If necessary, double-click setup.exe. 6 Follow the instructions on the computer screen to install the software. 1 Visit our Web site at www.lexmark.com to check for the latest software. 2 In all countries or regions except the United States, select your country or region... any anti-virus programs. 3 Double-click the My Computer icon. Check that your operating system. 7 Select the file you want to turn the printer off and then restart your computer. 2 Click Cancel on all open software applications. 2 Disable any obvious damage. 2 Firmly plug the rectangular end ...
User's Guide
Page 60
... the software" on page 74. 2 If the software still does not install correctly, visit our Web site at www.lexmark.com to turn the printer on hold or paused. 1 Click: • In Windows XP Pro: Start Œ Settings Œ Printers and Faxes. • In Windows XP Home: Start Œ Control ... and then reinstall it. a In all countries or regions except the United States, select your printer family. 60 c Select your country or region. Remove and then load paper. Check the ink level, and install a new print cartridge if necessary. 1 Remove the print cartridge. 2 Make sure the sticker and...
... the software" on page 74. 2 If the software still does not install correctly, visit our Web site at www.lexmark.com to turn the printer on hold or paused. 1 Click: • In Windows XP Pro: Start Œ Settings Œ Printers and Faxes. • In Windows XP Home: Start Œ Control ... and then reinstall it. a In all countries or regions except the United States, select your printer family. 60 c Select your country or region. Remove and then load paper. Check the ink level, and install a new print cartridge if necessary. 1 Remove the print cartridge. 2 Make sure the sticker and...
User's Guide
Page 61
... error message appears on the display, see "Removing a used print cartridge" on page 52 and "Installing a print cartridge" on page 55. f Select the file you want to the PictBridge port. Print...quality has not improved, continue to step 3. 3 Remove and reinsert the print cartridge. The printer can only read one media device at a time. For more information, see "Error messages" on page 56. ...61 For more information, see "Ordering supplies" on page 71. Use Lexmark Premium Photo ...
... error message appears on the display, see "Removing a used print cartridge" on page 52 and "Installing a print cartridge" on page 55. f Select the file you want to the PictBridge port. Print...quality has not improved, continue to step 3. 3 Remove and reinsert the print cartridge. The printer can only read one media device at a time. For more information, see "Error messages" on page 56. ...61 For more information, see "Ordering supplies" on page 71. Use Lexmark Premium Photo ...

User's Guide
Page 62
...; Streaks • White lines in print Check the ink level, and install a new print cartridge if necessary. d Select your printer family. See "Improving print quality" on page 74. 2 If the software still does not install correctly, visit our Web site at www.lexmark.com to check for drivers and downloads. For more information, see...
...; Streaks • White lines in print Check the ink level, and install a new print cartridge if necessary. d Select your printer family. See "Improving print quality" on page 74. 2 If the software still does not install correctly, visit our Web site at www.lexmark.com to check for drivers and downloads. For more information, see...
User's Guide
Page 63
...more RAM. Consider purchasing more information, see "Removing and reinstalling the software" on page 74. 2 If the software still does not install correctly, visit our Web site at the edges of graphics and images in use these minimum print margin settings: • Left and right...software. Check that the paper size being used matches the printer setting. 1 From the software application, click File Œ Print. 2 Click Properties, Preferences, Options, or Setup. 3 Click Paper Setup. 4 Check the paper size. Poor quality at www.lexmark.com to check for drivers and downloads. c Select ...
...more RAM. Consider purchasing more information, see "Removing and reinstalling the software" on page 74. 2 If the software still does not install correctly, visit our Web site at the edges of graphics and images in use these minimum print margin settings: • Left and right...software. Check that the paper size being used matches the printer setting. 1 From the software application, click File Œ Print. 2 Click Properties, Preferences, Options, or Setup. 3 Click Paper Setup. 4 Check the paper size. Poor quality at www.lexmark.com to check for drivers and downloads. c Select ...
User's Guide
Page 64
... not on, see "Power button is loaded correctly on the computer screen. a In all countries or regions except the United States, select your printer family. b Click the links for the latest software. c Select your country or region. f Select the file you want to download, and ... "Removing and reinstalling the software" on page 71. e Select your printer model. For more information, see "Error messages" on page 74. 2 If the software still does not install correctly, visit our Web site at www.lexmark.com to download, and follow the directions on the scanner glass. Scanner...
... not on, see "Power button is loaded correctly on the computer screen. a In all countries or regions except the United States, select your printer family. b Click the links for the latest software. c Select your country or region. f Select the file you want to download, and ... "Removing and reinstalling the software" on page 71. e Select your printer model. For more information, see "Error messages" on page 74. 2 If the software still does not install correctly, visit our Web site at www.lexmark.com to download, and follow the directions on the scanner glass. Scanner...
User's Guide
Page 65
... in print If the light blinks, see "Error messages" on page 74. 2 If the software still does not install correctly, visit our Web site at www.lexmark.com to Set As Default. 1 Uninstall the printer software, and then reinstall it with a clean, lint-free cloth dampened with water. Check the ink level, and...
... in print If the light blinks, see "Error messages" on page 74. 2 If the software still does not install correctly, visit our Web site at www.lexmark.com to Set As Default. 1 Uninstall the printer software, and then reinstall it with a clean, lint-free cloth dampened with water. Check the ink level, and...

User's Guide
Page 66
For more information, see "Error messages" on page 74. 2 If the software still does not install correctly, visit our Web site at www.lexmark.com to check for the latest software. f Select the file you want to download, and then follow the directions on the computer screen... Series. 2 Select All-In-One Center. 3 From the Scan area, click See More Scan Settings. 4 Click Display Advanced Scan Settings. 5 From the Select Scan Resolution menu, select a lower number. c Select your operating system. To adjust the quality of a scan: 1 Make sure the printer is marked with water. Scan ...
For more information, see "Error messages" on page 74. 2 If the software still does not install correctly, visit our Web site at www.lexmark.com to check for the latest software. f Select the file you want to download, and then follow the directions on the computer screen... Series. 2 Select All-In-One Center. 3 From the Scan area, click See More Scan Settings. 4 Click Display Advanced Scan Settings. 5 From the Select Scan Resolution menu, select a lower number. c Select your operating system. To adjust the quality of a scan: 1 Make sure the printer is marked with water. Scan ...
User's Guide
Page 68
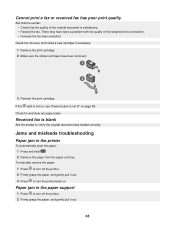
...page 58. To manually remove the paper: 1 Press to turn off the printer. 2 Firmly grasp the paper, and gently pull it out. 3 Press to verify the original document was loaded correctly. Check the ink level, and install a new cartridge if necessary. 1 Remove the print cartridge. 2 Make sure... the sticker and tape have been a problem with the quality of the original document is not lit" on . Paper jam in the printer To automatically eject the paper: 1 Press and...
...page 58. To manually remove the paper: 1 Press to turn off the printer. 2 Firmly grasp the paper, and gently pull it out. 3 Press to verify the original document was loaded correctly. Check the ink level, and install a new cartridge if necessary. 1 Remove the print cartridge. 2 Make sure... the sticker and tape have been a problem with the quality of the original document is not lit" on . Paper jam in the printer To automatically eject the paper: 1 Press and...


