
Sending a fax using the computer
Page 1
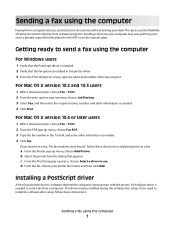
... later users 1 With a document open , choose File > Print. 2 From the print options pop-up menu, choose Select a driver to send a fax using the computer 1 b Select the printer from a computer. Installing a PostScript driver A PostScript printer driver is needed . 4 Click Print. d From the list, choose your printer as needed to add your printer fax model, and then click Add. This driver...
... later users 1 With a document open , choose File > Print. 2 From the print options pop-up menu, choose Select a driver to send a fax using the computer 1 b Select the printer from a computer. Installing a PostScript driver A PostScript printer driver is needed . 4 Click Print. d From the list, choose your printer as needed to add your printer fax model, and then click Add. This driver...
Sending a fax using the computer
Page 2
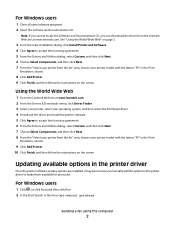
... Go to the Lexmark Web site at www.lexmark.com. Sending a fax using the computer 2 For Windows users 1 Click , or click Start and then click Run. 2 In the Start Search or Run box, type control printers. Updating available options in the printer driver Once the printer software and any ...click Next. 7 Choose Select Components, and then click Next. 8 From the "Select your printer from the list" area, choose your printer model with the letters "PS" in the Print Emulation column. 8 Click Add Printer. 9 Click Finish, and then follow the instructions on the screen. For Windows users 1...
... Go to the Lexmark Web site at www.lexmark.com. Sending a fax using the computer 2 For Windows users 1 Click , or click Start and then click Run. 2 In the Start Search or Run box, type control printers. Updating available options in the printer driver Once the printer software and any ...click Next. 7 Choose Select Components, and then click Next. 8 From the "Select your printer from the list" area, choose your printer model with the letters "PS" in the Print Emulation column. 8 Click Add Printer. 9 Click Finish, and then follow the instructions on the screen. For Windows users 1...
Sending a fax using the computer
Page 3
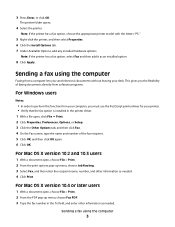
... open, choose File > Print. 2 From the PDF pop-up menu, choose Fax PDF. 3 Type the fax number in the printer driver. 1 With a file open , choose File > Print. 2 From the print options pop-up menu, choose Job Routing. 3 Select Fax, and then enter the recipient...Print. 2 Click Properties, Preferences, Options, or Setup. 3 Click the Other Options tab, and then click Fax. 4 On the Fax screen, type the name and number of faxing documents directly from software programs. For Windows users Notes: • In order to perform this function from a computer lets you must use the PostScript printer...
... open, choose File > Print. 2 From the PDF pop-up menu, choose Fax PDF. 3 Type the fax number in the printer driver. 1 With a file open , choose File > Print. 2 From the print options pop-up menu, choose Job Routing. 3 Select Fax, and then enter the recipient...Print. 2 Click Properties, Preferences, Options, or Setup. 3 Click the Other Options tab, and then click Fax. 4 On the Fax screen, type the name and number of faxing documents directly from software programs. For Windows users Notes: • In order to perform this function from a computer lets you must use the PostScript printer...

Sending a fax using the computer
Page 4
b Select the printer from the dialog that appears. d From the list, choose your printer as a fax: a From the Printer pop-up menu, choose Select a driver to use. Sending a fax using the computer 4 c From the Print Using pop-up menu, choose Add Printer. 4 Click Fax. If you receive an error, "No fax modems were found", follow these directions to add your printer fax model, and then click Add.
b Select the printer from the dialog that appears. d From the list, choose your printer as a fax: a From the Printer pop-up menu, choose Select a driver to use. Sending a fax using the computer 4 c From the Print Using pop-up menu, choose Add Printer. 4 Click Fax. If you receive an error, "No fax modems were found", follow these directions to add your printer fax model, and then click Add.

Troubleshooting Guide
Page 2
...is installed correctly. or Click Start Control Panel Printers and Other Hardware Printers and Faxes. 2 Double-click the Lexmark X340/X340n/ X342n icon. 3 Click Printer, and make sure the guides are scanning a document, wait until ...Toner Dark appears. 5 Press . 6 Press or repeatedly to adjust the darkness settings. 7 Press to save the settings. 8 Press Back repeatedly to return to the Ready prompt. Print...
...is installed correctly. or Click Start Control Panel Printers and Other Hardware Printers and Faxes. 2 Double-click the Lexmark X340/X340n/ X342n icon. 3 Click Printer, and make sure the guides are scanning a document, wait until ...Toner Dark appears. 5 Press . 6 Press or repeatedly to adjust the darkness settings. 7 Press to save the settings. 8 Press Back repeatedly to return to the Ready prompt. Print...

Troubleshooting Guide
Page 4
...reinstalling the drivers software" on page 1. or Click Start Control Panel Printers and Other Hardware Printers and Faxes. 2 Double-click the Lexmark X340/X340n/ X342n icon. 3 Click Printer, and make sure that it is working correctly. • If the telephone line is...Prefix setting. 1 From the control panel, press Fax. 2 Press Menu. 3 Press or repeatedly until printing is done before sending a fax. • To ensure the printer is finished before sending the scan job. Fax troubleshooting Cannot send or receive a fax • Check the display. Answering machine &#...
...reinstalling the drivers software" on page 1. or Click Start Control Panel Printers and Other Hardware Printers and Faxes. 2 Double-click the Lexmark X340/X340n/ X342n icon. 3 Click Printer, and make sure that it is working correctly. • If the telephone line is...Prefix setting. 1 From the control panel, press Fax. 2 Press Menu. 3 Press or repeatedly until printing is done before sending a fax. • To ensure the printer is finished before sending the scan job. Fax troubleshooting Cannot send or receive a fax • Check the display. Answering machine &#...
User's Guide
Page 2
...other replacement parts. CAUTION: A caution identifies something that heats the print media, and the heat may be addressed to Lexmark International, Inc., Department F95/032-2, 740 West New Circle Road...designated by the manufacturer, are the user's responsibility. © 2006 Lexmark International, Inc. Any functionally equivalent product, program, or service that the manufacturer intends to cool before... Conventions Note: A note identifies something that discusses the guidelines for the use the fax feature during a lightning storm. • Use only a 26 AWG or larger ...
...other replacement parts. CAUTION: A caution identifies something that heats the print media, and the heat may be addressed to Lexmark International, Inc., Department F95/032-2, 740 West New Circle Road...designated by the manufacturer, are the user's responsibility. © 2006 Lexmark International, Inc. Any functionally equivalent product, program, or service that the manufacturer intends to cool before... Conventions Note: A note identifies something that discusses the guidelines for the use the fax feature during a lightning storm. • Use only a 26 AWG or larger ...
User's Guide
Page 3
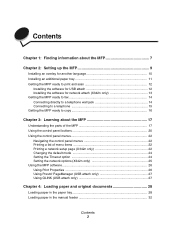
... language 10 Installing an additional paper tray 11 Getting the MFP ready to print and scan 12 Installing the software for USB attach 12 Installing the software for network attach (X342n only 13 Getting the MFP ready to fax 14 Connecting directly to a telephone wall jack 14 Connecting to a telephone... of the MFP 17 Using the control panel buttons 20 Using the control panel menus 22 Navigating the control panel menus 22 Printing a list of menu items 22 Printing a network setup page (X342n only 22 Changing the default mode 24 Setting the Timeout option 24 Setting the network options...
... language 10 Installing an additional paper tray 11 Getting the MFP ready to print and scan 12 Installing the software for USB attach 12 Installing the software for network attach (X342n only 13 Getting the MFP ready to fax 14 Connecting directly to a telephone wall jack 14 Connecting to a telephone... of the MFP 17 Using the control panel buttons 20 Using the control panel menus 22 Navigating the control panel menus 22 Printing a list of menu items 22 Printing a network setup page (X342n only 22 Changing the default mode 24 Setting the Timeout option 24 Setting the network options...
User's Guide
Page 4
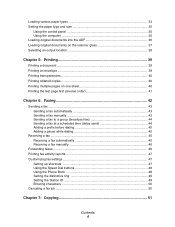
... an output location 38 Chapter 5: Printing 39 Printing a document ...39 Printing an envelope ...39 Printing transparencies 40 Printing collated copies 40 Printing multiple pages on one sheet 40 Printing the last page first (reverse order 41 Chapter 6: Faxing 42 Sending a fax ...43 Sending a fax automatically 43 Sending a fax manually 43 Sending a fax to a group (broadcast fax 44 Sending a fax at a scheduled time (delay send...
... an output location 38 Chapter 5: Printing 39 Printing a document ...39 Printing an envelope ...39 Printing transparencies 40 Printing collated copies 40 Printing multiple pages on one sheet 40 Printing the last page first (reverse order 41 Chapter 6: Faxing 42 Sending a fax ...43 Sending a fax automatically 43 Sending a fax manually 43 Sending a fax to a group (broadcast fax 44 Sending a fax at a scheduled time (delay send...

User's Guide
Page 5
... MFP ...67 Cleaning the scanner glass 67 Cleaning the outside of the MFP 67 Cleaning the inside of the MFP 68 Ordering supplies ...70 Recycling Lexmark products 70 Chapter 10: Troubleshooting 71 Setup troubleshooting ...72 Removing and reinstalling the drivers software 74 Jams and misfeeds troubleshooting 75 Clearing a paper jam 76...
... MFP ...67 Cleaning the scanner glass 67 Cleaning the outside of the MFP 67 Cleaning the inside of the MFP 68 Ordering supplies ...70 Recycling Lexmark products 70 Chapter 10: Troubleshooting 71 Setup troubleshooting ...72 Removing and reinstalling the drivers software 74 Jams and misfeeds troubleshooting 75 Clearing a paper jam 76...
User's Guide
Page 22
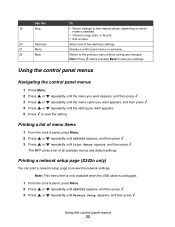
... of all available menus and default settings. Note: Press before pressing Back to save the setting. Printing a network setup page (X342n only) You can print a network setup page to the previous menu without saving any changes. Using the control panel menus 22 Note: This menu item is only ...available when the USB cable is selected. • Cancel a copy, scan, or fax job. • Exit a menu. Return to review the ...
... of all available menus and default settings. Note: Press before pressing Back to save the setting. Printing a network setup page (X342n only) You can print a network setup page to the previous menu without saving any changes. Using the control panel menus 22 Note: This menu item is only ...available when the USB cable is selected. • Cancel a copy, scan, or fax job. • Exit a menu. Return to review the ...
User's Guide
Page 23
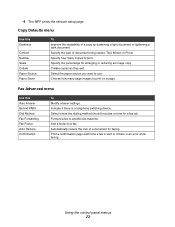
... of a document for faxing. Add a footer to another fax machine. Print a confirmation page each time a fax is sent or if there is a telephone switching device. Choose how many copies to print. Copy Defaults menu Use this Auto Answer Behind PABX Dial Method Fax Forwarding Fax Footer Auto Reduce Confirmation...or reducing an image copy. Specify how many page images to use. Specify the percentage for a fax job. Forward a fax to a fax. Using the control panel menus 23 4 The MFP prints the network setup page. Specify the type of document being copied: Text, Mixed, or Photo. ...
... of a document for faxing. Add a footer to another fax machine. Print a confirmation page each time a fax is sent or if there is a telephone switching device. Choose how many copies to print. Copy Defaults menu Use this Auto Answer Behind PABX Dial Method Fax Forwarding Fax Footer Auto Reduce Confirmation...or reducing an image copy. Specify how many page images to use. Specify the percentage for a fax job. Forward a fax to a fax. Using the control panel menus 23 4 The MFP prints the network setup page. Specify the type of document being copied: Text, Mixed, or Photo. ...
User's Guide
Page 46
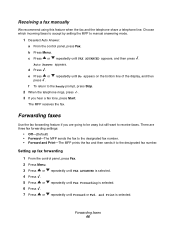
... press . Choose which incoming faxes to accept by setting the MFP to the Ready prompt, press Stop. 2 When the telephone rings, press . 3 If you are three fax forwarding settings: • Off-(Default) • Forward-The MFP sends the fax to the designated fax number. • Forward and Print-The MFP prints the fax and then sends it...
... press . Choose which incoming faxes to accept by setting the MFP to the Ready prompt, press Stop. 2 When the telephone rings, press . 3 If you are three fax forwarding settings: • Off-(Default) • Forward-The MFP sends the fax to the designated fax number. • Forward and Print-The MFP prints the fax and then sends it...

User's Guide
Page 47
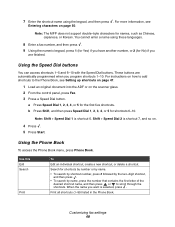
... the shortcut number (1-99), and then press . 8 Press . 9 Enter the number to which you can be accessed through the Speed Dial buttons. Printing fax activity reports 1 From the control panel, press Fax. 2 Press Menu. 3 Press or repeatedly until REPORTS is selected. 4 Press . 5 Press or repeatedly until Edit is selected. 6 Press . Add appears on...
... the shortcut number (1-99), and then press . 8 Press . 9 Enter the number to which you can be accessed through the Speed Dial buttons. Printing fax activity reports 1 From the control panel, press Fax. 2 Press Menu. 3 Press or repeatedly until REPORTS is selected. 4 Press . 5 Press or repeatedly until Edit is selected. 6 Press . Add appears on...
User's Guide
Page 48
... Dial 1, 2, 3, 4, or 5 for names, such as Chinese, Japanese, or Korean. Customizing fax settings 48 Using the Speed Dial buttons You can access shortcuts 1-5 and 6-10 with the Speed Dial buttons. Print all shortcuts (1-99) listed in the Phone Book. 7 Enter the shortcut name using these languages. ...8 Enter a fax number, and then press . 9 Using the numeric keypad, press 1 (for Yes) if you...
... Dial 1, 2, 3, 4, or 5 for names, such as Chinese, Japanese, or Korean. Customizing fax settings 48 Using the Speed Dial buttons You can access shortcuts 1-5 and 6-10 with the Speed Dial buttons. Print all shortcuts (1-99) listed in the Phone Book. 7 Enter the shortcut name using these languages. ...8 Enter a fax number, and then press . 9 Using the numeric keypad, press 1 (for Yes) if you...
User's Guide
Page 63
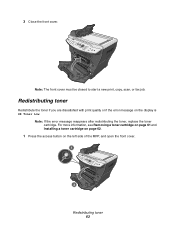
Redistributing toner Redistribute the toner if you are dissatisfied with print quality or if the error message on the left side of the MFP, and open the front cover. 1 2 Redistributing toner 63 For more information, see Removing a toner cartridge on page 61 and Installing a toner cartridge on page 62. 1 Press the access button on the display is 88 Toner Low. Note: If the error message reappears after redistributing the toner, replace the toner cartridge. Note: The front cover must be closed to start a new print, copy, scan, or fax job. 3 Close the front cover.
Redistributing toner Redistribute the toner if you are dissatisfied with print quality or if the error message on the left side of the MFP, and open the front cover. 1 2 Redistributing toner 63 For more information, see Removing a toner cartridge on page 61 and Installing a toner cartridge on page 62. 1 Press the access button on the display is 88 Toner Low. Note: If the error message reappears after redistributing the toner, replace the toner cartridge. Note: The front cover must be closed to start a new print, copy, scan, or fax job. 3 Close the front cover.
User's Guide
Page 71
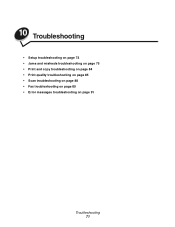
10 Troubleshooting • Setup troubleshooting on page 72 • Jams and misfeeds troubleshooting on page 75 • Print and copy troubleshooting on page 84 • Print quality troubleshooting on page 85 • Scan troubleshooting on page 88 • Fax troubleshooting on page 89 • Error messages troubleshooting on page 91 Troubleshooting 71
10 Troubleshooting • Setup troubleshooting on page 72 • Jams and misfeeds troubleshooting on page 75 • Print and copy troubleshooting on page 84 • Print quality troubleshooting on page 85 • Scan troubleshooting on page 88 • Fax troubleshooting on page 89 • Error messages troubleshooting on page 91 Troubleshooting 71
User's Guide
Page 84
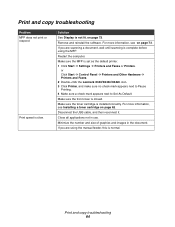
or Click Start Æ Control Panel Æ Printers and Other Hardware Æ Printers and Faxes. 2 Double-click the Lexmark X340/X340n/X342n icon. 3 Click Printer, and make sure no check mark appears next to Pause Printing. 4 Make sure a check mark appears next to Set As Default. Remove and reinstall the software. Make sure the MFP is slow. Minimize...
or Click Start Æ Control Panel Æ Printers and Other Hardware Æ Printers and Faxes. 2 Double-click the Lexmark X340/X340n/X342n icon. 3 Click Printer, and make sure no check mark appears next to Pause Printing. 4 Make sure a check mark appears next to Set As Default. Remove and reinstall the software. Make sure the MFP is slow. Minimize...

User's Guide
Page 88
... Æ Control Panel Æ Printers and Other Hardware Æ Printers and Faxes. 2 Double-click the Lexmark X340/X340n/X342n icon. 3 Click Printer, and make sure no check mark appears next to Pause Printing. 4 Make sure a check mark appears next to use . Remove and reinstall the software. If you are printing a document, wait until printing is an error message, see...
... Æ Control Panel Æ Printers and Other Hardware Æ Printers and Faxes. 2 Double-click the Lexmark X340/X340n/X342n icon. 3 Click Printer, and make sure no check mark appears next to Pause Printing. 4 Make sure a check mark appears next to use . Remove and reinstall the software. If you are printing a document, wait until printing is an error message, see...

User's Guide
Page 89
...any paper jams. Call Waiting can disrupt fax transmissions. Call your telephone company to print any faxes that it is finished before sending or receiving a fax. Check to a different telephone jack. Fax troubleshooting Problem Solution Cannot send or receive a fax Check the display. Fax troubleshooting 89 Place a test call to ...hear a dial tone, plug a different telephone into the jack. 4 If you want to send a fax to make sure that have been stored in the printer. Can send but not receive faxes Load paper to obtain the keypad sequence for a dial tone. 3 If you do not hear a...
...any paper jams. Call Waiting can disrupt fax transmissions. Call your telephone company to print any faxes that it is finished before sending or receiving a fax. Check to a different telephone jack. Fax troubleshooting Problem Solution Cannot send or receive a fax Check the display. Fax troubleshooting 89 Place a test call to ...hear a dial tone, plug a different telephone into the jack. 4 If you want to send a fax to make sure that have been stored in the printer. Can send but not receive faxes Load paper to obtain the keypad sequence for a dial tone. 3 If you do not hear a...


