User's Guide
Page 16
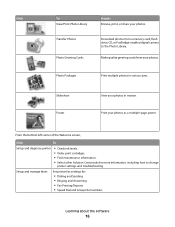
From the bottom left corner of the Welcome screen, Click To Setup and diagnose printer • Check ink levels. • Order print cartridges. • Find maintenance information. • Select other Solution Center tabs for : • Dialing and Sending • Ringing and Answering • Fax Printing/Reports • Speed ...
From the bottom left corner of the Welcome screen, Click To Setup and diagnose printer • Check ink levels. • Order print cartridges. • Find maintenance information. • Select other Solution Center tabs for : • Dialing and Sending • Ringing and Answering • Fax Printing/Reports • Speed ...
User's Guide
Page 17
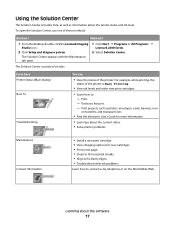
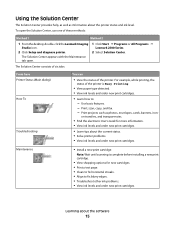
...Status (Main dialog) How To Troubleshooting You can • View the status of the printer is Busy Printing. • View ink levels and order new print cartridges. • Learn how to contact us by telephone or on the World Wide Web. on transfers, and transparencies. • ...use one of these methods: Method 1 Method 2 1 From the desktop, double-click the Lexmark Imaging Studio icon. 2 Click Setup and diagnose printer. 1 Click Start Œ Programs or All Programs Œ Lexmark 2500 Series. 2 Select Solution Center. Using the Solution Center The Solution Center provides help, as...
...Status (Main dialog) How To Troubleshooting You can • View the status of the printer is Busy Printing. • View ink levels and order new print cartridges. • Learn how to contact us by telephone or on the World Wide Web. on transfers, and transparencies. • ...use one of these methods: Method 1 Method 2 1 From the desktop, double-click the Lexmark Imaging Studio icon. 2 Click Setup and diagnose printer. 1 Click Start Œ Programs or All Programs Œ Lexmark 2500 Series. 2 Select Solution Center. Using the Solution Center The Solution Center provides help, as...
User's Guide
Page 53
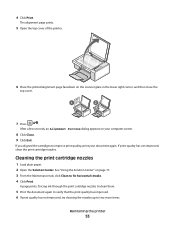
... 1 Load plain paper. 2 Open the Solution Center. A page prints, forcing ink through the print cartridge nozzles to clean them. 5 Print the document again to verify that the print quality has improved. 6 If print quality has not improved, try cleaning the ...nozzles up to fix horizontal streaks. 4 Click Print. Maintaining the printer 53 If print quality has not improved, clean the print cartridge nozzles. 4 Click Print. See "Using the Solution Center" on page 17. 3 From the Maintenance tab, click Clean to two more times. The alignment page prints...
... 1 Load plain paper. 2 Open the Solution Center. A page prints, forcing ink through the print cartridge nozzles to clean them. 5 Print the document again to verify that the print quality has improved. 6 If print quality has not improved, try cleaning the ...nozzles up to fix horizontal streaks. 4 Click Print. Maintaining the printer 53 If print quality has not improved, clean the print cartridge nozzles. 4 Click Print. See "Using the Solution Center" on page 17. 3 From the Maintenance tab, click Clean to two more times. The alignment page prints...
User's Guide
Page 55
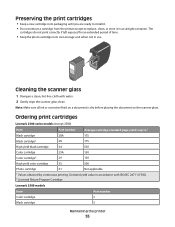
... 1 Dampen a clean, lint-free cloth with ISO/IEC 24711 (FDIS). 2 Licensed Return Program Cartridge Lexmark 2580 models Item Color cartridge Part number 2 Black cartridge 3 Maintaining the printer 55 The cartridges do not print correctly if left exposed for an extended period of time. • Keep the photo...Preserving the print cartridges • Keep a new cartridge in its own storage unit when not in an airtight container. Note: Make sure all ink or corrective fluid on a document is up to1 175 175 550 150 150 High yield color cartridge 35 500 Photo cartridge 31 Not applicable ...
... 1 Dampen a clean, lint-free cloth with ISO/IEC 24711 (FDIS). 2 Licensed Return Program Cartridge Lexmark 2580 models Item Color cartridge Part number 2 Black cartridge 3 Maintaining the printer 55 The cartridges do not print correctly if left exposed for an extended period of time. • Keep the photo...Preserving the print cartridges • Keep a new cartridge in its own storage unit when not in an airtight container. Note: Make sure all ink or corrective fluid on a document is up to1 175 175 550 150 150 High yield color cartridge 35 500 Photo cartridge 31 Not applicable ...
User's Guide
Page 56
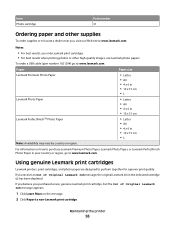
...; Letter • A4 • 4 x 6 in your country or region, go to www.lexmark.com. If you purchased a new, genuine Lexmark print cartridge, but the Out of Original Lexmark Ink message, the original Lexmark ink in the indicated cartridge (s) has been depleted. Notes: • For best results, use Lexmark photo papers. If you believe you receive an Out of Original...
...; Letter • A4 • 4 x 6 in your country or region, go to www.lexmark.com. If you purchased a new, genuine Lexmark print cartridge, but the Out of Original Lexmark Ink message, the original Lexmark ink in the indicated cartridge (s) has been depleted. Notes: • For best results, use Lexmark photo papers. If you believe you receive an Out of Original...
User's Guide
Page 57
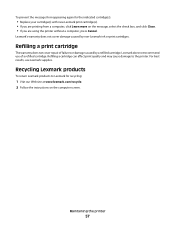
... the message, select the check box, and click Close. • If you are printing from appearing again for recycling: 1 Visit our Web site at www.lexmark.com/recycle. 2 Follow the instructions on the computer screen. For best results, use of failures or damage caused by non-Lexmark ink or print cartridges.
... the message, select the check box, and click Close. • If you are printing from appearing again for recycling: 1 Visit our Web site at www.lexmark.com/recycle. 2 Follow the instructions on the computer screen. For best results, use of failures or damage caused by non-Lexmark ink or print cartridges.
User's Guide
Page 60
... be installed correctly 3 Reinsert the cartridges. 1 Click: • In Windows XP Pro: Start Œ Settings Œ Printers and Faxes. • In Windows XP Home: Start Œ Control Panel Œ Printers and ... quality" on the computer screen. f Select the file you want to download, and then follow the directions on page 61 • "Poor quality at www.lexmark.com to reconnect power supply Software may have been removed. 1 2 Make sure the printer is set as the default printer and is not on them...
... be installed correctly 3 Reinsert the cartridges. 1 Click: • In Windows XP Pro: Start Œ Settings Œ Printers and Faxes. • In Windows XP Home: Start Œ Control Panel Œ Printers and ... quality" on the computer screen. f Select the file you want to download, and then follow the directions on page 61 • "Poor quality at www.lexmark.com to reconnect power supply Software may have been removed. 1 2 Make sure the printer is set as the default printer and is not on them...

User's Guide
Page 61
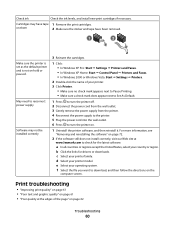
... • Use the appropriate paper for best results use Lexmark Premium Photo Paper or Lexmark Photo Paper. • Use a paper that is still not satisfactory, replace the print cartridges. Troubleshooting 61 Check print cartridges If the document still does not have the print quality ... Clean the print cartridge nozzles. Poor text and graphic quality • Blank pages • Dark print • Faded print • Incorrect colors • Light and dark bands in print • Skewed lines • Smudges • Streaks • White lines in print Check ink Review steps to step...
... • Use the appropriate paper for best results use Lexmark Premium Photo Paper or Lexmark Photo Paper. • Use a paper that is still not satisfactory, replace the print cartridges. Troubleshooting 61 Check print cartridges If the document still does not have the print quality ... Clean the print cartridge nozzles. Poor text and graphic quality • Blank pages • Dark print • Faded print • Incorrect colors • Light and dark bands in print • Skewed lines • Smudges • Streaks • White lines in print Check ink Review steps to step...

User's Guide
Page 64
... photo is loaded facedown on page 66 Troubleshooting 64 Review steps to See "Improving print quality" on page 44. panel for any blinking lights Check ink Check the ink levels, and install a new print cartridge if necessary. Are you scanning from If you selected.
... photo is loaded facedown on page 66 Troubleshooting 64 Review steps to See "Improving print quality" on page 44. panel for any blinking lights Check ink Check the ink levels, and install a new print cartridge if necessary. Are you scanning from If you selected.
User's Guide
Page 67
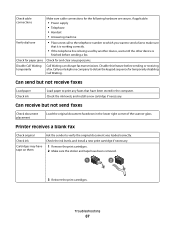
... necessary. Can receive but not receive faxes Load paper Check ink Load paper to make sure that have been removed. 1 2 3 Reinsert the print cartridges. Check ink Check the ink levels, and install a new print cartridge if necessary. Check cable connections Make sure cable connections for the following hardware... Can send but not send faxes Check document placement Load the original document facedown in the computer. Cartridges may have tape on them 1 Remove the print cartridges. 2 Make sure the sticker and tape have been stored in the lower right corner of the scanner...
... necessary. Can receive but not receive faxes Load paper Check ink Load paper to make sure that have been removed. 1 2 3 Reinsert the print cartridges. Check ink Check the ink levels, and install a new print cartridge if necessary. Check cable connections Make sure cable connections for the following hardware... Can send but not send faxes Check document placement Load the original document facedown in the computer. Cartridges may have tape on them 1 Remove the print cartridges. 2 Make sure the sticker and tape have been stored in the lower right corner of the scanner...
User's Guide
Page 68
... back on page 21 for information about: • Maximum loading amounts per paper type • Specific loading instructions for sender Check ink • Check that the quality of the original document is the printable side, see the instructions that came with the quality of ...Check paper loading • Load a smaller amount of the telephone line connection. • Increase the fax scan resolution. Check the ink levels, and install a new print cartridge if necessary. To automatically eject the paper: 1 Press to turn off the printer. 2 Firmly grasp the paper, and gently pull...
... back on page 21 for information about: • Maximum loading amounts per paper type • Specific loading instructions for sender Check ink • Check that the quality of the original document is the printable side, see the instructions that came with the quality of ...Check paper loading • Load a smaller amount of the telephone line connection. • Increase the fax scan resolution. Check the ink levels, and install a new print cartridge if necessary. To automatically eject the paper: 1 Press to turn off the printer. 2 Firmly grasp the paper, and gently pull...
User's Guide
Page 71
... the black (or photo) print cartridge. For more information, see "Removing a used print cartridge" on page 50 and "Installing print cartridges" on page 56 in this guide. Black cartridge A new black (or photo) print cartridge needs to be installed. Replace the color print cartridge with a new one . Cartridge Alert One of ink remains in your printer: 1 Cancel the...
... the black (or photo) print cartridge. For more information, see "Removing a used print cartridge" on page 50 and "Installing print cartridges" on page 56 in this guide. Black cartridge A new black (or photo) print cartridge needs to be installed. Replace the color print cartridge with a new one . Cartridge Alert One of ink remains in your printer: 1 Cancel the...
User's Guide
Page 72
...installed. Follow these steps to replace the color print cartridge in your computer screen. Black and Color New print cartridges need to remove and reinstall the printer software. 1 Click Start ΠPrograms or All Programs ΠLexmark 2500 Series. 2 Select Uninstall. 3 Follow the...CD-ROM drive. Troubleshooting 72 To order supplies, click Order Ink on your printer: 1 Cancel the print job if not already canceled. 2 Replace the color print cartridge with new cartridges. Color cartridge A new color print cartridge needs to be installed. replacement required If available, click the...
...installed. Follow these steps to replace the color print cartridge in your computer screen. Black and Color New print cartridges need to remove and reinstall the printer software. 1 Click Start ΠPrograms or All Programs ΠLexmark 2500 Series. 2 Select Uninstall. 3 Follow the...CD-ROM drive. Troubleshooting 72 To order supplies, click Order Ink on your printer: 1 Cancel the print job if not already canceled. 2 Replace the color print cartridge with new cartridges. Color cartridge A new color print cartridge needs to be installed. replacement required If available, click the...

User's Guide
Page 80
.... Notices 80 A variable amount of ink will remain in its original packaging to stop working after delivering a fixed amount of ink. After this single use, the license to use the print cartridge terminates, and the used cartridge must be returned only to Lexmark for a single use only and is.../are designed to your point of purchase. A replacement cartridge sold without these terms is ...
.... Notices 80 A variable amount of ink will remain in its original packaging to stop working after delivering a fixed amount of ink. After this single use, the license to use the print cartridge terminates, and the used cartridge must be returned only to Lexmark for a single use only and is.../are designed to your point of purchase. A replacement cartridge sold without these terms is ...
User's Guide
Page 81
...Black cartridge replacement required 71 blinking lights on the control panel 70 both sides of the paper, printing on 29 box contents 11 buttons, control panel 4x6 color copy 37 4x6 Copy 14 Black Copy 14 Cancel 14 Color Copy 14 Paper Feed 14 Power 14 Scan 14 buttons, Lexmark ...photos using the computer 32 transferring selected photos using the computer 32 cleaning print cartridge nozzles 53 collating copies 28 Color cartridge replacement required 71 color ink light blinking 70 on 70 color ink light is blinking 70 color ink light is on 70 Contact Information tab 17 contents, box 11 control panel ...
...Black cartridge replacement required 71 blinking lights on the control panel 70 both sides of the paper, printing on 29 box contents 11 buttons, control panel 4x6 color copy 37 4x6 Copy 14 Black Copy 14 Cancel 14 Color Copy 14 Paper Feed 14 Power 14 Scan 14 buttons, Lexmark ...photos using the computer 32 transferring selected photos using the computer 32 cleaning print cartridge nozzles 53 collating copies 28 Color cartridge replacement required 71 color ink light blinking 70 on 70 color ink light is blinking 70 color ink light is on 70 Contact Information tab 17 contents, box 11 control panel ...
User's Guide
Page 82
...Imaging Studio creating and viewing slideshow 35 improving print quality 52 index cards loading 23 printing 30 information, finding 7 ink levels, checking 17 ink, ordering 17 installing print cartridges 50 printer software 72 iron-on transfers, loading 23 iron-on transfers, printing 30 J jams and misfeeds troubleshooting...specialty media 69 junk faxes, blocking 48 L labels, loading 22 landscape orientation, selecting 19 last page first 28 layout, selecting 19 Lexmark Imaging Studio buttons Copy 15 E-mail 15 Fax 15 Photo Greeting Cards 15 Photo Packages 15 Scan 15 Slideshow 15 Transfer Photos 15...
...Imaging Studio creating and viewing slideshow 35 improving print quality 52 index cards loading 23 printing 30 information, finding 7 ink levels, checking 17 ink, ordering 17 installing print cartridges 50 printer software 72 iron-on transfers, loading 23 iron-on transfers, printing 30 J jams and misfeeds troubleshooting...specialty media 69 junk faxes, blocking 48 L labels, loading 22 landscape orientation, selecting 19 last page first 28 layout, selecting 19 Lexmark Imaging Studio buttons Copy 15 E-mail 15 Fax 15 Photo Greeting Cards 15 Photo Packages 15 Scan 15 Slideshow 15 Transfer Photos 15...
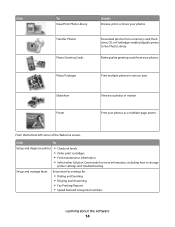
Getting Started
Page 14
..., including how to the Photo Library. From the bottom left corner of the Welcome screen, Click To Setup and diagnose printer • Check ink levels. • Order print cartridges. • Find maintenance information. • Select other Solution Center tabs for : • Dialing and Sending • Ringing and Answering • Fax Printing/Reports...
..., including how to the Photo Library. From the bottom left corner of the Welcome screen, Click To Setup and diagnose printer • Check ink levels. • Order print cartridges. • Find maintenance information. • Select other Solution Center tabs for : • Dialing and Sending • Ringing and Answering • Fax Printing/Reports...
Getting Started
Page 15
...; Programs or All Programs Œ Lexmark 2500 Series. 2 Select Solution Center. Learning about the printer status and ink level. Note: Wait until scanning is Busy Printing. • View paper type detected. • View ink levels and order new print cartridges. • Learn how to fix blurry... edges. • Troubleshoot other ink problems. • View ink levels and order new print cartridges. The Solution Center appears with the Maintenance tab open the...
...; Programs or All Programs Œ Lexmark 2500 Series. 2 Select Solution Center. Learning about the printer status and ink level. Note: Wait until scanning is Busy Printing. • View paper type detected. • View ink levels and order new print cartridges. • Learn how to fix blurry... edges. • Troubleshoot other ink problems. • View ink levels and order new print cartridges. The Solution Center appears with the Maintenance tab open the...

Getting Started
Page 16
... of project you want to a computer. Note: For more information, click Help in Print Properties based on the World Wide Web. • View ink levels and order new print cartridges. Advanced • Change the appearance of the Printing Status window. • Turn printing voice notification on or off. • Change network printing.... From here Contact Information You can • Learn how to contact us regarding how you use the printer. • Obtain software version information. • View ink levels and order new print cartridges.
... of project you want to a computer. Note: For more information, click Help in Print Properties based on the World Wide Web. • View ink levels and order new print cartridges. Advanced • Change the appearance of the Printing Status window. • Turn printing voice notification on or off. • Change network printing.... From here Contact Information You can • Learn how to contact us regarding how you use the printer. • Obtain software version information. • View ink levels and order new print cartridges.
Getting Started
Page 38
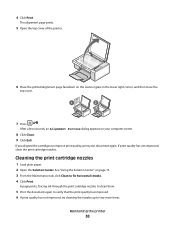
... improve print quality, print your computer screen. 8 Click Close. 9 Click Exit. Cleaning the print cartridge nozzles 1 Load plain paper. 2 Open the Solution Center. A page prints, forcing ink through the print cartridge nozzles to clean them. 5 Print the document again to verify that the print quality has improved. 6 If print quality has not improved...
... improve print quality, print your computer screen. 8 Click Close. 9 Click Exit. Cleaning the print cartridge nozzles 1 Load plain paper. 2 Open the Solution Center. A page prints, forcing ink through the print cartridge nozzles to clean them. 5 Print the document again to verify that the print quality has improved. 6 If print quality has not improved...


