
User's Guide
Page 13
... • Learn how to contact Lexmark by phone, e-mail, or on or off. • Obtain software version information. Move your graphic. Note: For more information, click the Help button located in the lower right corner of the Printing Status window and turn printing voice notification on the... World Wide Web. • Change the appearance of the screen. The Lexmark Photo Editor displays. Lexmark Photo Editor Touch-up tools to edit graphics. Use the touch-up ...
... • Learn how to contact Lexmark by phone, e-mail, or on or off. • Obtain software version information. Move your graphic. Note: For more information, click the Help button located in the lower right corner of the Printing Status window and turn printing voice notification on the... World Wide Web. • Change the appearance of the screen. The Lexmark Photo Editor displays. Lexmark Photo Editor Touch-up tools to edit graphics. Use the touch-up ...
User's Guide
Page 25
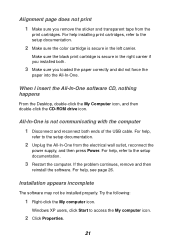
... and then double-click the CD-ROM drive icon. For help , refer to the setup documentation. 2 Unplug the All-In-One from the print cartridges. All-In-One is secure in the left carrier. For help , refer to the setup documentation. 3 Restart the computer. For help installing print... cartridges, refer to access the My computer icon. 2 Click Properties. 21 Windows XP users, click Start to the setup documentation. 2 Make sure the color cartridge is...
... and then double-click the CD-ROM drive icon. For help , refer to the setup documentation. 2 Unplug the All-In-One from the print cartridges. All-In-One is secure in the left carrier. For help , refer to the setup documentation. 3 Restart the computer. For help installing print... cartridges, refer to access the My computer icon. 2 Click Properties. 21 Windows XP users, click Start to the setup documentation. 2 Make sure the color cartridge is...
User's Guide
Page 26
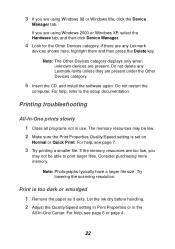
...be able to the setup documentation. Try lowering the scanning resolution. For help , refer to print larger files. If there are any Lexmark items unless they are present under the Other Devices category. 5 Insert the CD, and install the software again. Note: Photographs typically ... For help, see page 7. 3 Try printing a smaller file. Consider purchasing more memory. Printing troubleshooting All-In-One prints slowly 1 Close all programs not in the All-In-One Center. 3 If you are using Windows 98 or Windows Me, click the Device Manager tab. If you are present.
...be able to the setup documentation. Try lowering the scanning resolution. For help , refer to print larger files. If there are any Lexmark items unless they are present under the Other Devices category. 5 Insert the CD, and install the software again. Note: Photographs typically ... For help, see page 7. 3 Try printing a smaller file. Consider purchasing more memory. Printing troubleshooting All-In-One prints slowly 1 Close all programs not in the All-In-One Center. 3 If you are using Windows 98 or Windows Me, click the Device Manager tab. If you are present.
User's Guide
Page 34
... 10 loading 10 paper exit tray 1 Paper Feed button 2 paper guide adjusting 11 Paper Setup tab 7 parts of your All-In-One 1 photo paper 10 photos printing 6 scanning 13 poor quality printing 22 posters printing 6 Power button 2 Preview Now button 13 Preview ...7 Paper Setup tab 7 Print Layout tab 7 Quality/Copies tab 7 Save Settings menu 7 tabs 7 printing 10 banners 6 envelopes 6 photos 6 posters 6 Printing Status window changing appearance of 9 Q Quality/Copies tab 7 R reinstalling software 26 removing software 26 S safety information ii Save Settings menu 7 saved images viewing 5 Scan button 2...
... 10 loading 10 paper exit tray 1 Paper Feed button 2 paper guide adjusting 11 Paper Setup tab 7 parts of your All-In-One 1 photo paper 10 photos printing 6 scanning 13 poor quality printing 22 posters printing 6 Power button 2 Preview Now button 13 Preview ...7 Paper Setup tab 7 Print Layout tab 7 Quality/Copies tab 7 Save Settings menu 7 tabs 7 printing 10 banners 6 envelopes 6 photos 6 posters 6 Printing Status window changing appearance of 9 Q Quality/Copies tab 7 R reinstalling software 26 removing software 26 S safety information ii Save Settings menu 7 saved images viewing 5 Scan button 2...


