
User's Guide
Page 1
Print as book Printer overview Notices Other resources Navigation All rights reserved. Printing Paper handling Maintenance Troubleshooting Administration Index Lexmark T522 Change your language www.lexmark.com Copyright © 2001 Lexmark International, Inc.
Print as book Printer overview Notices Other resources Navigation All rights reserved. Printing Paper handling Maintenance Troubleshooting Administration Index Lexmark T522 Change your language www.lexmark.com Copyright © 2001 Lexmark International, Inc.
User's Guide
Page 3
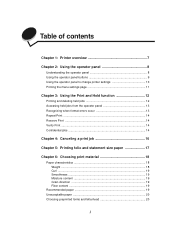
... 7 Chapter 2: Using the operator panel 8 Understanding the operator panel 8 Using the operator panel buttons 9 Using the operator panel to change printer settings 10 Printing the menu settings page 11 Chapter 3: Using the Print and Hold function 12 Printing and deleting held jobs 12 Accessing held jobs ...
... 7 Chapter 2: Using the operator panel 8 Understanding the operator panel 8 Using the operator panel buttons 9 Using the operator panel to change printer settings 10 Printing the menu settings page 11 Chapter 3: Using the Print and Hold function 12 Printing and deleting held jobs 12 Accessing held jobs ...

User's Guide
Page 5
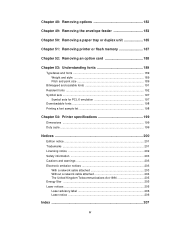
... cartridges 53 Label fuser cleaner 53 Charge roll 53 Transfer roll 54 Fuser assembly 54 Chapter 22: Storing supplies 55 Chapter 23: Checking an unresponsive printer 56 Chapter 24: Clearing paper jams 57 Identifying paper jam areas 57 Accessing paper jam areas 59 200 and 201 Paper Jam Remove Cartridge 59... Jam Check MP Feeder 71 260 Paper Jam Check Env Feeder 71 At entry into the envelope feeder 71 Between the envelope feeder and the printer 72 Chapter 25: Solving display problems 74 Chapter 26: Solving printing problems 75 Chapter 27: Solving print quality problems 77 iii
... cartridges 53 Label fuser cleaner 53 Charge roll 53 Transfer roll 54 Fuser assembly 54 Chapter 22: Storing supplies 55 Chapter 23: Checking an unresponsive printer 56 Chapter 24: Clearing paper jams 57 Identifying paper jam areas 57 Accessing paper jam areas 59 200 and 201 Paper Jam Remove Cartridge 59... Jam Check MP Feeder 71 260 Paper Jam Check Env Feeder 71 At entry into the envelope feeder 71 Between the envelope feeder and the printer 72 Chapter 25: Solving display problems 74 Chapter 26: Solving printing problems 75 Chapter 27: Solving print quality problems 77 iii
User's Guide
Page 7
...fonts 191 Resident fonts 192 Symbol sets ...197 Symbol sets for PCL 6 emulation 197 Downloadable fonts 198 Printing a font sample list 198 Chapter 54: Printer specifications 199 Dimensions ...199 Duty cycle ...199 Notices 200 Edition notice ...201 Trademarks ...201 Licensing notice 202 Safety information 203 Cautions and warnings 203 Electronic... emission notices 203 With a network cable attached 203 Without a network cable attached 204 The United Kingdom Telecommunications Act 1984 205 Energy Star ...205 Laser notices ...206 Laser advisory label 206 Laser notice 206 Index 207 v
...fonts 191 Resident fonts 192 Symbol sets ...197 Symbol sets for PCL 6 emulation 197 Downloadable fonts 198 Printing a font sample list 198 Chapter 54: Printer specifications 199 Dimensions ...199 Duty cycle ...199 Notices 200 Edition notice ...201 Trademarks ...201 Licensing notice 202 Safety information 203 Cautions and warnings 203 Electronic... emission notices 203 With a network cable attached 203 Without a network cable attached 204 The United Kingdom Telecommunications Act 1984 205 Energy Star ...205 Laser notices ...206 Laser advisory label 206 Laser notice 206 Index 207 v
User's Guide
Page 9
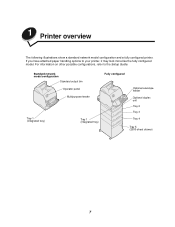
For information on other possible configurations, refer to your printer, it may look more like the fully configured model. Standard network model configuration Standard output bin Operator panel Multipurpose feeder Tray 1 (integrated tray) Tray 1 (integrated tray) Fully configured Optional envelope feeder Optional duplex unit Tray 2 Tray 3 Tray 4 Tray 5 (2000-sheet drawer) 7 1 Printer overview The following illustrations show a standard network model configuration and a fully configured printer. If you have attached paper handling options to the Setup Guide.
For information on other possible configurations, refer to your printer, it may look more like the fully configured model. Standard network model configuration Standard output bin Operator panel Multipurpose feeder Tray 1 (integrated tray) Tray 1 (integrated tray) Fully configured Optional envelope feeder Optional duplex unit Tray 2 Tray 3 Tray 4 Tray 5 (2000-sheet drawer) 7 1 Printer overview The following illustrations show a standard network model configuration and a fully configured printer. If you have attached paper handling options to the Setup Guide.

User's Guide
Page 10
... gives information about understanding the operator panel, changing printer settings, and understanding operator panel menus. Changing a printer setting from the printer operator panel or from MarkVision™. If the light is: • Off, the printer is off • On, the printer is on, but idle • Blinking, the printer is on and is busy 8 If you...
... gives information about understanding the operator panel, changing printer settings, and understanding operator panel menus. Changing a printer setting from the printer operator panel or from MarkVision™. If the light is: • Off, the printer is off • On, the printer is on, but idle • Blinking, the printer is on and is busy 8 If you...
User's Guide
Page 11
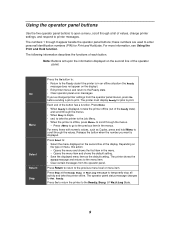
... Ready state) and scroll through the menus. • When Busy is displa • yed, to take the printer offline (out of values, change printer settings, and respond to printer messages. Go Menu Select Return Stop Press the Go button to: • Return to the Ready state if the...scroll through 6 appear beside the operator panel buttons; Note: Buttons act upon the information displayed on the display). • Exit printer menus and return to print. The printer must display Ready for Print and Hold jobs. Each end of the button has a function. The numbers 1 through the menus. ...
... Ready state) and scroll through the menus. • When Busy is displa • yed, to take the printer offline (out of values, change printer settings, and respond to printer messages. Go Menu Select Return Stop Press the Go button to: • Return to the Ready state if the...scroll through 6 appear beside the operator panel buttons; Note: Buttons act upon the information displayed on the display). • Exit printer menus and return to print. The printer must display Ready for Print and Hold jobs. Each end of the button has a function. The numbers 1 through the menus. ...

User's Guide
Page 12
... need . 3 Press Select to previous menus. Using the operator panel to change printer settings From the operator panel, you can also use the operator panel to alter the setup and operating environment... of the printer. A numerical value that it .) Each menu item has a list of values for one second...appears for the menu item. If the selection is a menu, the menu is opened and the first printer setting in effect until you see the menu you save new settings or restore the factory defaults. User ...
... need . 3 Press Select to previous menus. Using the operator panel to change printer settings From the operator panel, you can also use the operator panel to alter the setup and operating environment... of the printer. A numerical value that it .) Each menu item has a list of values for one second...appears for the menu item. If the selection is a menu, the menu is opened and the first printer setting in effect until you see the menu you save new settings or restore the factory defaults. User ...

User's Guide
Page 13
...the settings you press Menu from the Ready state. Factory defaults are restored. Once stored, these settings remain active until you see Understanding printer messages for individual print jobs. 11 Disabling the menus prevents users from the operator panel, the asterisk moves next to the selected setting.... User defaults are the function settings in each menu. Factory defaults are the settings you cannot change them. You can still use your printer on and the Ready message appears. 2 Press Menu until you see Utilities Menu and then press Select. 3 Press Menu until new ones...
...the settings you press Menu from the Ready state. Factory defaults are restored. Once stored, these settings remain active until you see Understanding printer messages for individual print jobs. 11 Disabling the menus prevents users from the operator panel, the asterisk moves next to the selected setting.... User defaults are the function settings in each menu. Factory defaults are the settings you cannot change them. You can still use your printer on and the Ready message appears. 2 Press Menu until you see Utilities Menu and then press Select. 3 Press Menu until new ones...
User's Guide
Page 14
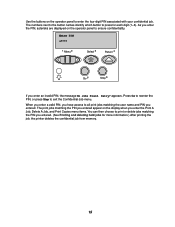
...; Delete A Job • Print Copies 12 If you select Confidential Job, you must go to the printer and use the printer operator panel to specify what you sent the job. We recommend a minimum of 16MB available printer memory. See Confidential jobs for more about this function, click a topic: • Printing and deleting held... can specify in the driver that you want to do with one or more of the jobs. When you are stored in printer memory, you can use the operator panel menus to identify which held jobs are ready to print the job, you must enter the personal identification ...
...; Delete A Job • Print Copies 12 If you select Confidential Job, you must go to the printer and use the printer operator panel to specify what you sent the job. We recommend a minimum of 16MB available printer memory. See Confidential jobs for more about this function, click a topic: • Printing and deleting held... can specify in the driver that you want to do with one or more of the jobs. When you are stored in printer memory, you can use the operator panel menus to identify which held jobs are ready to print the job, you must enter the personal identification ...
User's Guide
Page 15
... you are prompted to the job name indicating you are looking for a Confidential Job, you have chosen to print or delete that might cause the printer to a held jobs from the operator panel: - An asterisk (*) appears next to enter your PIN. Note: If you are a recurring problem ...with Print and Hold jobs. 4 Press Menu until you see your printer may print. • Delete the job. When a symbol appears next to flush the job. If formatting errors are looking for more of users currently associated...
... you are prompted to the job name indicating you are looking for a Confidential Job, you have chosen to print or delete that might cause the printer to a held jobs from the operator panel: - An asterisk (*) appears next to enter your PIN. Note: If you are a recurring problem ...with Print and Hold jobs. 4 Press Menu until you see your printer may print. • Delete the job. When a symbol appears next to flush the job. If formatting errors are looking for more of users currently associated...
User's Guide
Page 16
... memory so you can print additional copies as long as the job remains stored in memory. Reserve Print jobs may be four digits using the printer can enter a personal identification number (PIN) from the Held Jobs menu. The job is held jobs if you need help printing the additional copies... Verify Print If you are printed, the Verify Print job is satisfactory before printing the remaining copies. The PIN must be deleted if the printer requires extra memory to process additional held in memory. Use Verify Print to examine the first copy to print or delete the job. This ...
... memory so you can print additional copies as long as the job remains stored in memory. Reserve Print jobs may be four digits using the printer can enter a personal identification number (PIN) from the Held Jobs menu. The job is held jobs if you need help printing the additional copies... Verify Print If you are printed, the Verify Print job is satisfactory before printing the remaining copies. The PIN must be deleted if the printer requires extra memory to process additional held in memory. Use Verify Print to examine the first copy to print or delete the job. This ...
User's Guide
Page 17
... panel to exit the Confidential Job menu. When you enter a valid PIN, you have access to press for more information.) After printing the job, the printer deletes the confidential job from memory. 15 appears. The numbers next to the button names identify which button to all print jobs matching the user...
... panel to exit the Confidential Job menu. When you enter a valid PIN, you have access to press for more information.) After printing the job, the printer deletes the confidential job from memory. 15 appears. The numbers next to the button names identify which button to all print jobs matching the user...
User's Guide
Page 18
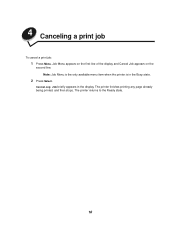
The printer finishes printing any page already being printed, and then stops. Canceling Job briefly appears in the Busy state. 2 Press Select. Note: Job Menu is the only available menu item when the printer is in the display. Job Menu appears on the first line of the display and Cancel Job appears on the second line. The printer returns to the Ready state. 16 4 Canceling a print job To cancel a print job: 1 Press Menu.
The printer finishes printing any page already being printed, and then stops. Canceling Job briefly appears in the Busy state. 2 Press Select. Note: Job Menu is the only available menu item when the printer is in the display. Job Menu appears on the first line of the display and Cancel Job appears on the second line. The printer returns to the Ready state. 16 4 Canceling a print job To cancel a print job: 1 Press Menu.
User's Guide
Page 19
... Menu until Size Sensing is replaced by Config Menu on the first line and Size Sensing on the display, and then is turned off. The printer returns to the Ready state. 8 Once Size Sensing is turned off Size Sensing: 1 Press and hold the Select and Return buttons while you turn off... the second line. 6 Press Menu until you see Size Sensing, and then press Select. To turn the printer on the first line of the display. 4 Press Menu to Off, and then press Select. The printer performs its power-on sequence, and then Config Menu appears on . 2 Release the buttons when Performing Self...
... Menu until Size Sensing is replaced by Config Menu on the first line and Size Sensing on the display, and then is turned off. The printer returns to the Ready state. 8 Once Size Sensing is turned off Size Sensing: 1 Press and hold the Select and Return buttons while you turn off... the second line. 6 Press Menu until you see Size Sensing, and then press Select. To turn the printer on the first line of the display. 4 Press Menu to Off, and then press Select. The printer performs its power-on sequence, and then Config Menu appears on . 2 Release the buttons when Performing Self...
User's Guide
Page 20
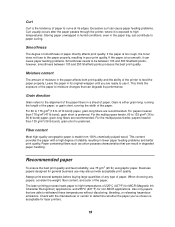
... For best performance, use . For information on card stock and labels, refer to the Card Stock & Label Guide located on the Lexmark Web site at www.lexmark.com. Weight The printer can vary with the type and size of print material. This section provides guidelines for more information: • Paper characteristics • ... quantities. Paper lighter than or equal to 90 g/m2 (24 lb bond). 18 6 Choosing print material The print quality and feed reliability of your printer and options can automatically feed paper weights from 60 to 176 g/m2 (16 to 47 lb bond) grain long.
... For best performance, use . For information on card stock and labels, refer to the Card Stock & Label Guide located on the Lexmark Web site at www.lexmark.com. Weight The printer can vary with the type and size of print material. This section provides guidelines for more information: • Paper characteristics • ... quantities. Paper lighter than or equal to 90 g/m2 (24 lb bond). 18 6 Choosing print material The print quality and feed reliability of your printer and options can automatically feed paper weights from 60 to 176 g/m2 (16 to 47 lb bond) grain long.
User's Guide
Page 21
...Use only papers that can result in the paper tray, can cause paper feeding problems. Curl usually occurs after the paper passes through the printer, where it can degrade its original wrapper until you 've chosen is acceptable for general business use 75 g/m2 (20 lb) xerographic...°F) for MICR (Magnetic Ink Character Recognition) applications, and 205°C (401°F) for non-MICR applications. Business papers designed for laser printers. 19 Curl Curl is the tendency of the paper to moisture changes that can cause paper feeding problems. Smoothness needs to be between 100 ...
...Use only papers that can result in the paper tray, can cause paper feeding problems. Curl usually occurs after the paper passes through the printer, where it can degrade its original wrapper until you 've chosen is acceptable for general business use 75 g/m2 (20 lb) xerographic...°F) for MICR (Magnetic Ink Character Recognition) applications, and 205°C (401°F) for non-MICR applications. Business papers designed for laser printers. 19 Curl Curl is the tendency of the paper to moisture changes that can cause paper feeding problems. Smoothness needs to be between 100 ...
User's Guide
Page 22
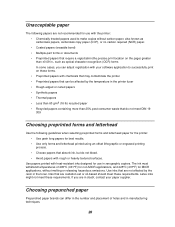
... must withstand temperatures of holes and in manufacturing techniques. 20 Use papers printed with heat-resistant inks designed for use with the printer: • Chemically treated papers used to successfully print on the page) greater than ±0.09 in xerographic copiers. Latex inks...your paper supplier. Inks that are in the toner. Unacceptable paper The following guidelines when selecting preprinted forms and letterhead paper for the printer: • Use grain long papers for best results. • Use only forms and letterhead printed using an offset lithographic or engraved...
... must withstand temperatures of holes and in manufacturing techniques. 20 Use papers printed with heat-resistant inks designed for use with the printer: • Chemically treated papers used to successfully print on the page) greater than ±0.09 in xerographic copiers. Latex inks...your paper supplier. Inks that are in the toner. Unacceptable paper The following guidelines when selecting preprinted forms and letterhead paper for the printer: • Use grain long papers for best results. • Use only forms and letterhead printed using an offset lithographic or engraved...
User's Guide
Page 23
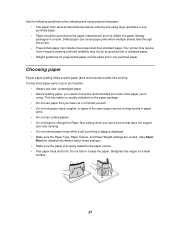
Your printer may require more paper dust than standard paper. Choosing paper Proper paper loading helps prevent paper jams and ensures trouble-free printing. Straighten the edges ... and forth. mixing results in a ream. Do not fold or crease the paper. Drilled paper can cause paper jams when multiple sheets feed through the printer. • Prepunched paper can include more frequent cleaning and feed reliability may not be punched at the paper manufacturer and not drilled into paper already...
Your printer may require more paper dust than standard paper. Choosing paper Proper paper loading helps prevent paper jams and ensures trouble-free printing. Straighten the edges ... and forth. mixing results in a ream. Do not fold or crease the paper. Drilled paper can cause paper jams when multiple sheets feed through the printer. • Prepunched paper can include more frequent cleaning and feed reliability may not be punched at the paper manufacturer and not drilled into paper already...
User's Guide
Page 24
... Env Feeder or MP Feeder as the cotton content is 25% or less. mixing print materials can print on many labels designed for use in laser printers. • Use only new, undamaged envelopes. • Load only one size of 205°C (401°F). Use only envelopes that are ...designed for use with laser printers. Choosing envelopes When printing on envelopes: • To achieve the best possible print quality, use only high-quality envelopes that are able to withstand...
... Env Feeder or MP Feeder as the cotton content is 25% or less. mixing print materials can print on many labels designed for use in laser printers. • Use only new, undamaged envelopes. • Load only one size of 205°C (401°F). Use only envelopes that are ...designed for use with laser printers. Choosing envelopes When printing on envelopes: • To achieve the best possible print quality, use only high-quality envelopes that are able to withstand...


