Card Stock & Label Guide
Page 10
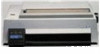
....5-32°C (60 to 90°F) with relative humidity of 8 to prevent delamination of the ink you plan to use micro-perfs. Lexmark printers are designed to operate in a jam. Thermography inks are also not recommended. Perforations and die-cuts If your converter, or the manufacturer... if the ink is lightly snapped as micro-perfs or data-perfs) provide greater stability and are recommended. Back splits and pop-out windows are not recommended. Inks (preprinted stock) Preprinted stock introduces semi-liquid and volatile components to the high temperatures and pressure used to 25...
....5-32°C (60 to 90°F) with relative humidity of 8 to prevent delamination of the ink you plan to use micro-perfs. Lexmark printers are designed to operate in a jam. Thermography inks are also not recommended. Perforations and die-cuts If your converter, or the manufacturer... if the ink is lightly snapped as micro-perfs or data-perfs) provide greater stability and are recommended. Back splits and pop-out windows are not recommended. Inks (preprinted stock) Preprinted stock introduces semi-liquid and volatile components to the high temperatures and pressure used to 25...
Network Scan Drivers
Page 3
... using a network printer...6 Removing the network scan driver...6 Scanning...7 Scanning using applications...7 Scanning using XSane...7 Scanning using OpenOffice.org...7 Scanning using GIMP ...8 Scanning using a terminal window ...8 Scanning multiple pages...8 Scanning both sides of a page...10 Canceling a scan...11 Adjusting scan settings...12 Adjusting scan settings using XSane or OpenOffice.org 12...
... using a network printer...6 Removing the network scan driver...6 Scanning...7 Scanning using applications...7 Scanning using XSane...7 Scanning using OpenOffice.org...7 Scanning using GIMP ...8 Scanning using a terminal window ...8 Scanning multiple pages...8 Scanning both sides of a page...10 Canceling a scan...11 Adjusting scan settings...12 Adjusting scan settings using XSane or OpenOffice.org 12...
Network Scan Drivers
Page 6
..., Linux openSUSE, Red Hat Enterprise Linux, or Red Flag Linux Open a terminal window, and then type rpm -e lexmark-network-scan. In Debian GNU/Linux or Linspire Linux Open a terminal window, and then type dpkg -r lexmark-network-scan. Press Enter. Scanning using a network printer 1 To use the network... scan driver, open a terminal window, and then type dpkg -i network-scan-linux-glibc2-x86.deb. Introduction to www.lexmark.com. Checking if the network scan driver is installed Make sure the network scan driver is ...
..., Linux openSUSE, Red Hat Enterprise Linux, or Red Flag Linux Open a terminal window, and then type rpm -e lexmark-network-scan. In Debian GNU/Linux or Linspire Linux Open a terminal window, and then type dpkg -r lexmark-network-scan. Press Enter. Scanning using a network printer 1 To use the network... scan driver, open a terminal window, and then type dpkg -i network-scan-linux-glibc2-x86.deb. Introduction to www.lexmark.com. Checking if the network scan driver is installed Make sure the network scan driver is ...
Network Scan Drivers
Page 7
...Enter. 2 From the "device detection" dialog, navigate to: Available devices > select your printer > OK 3 From the "Network:scanner" dialog, click Window > Show standard options. 4 If necessary, adjust other options, and then click OK. 4 From the application toolbar, do either of the following : &#...Scanning For more information on the scanner glass. 6 From the printer control panel, select your scan job. Scanning using XSane 1 Open a terminal window, and then type xsane. Scanning using applications Scanning using OpenOffice.org Note: You may use Writer, Calc, Impress, or Draw only. 1 From...
...Enter. 2 From the "device detection" dialog, navigate to: Available devices > select your printer > OK 3 From the "Network:scanner" dialog, click Window > Show standard options. 4 If necessary, adjust other options, and then click OK. 4 From the application toolbar, do either of the following : &#...Scanning For more information on the scanner glass. 6 From the printer control panel, select your scan job. Scanning using XSane 1 Open a terminal window, and then type xsane. Scanning using applications Scanning using OpenOffice.org Note: You may use Writer, Calc, Impress, or Draw only. 1 From...
Network Scan Drivers
Page 8
... 4 From the printer control panel, select your document in function allows xscanimage and XSane to provide the scanned image to GIMP. Using scanimage 1 Open a terminal window, and then type scanimage -b --source="Multiple Pages" -d [device_name]. Note: Make sure the GIMP plug-in that came with your operating system is the Automatic ...You can scan multiple pages in the ADF or on the application. Scanning 8 Note: If an Assertion 'c->xlib.lock' failed error occurs when using a terminal window 1 Open a terminal window, and then type scanimage -d [device_name] > /tmp/scan.pnm.
... 4 From the printer control panel, select your document in function allows xscanimage and XSane to provide the scanned image to GIMP. Using scanimage 1 Open a terminal window, and then type scanimage -b --source="Multiple Pages" -d [device_name]. Note: Make sure the GIMP plug-in that came with your operating system is the Automatic ...You can scan multiple pages in the ADF or on the application. Scanning 8 Note: If an Assertion 'c->xlib.lock' failed error occurs when using a terminal window 1 Open a terminal window, and then type scanimage -d [device_name] > /tmp/scan.pnm.
Network Scan Drivers
Page 9
...your document in the ADF or on the scanner glass. 3 From the printer control panel, select your scan job. Scanning 9 Using scanadf 1 Open a terminal window, and then type scanadf --source="Multiple Pages" -d [device_name]. You have to click Scan again to : Available devices > select your printer > OK 3 From... of pages specified are displayed on the scanner glass. 6 From the printer control panel, select your scan job. Using XSane 1 Open a terminal window, and then type xsane. Using XSane 0.99 and later 1 From the menu, select Multiple Pages. 2 Click Scan. If you specify a number...
...your document in the ADF or on the scanner glass. 3 From the printer control panel, select your scan job. Scanning 9 Using scanadf 1 Open a terminal window, and then type scanadf --source="Multiple Pages" -d [device_name]. You have to click Scan again to : Available devices > select your printer > OK 3 From... of pages specified are displayed on the scanner glass. 6 From the printer control panel, select your scan job. Using XSane 1 Open a terminal window, and then type xsane. Using XSane 0.99 and later 1 From the menu, select Multiple Pages. 2 Click Scan. If you specify a number...
Network Scan Drivers
Page 10
Using scanimage 1 Open a terminal window, and then type scanimage -b --scan-both sides of the page in several ways depending on the application. 3 Place your document in the ADF or on ... 2 From the dialog, click Scan. 3 Place your document in the ADF or on your scan job. Scanning both -sides=yes -d [device_name]. Using scanadf 1 Open a terminal window, and then type scanadf --scan-both sides of a page Notes: • Make sure that your printer has a duplex scanner and an Automatic Document Feeder (ADF...
Using scanimage 1 Open a terminal window, and then type scanimage -b --scan-both sides of the page in several ways depending on the application. 3 Place your document in the ADF or on ... 2 From the dialog, click Scan. 3 Place your document in the ADF or on your scan job. Scanning both -sides=yes -d [device_name]. Using scanadf 1 Open a terminal window, and then type scanadf --scan-both sides of a page Notes: • Make sure that your printer has a duplex scanner and an Automatic Document Feeder (ADF...
Network Scan Drivers
Page 11
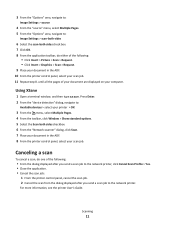
Press Enter. 2 From the "device detection" dialog, navigate to the network printer. Scanning 11 Using XSane 1 Open a terminal window, and then type xsane. For more information, see the printer User's Guide. 3 From the "Options" area, navigate to: Image Settings > source 4 From the ... displayed after you send a scan job to : Available devices > select your printer > OK 3 From the menu, select Multiple Pages. 4 From the toolbar, click Window > Show standard options. 5 Select the Scan both sides checkbox. 6 From the "Network:scanner" dialog, click Scan. 7 Place your document in the ADF. 10 ...
Press Enter. 2 From the "device detection" dialog, navigate to the network printer. Scanning 11 Using XSane 1 Open a terminal window, and then type xsane. For more information, see the printer User's Guide. 3 From the "Options" area, navigate to: Image Settings > source 4 From the ... displayed after you send a scan job to : Available devices > select your printer > OK 3 From the menu, select Multiple Pages. 4 From the toolbar, click Window > Show standard options. 5 Select the Scan both sides checkbox. 6 From the "Network:scanner" dialog, click Scan. 7 Place your document in the ADF. 10 ...

Network Scan Drivers
Page 12
... Select a document size. Scanning 12 To Select Select the document type. or mode Note: The icon is found on the XSane main dialog. Click Window > Show advanced options. • Using OpenOffice.org Note: You may use Writer, Calc, Impress, or Draw only. 1 From an OpenOffice.org... > Scan > Select Source. 2 From the "Device Used" menu, select your printer Navigate to access the scan options: • Using XSane 1 Open a terminal window, and then type xsane. Scan both sides or scan-both-sides Notes: • Make sure that the printer has a duplex scanner and an Automatic Document...
... Select a document size. Scanning 12 To Select Select the document type. or mode Note: The icon is found on the XSane main dialog. Click Window > Show advanced options. • Using OpenOffice.org Note: You may use Writer, Calc, Impress, or Draw only. 1 From an OpenOffice.org... > Scan > Select Source. 2 From the "Device Used" menu, select your printer Navigate to access the scan options: • Using XSane 1 Open a terminal window, and then type xsane. Scan both sides or scan-both-sides Notes: • Make sure that the printer has a duplex scanner and an Automatic Document...
Network Scan Drivers
Page 17
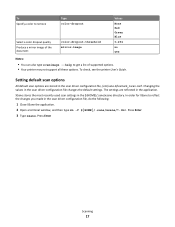
Changing the values in the scan driver configuration file, do the following: 1 Close XSane the application. 2 Open a terminal window, and then type rm -f ${HOME}/.sane/xsane/*.drc. In order for XSane to get a list of the document color-dropout-threshold mirror-image Values None ...
Changing the values in the scan driver configuration file, do the following: 1 Close XSane the application. 2 Open a terminal window, and then type rm -f ${HOME}/.sane/xsane/*.drc. In order for XSane to get a list of the document color-dropout-threshold mirror-image Values None ...
Network Scan Drivers
Page 18
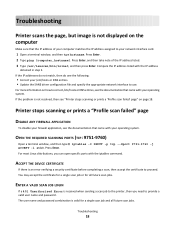
.... Compare the IP address listed with the iptables command. For more information on how to your network interface card. 1 Open a terminal window, and then type hostname. The user name and password combination is valid for all future scan jobs. Press Enter. 2 Type ping [computer_hostname...]. OPEN THE REQUIRED SCANNING PORTS (TCP: 9751-9760) Open a terminal window, and then type # iptables -I INPUT -p tcp --dport 9751:9760 -j ACCEPT -i eth0. Troubleshooting 18 If the IP addresses do not match, then...
.... Compare the IP address listed with the iptables command. For more information on how to your network interface card. 1 Open a terminal window, and then type hostname. The user name and password combination is valid for all future scan jobs. Press Enter. 2 Type ping [computer_hostname...]. OPEN THE REQUIRED SCANNING PORTS (TCP: 9751-9760) Open a terminal window, and then type # iptables -I INPUT -p tcp --dport 9751:9760 -j ACCEPT -i eth0. Troubleshooting 18 If the IP addresses do not match, then...

Network Scan Drivers
Page 20
XSane displays garbage characters Run XSane version 0.90 or higher, which supports more languages than its earlier versions. Troubleshooting 20 Note: If you may need to version 0.90 or higher so it will work correctly with non-English languages. • For some SANE installations, you are running Linpus Linux, upgrade XSane to set the LD_LIBRARY_PATH: 1 Open a terminal window, and then type export LD_LIBRARY_PATH=/usr/lib. 2 Press Enter.
XSane displays garbage characters Run XSane version 0.90 or higher, which supports more languages than its earlier versions. Troubleshooting 20 Note: If you may need to version 0.90 or higher so it will work correctly with non-English languages. • For some SANE installations, you are running Linpus Linux, upgrade XSane to set the LD_LIBRARY_PATH: 1 Open a terminal window, and then type export LD_LIBRARY_PATH=/usr/lib. 2 Press Enter.
Print Drivers for UNIX and LINUX Systems
Page 15
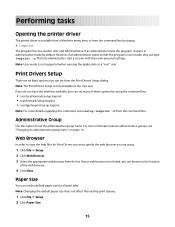
... mode, they can browse to the root user. Print Drivers Setup There are using the command line. • /usr/local/lexmark/setup.lexprint • /opt/lexmark/setup.lexprint • /usr/lpp/lexprint/setup.lexprint Note: For more information about administrative groups, see "Changing an administrative group name... you can set many of the web browser. 4 Click Next. Performing tasks Opening the printer driver The printer driver is available from a Windows menu item, or from the command line by default. Note: Changing the default paper size does not affect the existing print queues. 1 ...
... mode, they can browse to the root user. Print Drivers Setup There are using the command line. • /usr/local/lexmark/setup.lexprint • /opt/lexmark/setup.lexprint • /usr/lpp/lexprint/setup.lexprint Note: For more information about administrative groups, see "Changing an administrative group name... you can set many of the web browser. 4 Click Next. Performing tasks Opening the printer driver The printer driver is available from a Windows menu item, or from the command line by default. Note: Changing the default paper size does not affect the existing print queues. 1 ...
Print Drivers for UNIX and LINUX Systems
Page 23
... you want to be removed, and then click . # /usr/lexprint/bin/chqueue -q myqueue -c -r class1 Note: After the last queue has been removed from the main window onto a printer group or by right-clicking All Printers and selecting New Group. 1 Enter the group name in groups. Note: To remove a print queue from...
... you want to be removed, and then click . # /usr/lexprint/bin/chqueue -q myqueue -c -r class1 Note: After the last queue has been removed from the main window onto a printer group or by right-clicking All Printers and selecting New Group. 1 Enter the group name in groups. Note: To remove a print queue from...

Print Drivers for UNIX and LINUX Systems
Page 34
... are still in place before the administrator changed the settings on the queue, but if your home directory as an administrator. 2 From the main window, right-click the print queue icon. 3 Clear the Enabled check box. Default settings for everyone. Your colleague must open the print driver as ... to a particular queue, those changes are stored in as a normal user, and you change the settings (such as an administrator. 2 From the main window, right-click the print queue icon. 3 Select the Enabled check box. You can also change his or her user settings. What is wrong? No. ...
... are still in place before the administrator changed the settings on the queue, but if your home directory as an administrator. 2 From the main window, right-click the print queue icon. 3 Clear the Enabled check box. Default settings for everyone. Your colleague must open the print driver as ... to a particular queue, those changes are stored in as a normal user, and you change the settings (such as an administrator. 2 From the main window, right-click the print queue icon. 3 Select the Enabled check box. You can also change his or her user settings. What is wrong? No. ...
Print Drivers for UNIX and LINUX Systems
Page 47
...communications. Queues use the information from the virtual device to transport the data to a monitor. A program that runs using the X Window System. X Window System servers run on a weekly basis. A type of managed network devices on computers connected to the printer. A segment of displaying ...47 A network protocol used on the monitor. Virtual devices contain information about the printer the virtual device represents. The X Window System is a window system capable of a network that is connected to connect computers and hosts. The X server also accepts output from the ...
...communications. Queues use the information from the virtual device to transport the data to a monitor. A program that runs using the X Window System. X Window System servers run on a weekly basis. A type of managed network devices on computers connected to the printer. A segment of displaying ...47 A network protocol used on the monitor. Virtual devices contain information about the printer the virtual device represents. The X Window System is a window system capable of a network that is connected to connect computers and hosts. The X server also accepts output from the ...
Tech Notes
Page 1
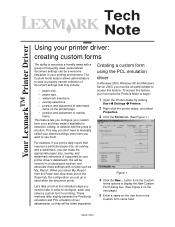
.... Let's take in the Custom form name field. March 2004 To access this feature. Creating a custom form using the PCL emulation driver In Windows 2000, Windows XP, and Windows Server 2003, you set up is used , personalized document settings can make it available for printing. button from the Paper size drop-down list...
.... Let's take in the Custom form name field. March 2004 To access this feature. Creating a custom form using the PCL emulation driver In Windows 2000, Windows XP, and Windows Server 2003, you set up is used , personalized document settings can make it available for printing. button from the Paper size drop-down list...

