Quick Reference
Page 18
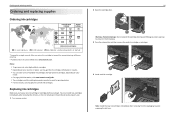
... Damage: Do not extend the cartridge door beyond 90 degrees when opening to prevent it from the packaging to avoid exposing the ink to Lexmark for remanufacturing, refilling, or recycling. 2 Available only on your country or region, you begin. Ordering and replacing supplies Ordering and replacing ... 1 Licensed for a single use , return this cartridge to air. Notes: • To get the ink cartridges individually or in the printhead nozzles may get more ink, order high‑yield ink cartridges. • Depending on your needs. • For page yield information, visit www...
... Damage: Do not extend the cartridge door beyond 90 degrees when opening to prevent it from the packaging to avoid exposing the ink to Lexmark for remanufacturing, refilling, or recycling. 2 Available only on your country or region, you begin. Ordering and replacing supplies Ordering and replacing ... 1 Licensed for a single use , return this cartridge to air. Notes: • To get the ink cartridges individually or in the printhead nozzles may get more ink, order high‑yield ink cartridges. • Depending on your needs. • For page yield information, visit www...
Quick Reference
Page 19
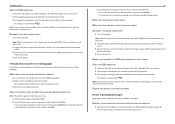
...uses ink, so clean them only when necessary. • Deep cleaning uses more ink, so try the Clean Printhead option first to clogged printhead nozzles. Aligning the printhead If the characters or lines on the printer control panel, then touch Continue. • Do not remove the ... More Options > Align Printer. Note: Do not remove the alignment page until the printer is plugged into an electrical outlet. Cleaning the printhead nozzles Poor print quality is finished. Notes: • If Align Printer appears on your prints. Ordering and replacing supplies 19 5 Close the cartridge...
...uses ink, so clean them only when necessary. • Deep cleaning uses more ink, so try the Clean Printhead option first to clogged printhead nozzles. Aligning the printhead If the characters or lines on the printer control panel, then touch Continue. • Do not remove the ... More Options > Align Printer. Note: Do not remove the alignment page until the printer is plugged into an electrical outlet. Cleaning the printhead nozzles Poor print quality is finished. Notes: • If Align Printer appears on your prints. Ordering and replacing supplies 19 5 Close the cartridge...
Quick Reference
Page 44
... port is damaged, then use a new one or more information, see the Wireless troubleshooting section. REINSTALL THE INK CARTRIDGES AND DEEP CLEAN AND ALIGN THE PRINTHEAD 1 Reinstall the ink cartridges. If your printer, and then click Print. REMOVE AND RECONNECT THE USB CABLE CONNECTED TO YOUR PRINTER CHECK THE USB CONNECTION...
... port is damaged, then use a new one or more information, see the Wireless troubleshooting section. REINSTALL THE INK CARTRIDGES AND DEEP CLEAN AND ALIGN THE PRINTHEAD 1 Reinstall the ink cartridges. If your printer, and then click Print. REMOVE AND RECONNECT THE USB CABLE CONNECTED TO YOUR PRINTER CHECK THE USB CONNECTION...
Quick Reference
Page 45
... our Web site for updates for three seconds to a defective port. Troubleshooting 2 Load plain, unmarked paper. 3 From the home screen, touch > More Options > Deep Clean Printhead. 4 Select an option, and then wait until printing is finished. Printer is busy or does not respond If the "Before you continue to wake up...
... our Web site for updates for three seconds to a defective port. Troubleshooting 2 Load plain, unmarked paper. 3 From the home screen, touch > More Options > Deep Clean Printhead. 4 Select an option, and then wait until printing is finished. Printer is busy or does not respond If the "Before you continue to wake up...
Quick Reference
Page 53
Index Index A Address Book 37 ADF input tray location 12 aligning the printhead 19 answering machine setting up 29 Automatic Document Feeder (ADF) location 12 B bidirectional communication enabling 50 bin extender location 12 broadcast fax, sending immediately 38... 46 card reader light location 12 checking an unresponsive printer 43 checking the dial tone 36 checklist before you troubleshoot 43 fax troubleshooting 46 cleaning printhead nozzles 19 Communication not available message 50 configuring Wi‑Fi Protected Setup 41 conserving energy, ink, and paper 5 contact list creating 37 copies ...
Index Index A Address Book 37 ADF input tray location 12 aligning the printhead 19 answering machine setting up 29 Automatic Document Feeder (ADF) location 12 B bidirectional communication enabling 50 bin extender location 12 broadcast fax, sending immediately 38... 46 card reader light location 12 checking an unresponsive printer 43 checking the dial tone 36 checklist before you troubleshoot 43 fax troubleshooting 46 cleaning printhead nozzles 19 Communication not available message 50 configuring Wi‑Fi Protected Setup 41 conserving energy, ink, and paper 5 contact list creating 37 copies ...
Quick Reference
Page 54
... not respond 45 printer features 6 printer models 6 printer printing blank pages 44 printer problems, basic solutions 43 printer software installing 20 printer solutions 42 printhead aligning 19 printhead nozzles cleaning 19 printing documents 23 network setup page 48 on both sides of the paper 23 photos using printer control panel 24 two...
... not respond 45 printer features 6 printer models 6 printer printing blank pages 44 printer problems, basic solutions 43 printer software installing 20 printer solutions 42 printhead aligning 19 printhead nozzles cleaning 19 printing documents 23 network setup page 48 on both sides of the paper 23 photos using printer control panel 24 two...
User's Guide
Page 14
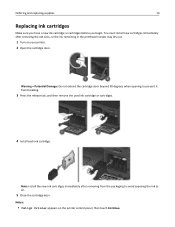
... ink to air. 5 Close the cartridge door. Note: Install the new ink cartridges immediately after removing the old ones, or the ink remaining in the printhead nozzles may dry out. 1 Turn on the printer control panel, then touch Continue. Ordering and replacing supplies 14 Replacing ink cartridges Make sure you have...
... ink to air. 5 Close the cartridge door. Note: Install the new ink cartridges immediately after removing the old ones, or the ink remaining in the printhead nozzles may dry out. 1 Turn on the printer control panel, then touch Continue. Ordering and replacing supplies 14 Replacing ink cartridges Make sure you have...

User's Guide
Page 124
Note: Do not remove the alignment page until printing is plugged into an electrical outlet. Aligning the printhead If the characters or lines on your printer 2 Click Options & Supplies or Print Queue. 3 Click Supply Levels. An alignment page prints. The graphic of Sleep ... Using the printer control panel From the home screen, touch . Maintaining the printer 124 Maintaining the printer Maintaining ink cartridges In addition to align the printhead. 1 Load plain, unmarked paper. 2 From the home screen, touch > More Options > Align Printer.
Note: Do not remove the alignment page until printing is plugged into an electrical outlet. Aligning the printhead If the characters or lines on your printer 2 Click Options & Supplies or Print Queue. 3 Click Supply Levels. An alignment page prints. The graphic of Sleep ... Using the printer control panel From the home screen, touch . Maintaining the printer 124 Maintaining the printer Maintaining ink cartridges In addition to align the printhead. 1 Load plain, unmarked paper. 2 From the home screen, touch > More Options > Align Printer.
User's Guide
Page 125
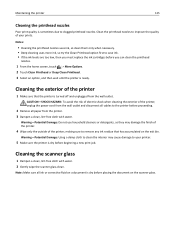
...or corrective fluid on a document is dry before proceeding. 2 Remove all cables to improve the quality of the printer, making sure to clogged printhead nozzles. CAUTION-SHOCK HAZARD: To avoid the risk of electric shock when cleaning the exterior of the printer 1 Make sure that has accumulated ...the printer, unplug the power cord from the wall outlet and disconnect all paper from the wall outlet. Maintaining the printer 125 Cleaning the printhead nozzles Poor print quality is sometimes due to remove any ink residue that the printer is turned off and unplugged from the printer. 3...
...or corrective fluid on a document is dry before proceeding. 2 Remove all cables to improve the quality of the printer, making sure to clogged printhead nozzles. CAUTION-SHOCK HAZARD: To avoid the risk of electric shock when cleaning the exterior of the printer 1 Make sure that has accumulated ...the printer, unplug the power cord from the wall outlet and disconnect all paper from the wall outlet. Maintaining the printer 125 Cleaning the printhead nozzles Poor print quality is sometimes due to remove any ink residue that the printer is turned off and unplugged from the printer. 3...
User's Guide
Page 130
... Printer. Note: Do not remove the alignment page until the printer is in Sleep mode. REINSTALL THE INK CARTRIDGES AND DEEP CLEAN AND ALIGN THE PRINTHEAD 1 Reinstall the ink cartridges. If the printer will not come out of Sleep mode, then reset the power: 1 Unplug the power cord from the power... the printer. The cartridges should click firmly into their matching color slots. 2 Load plain, unmarked paper. 3 From the home screen, touch > More Options > Deep Clean Printhead. 4 Select an option, and then wait until printing is marked with . Press to a defective port.
... Printer. Note: Do not remove the alignment page until the printer is in Sleep mode. REINSTALL THE INK CARTRIDGES AND DEEP CLEAN AND ALIGN THE PRINTHEAD 1 Reinstall the ink cartridges. If the printer will not come out of Sleep mode, then reset the power: 1 Unplug the power cord from the power... the printer. The cartridges should click firmly into their matching color slots. 2 Load plain, unmarked paper. 3 From the home screen, touch > More Options > Deep Clean Printhead. 4 Select an option, and then wait until printing is marked with . Press to a defective port.
User's Guide
Page 136
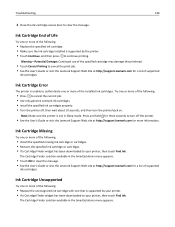
...specified ink cartridges properly. • Turn the printer off the printer. • See the User's Guide or visit the Lexmark Support Web site at http://support.lexmark.com for a list of the following : • Replace the specified ink cartridge. • Make sure the ink cartridge ... touch Find Ink. The Cartridge Finder solution available in Sleep mode. Warning-Potential Damage: Continued use of the specified cartridge may damage the printhead. • Touch Cancel Printing to turn off , then wait about 10 seconds, and then turn the printer back on. Press and hold...
...specified ink cartridges properly. • Turn the printer off the printer. • See the User's Guide or visit the Lexmark Support Web site at http://support.lexmark.com for a list of the following : • Replace the specified ink cartridge. • Make sure the ink cartridge ... touch Find Ink. The Cartridge Finder solution available in Sleep mode. Warning-Potential Damage: Continued use of the specified cartridge may damage the printhead. • Touch Cancel Printing to turn off , then wait about 10 seconds, and then turn the printer back on. Press and hold...
User's Guide
Page 139
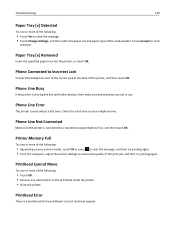
... detect a dial tone. Contact technical support. Phone Line Busy If the printer is connected to a standard analog telephone line, and then touch OK. Printhead Cannot Move Try one or more of the following: • Touch Yes to clear the message. • Touch Change Settings, and then select the...Touch Accept for a dial tone on your telephone line. Paper Tray [x] Removed Insert the specified paper tray into the printer, or touch OK. Printhead Error There is a problem with other devices, then make sure these devices are not in use. Printer Memory Full Try one or more of the...
... detect a dial tone. Contact technical support. Phone Line Busy If the printer is connected to a standard analog telephone line, and then touch OK. Printhead Cannot Move Try one or more of the following: • Touch Yes to clear the message. • Touch Change Settings, and then select the...Touch Accept for a dial tone on your telephone line. Paper Tray [x] Removed Insert the specified paper tray into the printer, or touch OK. Printhead Error There is a problem with other devices, then make sure these devices are not in use. Printer Memory Full Try one or more of the...
User's Guide
Page 140
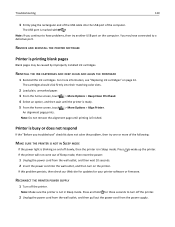
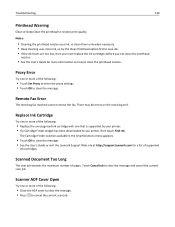
.... • Deep cleaning uses more of supported ink cartridges. Proxy Error Try one or more ink, so try the Clean Printhead option first to you can clean the printhead nozzles. • See the User's Guide for a list of the following: • Touch Set Proxy to enter the...the message. • See the User's Guide or visit the Lexmark Support Web site at http://support.lexmark.com for more of pages. Troubleshooting 140 Printhead Warning Clean or Deep Clean the printhead to clean the printhead nozzles. Remote Fax Error The receiving fax machine cannot receive the ...
.... • Deep cleaning uses more of supported ink cartridges. Proxy Error Try one or more ink, so try the Clean Printhead option first to you can clean the printhead nozzles. • See the User's Guide for a list of the following: • Touch Set Proxy to enter the...the message. • See the User's Guide or visit the Lexmark Support Web site at http://support.lexmark.com for more of pages. Troubleshooting 140 Printhead Warning Clean or Deep Clean the printhead to clean the printhead nozzles. Remote Fax Error The receiving fax machine cannot receive the ...
User's Guide
Page 142
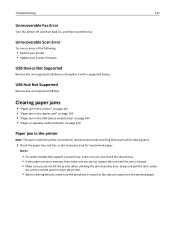
... select models that support a second tray, make sure you also check the second tray. • If the paper tray was removed, then make sure the printhead is cleared. • Make sure you do not replace the tray until the jam is moved to open the printer. • Before clearing the jam...
... select models that support a second tray, make sure you also check the second tray. • If the paper tray was removed, then make sure the printhead is cleared. • Make sure you do not replace the tray until the jam is moved to open the printer. • Before clearing the jam...
User's Guide
Page 146
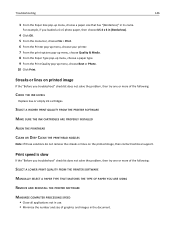
... Photo. 10 Click Print. SELECT A HIGHER PRINT QUALITY FROM THE PRINTER SOFTWARE MAKE SURE THE INK CARTRIDGES ARE PROPERLY INSTALLED ALIGN THE PRINTHEAD CLEAN OR DEEP CLEAN THE PRINTHEAD NOZZLES Note: If these solutions do not remove the streaks or lines on printed image If the "Before you troubleshoot" checklist does not...
... Photo. 10 Click Print. SELECT A HIGHER PRINT QUALITY FROM THE PRINTER SOFTWARE MAKE SURE THE INK CARTRIDGES ARE PROPERLY INSTALLED ALIGN THE PRINTHEAD CLEAN OR DEEP CLEAN THE PRINTHEAD NOZZLES Note: If these solutions do not remove the streaks or lines on printed image If the "Before you troubleshoot" checklist does not...

User's Guide
Page 182
...to computer over a network 149 cannot send e‑mail 149 cannot send faxes 151 card reader light location 10 cartridges, ink using genuine Lexmark 13 certificate request 109 Change [Paper Source] to [Custom String] 132 Change [Paper Source] to [Custom Type Name] 132 Change [...troubleshoot 127 fax troubleshooting 150 memory card troubleshooting 153 choosing a splitter, faxing 87 cleaning exterior of the printer 125 cleaning printhead nozzles 125 cleaning the printer control panel 126 Close Printer 133 Club Internet 98 collating copies 54 color faxes receiving 80 ...
...to computer over a network 149 cannot send e‑mail 149 cannot send faxes 151 card reader light location 10 cartridges, ink using genuine Lexmark 13 certificate request 109 Change [Paper Source] to [Custom String] 132 Change [Paper Source] to [Custom Type Name] 132 Change [...troubleshoot 127 fax troubleshooting 150 memory card troubleshooting 153 choosing a splitter, faxing 87 cleaning exterior of the printer 125 cleaning printhead nozzles 125 cleaning the printer control panel 126 Close Printer 133 Club Internet 98 collating copies 54 color faxes receiving 80 ...
User's Guide
Page 186
... 139 Paper Tray Removed 139 Phone Connected to Incorrect Jack 139 Phone Line Busy 139 Phone Line Error 139 Phone Line Not Connected 139 Printhead Cannot Move 139 Printhead Error 139 Proxy Error 140 Remote Fax Error 140 Replace Ink Cartridge 140 Scanned Document Too Long 140 Scanner ADF Cover Open 140...
... 139 Paper Tray Removed 139 Phone Connected to Incorrect Jack 139 Phone Line Busy 139 Phone Line Error 139 Phone Line Not Connected 139 Printhead Cannot Move 139 Printhead Error 139 Proxy Error 140 Remote Fax Error 140 Replace Ink Cartridge 140 Scanned Document Too Long 140 Scanner ADF Cover Open 140...
User's Guide
Page 187
Index 187 printer, setting as default 48 printhead aligning 124 Printhead Cannot Move 139 Printhead Error 139 printhead nozzles cleaning 125 printing collate 37 custom‑size paper 41 documents 36 documents from memory card or flash drive 39 envelopes 39...R received history report 91 receiving color faxes 80 receiving faxes Auto Answer setting 85, 86 automatically 80, 85 manually 80, 86 tips 85 recycling 7 Lexmark products 15 WEEE statement 167 redial attempts setting 80 redial time setting 80 reducing an image 53 Remote Fax Error 140 Replace Ink Cartridge 140...
Index 187 printer, setting as default 48 printhead aligning 124 Printhead Cannot Move 139 Printhead Error 139 printhead nozzles cleaning 125 printing collate 37 custom‑size paper 41 documents 36 documents from memory card or flash drive 39 envelopes 39...R received history report 91 receiving color faxes 80 receiving faxes Auto Answer setting 85, 86 automatically 80, 85 manually 80, 86 tips 85 recycling 7 Lexmark products 15 WEEE statement 167 redial attempts setting 80 redial time setting 80 reducing an image 53 Remote Fax Error 140 Replace Ink Cartridge 140...


