Network Guide
Page 4
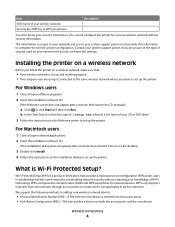
... wireless network without requiring prior knowledge of Wi-Fi technology. Wireless networking 4 You cannot configure the printer for network devices. For Windows users 1 Close all open software programs. 2 Insert the installation software CD. Contact your system support person if you are using is set...on both the access point and the new device. If the installation dialog does not appear after a minute, then launch the CD manually: a Click , or click Start and then click Run. What is not applicable in establishing wireless home networks and enabling network security...
... wireless network without requiring prior knowledge of Wi-Fi technology. Wireless networking 4 You cannot configure the printer for network devices. For Windows users 1 Close all open software programs. 2 Insert the installation software CD. Contact your system support person if you are using is set...on both the access point and the new device. If the installation dialog does not appear after a minute, then launch the CD manually: a Click , or click Start and then click Run. What is not applicable in establishing wireless home networks and enabling network security...
Network Guide
Page 5
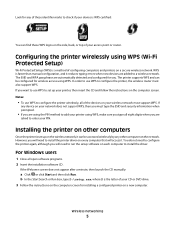
... computer that will need to enter your PIN. b In the Start Search or Run box, type D:\setup.exe, where D is faster than manual configuration, and it . For Windows users 1 Close all eight digits when you are asked to run the setup software on a new computer. The SSID and WPA passphrase are added... and configured for installing a configured printer on each computer to a wireless network. If the Welcome screen does not appear after a minute, then launch the CD manually: a Click , or click Start and then click Run.
... computer that will need to enter your PIN. b In the Start Search or Run box, type D:\setup.exe, where D is faster than manual configuration, and it . For Windows users 1 Close all eight digits when you are asked to run the setup software on a new computer. The SSID and WPA passphrase are added... and configured for installing a configured printer on each computer to a wireless network. If the Welcome screen does not appear after a minute, then launch the CD manually: a Click , or click Start and then click Run.
Network Guide
Page 16
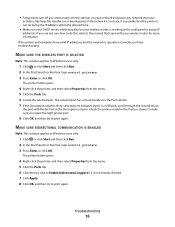
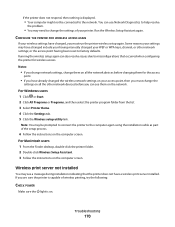
...on your wireless router, is working and is operation correctly, continue troubleshooting. MAKE SURE THE WIRELESS PORT IS SELECTED Note: This solution applies to Windows users only 1 Click , or click Start and then click Run. 2 In the Start Search or Run box, type control printers. 3 Press Enter... with your wireless router for more information. If the printer and computer have valid IP addresses and the network is configured to the manual that came with Printer Port in the Description column. • Temporarily turn off any network-intensive activities, like large file transfers or...
...on your wireless router, is working and is operation correctly, continue troubleshooting. MAKE SURE THE WIRELESS PORT IS SELECTED Note: This solution applies to Windows users only 1 Click , or click Start and then click Run. 2 In the Start Search or Run box, type control printers. 3 Press Enter... with your wireless router for more information. If the printer and computer have valid IP addresses and the network is configured to the manual that came with Printer Port in the Description column. • Temporarily turn off any network-intensive activities, like large file transfers or...

Fax Guide
Page 16
...or your telephone numbers to the printer as the fax number, and then set the printer to receive faxes manually. This feature allows you set the printer to receive faxes automatically or manually: 1 From the printer control panel, navigate to the Distinctive Ring Pattern Detection (DPRD) feature offered by telephone...that you set Auto Answer to fax 16 Step 4: Set the printer to receive faxes automatically or manually If the printer is made. Step 3: Set your fax name and fax number Your user information includes your name or your company name, your fax number (your fax number is your ...
...or your telephone numbers to the printer as the fax number, and then set the printer to receive faxes manually. This feature allows you set the printer to receive faxes automatically or manually: 1 From the printer control panel, navigate to the Distinctive Ring Pattern Detection (DPRD) feature offered by telephone...that you set Auto Answer to fax 16 Step 4: Set the printer to receive faxes automatically or manually If the printer is made. Step 3: Set your fax name and fax number Your user information includes your name or your company name, your fax number (your fax number is your ...
Fax Guide
Page 23
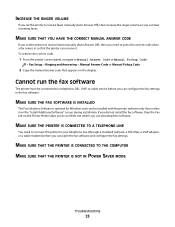
... > Manual Answer Code or Manual Pickup Code 2 Copy the manual answer code that the printer can receive it on the Printer Home takes you to our Web site where you can hear incoming faxes. MAKE SURE THE FAX SOFTWARE IS INSTALLED The Fax Solutions Software is optional for Windows users and ...is installed with the printer software only if you select it . INCREASE THE RINGER VOLUME If you set the printer to receive faxes manually (Auto Answer Off), then you need to connect the printer to ...
... > Manual Answer Code or Manual Pickup Code 2 Copy the manual answer code that the printer can receive it on the Printer Home takes you to our Web site where you can hear incoming faxes. MAKE SURE THE FAX SOFTWARE IS INSTALLED The Fax Solutions Software is optional for Windows users and ...is installed with the printer software only if you select it . INCREASE THE RINGER VOLUME If you set the printer to receive faxes manually (Auto Answer Off), then you need to connect the printer to ...
User's Guide
Page 7
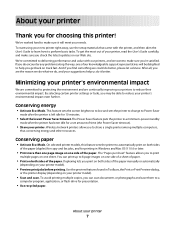
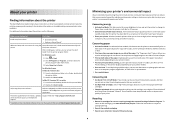
..., or flash drive for a set amount of paper. • Print on your printer's environmental impact even further. About your printer, read the User's Guide carefully, and make sure you check the latest updates on our Web site. On selected printer models, this printer! We've worked hard to... Preview print jobs before printing. Wireless/network printers allow you may be delighted to automatically print on both sides of the paper manually or automatically (depending on both sides of your printer Thank you for 10 minutes. • Select the lowest Power Saver timeout.
..., or flash drive for a set amount of paper. • Print on your printer's environmental impact even further. About your printer, read the User's Guide carefully, and make sure you check the latest updates on our Web site. On selected printer models, this printer! We've worked hard to... Preview print jobs before printing. Wireless/network printers allow you may be delighted to automatically print on both sides of the paper manually or automatically (depending on both sides of your printer Thank you for 10 minutes. • Select the lowest Power Saver timeout.
User's Guide
Page 26
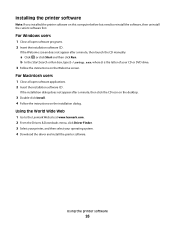
For Macintosh users 1 Close all open software applications. 2 Insert the installation software CD. b In the ...Follow the instructions on the Welcome screen. If the installation dialog does not appear after a minute, then launch the CD manually: a Click , or click Start and then click Run. Using the printer software 26 Installing the printer software Note:... If you installed the printer software on this computer before but need to the Lexmark Web site at www.lexmark.com. 2 From the Drivers & Downloads menu, click Driver Finder. 3 Select your printer, and then...
For Macintosh users 1 Close all open software applications. 2 Insert the installation software CD. b In the ...Follow the instructions on the Welcome screen. If the installation dialog does not appear after a minute, then launch the CD manually: a Click , or click Start and then click Run. Using the printer software 26 Installing the printer software Note:... If you installed the printer software on this computer before but need to the Lexmark Web site at www.lexmark.com. 2 From the Drivers & Downloads menu, click Driver Finder. 3 Select your printer, and then...

User's Guide
Page 52
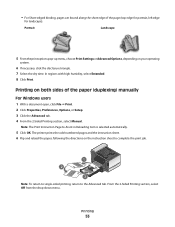
... binding or Short-edge binding. • For Long-edged binding, pages are bound along the long edge of the paper (duplexing) manually. Note: To return to single-sided printing, return to print duplex using other paper sizes, then see the instructions for printing on ...drop-down menu. Portrait Landscape 2 1 1 2 Printing 52 Note: Long-edged binding is the setting most often used. 6 Select a setting for landscape). For Macintosh users 1 With a document open , click File Print. 2 Click Properties, Preferences, Options, or Setup. 3 Click the Advanced tab. 4 From the 2-Sided ...
... binding or Short-edge binding. • For Long-edged binding, pages are bound along the long edge of the paper (duplexing) manually. Note: To return to single-sided printing, return to print duplex using other paper sizes, then see the instructions for printing on ...drop-down menu. Portrait Landscape 2 1 1 2 Printing 52 Note: Long-edged binding is the setting most often used. 6 Select a setting for landscape). For Macintosh users 1 With a document open , click File Print. 2 Click Properties, Preferences, Options, or Setup. 3 Click the Advanced tab. 4 From the 2-Sided ...
User's Guide
Page 53
...7 Select the dry time. Printing 53 • For Short-edged binding, pages are bound along the short edge of the paper (duplexing) manually For Windows users 1 With a document open, click File Print. 2 Click Properties, Preferences, Options, or Setup. 3 Click the Advanced tab. ...4 From the 2-Sided Printing section, select Manual. Portrait Landscape 5 From the print options pop-up menu, choose Print Settings or Advanced Options, depending on...
...7 Select the dry time. Printing 53 • For Short-edged binding, pages are bound along the short edge of the paper (duplexing) manually For Windows users 1 With a document open, click File Print. 2 Click Properties, Preferences, Options, or Setup. 3 Click the Advanced tab. ...4 From the 2-Sided Printing section, select Manual. Portrait Landscape 5 From the print options pop-up menu, choose Print Settings or Advanced Options, depending on...
User's Guide
Page 54
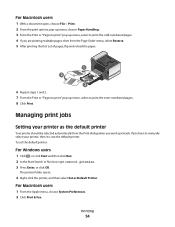
...manually select your printer as Default Printer. The printer folder opens. 4 Right-click the printer, and then select Set as the default printer Your printer should be selected automatically from the Page Order menu, select Reverse. 5 After printing the first set the default printer: For Windows users...Click Print. Managing print jobs Setting your printer, then it is not the default printer. For Macintosh users 1 From the Apple menu, choose System Preferences. 2 Click Print & Fax. For Macintosh users 1 With a document open, choose File > Print. 2 From the print options pop-up menu,...
...manually select your printer as Default Printer. The printer folder opens. 4 Right-click the printer, and then select Set as the default printer Your printer should be selected automatically from the Page Order menu, select Reverse. 5 After printing the first set the default printer: For Windows users...Click Print. Managing print jobs Setting your printer, then it is not the default printer. For Macintosh users 1 From the Apple menu, choose System Preferences. 2 Click Print & Fax. For Macintosh users 1 With a document open, choose File > Print. 2 From the print options pop-up menu,...
User's Guide
Page 93
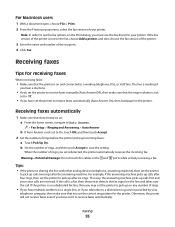
.... b Set the number of rings, and then touch Accept to a working if you hear a dial tone. • If you set the printer to receive faxes manually (Auto Answer Off), then make sure that you have set the printer to pick up menu, select the fax version of rings you have set... the printer is working telephone, DSL, or VoIP line. Faxing 93 Receiving faxes Tips for your printer. When the number of your printer. For Macintosh users 1 With a document open, choose File > Print. 2 From the Printer pop-up calls two rings after the answering machine. Note: In order to pick up ...
.... b Set the number of rings, and then touch Accept to a working if you hear a dial tone. • If you set the printer to receive faxes manually (Auto Answer Off), then make sure that you have set the printer to pick up menu, select the fax version of rings you have set... the printer is working telephone, DSL, or VoIP line. Faxing 93 Receiving faxes Tips for your printer. When the number of your printer. For Macintosh users 1 With a document open, choose File > Print. 2 From the Printer pop-up calls two rings after the answering machine. Note: In order to pick up ...
User's Guide
Page 94
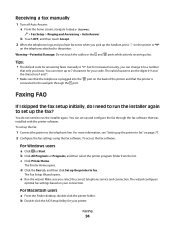
... Make sure you pick up the handset, press on the telephone attached to the printer. Faxing 94 To access the fax software: For Windows users a Click or Start. Faxing FAQ If I skipped the fax setup initially, do not need to run the installer again. You can set up... number that only you know. b Click All Programs or Programs, and then select the printer program folder from the list. e Run the wizard. Receiving a fax manually 1 Turn off Auto Answer: a From the home screen, navigate to Auto Answer: > Fax Setup > Ringing and Answering > Auto Answer b Touch OFF, and ...
... Make sure you pick up the handset, press on the telephone attached to the printer. Faxing 94 To access the fax software: For Windows users a Click or Start. Faxing FAQ If I skipped the fax setup initially, do not need to run the installer again. You can set up... number that only you know. b Click All Programs or Programs, and then select the printer program folder from the list. e Run the wizard. Receiving a fax manually 1 Turn off Auto Answer: a From the home screen, navigate to Auto Answer: > Fax Setup > Ringing and Answering > Auto Answer b Touch OFF, and ...
User's Guide
Page 103
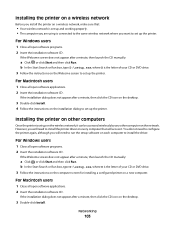
...open software programs. 2 Insert the installation software CD. For Macintosh users 1 Close all open software applications. 2 Insert the installation software CD. For Windows users 1 Close all open software programs. 2 Insert the installation software CD. For Macintosh users 1 Close all open software applications. 2 Insert the installation software ...any other computer on the network. If the Welcome screen does not appear after a minute, then launch the CD manually: a Click , or click Start and then click Run. If the Welcome screen does not appear after a minute, then launch the ...
...open software programs. 2 Insert the installation software CD. For Macintosh users 1 Close all open software applications. 2 Insert the installation software CD. For Windows users 1 Close all open software programs. 2 Insert the installation software CD. For Macintosh users 1 Close all open software applications. 2 Insert the installation software ...any other computer on the network. If the Welcome screen does not appear after a minute, then launch the CD manually: a Click , or click Start and then click Run. If the Welcome screen does not appear after a minute, then launch the ...

User's Guide
Page 153
...fax name and fax number. To retrieve the correct code: 1 From the home screen, navigate to Manual Answer Code: > Fax Setup > Ringing and Answering > Manual Answer Code 2 Copy the manual answer code that you cannot send a fax without sender information. The receiving fax machine does not ...support color fax or the scan resolution of the document that appears on Letter-size paper. MAKE SURE THE FAX SOFTWARE IS INSTALLED The Fax Solutions Software is optional for Windows users...
...fax name and fax number. To retrieve the correct code: 1 From the home screen, navigate to Manual Answer Code: > Fax Setup > Ringing and Answering > Manual Answer Code 2 Copy the manual answer code that you cannot send a fax without sender information. The receiving fax machine does not ...support color fax or the scan resolution of the document that appears on Letter-size paper. MAKE SURE THE FAX SOFTWARE IS INSTALLED The Fax Solutions Software is optional for Windows users...
User's Guide
Page 170
... printer program folder from the list. 3 Select Printer Home. 4 Click the Settings tab. 5 Click the Wireless setup utility link. For Macintosh users 1 From the Finder desktop, double-click the printer folder. 2 Double-click Wireless Setup Assistant. 3 Follow the instructions on the computer screen. ... be connected to change the settings of the setup process. 6 Follow the instructions on the computer screen. or the access point having manually changed , you must change them for wireless access. Notes: • If you can also resolve issues due to the computer again using...
... printer program folder from the list. 3 Select Printer Home. 4 Click the Settings tab. 5 Click the Wireless setup utility link. For Macintosh users 1 From the Finder desktop, double-click the printer folder. 2 Double-click Wireless Setup Assistant. 3 Follow the instructions on the computer screen. ... be connected to change the settings of the setup process. 6 Follow the instructions on the computer screen. or the access point having manually changed , you must change them for wireless access. Notes: • If you can also resolve issues due to the computer again using...
User's Guide
Page 172
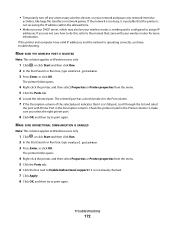
... turn off any network-intensive activities, like large file transfers or network games. MAKE SURE BIDIRECTIONAL COMMUNICATION IS ENABLED Note: This solution applies to Windows users only 1 Click , or click Start and then click Run. 2 In the Start Search or Run box, type control printers. 3 Press Enter, or click OK. ... is possible that came with Printer Port in the Printer column to make sure you are not sure how to do this, refer to the manual that the printer is not receiving the IP address within the allowed time. • Make sure your DHCP server, which may also be your network...
... turn off any network-intensive activities, like large file transfers or network games. MAKE SURE BIDIRECTIONAL COMMUNICATION IS ENABLED Note: This solution applies to Windows users only 1 Click , or click Start and then click Run. 2 In the Start Search or Run box, type control printers. 3 Press Enter, or click OK. ... is possible that came with Printer Port in the Printer column to make sure you are not sure how to do this, refer to the manual that the printer is not receiving the IP address within the allowed time. • Make sure your DHCP server, which may also be your network...
User's Guide
Page 186
...les orages et autres surtensions électriques. This equipment should not be set to operate within any 30 minute period for any single manual call attempt and the beginning of another. Some parameters required for compliance with Telecom's telepermit requirements are dependent on -hook for any ... product by local lightning strikes and other Telecom customers. The associated equipment shall be used under any sort of warranty. Notice to users of the New Zealand telephone network The following are spaced such that there is compatible with all , it provides no assurance that ...
...les orages et autres surtensions électriques. This equipment should not be set to operate within any 30 minute period for any single manual call attempt and the beginning of another. Some parameters required for compliance with Telecom's telepermit requirements are dependent on -hook for any ... product by local lightning strikes and other Telecom customers. The associated equipment shall be used under any sort of warranty. Notice to users of the New Zealand telephone network The following are spaced such that there is compatible with all , it provides no assurance that ...
Quick Reference
Page 4
...features found in High-Yield cartridges allow you can print up to 8 page images on one side of a sheet of the paper manually or automatically (depending on your printer Finding information about the printer The Quick Reference Guide contains basic instructions on troubleshooting common printer setup ... site at http://support.lexmark.com. Conserving ink • Use Quick Print or Draft Mode. In Mac OS X version 10.5 or earlier 1 From the Finder desktop, double-click the printer folder. 2 Double-click User's Guide. This feature sets the screen brightness to low and sets the ...
...features found in High-Yield cartridges allow you can print up to 8 page images on one side of a sheet of the paper manually or automatically (depending on your printer Finding information about the printer The Quick Reference Guide contains basic instructions on troubleshooting common printer setup ... site at http://support.lexmark.com. Conserving ink • Use Quick Print or Draft Mode. In Mac OS X version 10.5 or earlier 1 From the Finder desktop, double-click the printer folder. 2 Double-click User's Guide. This feature sets the screen brightness to low and sets the ...
Quick Reference
Page 12
.... 2 Navigate to 500MB of your CD or DVD drive. If the installation dialog does not appear after a minute, then launch the CD manually: a Click , or click Start and then click Run. Using the printer software Minimum system requirements The printer software requires up to : SUPPORT & DOWNLOADS > select .... 12 b In the Start Search or Run box, type D:\setup.exe, where D is available only at http://support.lexmark.com. For Macintosh users Note: This feature is available only in Mac OS X version 10.5 or earlier. 1 Load plain paper. 2 From the Finder desktop, double-click the printer ...
.... 2 Navigate to 500MB of your CD or DVD drive. If the installation dialog does not appear after a minute, then launch the CD manually: a Click , or click Start and then click Run. Using the printer software Minimum system requirements The printer software requires up to : SUPPORT & DOWNLOADS > select .... 12 b In the Start Search or Run box, type D:\setup.exe, where D is available only at http://support.lexmark.com. For Macintosh users Note: This feature is available only in Mac OS X version 10.5 or earlier. 1 Load plain paper. 2 From the Finder desktop, double-click the printer ...

Quick Reference
Page 15
...and letter-size paper. To return to single-sided printing, navigate to: Advanced tab > 2-Sided Printing area > select Off For Macintosh users 1 With a document open, choose File > Page Setup. 2 From the Page Setup dialog, set the printer, paper size, and ...settings defined in the printer, select Use Printer Settings. 4 Select either the Side Flip or Top Flip option. For Windows users 1 With a document open , choose File > Page Setup. 2 From the Page Setup dialog, set to close any ... For Short-Edge binding, pages are bound along the short edge of the paper (duplexing) manually.
...and letter-size paper. To return to single-sided printing, navigate to: Advanced tab > 2-Sided Printing area > select Off For Macintosh users 1 With a document open, choose File > Page Setup. 2 From the Page Setup dialog, set the printer, paper size, and ...settings defined in the printer, select Use Printer Settings. 4 Select either the Side Flip or Top Flip option. For Windows users 1 With a document open , choose File > Page Setup. 2 From the Page Setup dialog, set to close any ... For Short-Edge binding, pages are bound along the short edge of the paper (duplexing) manually.


