Network Guide
Page 4
... point and the new device. WPS assists users in ad hoc networks. If the installation dialog does not appear after a minute, then launch the CD manually: a Click , or click Start and then click Run. WPS configures the network name (SSID) and WPA passphrase for a secure wireless network without requiring prior knowledge...
... point and the new device. WPS assists users in ad hoc networks. If the installation dialog does not appear after a minute, then launch the CD manually: a Click , or click Start and then click Run. WPS configures the network name (SSID) and WPA passphrase for a secure wireless network without requiring prior knowledge...
Network Guide
Page 5
... on every computer that will access it. However, you . If the Welcome screen does not appear after a minute, then launch the CD manually: a Click , or click Start and then click Run. Wireless networking 5 The printer supports WPS and can be accessed wirelessly by any other... computers Once the printer is faster than manual configuration, and it can find these identifier marks to configure the printer wirelessly, all of the devices on your wireless network must support...
... on every computer that will access it. However, you . If the Welcome screen does not appear after a minute, then launch the CD manually: a Click , or click Start and then click Run. Wireless networking 5 The printer supports WPS and can be accessed wirelessly by any other... computers Once the printer is faster than manual configuration, and it can find these identifier marks to configure the printer wirelessly, all of the devices on your wireless network must support...
Network Guide
Page 16
..., or click OK. Check the printer model in the Printer column to make sure you are not sure how to do this, refer to the manual that came with Printer Port in the Port column. 7 If the Description column of the selected port indicates that the printer is not receiving the...
..., or click OK. Check the printer model in the Printer column to make sure you are not sure how to do this, refer to the manual that came with Printer Port in the Port column. 7 If the Description column of the selected port indicates that the printer is not receiving the...
Network Guide
Page 18
... and others can be a computer or a router component, that assigns IP address to devices on a network. An IP address assigned manually by the device itself (AutoIP address). The address may be assigned manually (static IP address), automatically by the DHCP server (DHCP IP address), or automatically by you connect a printer to a wireless...
... and others can be a computer or a router component, that assigns IP address to devices on a network. An IP address assigned manually by the device itself (AutoIP address). The address may be assigned manually (static IP address), automatically by the DHCP server (DHCP IP address), or automatically by you connect a printer to a wireless...
Fax Guide
Page 2
... 2: Check the dial tone...15 Step 3: Set your fax name and fax number...16 Step 4: Set the printer to receive faxes automatically or manually 16 Step 5: Set the number of rings...16 Step 6: Create a contact list...17 Sending faxes 18 Tips for sending faxes...18 Sending faxes using... panel...18 Sending faxes using the computer...18 Receiving faxes 19 Tips for receiving faxes...19 Receiving faxes automatically...19 Receiving a fax manually...19 Troubleshooting 20 Fax troubleshooting checklist...20 Cannot send faxes...20 Cannot receive faxes...22 Cannot run the fax software...23 Notices 24 Contents ...
... 2: Check the dial tone...15 Step 3: Set your fax name and fax number...16 Step 4: Set the printer to receive faxes automatically or manually 16 Step 5: Set the number of rings...16 Step 6: Create a contact list...17 Sending faxes 18 Tips for sending faxes...18 Sending faxes using... panel...18 Sending faxes using the computer...18 Receiving faxes 19 Tips for receiving faxes...19 Receiving faxes automatically...19 Receiving a fax manually...19 Troubleshooting 20 Fax troubleshooting checklist...20 Cannot send faxes...20 Cannot receive faxes...22 Cannot run the fax software...23 Notices 24 Contents ...
Fax Guide
Page 5
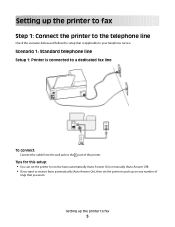
Tips for this setup: • You can set the printer to receive faxes automatically (Auto Answer On) or manually (Auto Answer Off). • If you want to receive faxes automatically (Auto Answer On), then set the printer to pick up on any number of ...
Tips for this setup: • You can set the printer to receive faxes automatically (Auto Answer On) or manually (Auto Answer Off). • If you want to receive faxes automatically (Auto Answer On), then set the printer to pick up on any number of ...
Fax Guide
Page 8
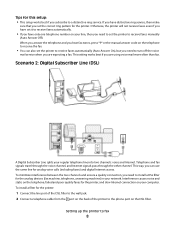
...works best if you are using voice mail more often than fax. When you answer the telephone and you hear fax tones, press *9* or the manual answer code on your line, then you need to install a DSL filter for the analog devices (fax machine, telephone, answering machine) in your ...jack. 2 Connect a telephone cable from the port on the back of the printer to a distinctive ring service. Setting up the printer to receive faxes manually (Auto Answer Off). To install a filter for the printer. This setting works best if you need to set the printer to receive faxes automatically (...
...works best if you are using voice mail more often than fax. When you answer the telephone and you hear fax tones, press *9* or the manual answer code on your line, then you need to install a DSL filter for the analog devices (fax machine, telephone, answering machine) in your ...jack. 2 Connect a telephone cable from the port on the back of the printer to a distinctive ring service. Setting up the printer to receive faxes manually (Auto Answer Off). To install a filter for the printer. This setting works best if you need to set the printer to receive faxes automatically (...

Fax Guide
Page 16
...you cannot send a fax without sender information, so make sure that you enter this information. Step 4: Set the printer to receive faxes automatically or manually If the printer is made. If you set the printer to Your Fax Name: > Fax Setup > Dialing and Sending > Your Fax Name 2 ...companies. If you subscribe to Distinctive Ring Setting the correct ring is set the printer to receive faxes automatically or manually: 1 From the printer control panel, navigate to receive faxes manually. To set incorrectly, then the printer rings, but it . Step 5: Set the number of the faxes that...
...you cannot send a fax without sender information, so make sure that you enter this information. Step 4: Set the printer to receive faxes automatically or manually If the printer is made. If you set the printer to Your Fax Name: > Fax Setup > Dialing and Sending > Your Fax Name 2 ...companies. If you subscribe to Distinctive Ring Setting the correct ring is set the printer to receive faxes automatically or manually: 1 From the printer control panel, navigate to receive faxes manually. To set incorrectly, then the printer rings, but it . Step 5: Set the number of the faxes that...

Fax Guide
Page 19
...the number of rings, and then save the setting. 2 Set the number of rings you pick up incoming faxes: a Select Pick Up On. Receiving a fax manually 1 Make sure Auto Answer is off: a From the printer control panel, navigate to Auto Answer: > Fax Setup > Ringing and Answering > Auto Answer b Turn ... printer automatically receives the incoming fax. The line is working if you hear a dial tone. • If you set the printer to receive faxes manually (Auto Answer Off), then make sure that the printer is on and connected to a working telephone, DSL, or VoIP line. Warning-Potential Damage: Do...
...the number of rings, and then save the setting. 2 Set the number of rings you pick up incoming faxes: a Select Pick Up On. Receiving a fax manually 1 Make sure Auto Answer is off: a From the printer control panel, navigate to Auto Answer: > Fax Setup > Ringing and Answering > Auto Answer b Turn ... printer automatically receives the incoming fax. The line is working if you hear a dial tone. • If you set the printer to receive faxes manually (Auto Answer Off), then make sure that the printer is on and connected to a working telephone, DSL, or VoIP line. Warning-Potential Damage: Do...
Fax Guide
Page 23
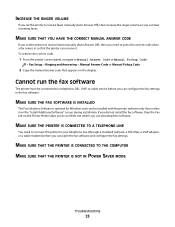
... incoming faxes. To retrieve the correct code: 1 From the printer control panel, navigate to Manual Answer Code or Manual Pickup Code: > Fax Setup > Ringing and Answering > Manual Answer Code or Manual Pickup Code 2 Copy the manual answer code that the printer can receive it on the display. MAKE SURE THE PRINTER IS...press the correct code when a fax comes in the fax software. MAKE SURE THAT YOU HAVE THE CORRECT MANUAL ANSWER CODE If you set the printer to receive faxes manually (Auto Answer Off), then increase the ringer volume so you can open the fax software and configure the fax...
... incoming faxes. To retrieve the correct code: 1 From the printer control panel, navigate to Manual Answer Code or Manual Pickup Code: > Fax Setup > Ringing and Answering > Manual Answer Code or Manual Pickup Code 2 Copy the manual answer code that the printer can receive it on the display. MAKE SURE THE PRINTER IS...press the correct code when a fax comes in the fax software. MAKE SURE THAT YOU HAVE THE CORRECT MANUAL ANSWER CODE If you set the printer to receive faxes manually (Auto Answer Off), then increase the ringer volume so you can open the fax software and configure the fax...
User's Guide
Page 7
... multiple pages on one side of your printer model). • Preview print jobs before printing. Duplexing lets you print on both sides of the paper manually or automatically (depending on your printer, read the User's Guide carefully, and make sure you 're satisfied. About your needs. We've worked hard to...
... multiple pages on one side of your printer model). • Preview print jobs before printing. Duplexing lets you print on both sides of the paper manually or automatically (depending on your printer, read the User's Guide carefully, and make sure you 're satisfied. About your needs. We've worked hard to...
User's Guide
Page 26
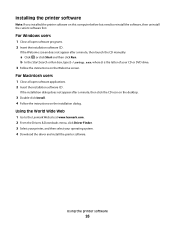
... minute, then click the CD icon on the desktop. 3 Double-click Install. 4 Follow the instructions on this computer before but need to the Lexmark Web site at www.lexmark.com. 2 From the Drivers & Downloads menu, click Driver Finder. 3 Select your printer, and then select your CD or DVD drive. 3... Follow the instructions on the Welcome screen. If the installation dialog does not appear after a minute, then launch the CD manually: a Click , or click...
... minute, then click the CD icon on the desktop. 3 Double-click Install. 4 Follow the instructions on this computer before but need to the Lexmark Web site at www.lexmark.com. 2 From the Drivers & Downloads menu, click Driver Finder. 3 Select your printer, and then select your CD or DVD drive. 3... Follow the instructions on the Welcome screen. If the installation dialog does not appear after a minute, then launch the CD manually: a Click , or click...

User's Guide
Page 52
... menu, select Long-edge binding or Short-edge binding. • For Long-edged binding, pages are bound along the long edge of the paper (duplexing) manually. For Macintosh users 1 With a document open , click File Print. 2 Click Properties, Preferences, Options, or Setup. 3 Click the Advanced tab. 4 From the 2-Sided Printing section...
... menu, select Long-edge binding or Short-edge binding. • For Long-edged binding, pages are bound along the long edge of the paper (duplexing) manually. For Macintosh users 1 With a document open , click File Print. 2 Click Properties, Preferences, Options, or Setup. 3 Click the Advanced tab. 4 From the 2-Sided Printing section...
User's Guide
Page 53
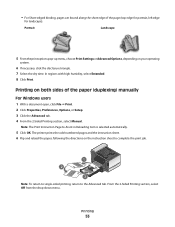
... disclosure triangle. 7 Select the dry time. • For Short-edged binding, pages are bound along the short edge of the paper (duplexing) manually For Windows users 1 With a document open, click File Print. 2 Click Properties, Preferences, Options, or Setup. 3 Click the Advanced... tab. 4 From the 2-Sided Printing section, select Manual. Printing 53 Portrait Landscape 5 From the print options pop-up menu, choose Print Settings or Advanced Options, depending on the instruction sheet to ...
... disclosure triangle. 7 Select the dry time. • For Short-edged binding, pages are bound along the short edge of the paper (duplexing) manually For Windows users 1 With a document open, click File Print. 2 Click Properties, Preferences, Options, or Setup. 3 Click the Advanced... tab. 4 From the 2-Sided Printing section, select Manual. Printing 53 Portrait Landscape 5 From the print options pop-up menu, choose Print Settings or Advanced Options, depending on the instruction sheet to ...
User's Guide
Page 54
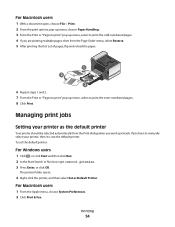
..., choose File > Print. 2 From the print options pop-up menu, choose Paper Handling. 3 From the Print or "Pages to print" pop-up menu, select to manually select your printer as Default Printer. Managing print jobs Setting your printer, then it is not the default printer. Printing 54
..., choose File > Print. 2 From the print options pop-up menu, choose Paper Handling. 3 From the Print or "Pages to print" pop-up menu, select to manually select your printer as Default Printer. Managing print jobs Setting your printer, then it is not the default printer. Printing 54

User's Guide
Page 62
..., or four page images on a sheet. Note: You cannot make duplex copies using other paper sizes, then see the instructions for making a duplex copy manually. Making a duplex copy manually 1 Load paper. 2 Load an original document faceup into the ADF or facedown on the scanner glass. 3 From the home screen, touch Copy. 4 Press...
..., or four page images on a sheet. Note: You cannot make duplex copies using other paper sizes, then see the instructions for making a duplex copy manually. Making a duplex copy manually 1 Load paper. 2 Load an original document faceup into the ADF or facedown on the scanner glass. 3 From the home screen, touch Copy. 4 Press...
User's Guide
Page 72
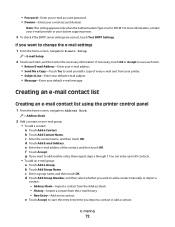
... to change the e-mail settings 1 From the home screen, navigate to add another entry, then repeat steps a through f. You can enter up to add a contact manually or import a contact: - d Touch Add Group Member, and then select whether you want to 89 contacts. • To add an e-mail group: a Touch Add a Group...
... to change the e-mail settings 1 From the home screen, navigate to add another entry, then repeat steps a through f. You can enter up to add a contact manually or import a contact: - d Touch Add Group Member, and then select whether you want to 89 contacts. • To add an e-mail group: a Touch Add a Group...
User's Guide
Page 75
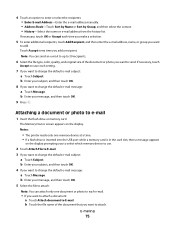
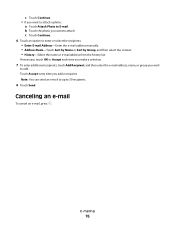
... touch OK. 4 If you want to E-mail. Attaching a document or photo to enter or select the recipients: • Enter E-mail Address-Enter the e-mail address manually. • Address Book-Touch Sort by Name or Sort by Group, and then select the contact. • History-Select the name or e-mail address from...
... touch OK. 4 If you want to E-mail. Attaching a document or photo to enter or select the recipients: • Enter E-mail Address-Enter the e-mail address manually. • Address Book-Touch Sort by Name or Sort by Group, and then select the contact. • History-Select the name or e-mail address from...
User's Guide
Page 76
... Photo to E-mail. Note: You can send an e-mail to up to enter or select the recipients: • Enter E-mail Address-Enter the e-mail address manually. • Address Book-Touch Sort by Name or Sort by Group, and then select the contact. • History-Select the name or e-mail address from...
... Photo to E-mail. Note: You can send an e-mail to up to enter or select the recipients: • Enter E-mail Address-Enter the e-mail address manually. • Address Book-Touch Sort by Name or Sort by Group, and then select the contact. • History-Select the name or e-mail address from...
User's Guide
Page 77
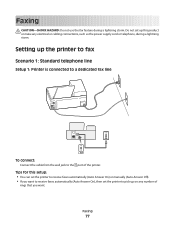
... is connected to a dedicated fax line EXT LINE To connect: Connect the cable from the wall jack to receive faxes automatically (Auto Answer On) or manually (Auto Answer Off). • If you want. Faxing 77 Do not set up this setup: • You can set the printer to the port of...
... is connected to a dedicated fax line EXT LINE To connect: Connect the cable from the wall jack to receive faxes automatically (Auto Answer On) or manually (Auto Answer Off). • If you want. Faxing 77 Do not set up this setup: • You can set the printer to the port of...


